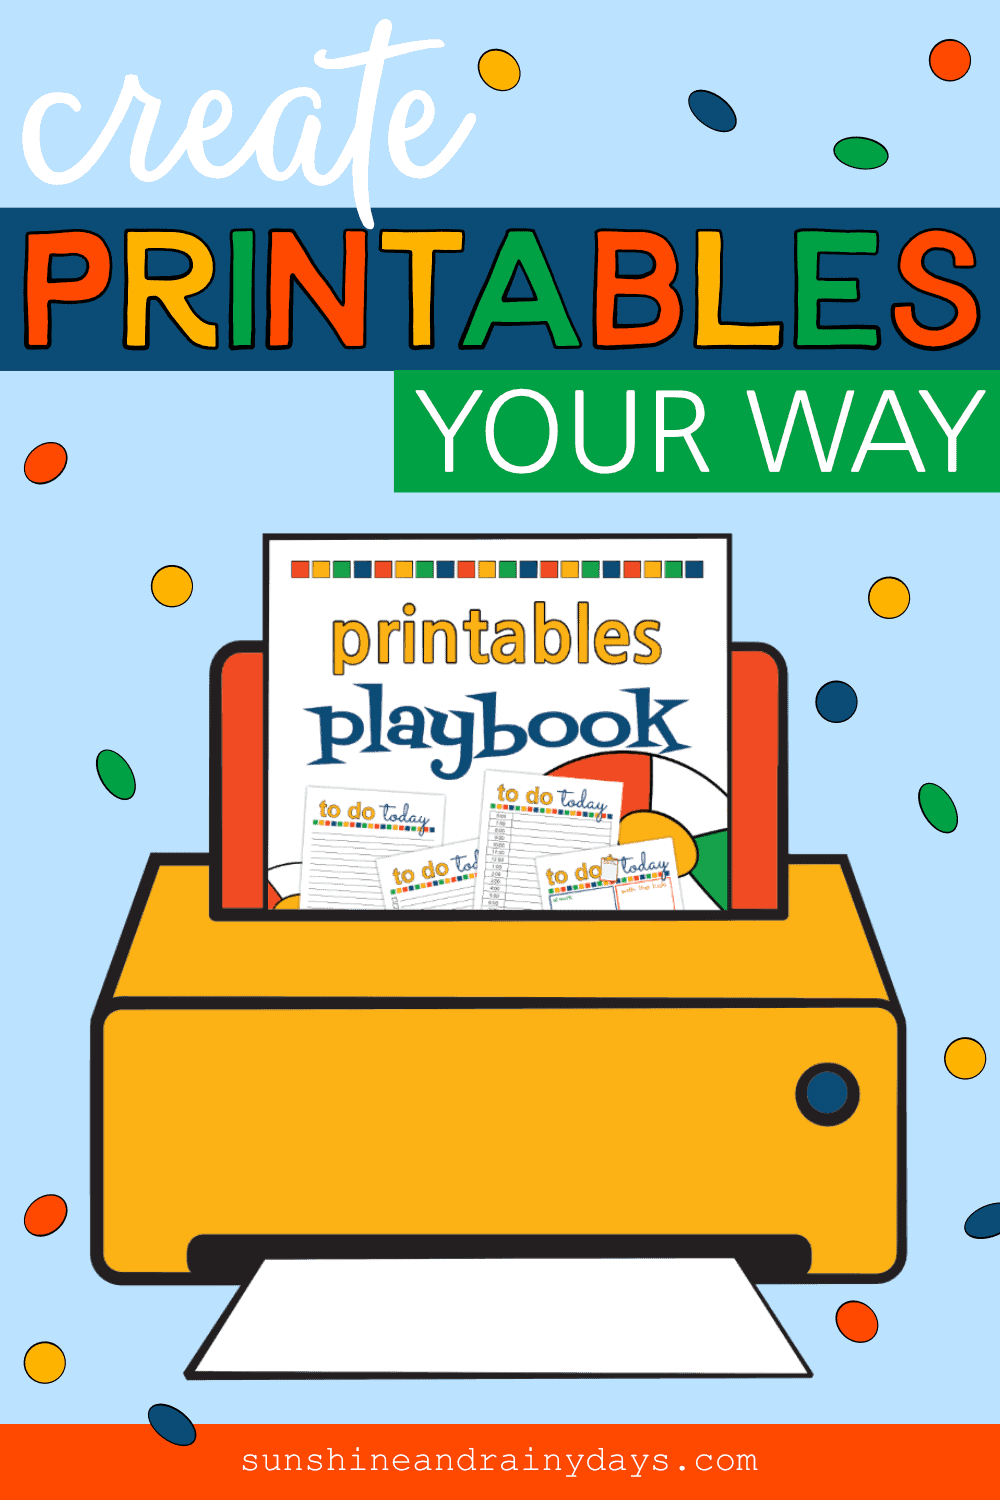
Printables Playbook – Create Printables Using Affinity Designer
Learn how to create printables using Affinity Designer. Affinity Designer gives you the ability to make your printable vision come to life!
Do you ever get an idea in your head but can’t find that awesome idea in real life?
It happens ALL THE TIME, right?
From home decor to the clothes you wear … you search and search but are lucky if you come close to your vision.
I’ve got GOOD NEWS!
When it comes to Printables … you CAN make your ideas come to life!
A few years ago, I wanted to create a printable that said, ‘you’ve been egged’ … but I wanted EGGED to be all drippy like egg dripping, you know? The programs I had tried couldn’t make my vision a reality.
Soooo … I went on a search.
That search landed me at a super cool app called Affinity Designer!
… and I’ve never looked back.

Sweet drips, right?
This Printables Course is developed around Affinity Designer. You NEED Affinity Designer if you want to take this course and learn how to create the printables dancing around in your head!
I’ve got EVEN BETTER NEWS!
Affinity Designer is NOT subscription-based. NOPE! You pay once and all the goodness is yours!
I paid four years ago and haven’t paid a dime since. And it’s quite reasonable. So far, updates have been free. (In full disclosure, I was told when they get to 2.0 there will be a charge to upgrade.)
Here’s the deal: you can try Affinity Designer FREE for 10 days! Just be sure to get right on it because the 10-day trial starts as soon as you download the app. (That isn’t even an affiliate link. Affinity Designer doesn’t use affiliates. Could that be why they’re the best-kept secret?)
Warning: It’s easy to get overwhelmed when you look into new programs. That’s what I’m here for … to take the overwhelm away so you don’t have to miss out on cool stuff, like making drippy letters!
Now, if I could find the outfit I’ve been dreaming of …

“If creating printables seems really intimidating and you’re not sure where to start, Bridget has you covered! She’s put together a really comprehensive Printables Playbook – a step-by-step guide to creating printables the easy way! The Printables Playbook is broken down into bite-sized chunks so that anyone can learn to create printables. And you can refer back to it any time you need it!”
— Crystal Paine, Money Saving Mom
What Does The Printables Playbook Course Teach?
The Basics
The Printables Playbook takes you from downloading the Affinity Designer app to designing a To Do Today Printable, 4 different ways.
The step-by-step approach takes the intimidation away and makes creating printables FUN and EASY!
You will learn just what you need to know as you create your own masterpiece.
Clip Art
Learn how to create clip art! There’s no need to buy clip art, or read the fine print, when you can Make Your Very Own Clip Art!
The Printables Playbook provides lessons to create the following clip art using shapes:
- Beach Ball
- Laughing Emoji
- Flowers
- House
Once you’ve created the clip art in this Bonus, you’ll be giddy with excitement to create your own artwork!
Work With Text
Discover 5 ways to Work With Text!
This section will teach you how to:
- Make letters drip (warp letters).
- Place a picture inside text.
- Combine text with shapes (like the picture above).
- Place text on a path.
- Use the Frame Text Tool.
Dreams of drippy letters are now reality! You have the power to make those letters drip!
Advanced Skills
Once you’ve gotten down the basics of Affinity Designer, there are many ways to expand your creative skills.
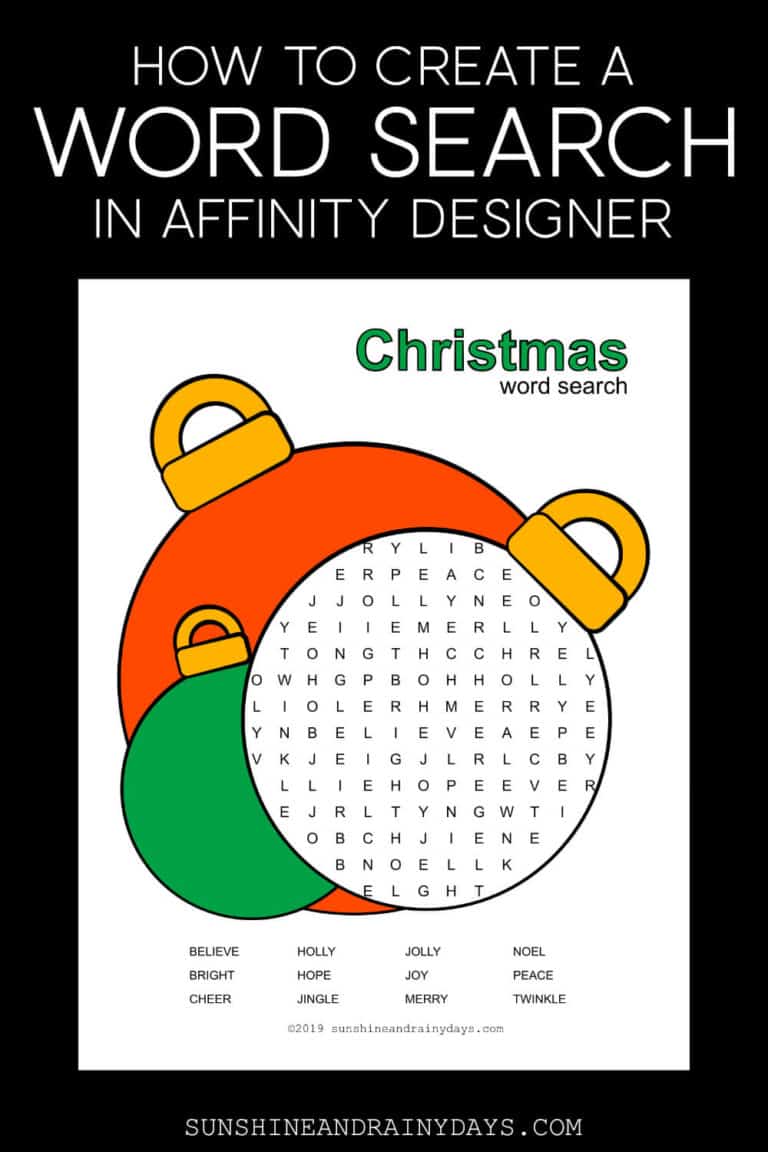
Word Search
Learn how to create a Word Search with the step-by-step tutorial!
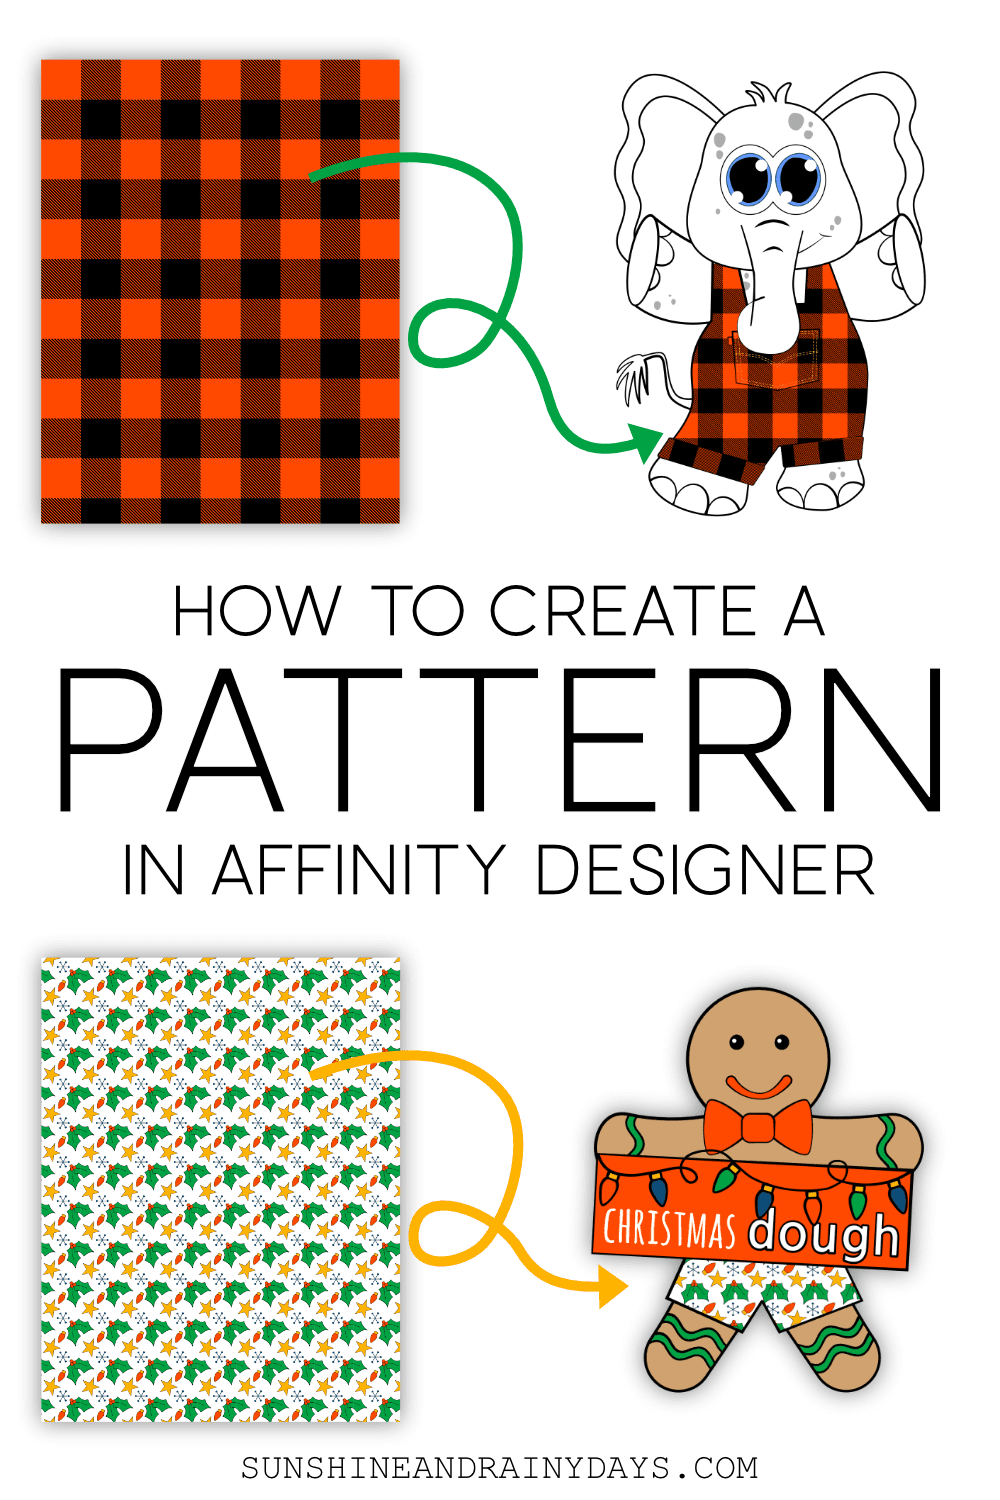
Patterns
Patterns are super useful to use in design and they are quite simple to create!
I’ll take you step-by-step on how to create a pattern in Affinity Designer so you can create your own!

“You made everything sound so easy. I HATE making printables and the whole time I was like this sounds so easy!”
— Julie Sellers, Frugally Blonde
What You Need To Take This Course
Affinity Designer
This course is taught using Affinity Designer!
You NEED Affinity Designer if you want to take this course and learn how to create the printables dancing around in your head!
Affinity Designer is NOT subscription-based. NOPE! You pay once and all the goodness is yours!
I paid four years ago and haven’t paid a dime since. And it’s quite reasonable. So far, updates have been free. (In full disclosure, I was told when they get to 2.0 there will be a charge to upgrade.)
Here’s the deal: you can try Affinity Designer FREE for 10 days! Just be sure to get right on it because the 10-day trial starts as soon as you download the app. (That isn’t an affiliate link. Affinity Designer doesn’t use affiliates. Could that be why they’re the best-kept secret?)
Warning: It’s easy to get overwhelmed when you look into new programs. That’s what I’m here for … to take the overwhelm away so you don’t have to miss out on creating cool stuff!
When you purchase Affinity Designer, you will be given a code. Enter that code and you’re in!
Affinity Designer Keyboard Shortcuts Cheat Sheets
Whether you are on a Mac or Windows, be sure to download the Affinity Designer Keyboard Shortcuts Cheat Sheets. Print it and keep it near your computer for easy reference.

“The Printables Playbook is a great value with a wealth of content available. Bridget explained everything clearly and in great detail so designing printables didn’t feel so overwhelming anymore. I love that she based this on a one-time fee program too, which is perfect for frugal bloggers!”
— Kristen Whirrett, Joyfully Thriving
How To Get The Most Out Of This Course
This is where your printables come to life!
It’s where you take your vision and turn it into something you can actually share, print, and use!
The Printables Playbook isn’t an actual book. Instead, it’s a series of hands-on tutorials that build on each other to create different styles of printables, while you learn!
It’s important to do the steps in order since each step builds on the next.
I suggest you open Affinity Designer and work along with me!
After you’ve completed each step, you will be well prepared to let your creativity soar and produce printables you could only imagine before now!
Notes For PC Users Only
It’s important to note this class is done on an iMac. No worries though! If you’re on a PC, keep this in mind:
Option = ALT
Command = Control
STEP 1: Choose A Printable Idea
Printable Ideas
The BEST Printable Ideas come from the printables you need. Practical Printables you would actually use, in real life! The thing is, if you would use it, others probably would too!
Here are a few Printable Ideas to get your creative juices flowing:
Full Page Worksheets
This is the most common printable you will find. A full-page worksheet that helps you organize information or work toward a goal.
Sample: Daily To Do List Printables. We will be creating these printables together, in STEP 3.
Signs
Signs give you the opportunity to get creative and send a message!
Sample: Say goodbye to solicitors with the No Soliciting Sign.
Artwork
You can design artwork to frame and hang on the wall. You could even do seasonal designs to switch out, according to the season.
Labels
Labels help you organize and stay organized!
I recently created storage box labels like these: Memories Storage Box Labels
Calendars
Everyone needs a calendar! Whether you use a calendar online or paper and pen, a printable calendar is always useful.
Charts
Charts are a popular way to compare or track information.
Sample: The Medication Chart is a practical printable to track your medications.
Decor
Kind of along the lines of Artwork, Decor Printables are a fun way to decorate for special events or holidays.
Sample: Decorate a care package: Christmas Care Package For College Students
Games
Printable Games are a FUN, inexpensive way to entertain at parties!
Sample: We used this Printable Game at a Teenage Christmas Party: Name That Christmas Song
Cards
Cards are super expensive to buy at the store. You can design your own cards and print them right from home!
Sample: Mother’s Day Free Printable Card
Gifts
Believe it or not, you can create printable gifts or add printables to a simple gift to make it extra special!
Samples: Just Poppin’ By
Coloring Pages
Who doesn’t like to color? Coloring is a relaxing thing to do and you can create your own coloring pages!
Sample: Thanksgiving Coloring Page
Word Searches
A Word Search is good for all ages!
Sample: Christmas Word Search
Crossword Puzzles
Exercise your mind with a Crossword Puzzle!
Sample: Valentine Crossword Puzzle
Trackers
Printables are an excellent way to track information.
Sample: Printable Exercise Tracker
Binder Covers
Binders are a great way to organize and, of course, you will need a binder cover!
Sample: Medical Binder Cover
Sinking Fund Charts
Sinking Fund Charts are an excellent visual to help you save!
Sample: Sinking Fund Charts
Printable Ideas are endless. There are SO MANY ways to organize, give, track, and decorate with printables!
What printables do you need in real life?
Assignment 1: Come Up With A Printable Idea Of Your Own
The ideas are endless! What printable do you need in your life?
Write your idea down on a piece of paper or in a notebook!
STEP 2: Make A Sketch Of Your Design
Make A Quick Sketch
Determine the printable idea you want to bring to life and make a quick sketch of what you want it to look like.
This is no time for perfection. There’s no need to make your sketch pretty. Nope! This is just a general idea of the vision in your head.
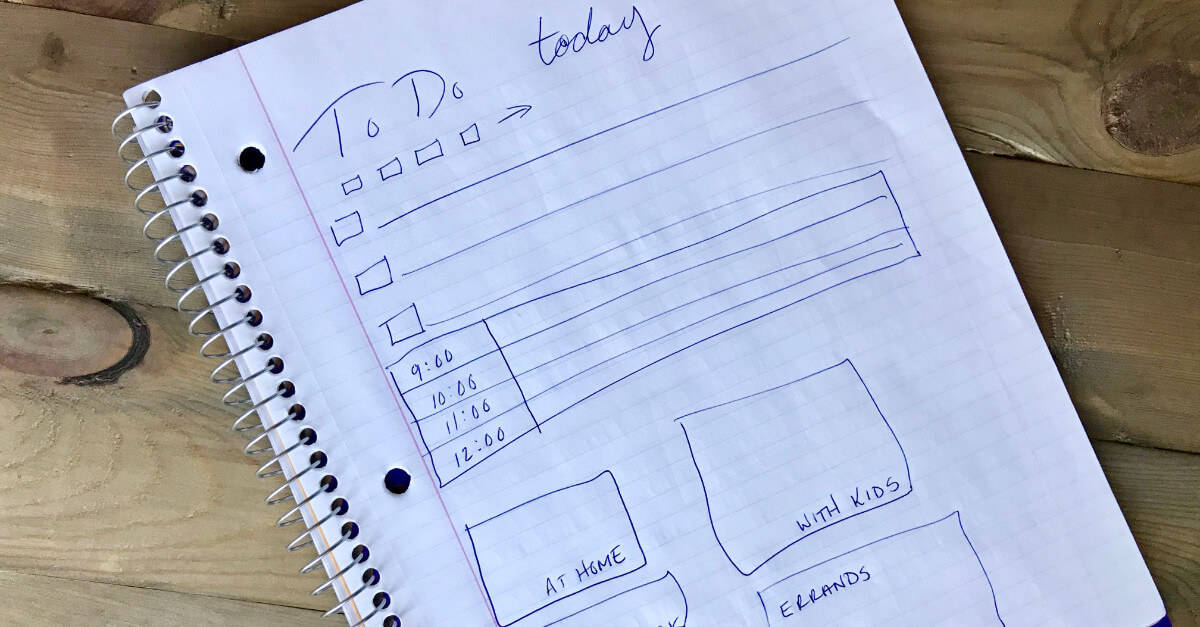
The To Do Today Printables were designed in four different ways. One with lines, another with checkboxes and lines, a third with time blocks, and the last with category rectangles.
As you can see, I didn’t spend a whole lot of time on this sketch. It is a simple idea of what I wanted the To Do Today Printables to look like!
Your sketch doesn’t need to exactly match your final product. You have room for changes and improvement!
Assignment 2: Sketch Your Printable Design
Make a quick sketch of the Printable Idea you came up with in Assignment 1.
This isn’t art class! There’s no need to spend a lot of time or effort here. No one is looking but you.
STEP 3: Create A To Do Today Printable In Four Different Ways
Page Setup
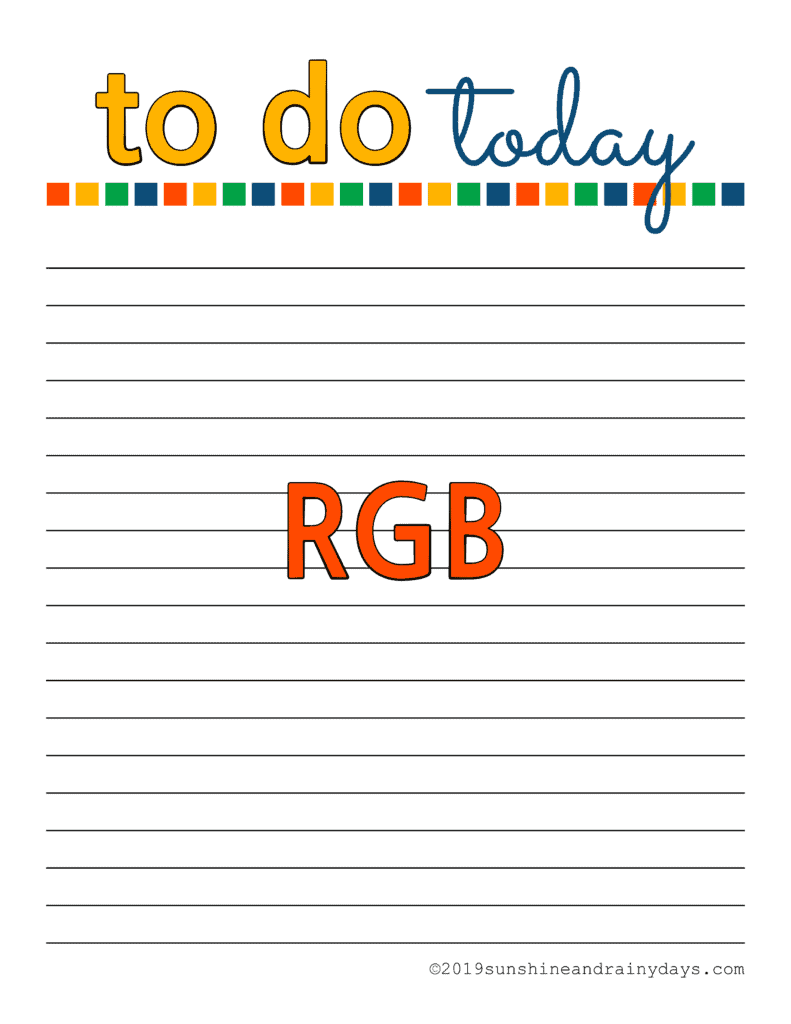
CMYK or RGB?
You may be wondering why I set the printable page up with the color format of RGB.
RGB is the color format used by most home printers.
CMYK is the color format for commercial printers, although you will want to check with your commercial printer to ask what color format they would like you to use.
It is my understanding that if you use CMYK, home printers must first convert them to RGB to print.
This color format question raised my curiosity so I did a little experiment.
I created the To Do Today printable with the CMYK color format and then the RGB color format.
This is the on-screen result:
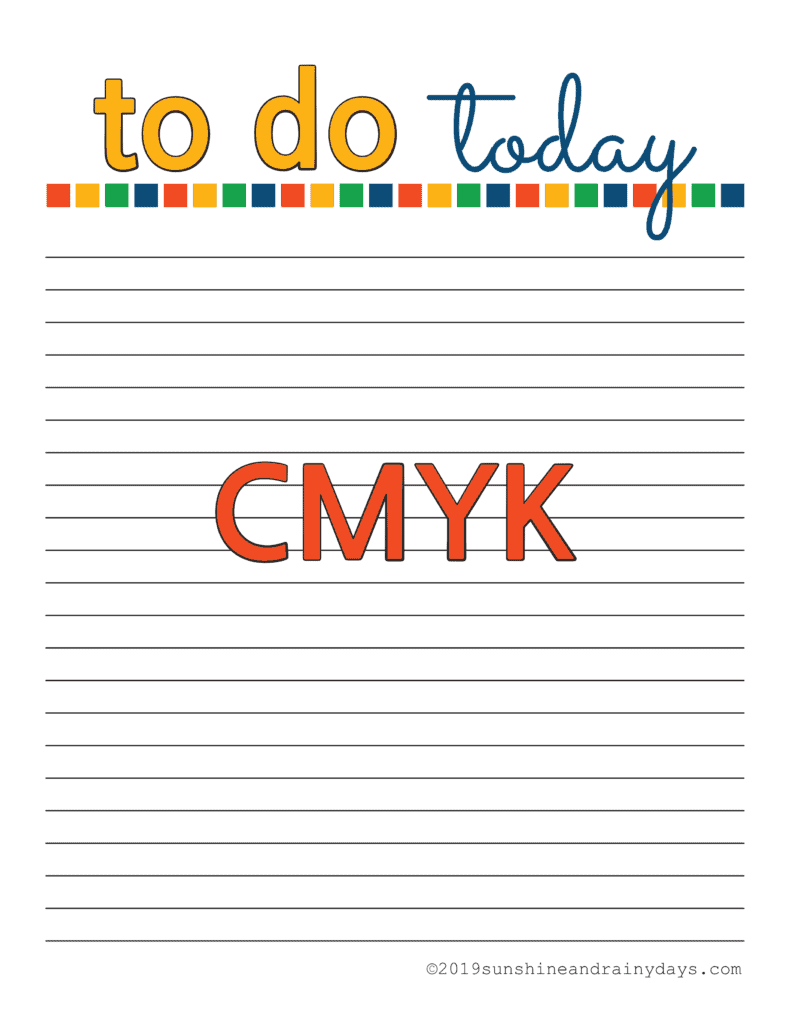
Next, I printed the PDF version of each on my HP Color LaserJet Pro. Here is the result of that:
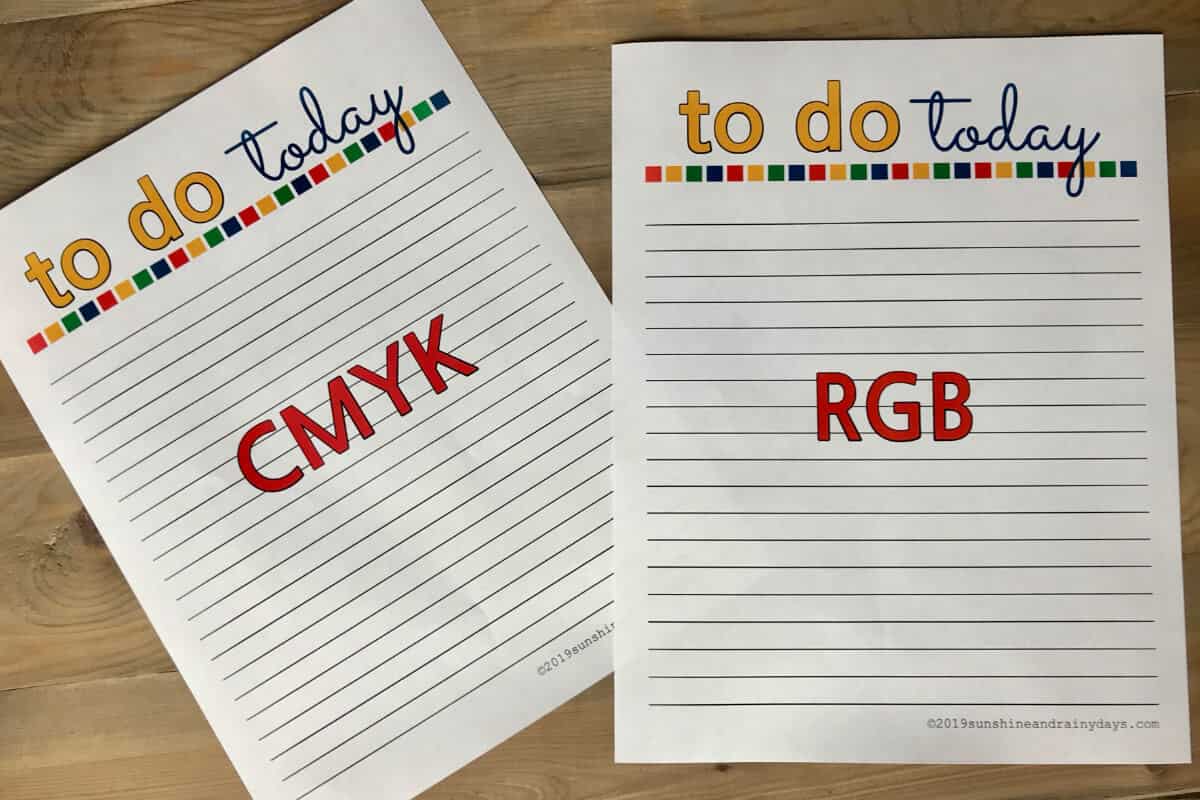
My conclusion is to create my printables and graphics in RGB. I may consider CMYK if I were to send my printables to a commercial printer.
How To Make A Menu With Your Branded Colors
Make future projects easier on yourself by creating a menu with your very own brand colors.
Create A Menu
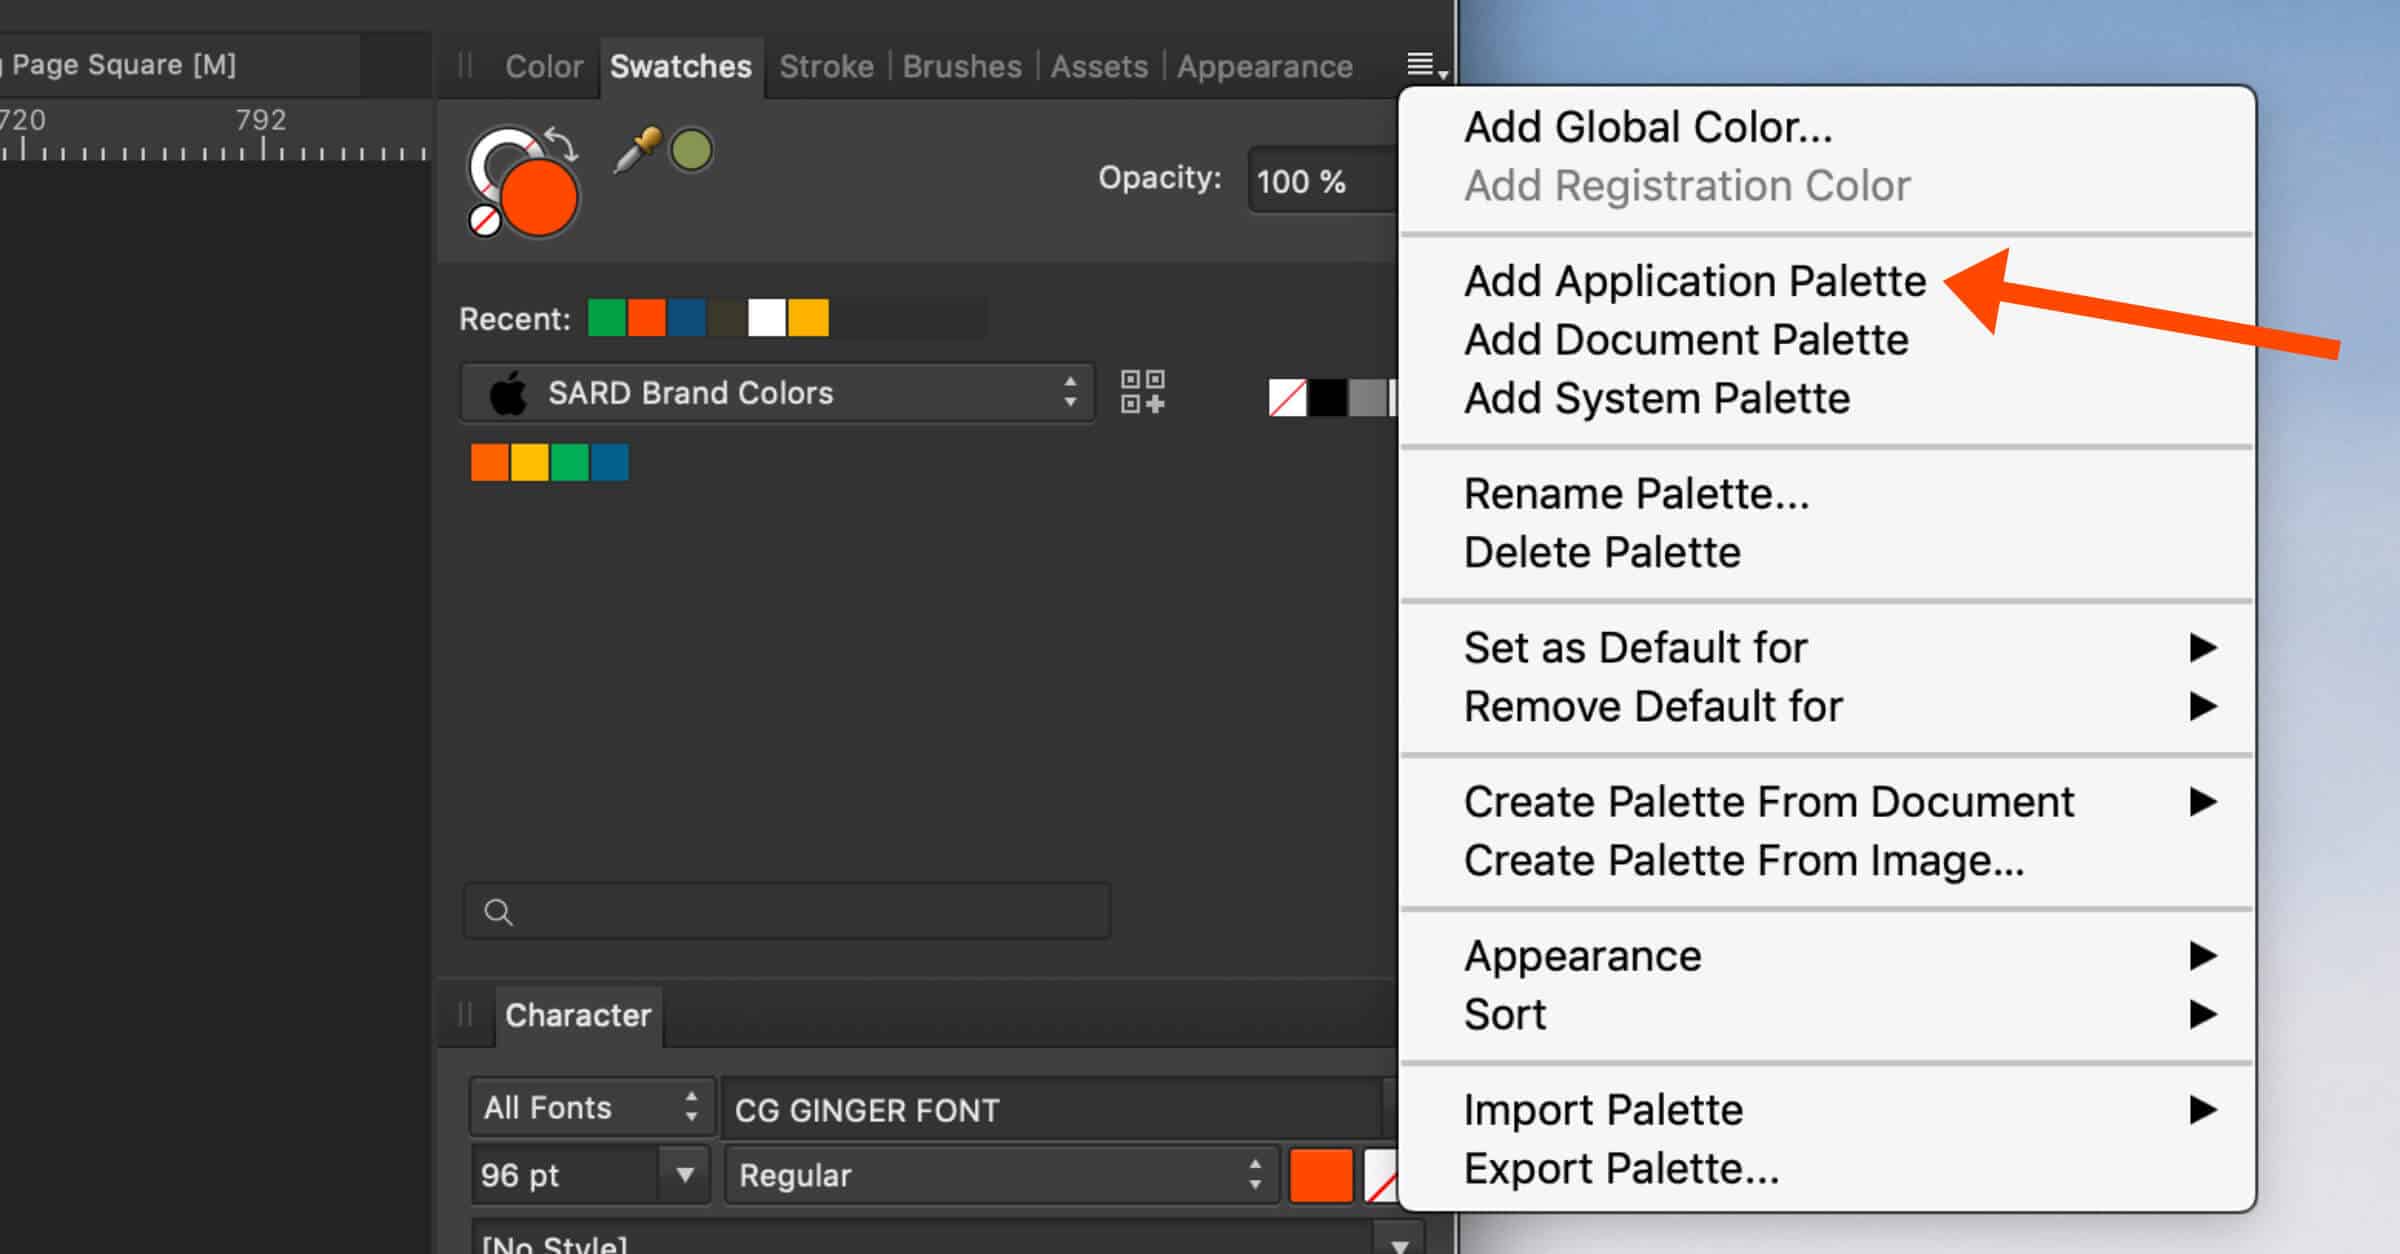
Go to the Swatches Panel on the right-hand side.
Click the drop-down menu.
You will choose one of the following options:
- Application Palette – good for documents in Affinity Designer
- Document Palette – good for just the document you are working on
- System-Wide Palette – works system-wide
I chose System Wide Palette.
When creating your Brand Color Menu, you may or may not have the Add System Palette option. Instead, use Add Application Palette and you’ll be good to go!
I also have Affinity Publisher, which may be why I have this option!
Name Your Menu
- Go back to the menu drop-down in the right-hand corner of your swatches panel.
- Choose Rename Palette.
- Type the name you choose for your menu.
- Press OK.
Draw A Square
- In the left-hand toolbar, choose the Rectangle Tool.
- On your document, press and hold Shift while you drag and drop. This will create a perfect square.
Copy Your Square
- With your first square highlighted, Press and hold Option/Alt and drag and drop.
- Repeat for as many brand colors as you have.
Align Squares
- Drag your cursor over all your squares to highlight.
- In the top toolbar choose the Alignment tool.
- Choose Align Top.
- Next, choose Space Horizontally.
- Then, with your squares still highlighted, drag them to the center of your document.
- You will know they are in the center of the document when a vertical green line pops up.
Add Your Brand Colors To Your Document
- Highlight your first square.
- Go to your Swatches Panel on the right-hand side.
- Double-click the Fill Tool, which is the solid circle.
- The Color Chooser will pop up.
- Enter your first color code in the Color Chooser next to the #: (your color code will be a series of six numbers and letters).
- Press Enter.
- Repeat for your remaining brand colors.
Add Your Brand Colors To Your Menu
- Highlight your first square.
- Press + next to your new menu name.
- Repeat for each brand color.
- Your brand colors will show up under your menu name.
Each time you design a new document, use the drop-down menu in the Swatches Panel to choose your Branded Menu!
That’s a time saver!
Duplicate And Align
Create A Border Out Of The Squares You Made
You can easily create a border out of the squares you drew in the last step!
Make Your Squares Smaller
- Drag your cursor over all of your squares to highlight them.
- Press and Hold Shift while you bring the corner in to make those squares much, much smaller.
Next, you’ll copy those squares.
Copy The Squares
There are multiple ways you can copy:
- Press Command C, Command V, and then drag and drop.
- Press and Hold Option while you drag and drop.
- Press Command J after you’ve copied it once.
Align and Space Your Border
- First, drag your cursor over all of your squares to highlight them.
- From the Top Toolbar, press the Alignment Tool.
- Choose Align Top.
- Then, choose Space Horizontally.
- Press Done.
If your border is beyond your margins, Press and Hold Shift while you bring in the corner and move them into place.
Green Lines will pop up to let you know that you are aligned to the margins or the middle.
You now have a border for your printable!
Use The Artistic Text Tool
Save Your Affinity File
It’s a good idea to save your document as you work.
From the menu:
- File
- Save
- Name Your File
- Press Save
Use The Pen Tool To Create Lines
Use The Pen Tool To Create Lines
You can use the Pen Tool to create straight lines.
- Click the Pen Tool in the left-hand tool bar.
- Move to the document, click on your margin, then Press and Hold Shift while you move across the page. Click again on your right hand margin. This creates a straight line.
- Go to the Stroke Panel on the right-hand side and change the width of your line. In this example, I used a width of one point.
- You can also cap the ends of your lines in different ways in this panel.
There are multiple ways to copy lines.
- With your line highlighted, Press and Hold Option while you drag and drop the line.
- Press Command C, Command V, then drag and drop your line.
- After you have copied once, press Command J to repeat.
- Highlight multiple lines at once by dragging your cursor over them, then Press and Hold Option while you drag and drop.
Align, evenly space, and center lines.
- Drag your cursor over all of the lines to highlight.
- Move to the Alignment Tool in the top toolbar.
- Choose Align Left.
- Choose Space Vertically. If your lines are too close together or too far apart, you may want to add or delete lines, then realign.
- Press Done.
- Move the line group to the center of the page. You will know they are centered when a green line pops up in the center of your document.
- Press Command G to group the lines. This will keep them from getting out of alignment.
Add Copyright And URL
If you have a blog or website, you will want to protect your work. One small way to do that is with a copyright symbol.
- From the Left Hand Tool Bar choose the Artistic Text Tool.
- For a copyright symbol, on a Mac, hold the Option key and press G to create the copyright symbol. On Windows, hold the Alt key down and type 0169.
- Type the Year.
- Type your Blog URL.
- Change the Font in the Context Toolbar.
- Change the Font Size in the Context Toolbar.
- Change the Font Color in the Swatches Panel.
- Move URL into place.
It is also beneficial to have your blog URL on each printable you create so people can find you again!
Save As Affinity File, PDF, PNG, Or JPEG
Make Checkboxes
Save A New File
If you save a document, then continue to work on it and make changes, you may want to preserve the original file you saved.
To save the file you are working on as a New Document:
- From the menu, press File
- Save As (if you press Save here, you will write over the original document you saved)
- Change the Name of the File
- Save
I often use previous documents as templates. Since I do this, I have gotten into the habit of pressing Save As whenever I save any documents.
Create A Table
Create Boxes
Assignment 3: Create Each Of The To Do Today Printables
If you haven’t already, work along with me to create each of the four different styles of the To Do Today Printables.
By doing so, you will have learned the process of creating a printable and be able to create a printable of your own!
STEP 4: Make Your Own Clip Art
Design Clip Art
Assignment 4: Create Your Own Clipboard Clipart
Create your own Clipboard Clipart using your brand colors!
You’ll be so amazed at how easy it is to create your own clipart that you may never want to pay for clipart again!
STEP 5: Create A Printable With A Repetitive Design
Page Set Up
Create A Perfect Square
Add Text
Add A Text Box
Duplicate A Design
Add An URL And Change Elements In Duplicate Designs
Assignment 5: Create A Printable With A Repetitive Design
This is where you get to be creative!
Design your own Printable With A Repetitive Design!
Not sure where to start? How about a business card? The standard size business card is 3.5 x 2 inches.
Step 6: Create Your Own Printable Design
Create Your Printable!
After going through STEPS 3, 4, and 5, you now have the tools to create a Printable Design YOUR WAY!
Assignment 4: Create Your Own Printable!
Use your sketch from Assignment 2, along with the knowledge you’ve learned in STEPS 3, 4, & 5, to create your first printable in Affinity Designer!
You can totally do this! You have the tools to refer back to, when needed!

“The Printables Playbook has changed the printables game for my blog. The instructions are easy to follow and walked me through creating a printable with Affinity Designer from drawing out my design and setting up my page, to saving as a PDF and how to deliver to my readers – plus all the fun, fancy stuff in between. I love having the ability to create my own reusable assets and being able to combine text and shapes to create word art that can’t be done in Canva and Word. It’s super easy to align boxes, change colors, and create my own clip art – which means I don’t have to worry about copyrights when selling my printables. The templates that come with the course gave me a good foundation to create my first printable. Now I’ve created my own templates and printable creating is quicker and easier than ever. I highly recommend The Printables Playbook for learning to create gorgeous printables with Affinity Designer.”
— Tanya Plattner, Tidy Life Happy Wife
How To Make Your Own Clip Art In Affinity Designer
One thing I love about Affinity Designer is that I’m able to make my own clip art. Hopefully, these tutorials will spur your creativity to make your own designs!
Ways To Deliver Your Printable Files
There are multiple ways to deliver your printable files. I believe it is best to share your files in many different ways.
Blog Post
When readers can click an image or link to download a file, right from a post, it’s a quick win! They get exactly what they want, making your post valuable!
I upload my PDFs to Google Drive and then link them to a picture of the printable or text in a post.
Resource Library
A Resource Library is an excellent way to organize your printables on your blog. It also makes it easy for readers to find printables they are looking for. You may choose to make your Resource Library password-protected for subscribers only.
Email Service Provider
You can also create an opt-in form through your Email Service Provider and have your printables delivered directly to the recipient’s email.
I use ConvertKit to do this (that’s an affiliate link)!
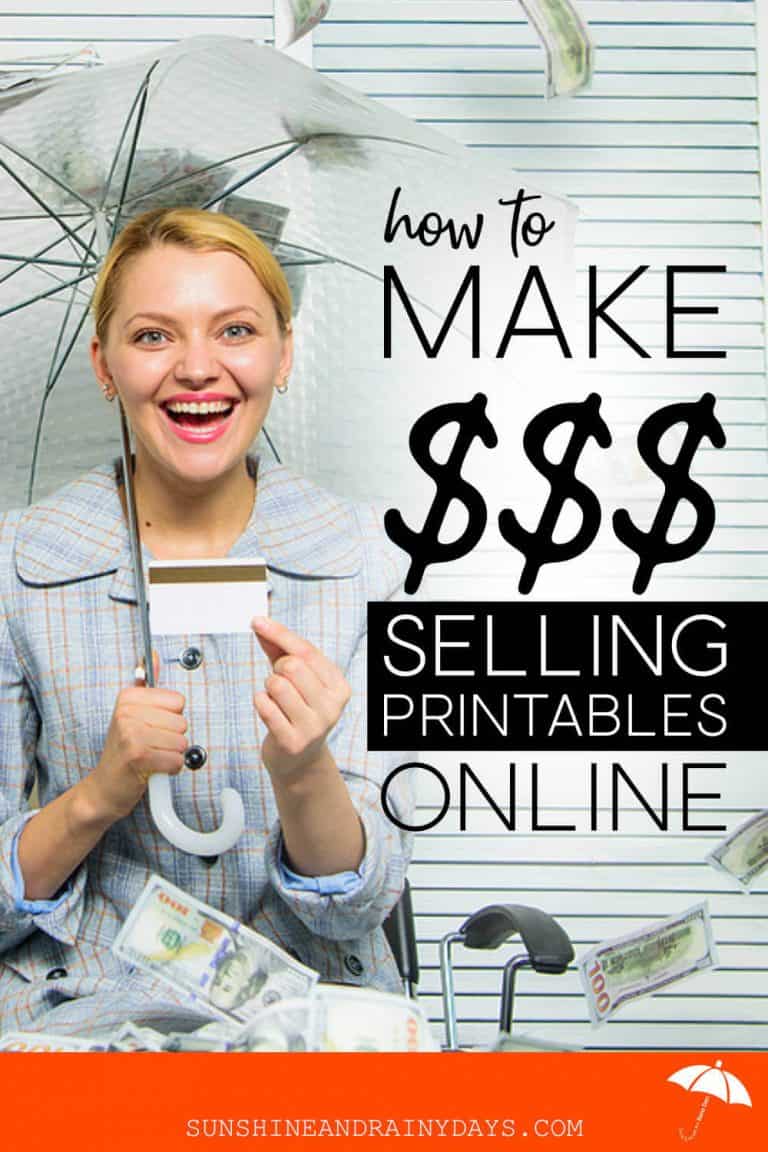
Gumroad
Gumroad is an excellent way to sell printables. It’s free to get started and the fee is 3.5% + 30¢ per charge. Gumroad is where I first got my start selling printables!
Shopify
You can set up your own Shopify store to sell your printables!
Once my printables were selling, I set up my own Shopify store.
Etsy
I have recently dabbled in selling on Etsy and feel it’s a great way to find a new audience.
Teachers Pay Teachers
Another huge platform is Teachers Pay Teachers. I dabbled in this a little but didn’t take the time to make it a success.
These are just a few ways to deliver your printable files. You will find that many people prefer one over the other.
“Graphics and printables are my weak spot. I have so many ideas but don’t know where to start. I’ve used another Serif product in the past with ease, so felt good trying Affinity. After taking this course, I feel fully prepared and confident that I’ll be able to handle my own printable needs in the future. I’ll save a great deal with this one-time small investment instead of hiring someone each time I need something created. Thanks, Printables Playbook!”
— Amylee, Productive Mama