DIY Photo Backdrop Wall On Wheels (it folds too)
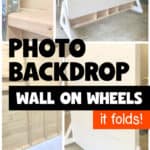
My niece had a vision for a transportable, DIY Photo Backdrop Wall On Wheels. A Wall On Wheels that could easily be loaded on a truck and used at shows. That meant the wall had to fold so height wouldn’t be an issue on the road.
It took me a while to wrap my head around this project. I searched the internet but couldn’t find a Wall On Wheels that could Fold. It was up to me and Justine, my daughter, to come up with our own plans!
DIY Photo Backdrop Wall Tools & Supplies
This post contains affiliate links. When you purchase through an affiliate link, we receive a small commission at no additional cost to you. Disclosure.
Tools Used
- Kreg Jig
- Drill
- Miter Saw
- Corner Kreg Clamp
- Sander
- Wood Spade Bit
- Nail Gun
- Paint Supplies
Supplies Used
- 2 x 4’s (I used 11)
- Plywood (2 – 4 x 8 sheets)
- Casters (3)
- Caster with lock (1)
- Carriage Bolts – 6″ x 1/2″ (4)
- Carriage Bolts – 4″ x 1/2″ (2)
- Nuts
- Barrel Bolts (2)
- Hinges (4)
- 2-1/2″ Kreg Screws
- Wood Glue
- Plastic Wood
- Nails (for Nail Gun)
- Pocket Hole Plugs
- Sand Paper
- White Exterior Paint (I used 1/2 of 1 gallon)
How To Build A Folding Backdrop Wall On Wheels
Transform any space into a professional photography studio with this foldable and mobile DIY photo backdrop wall.
Photo Backdrop Triangle Legs
The first thing we had to wrap our minds around was how to make a 7 x 7 wall stand upright. We found many variations online and settled on our own version of the triangle leg!
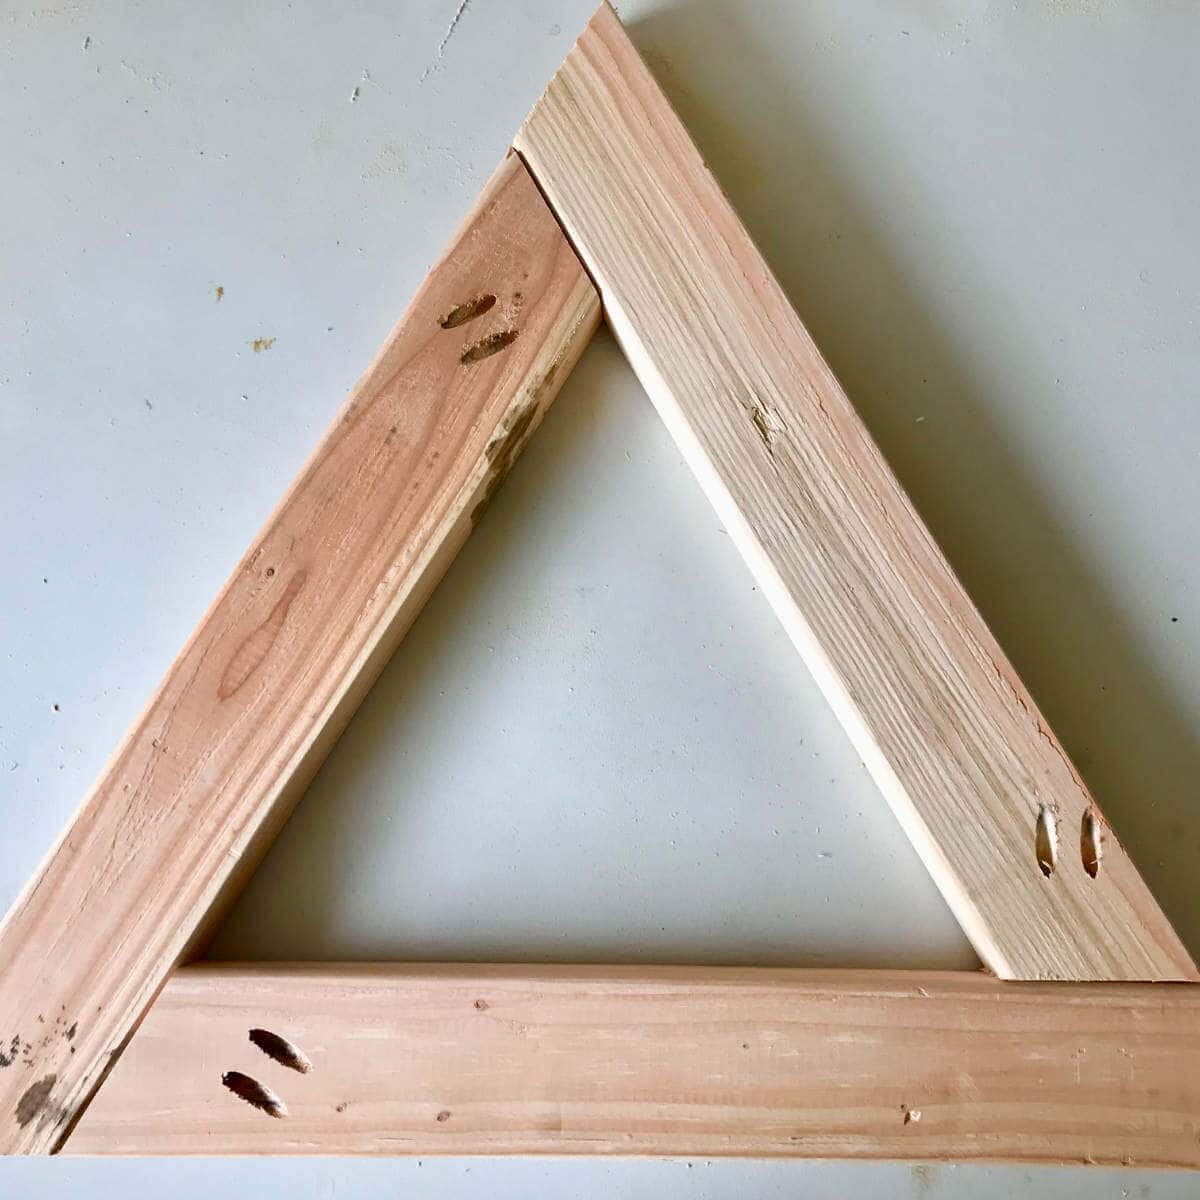
We cut six 2 x 4’s at a 30º angle on both ends with a 23-3/4″ length on the longest side.
Then, we drilled two pocket holes with our Kreg Jig on one end of each board and sanded each piece. This allowed us to attach our triangle pieces together with 2-1/2″ Kreg Screws and wood glue.
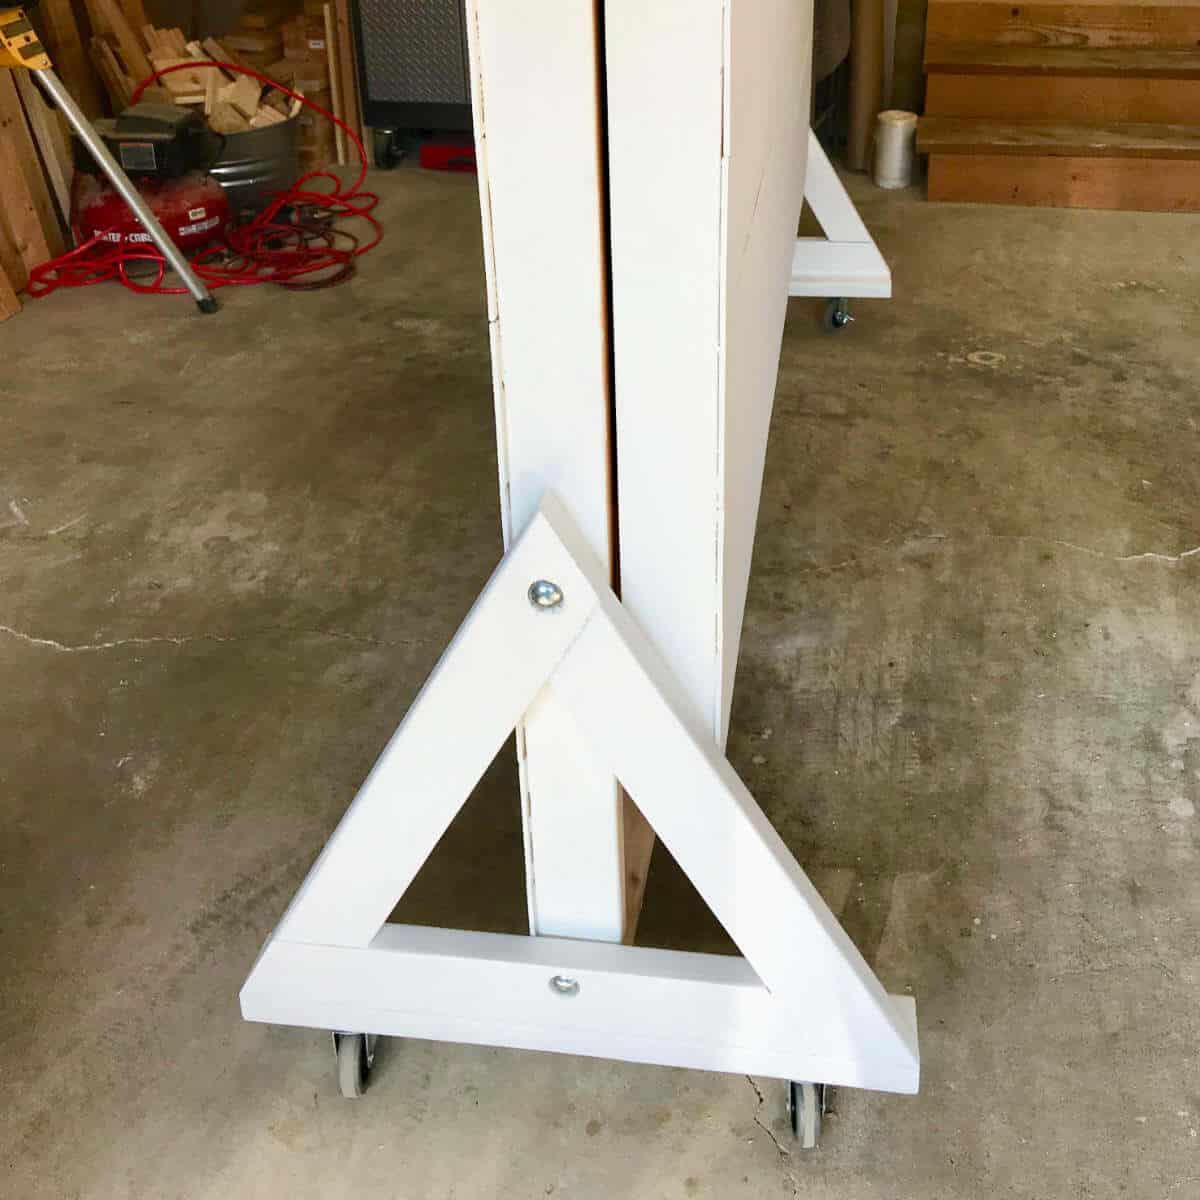
Once our triangle legs were put together, we drilled pilot holes where we wanted to attach the triangle leg to the 7 x 7 wall.
One in the top tip of the triangle and the other in the middle of the bottom board. However, we knew the hole in the bottom piece had to allow for room for a 2 x 4 base (on the wall) so that hole was toward the top of the base.
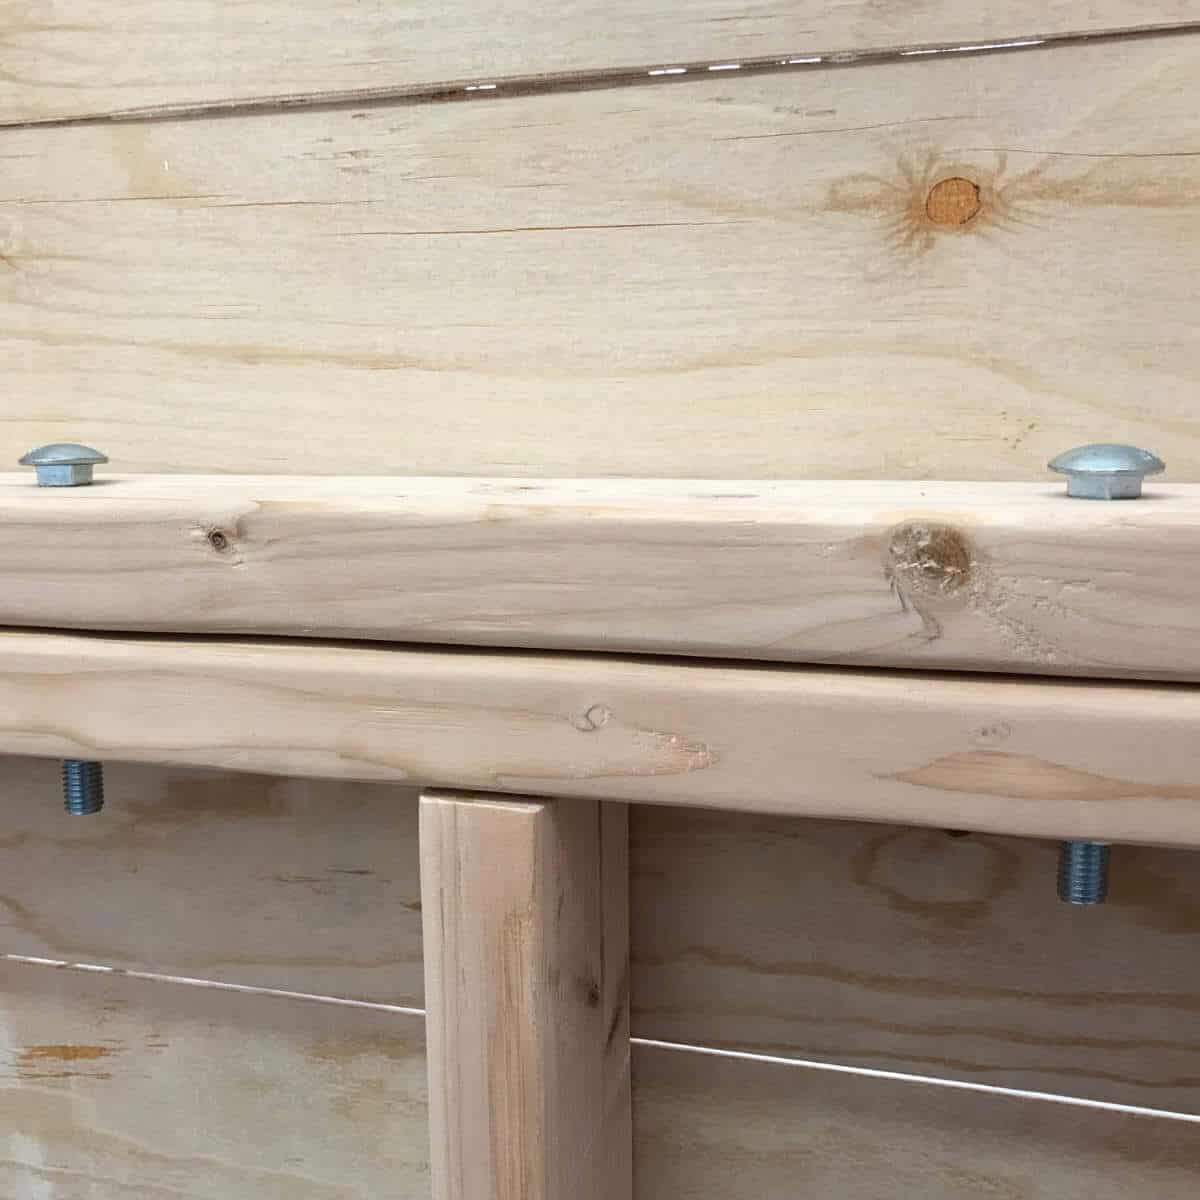
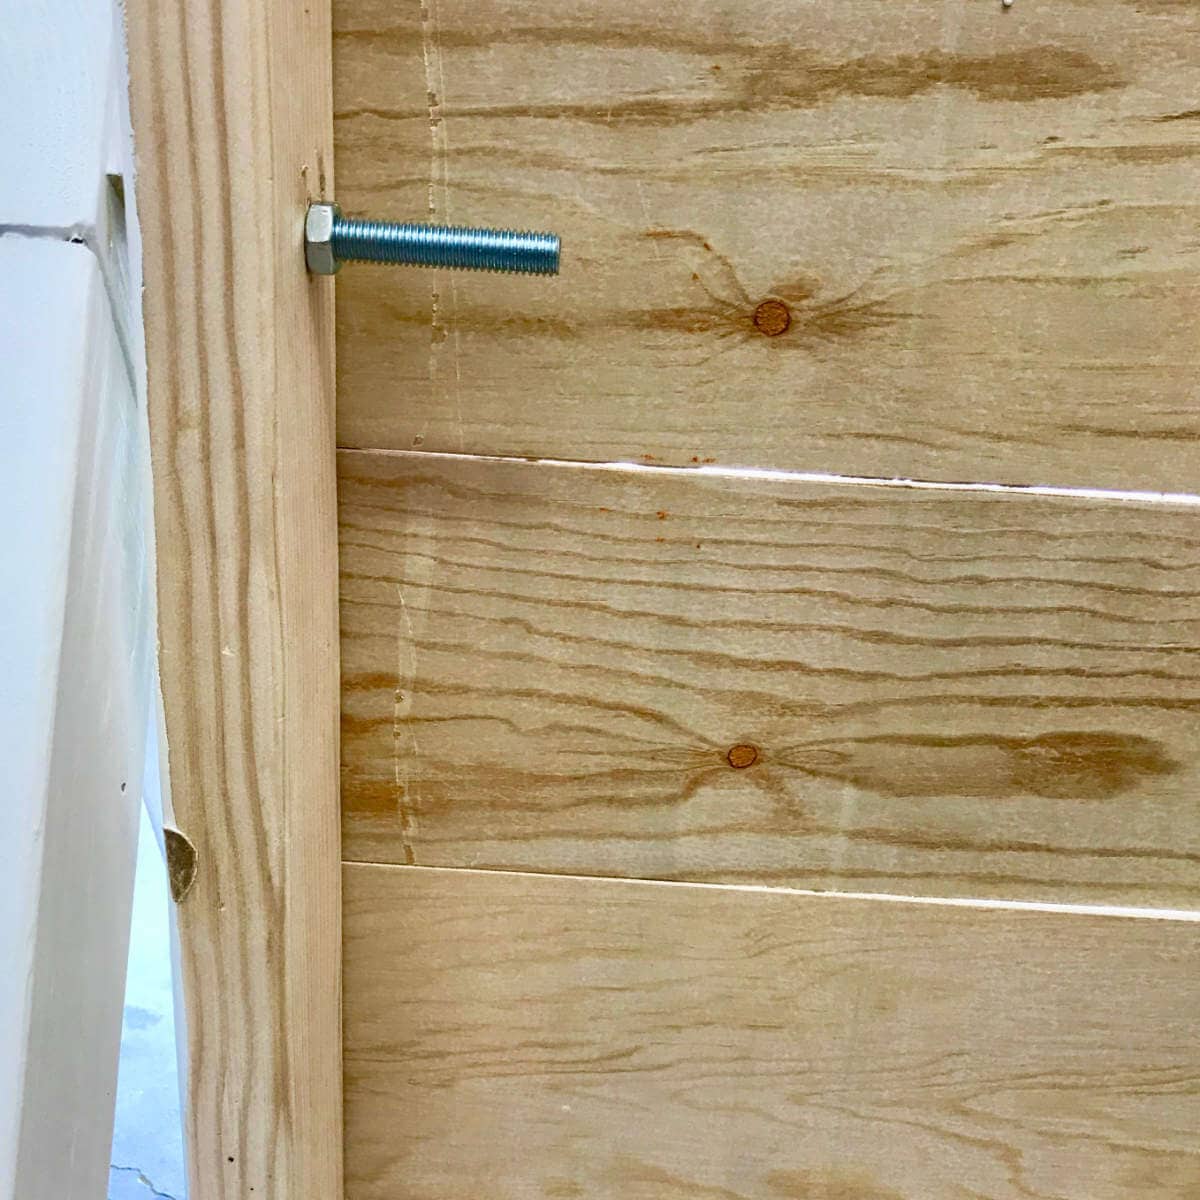
Next, we used a 1-1/8″ wood spade bit to drill a half-inch depth in both the top and bottom using the pilot hole. This would allow the top of our carriage bolts to sit recessed inside.
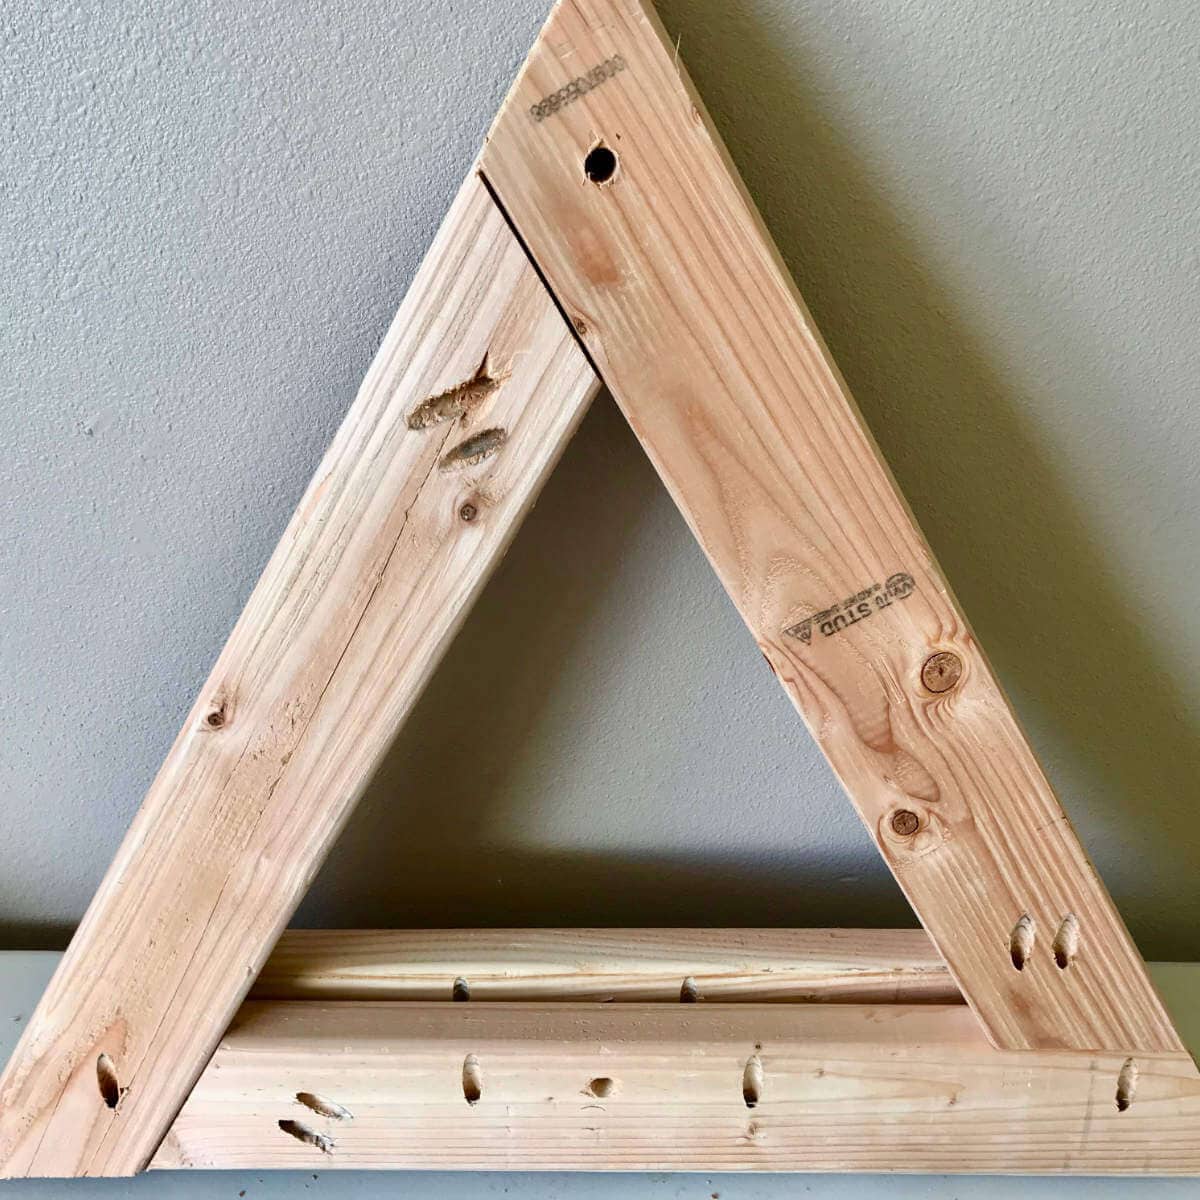
Then, we used a 1/2″ wood spade bit to drill the rest of the way through the 2 x 4’s for our carriage bolts to fit through. You can see the backside of the 1/2″ holes in the picture above.
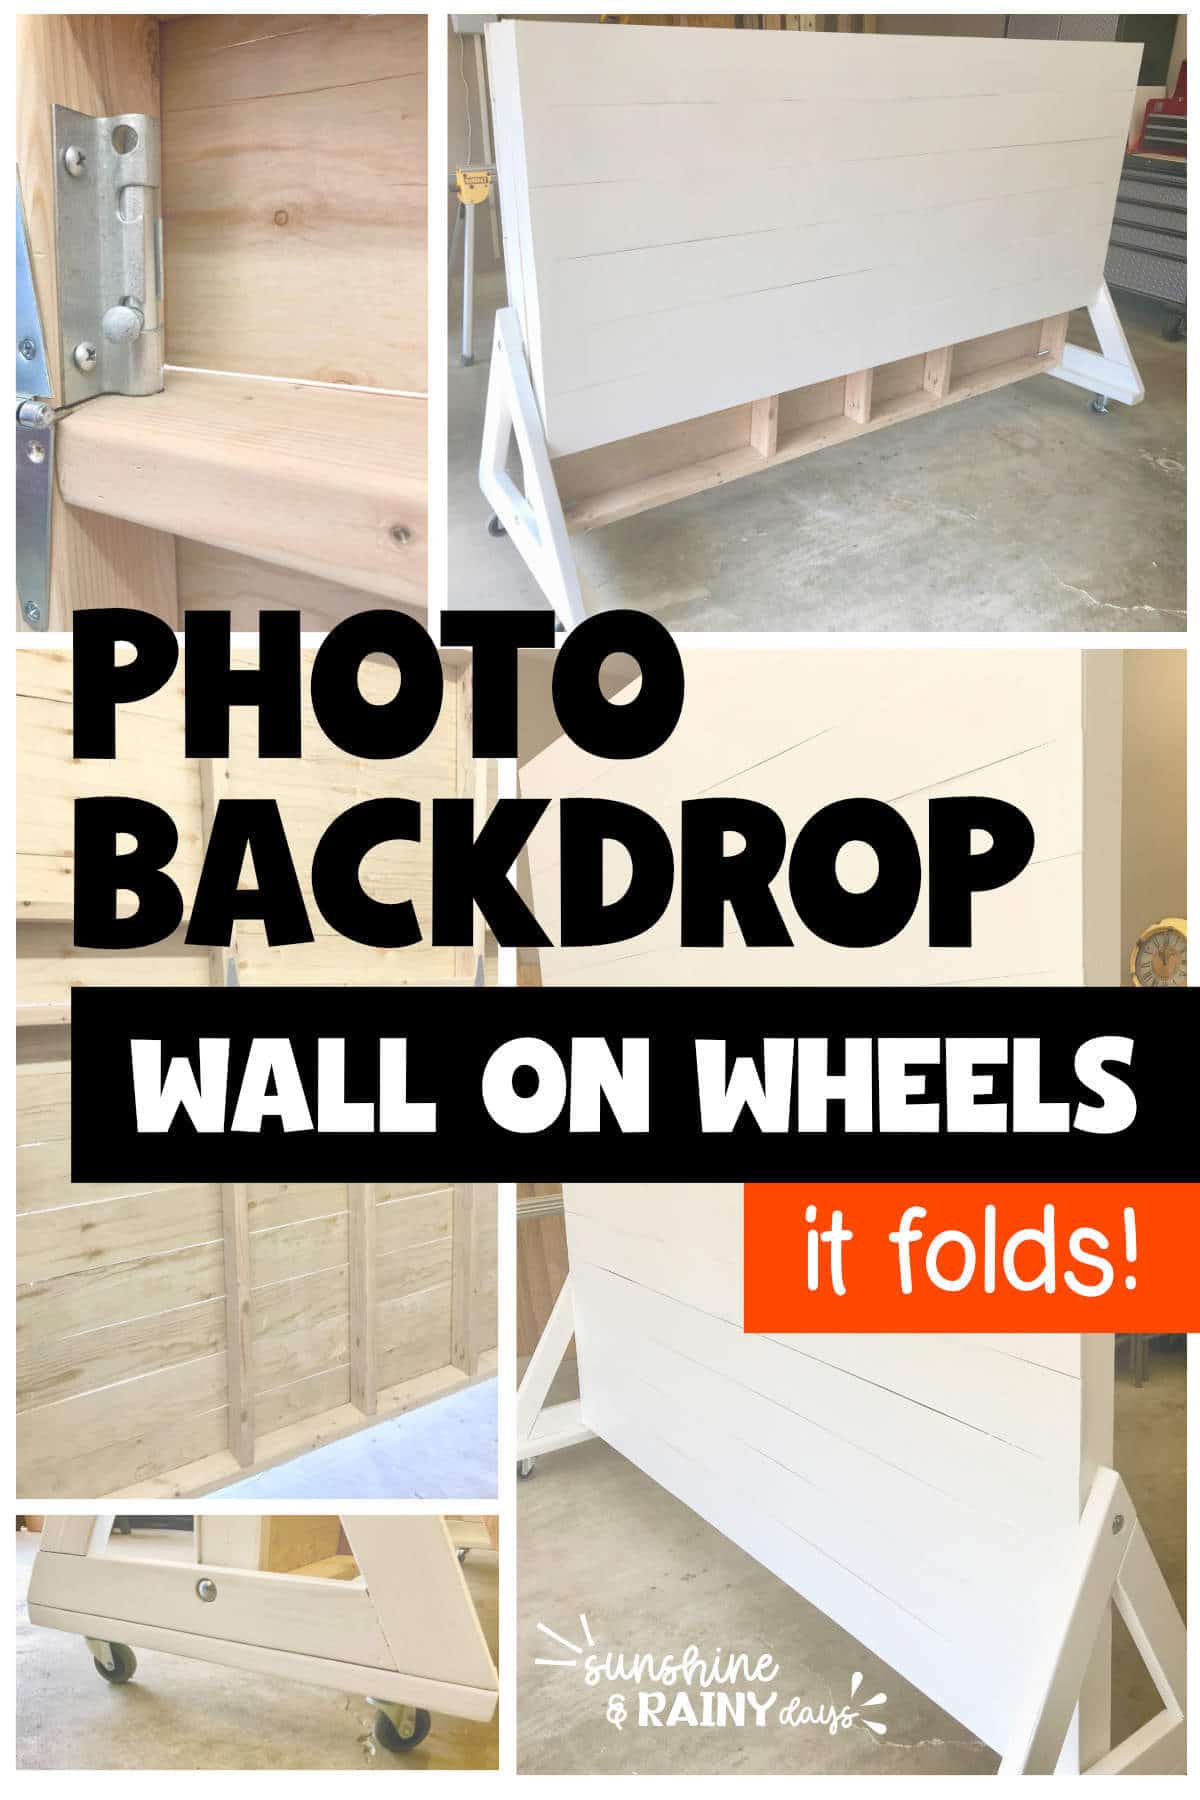
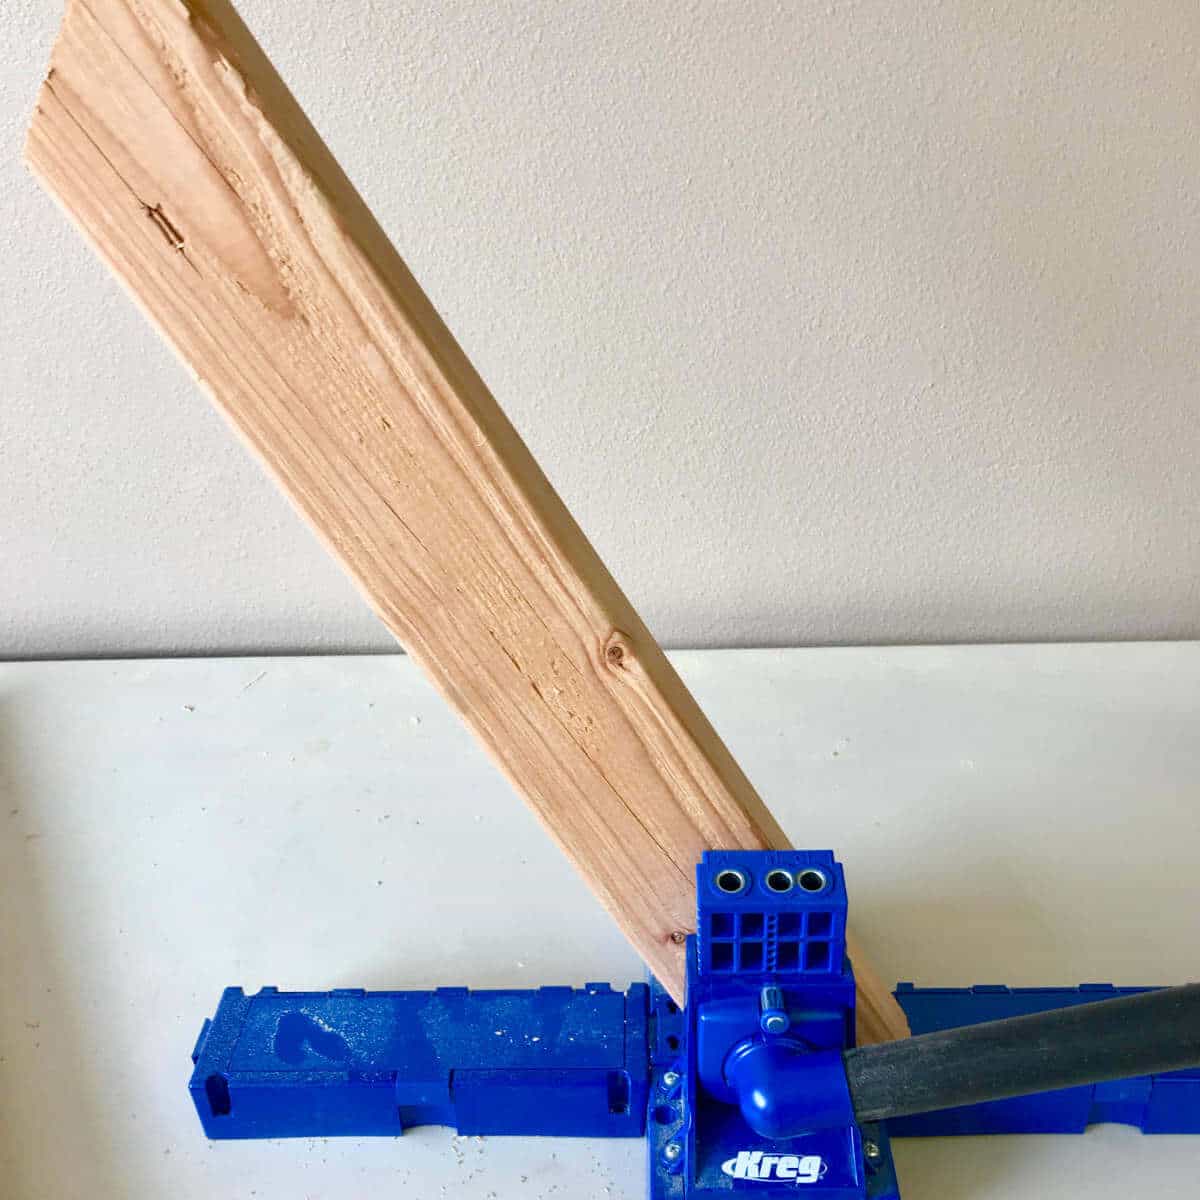
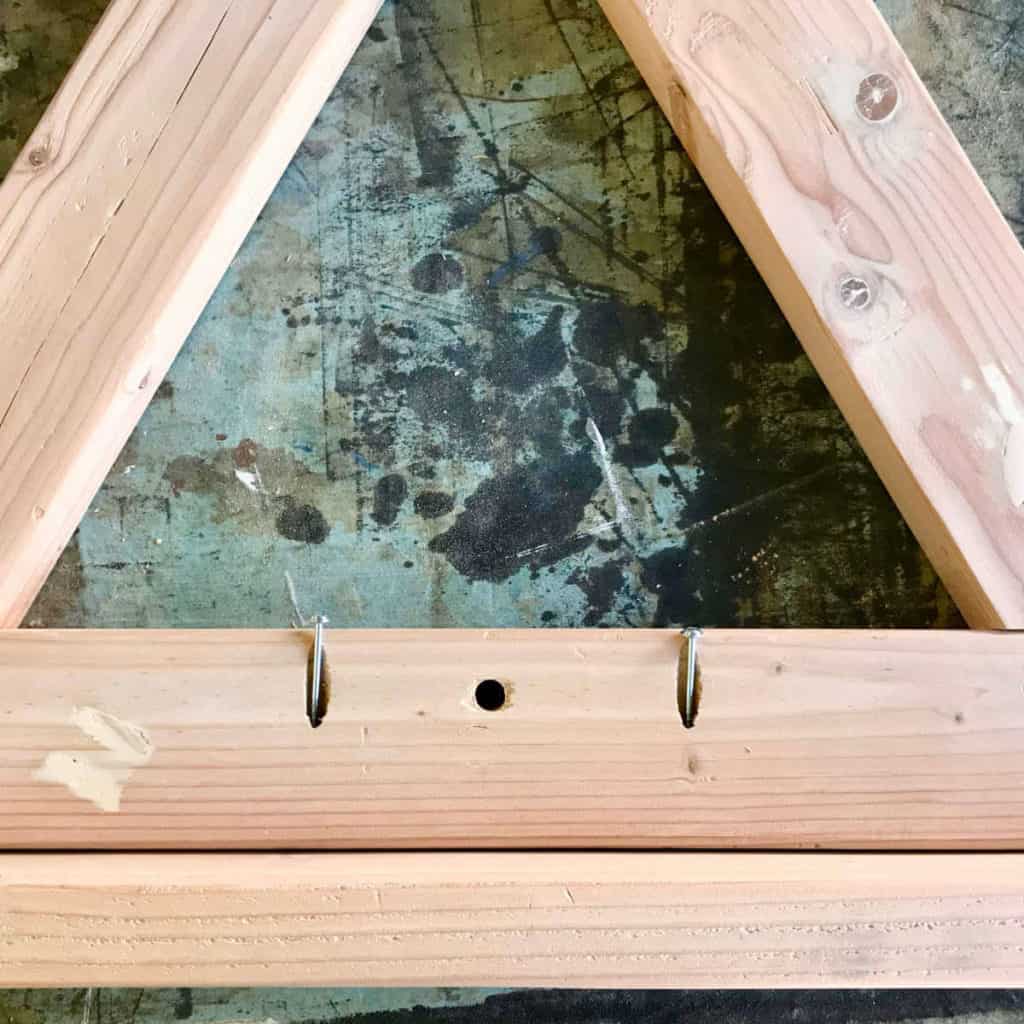
Our triangle legs needed to be attached to a 2 x 4 base to have a ledge for our wall to sit on and a place to attach our casters. For this, we drilled 4 pocket holes in the bottom of each triangle leg. In the picture above, you can see the pocket holes we drilled to attach a 2 x 4 to the bottom of our triangle legs.
We used 2-1/2″ Kreg Screws and wood glue to attach the 2 x 4 to the bottom of the triangle legs.
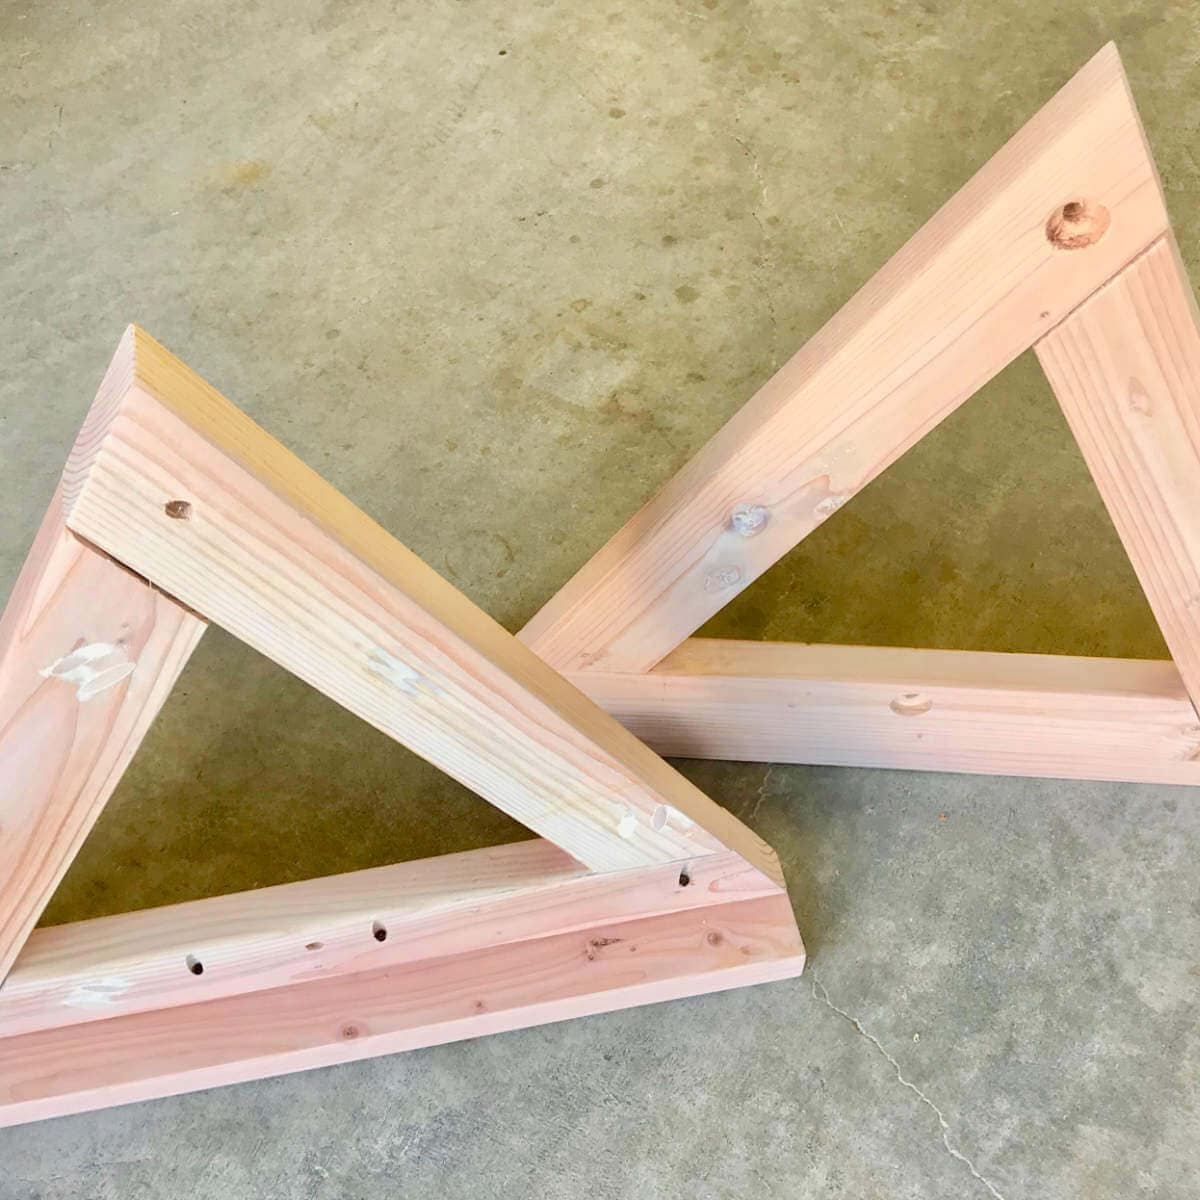
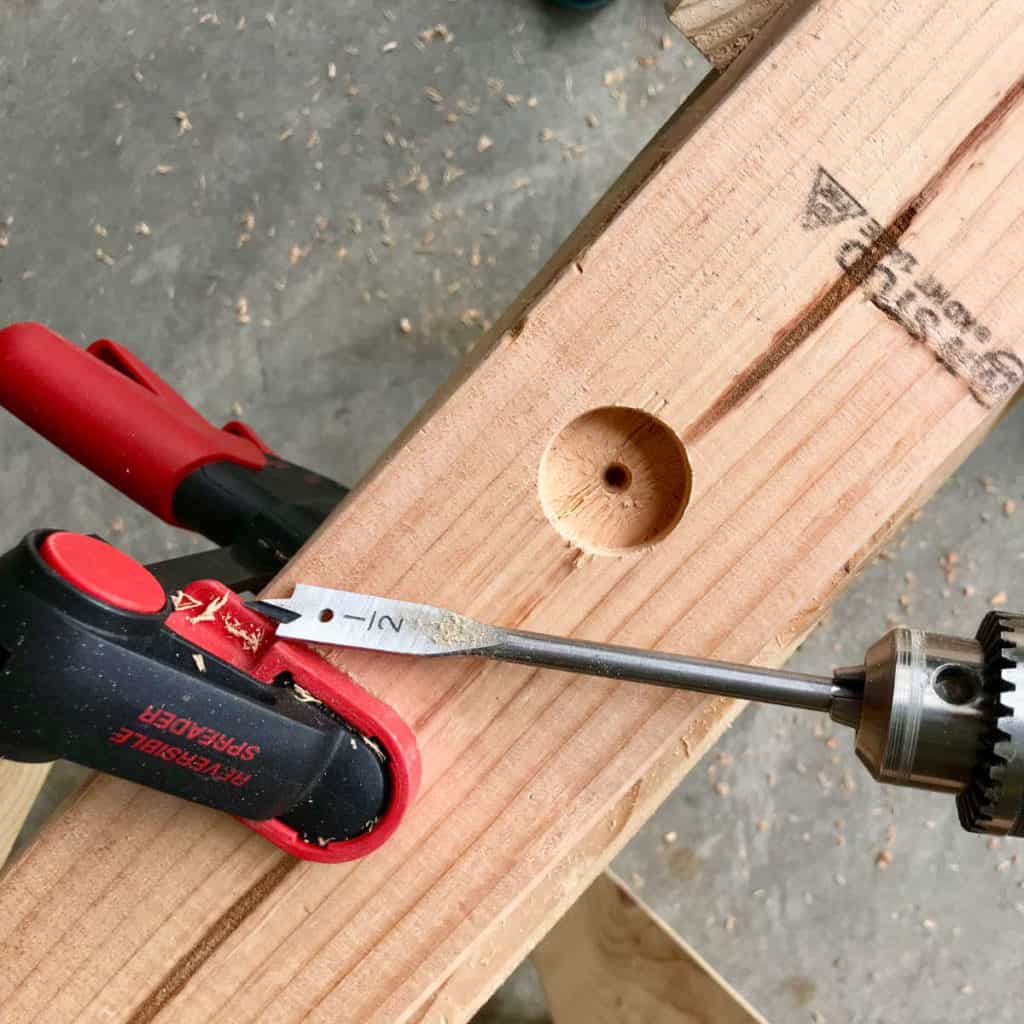
Once everything was attached, we used Kreg Pocket Hole Plugs and plastic wood to fill our pocket holes in the legs, since they would be visible. We finished the triangle legs with a quick sand and they were ready to paint.
Photo Backdrop Wall
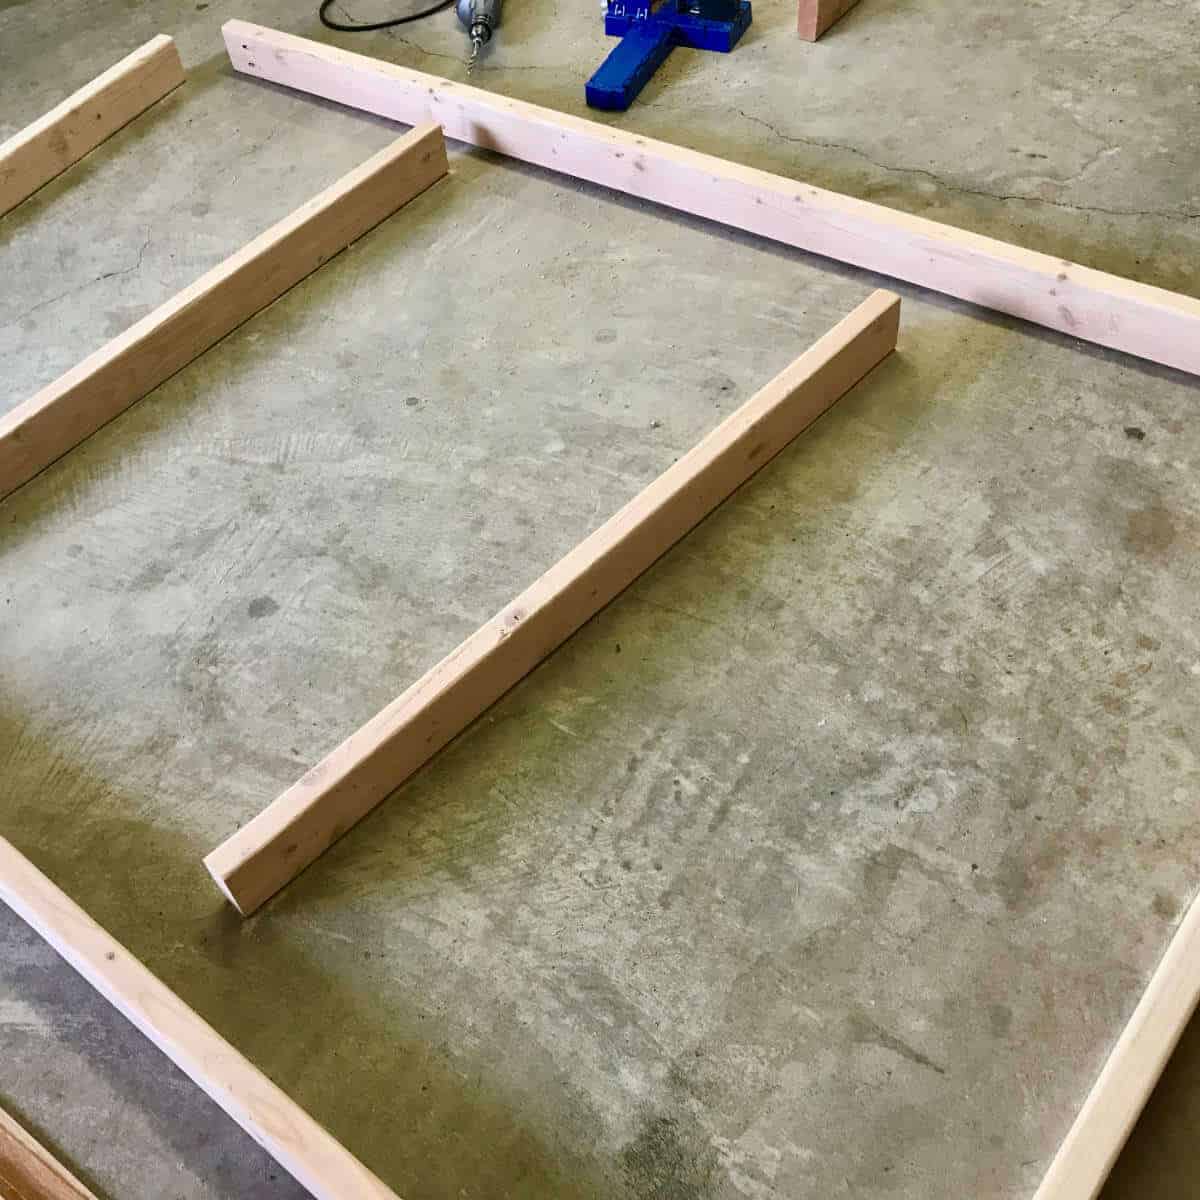
For the wall, we knew we wanted the lower portion to be 4′ tall and the top portion to be 3′ tall. The entire wall would have dimensions of 7′ x 7′. We cut each side piece for the top at 3′ and each side piece for the bottom at 4′. Then, we cut 3 top and bottom pieces at 81″ or 3″ less than 7′ since the side pieces total 3″ to make the total width 7′.
The 2 x 4 center pieces for the 4′ base were cut at 45″ or 3″ less than 4′ (because the top and bottom 2 x 4’s account for the 3″ difference. 2 x 4’s are actually 1-1/2″ x 3-1/2″).
Tip: Wait until you build the frame and then measure to make sure you get the right measurement for the inside pieces.
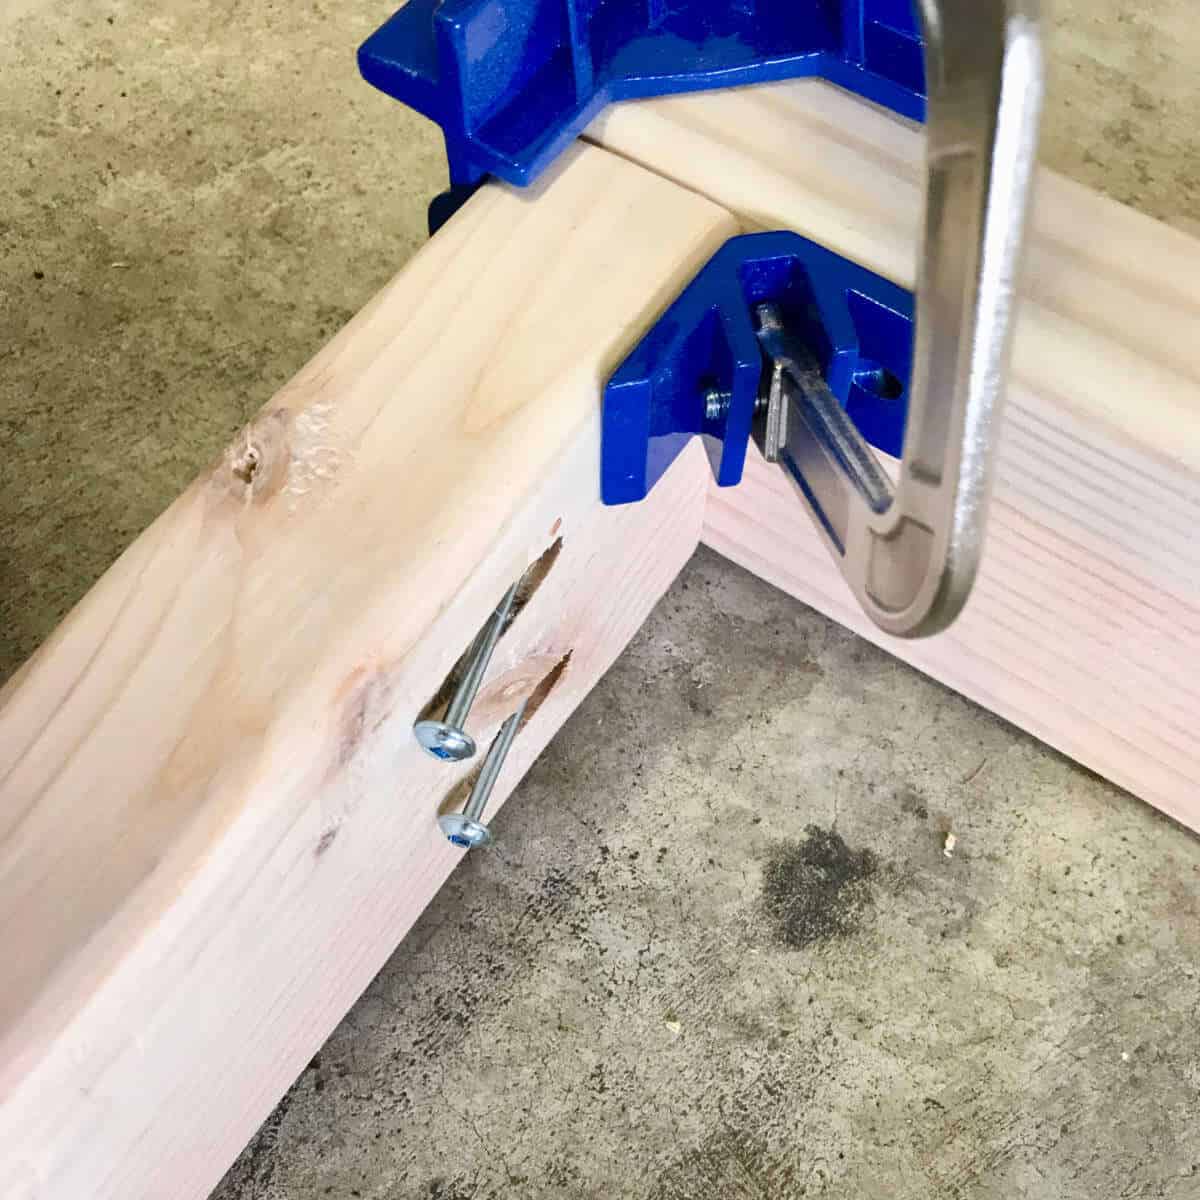
We used wood glue, our Kreg Corner Clamp, and 2-1/2″ Kreg Screws to attach the frame pieces.
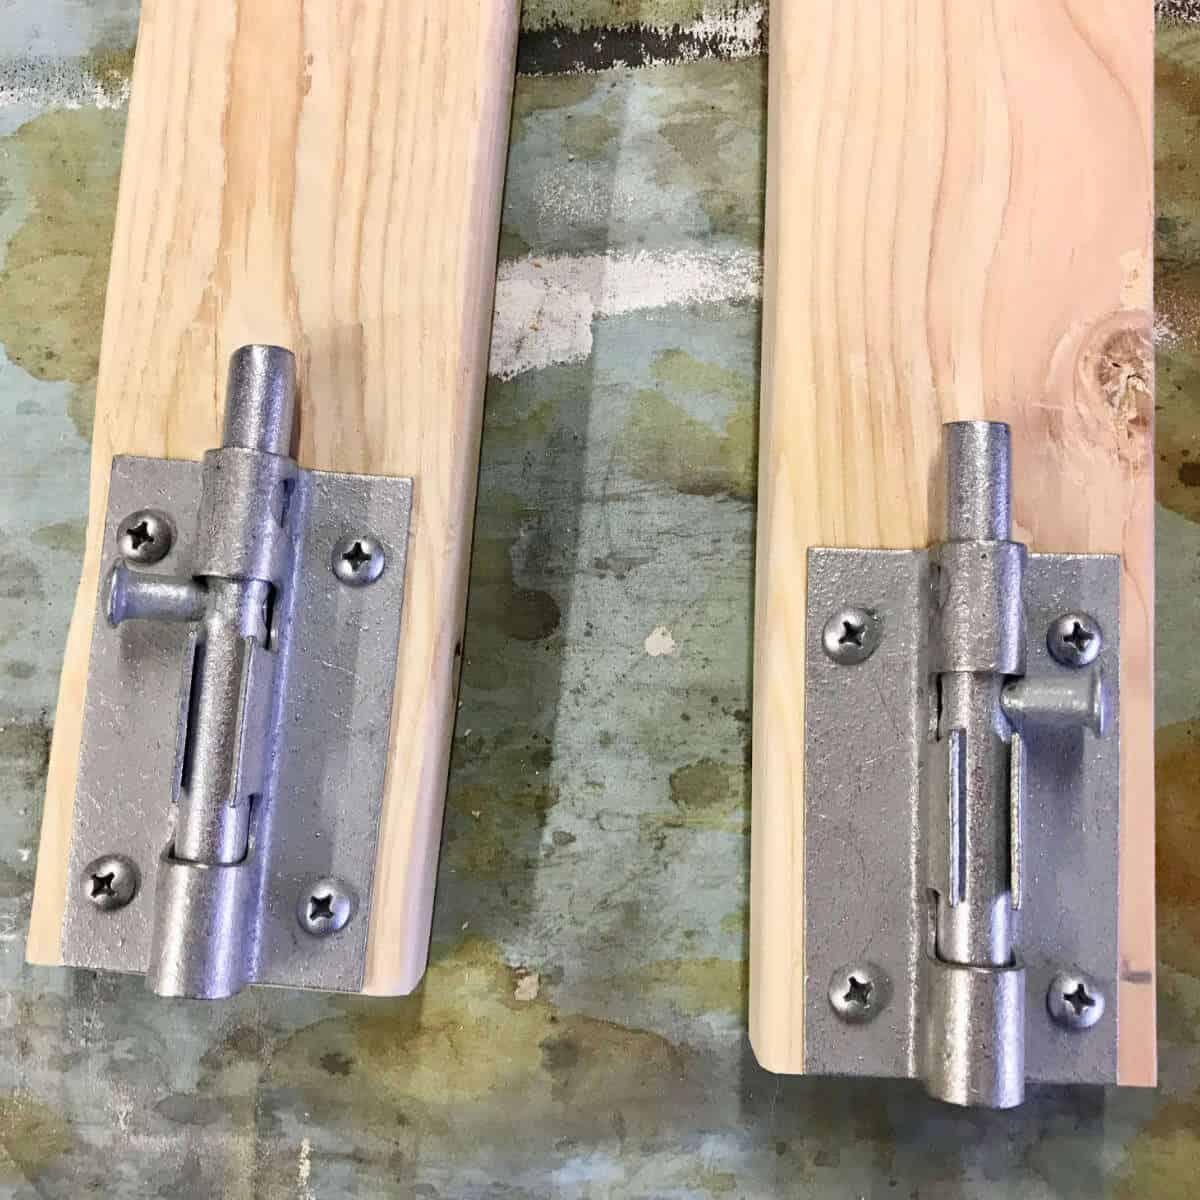
Before we attached our top frame pieces, we attached our Barrel Bolts to the inside bottom of each side frame 2 x 4.
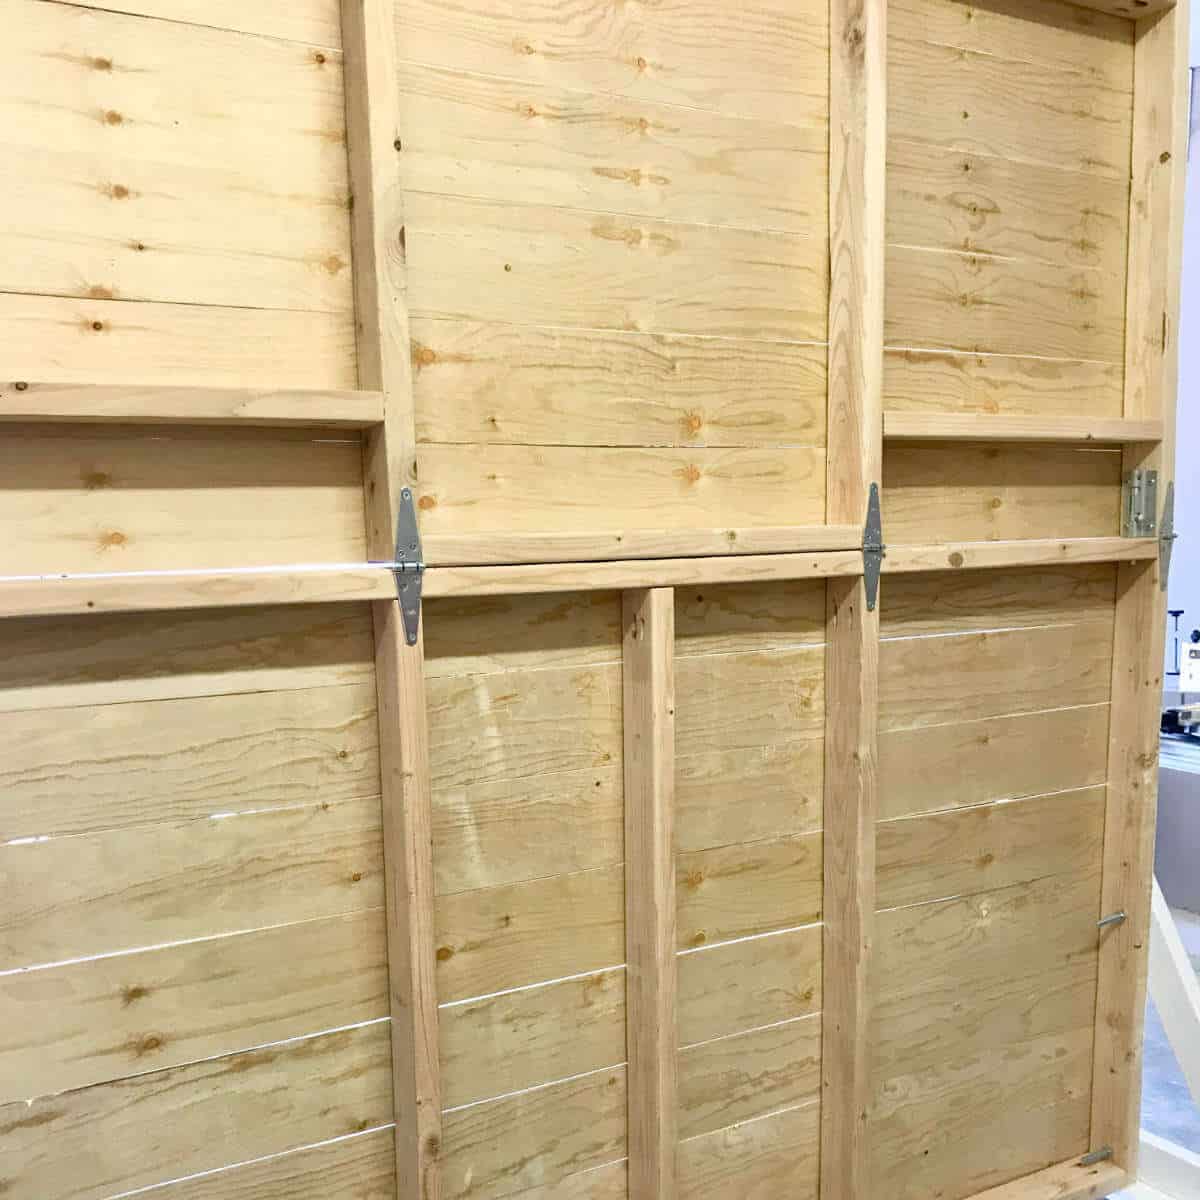
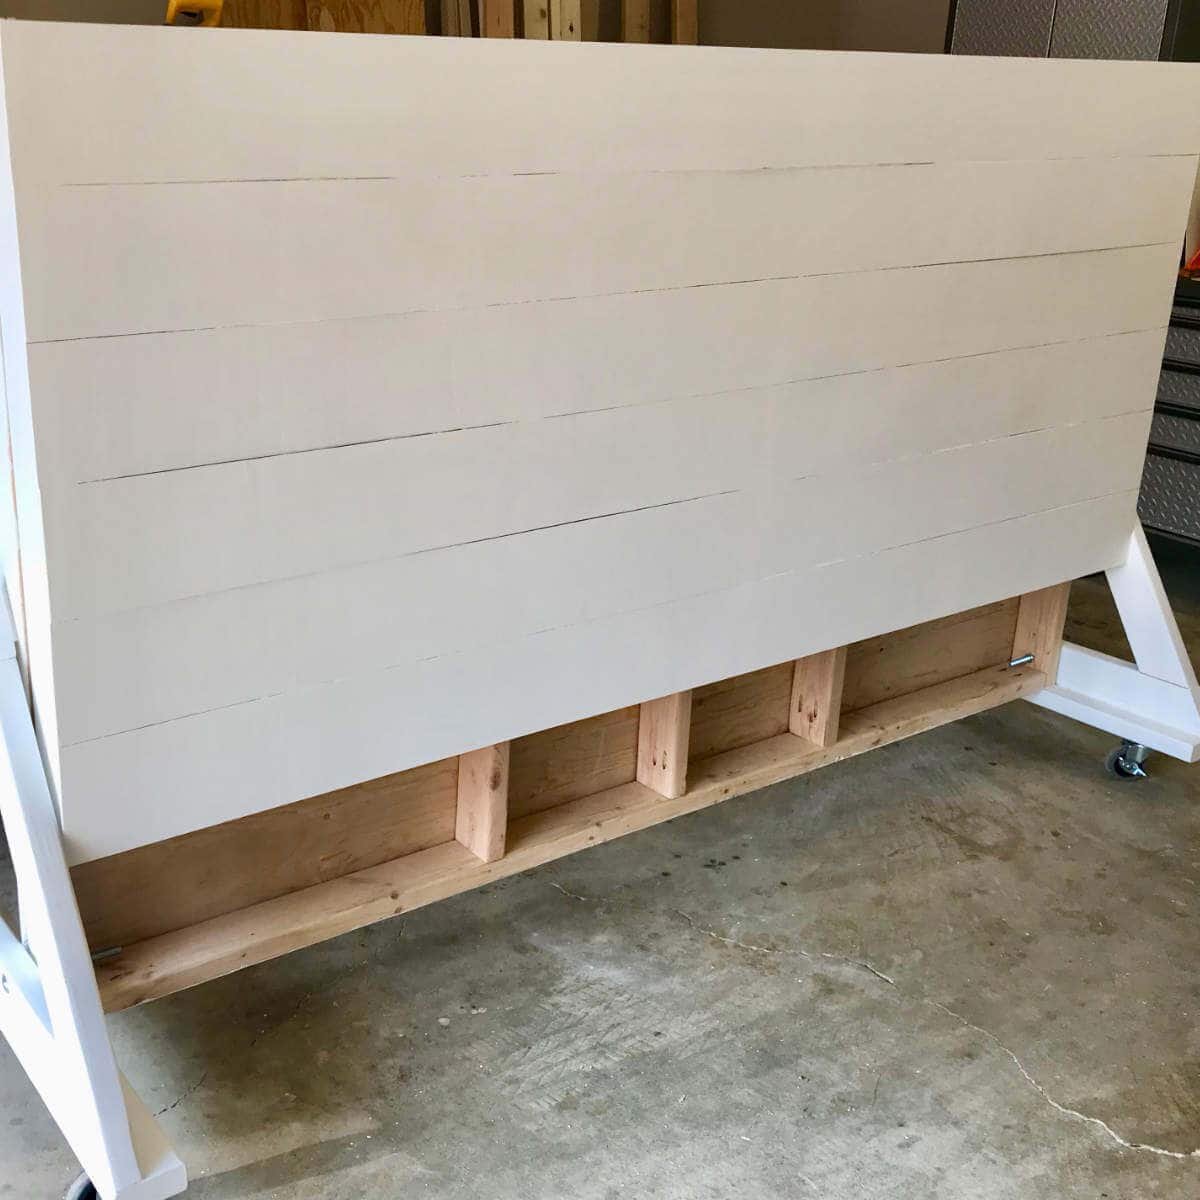
Note: The picture above shows the wall with the plywood attached. I did not have the plywood attached at this point but failed to take pictures. This gives you a good idea of how the frame pieces were attached.
The 2 vertical 2 x 4 braces should be cut at 34-1/2″ or 1-1/2″ less than 3′. It gets a bit tricky after that. The center cross 2 x 4 brace is 28″ and sits inside the vertical 2 x 4’s. The side horizontal braces sit just above the barrel locks and are 24-7/8″. (I cut mine at 25″ because the numbers added up that way but the top ended up slightly wider than the bottom. Be sure to measure for your exact dimensions.)
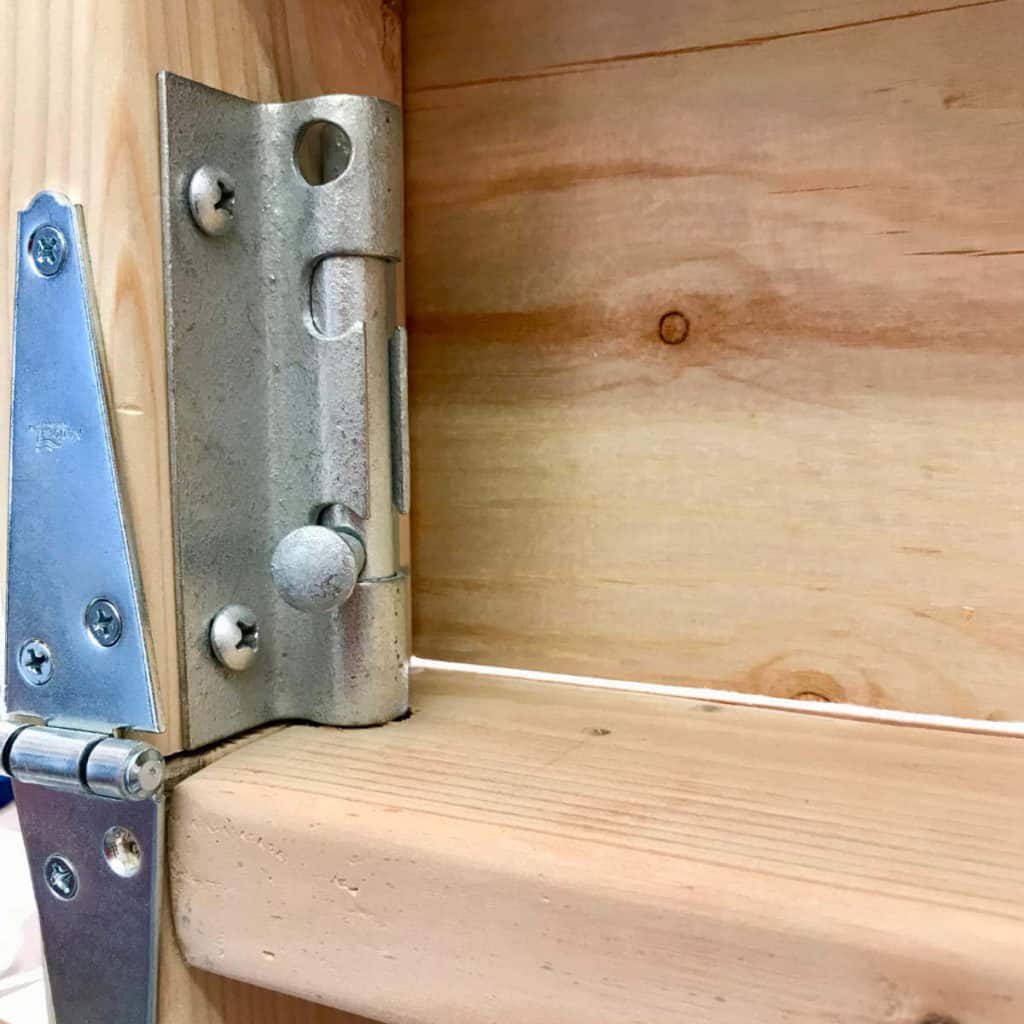
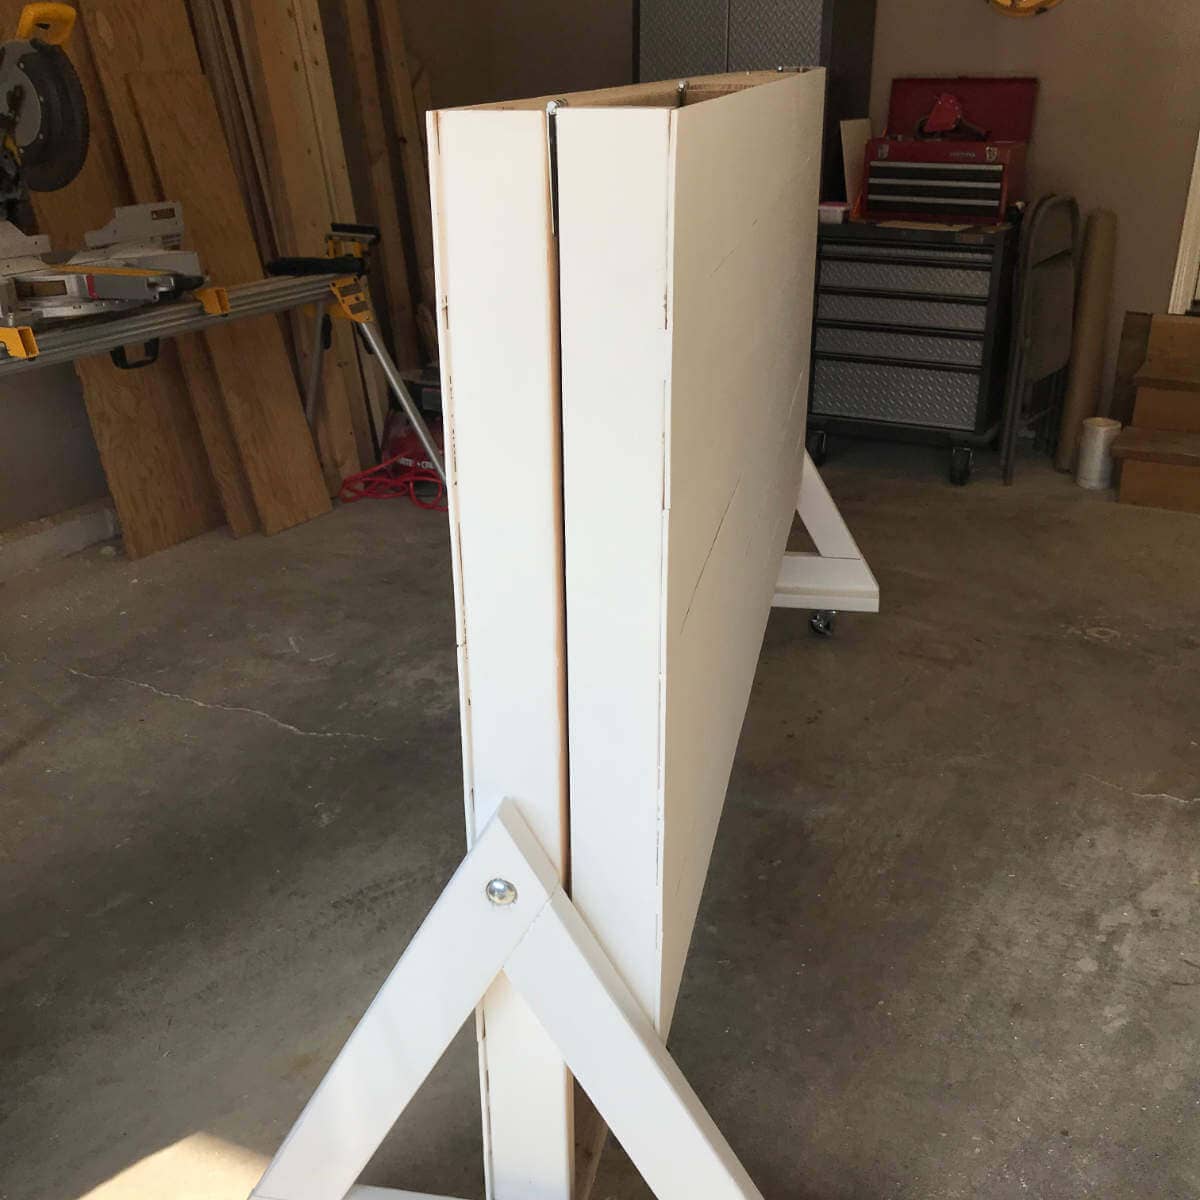
At this point, we attached the hinges in four places and used the 1/2″ wood spade to drill holes for the Barrel Bolts to go through.
Note: The front plywood pieces were not attached at this point but I failed to take pictures. This picture is of the finished wall.
In order to know where to drill the Barrel Bolt holes, I folded the wall in half, used a pencil to color the bottom of the Barrel Bolt, opened the wall back up and pushed the Barrel Bolt onto the bottom frame to mark where the hole should go. I then folded the wall again and, with my daughter holding the wall upright, drilled a pilot hole in the center of each mark and then drilled through the 2 x 4 frame with the 1/2″ wood spade bit.
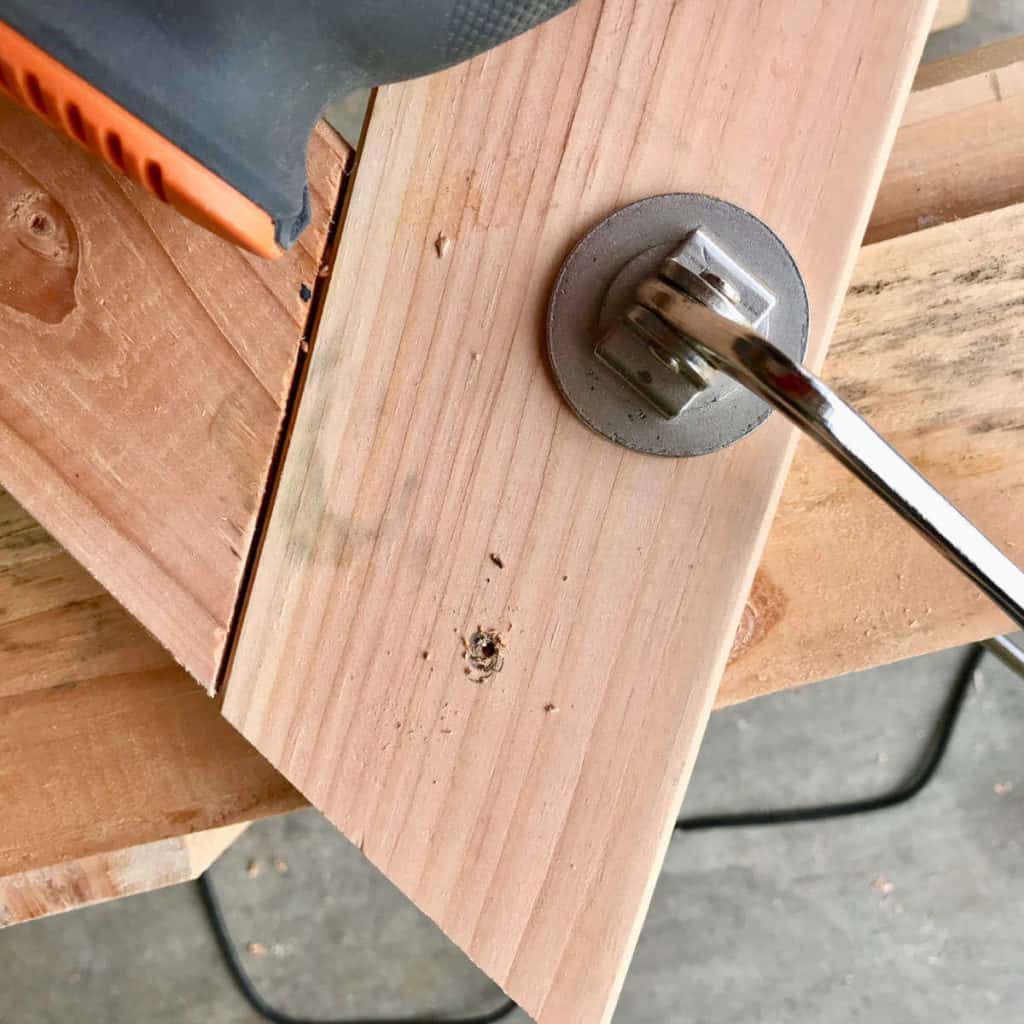
The Barrel Bolts hold the wall quite well but there was a little give if you leaned on the top of the wall. We wanted it to be super solid so, with the wall unfolded and upright, I drilled two 1/2″ holes through both center frame pieces with the 1/2″ wood spade bit. We then twisted two carriage bolts through both holes and secured them with nuts. This made the wall super secure.
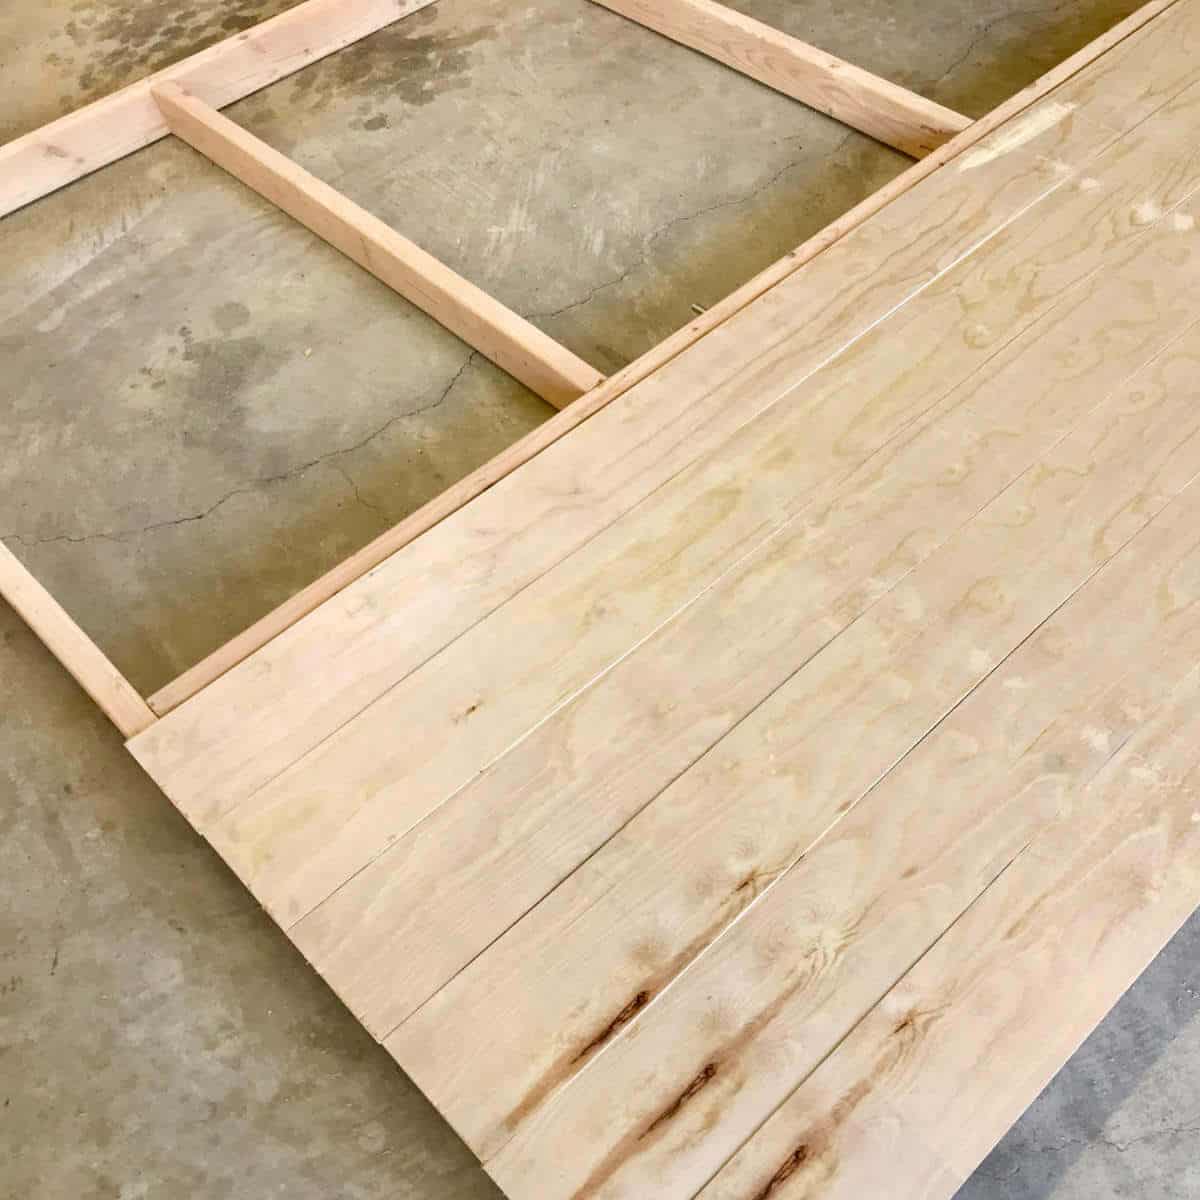
We had the hardware store cut our 4′ x 8′ plywood into 6″ pieces. That way, the dimensions would be right for both the 3′ (36″) top and the 4′ (48″) bottom (6×6=36 for 6 boards on the top and 6×8=48 for 8 boards on the bottom).
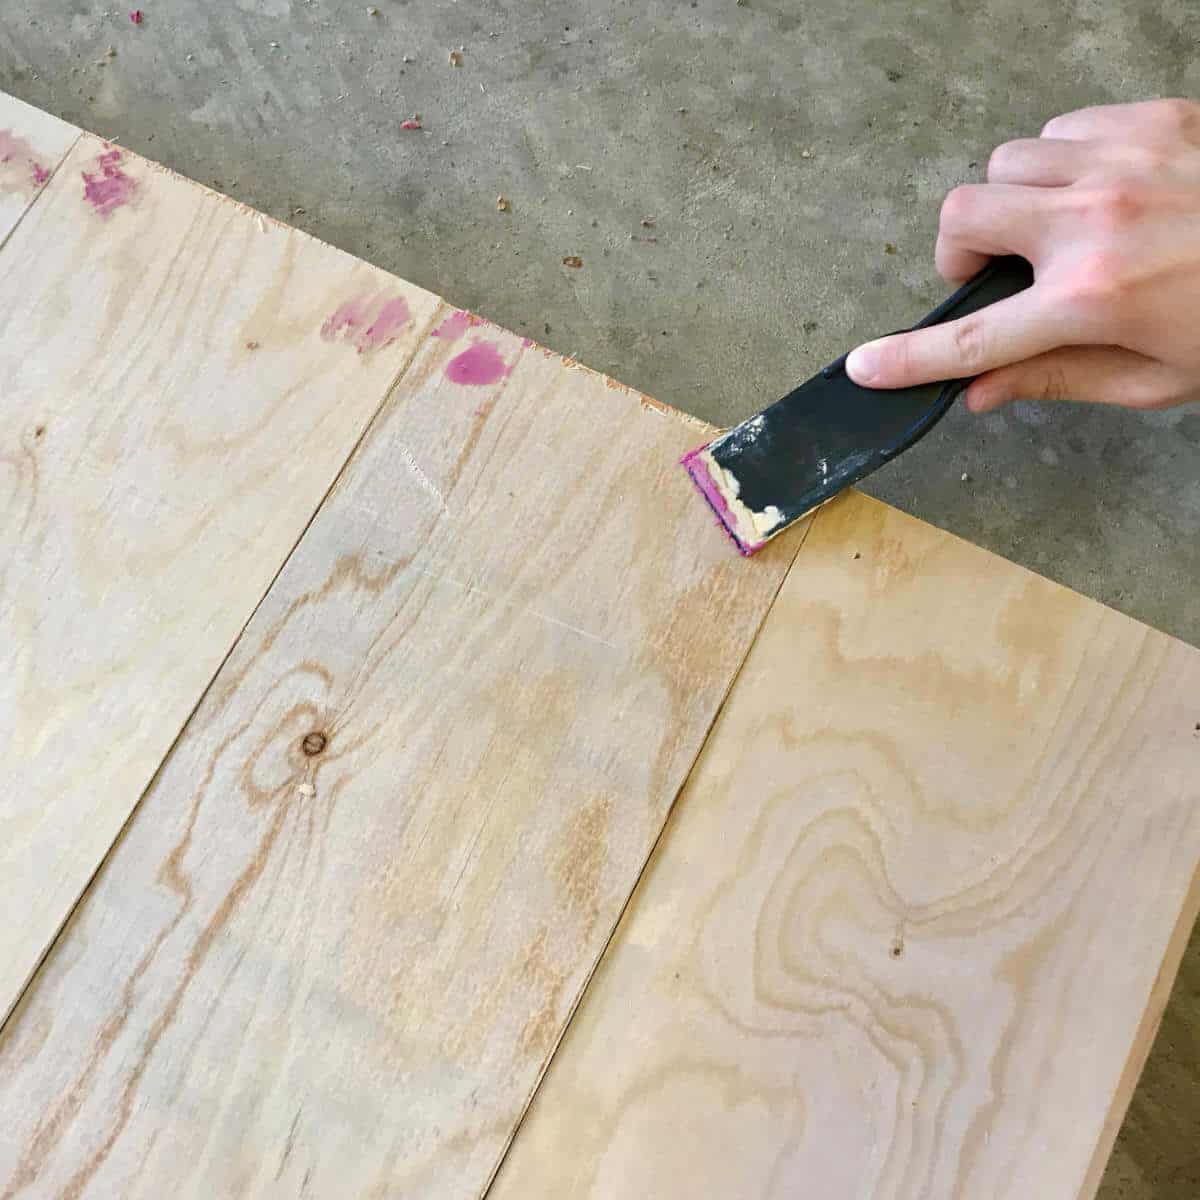
Before attaching the plywood boards, we gave the cut edges a quick sand.
With the wall laid out flat, we began attaching our plywood boards with wood glue and a nail gun.
Since our boards were 8′, we held each one up to the frame, where it would be placed, made a mark, and then cut. This way we knew we had the right dimension for the frame.
Justine filled each nail gun hole with plastic wood.
Painting The Wall And Triangle Legs
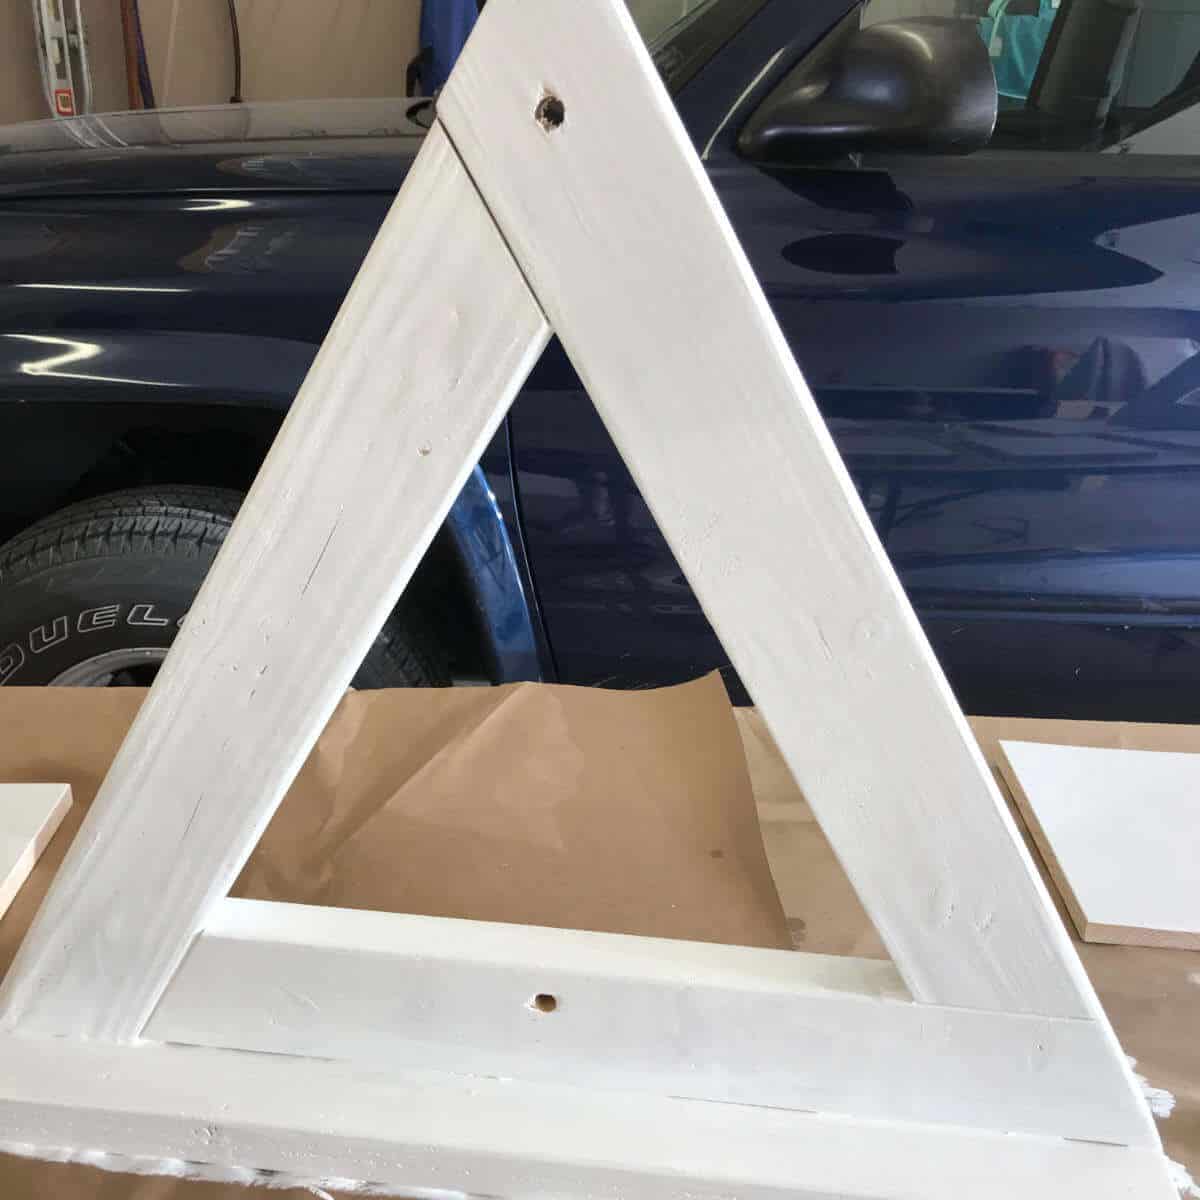
We used Behr Ultra Pure White Flat Exterior Paint and Primer in One to paint our wall and triangle legs. We used a smooth roller and applied three coats of paint.
If you’d prefer to stain your rolling wall, check out How To Make Wood Stain With Common Household Products.
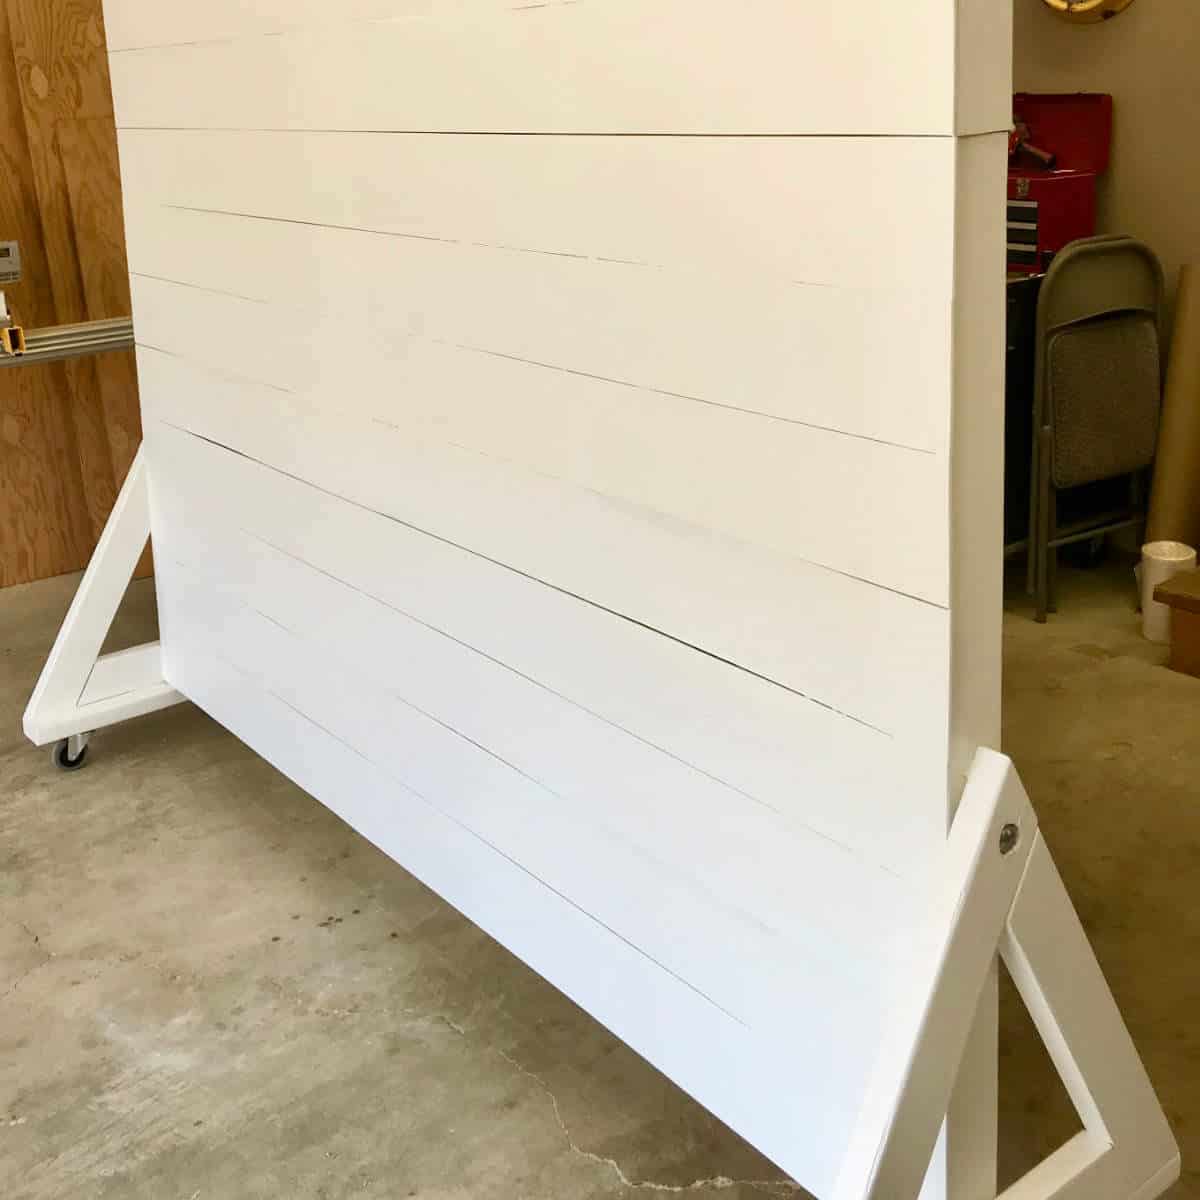
Wall On Wheels Assembly
Once the paint was dry, we set the wall in the center of the ledges of the triangle legs. My husband and daughter held the wall upright, we used a level to make sure it was straight, and then I used my 1/2″ wood spade bit to drill right through the holes on the triangle legs and through the wall frame. I then screwed the carriage bolts through the triangle legs and wall and secured them with nuts.
Wheel Attachment
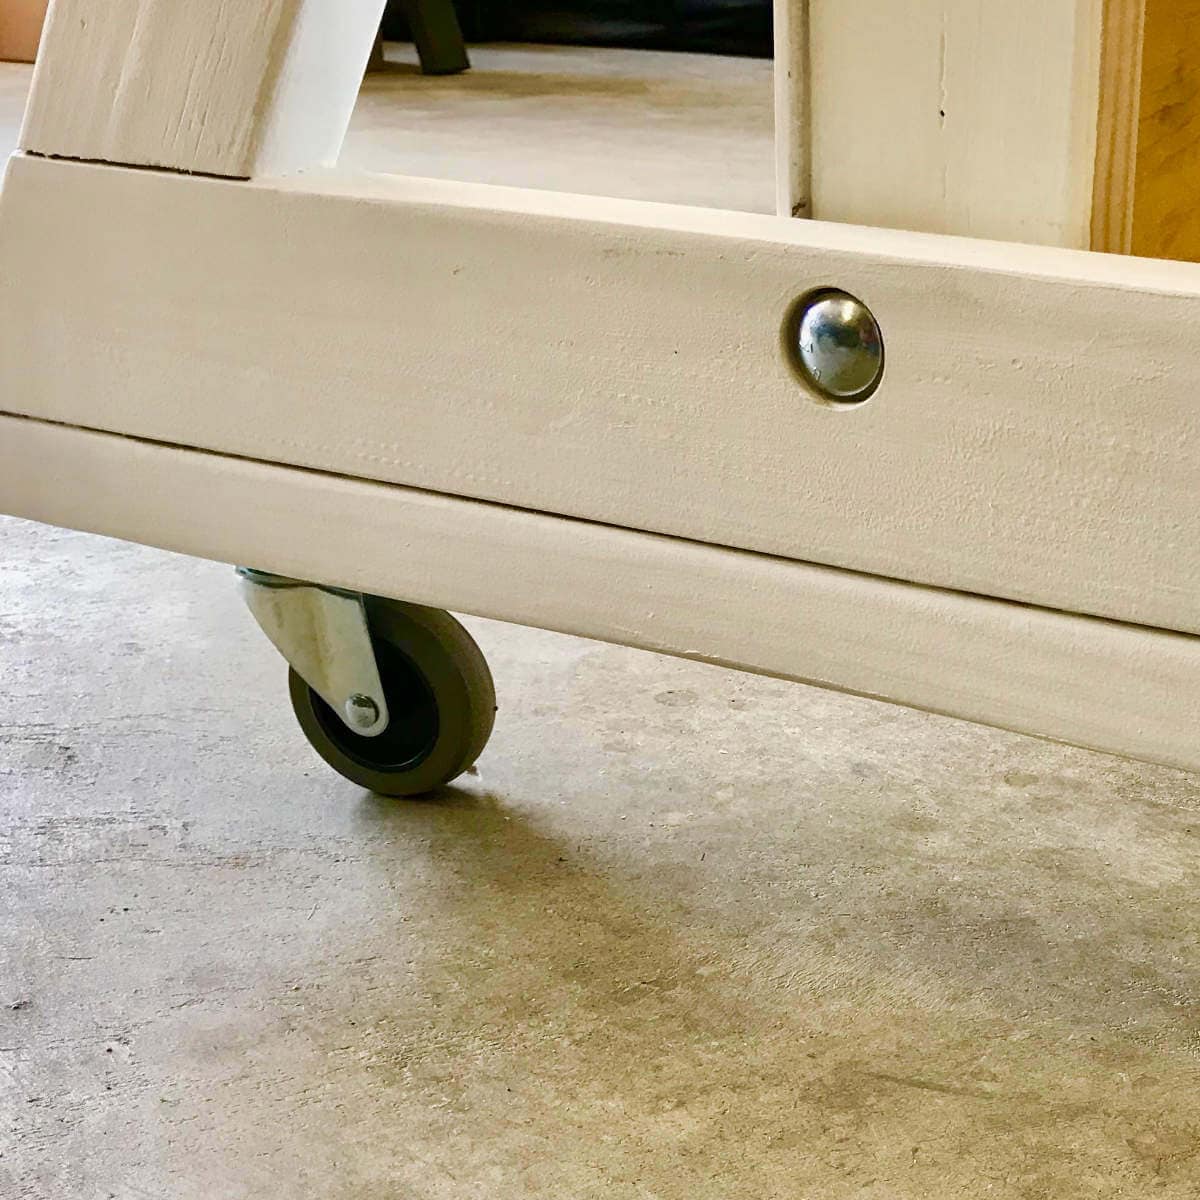
The final step was to attach the wheels! We folded the wall, laid it back on our drop cloth, and attached the casters 3″ in from each end of the bottom 2 x 4. Our casters rotate for easy movement and one has a wheel lock.
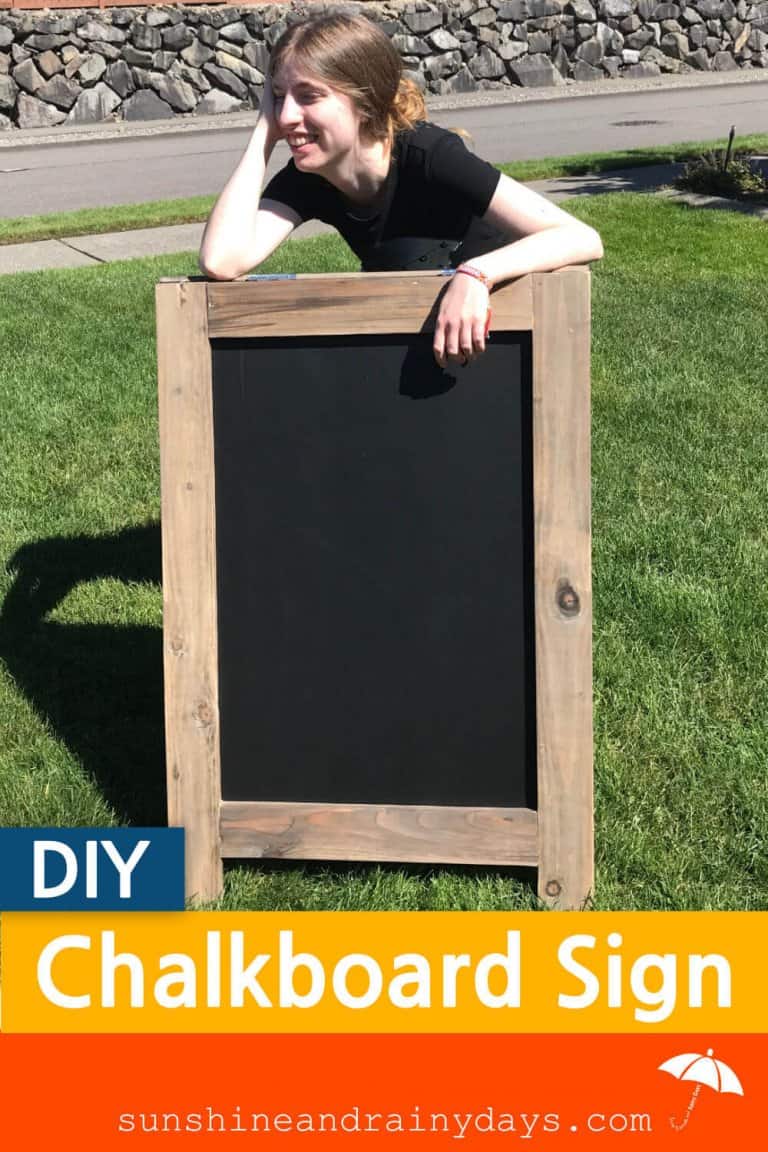
If you’re building this wall for a party, you might also be interested in learning How To Build A DIY Chalkboard Sign to welcome guests.
Troubleshooting
One of the plywood pieces on the bottom half of the wall was sagging in a little more than I liked so I added the center vertical brace, at this point.
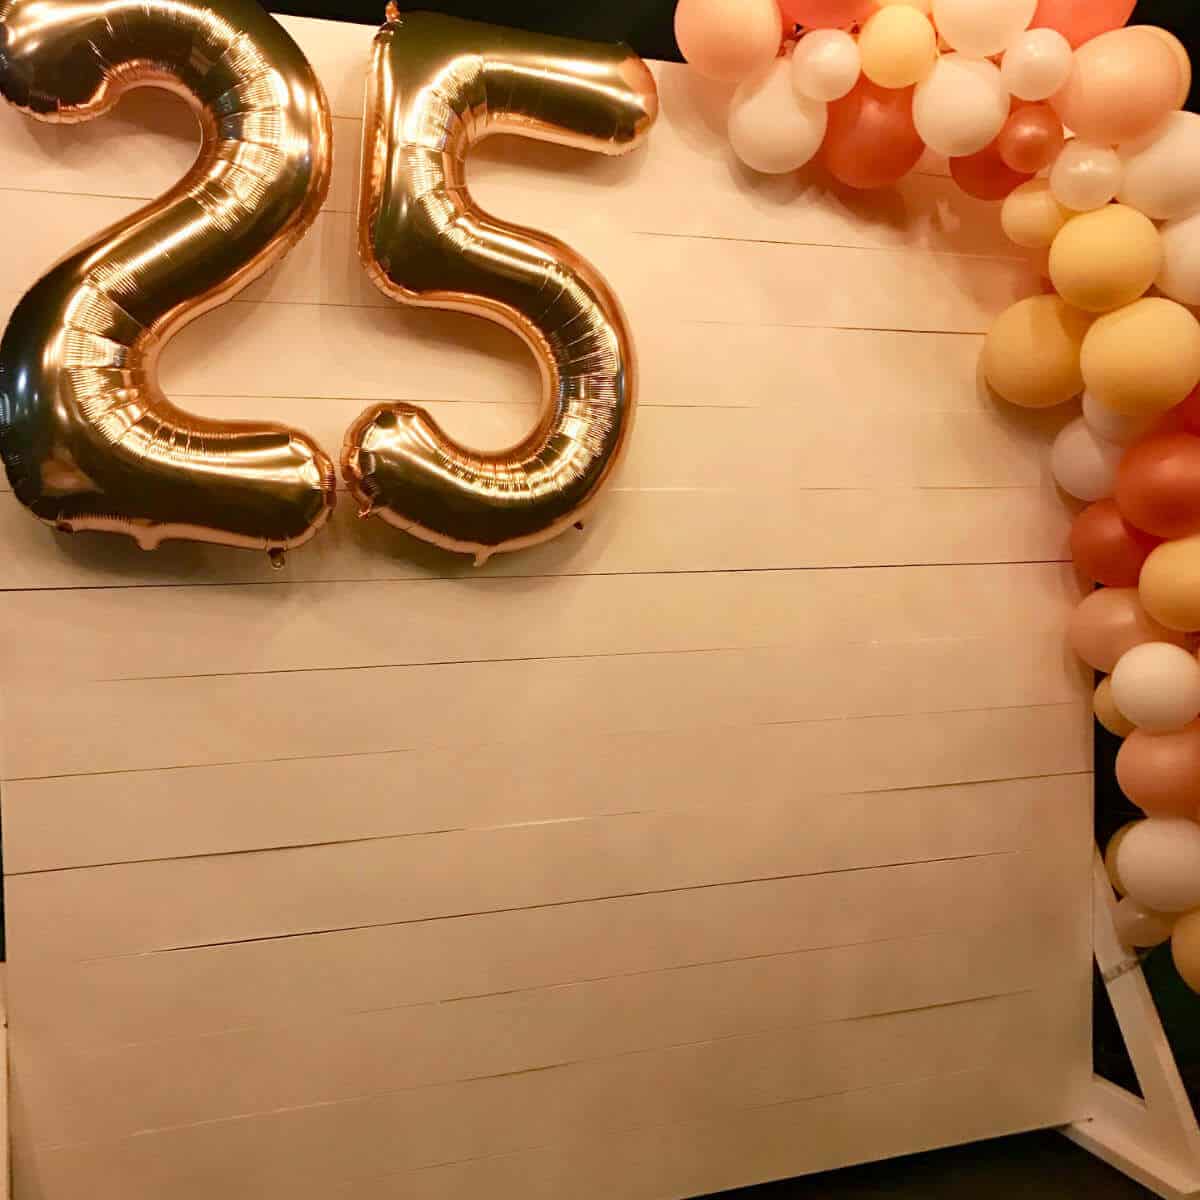
The Finished Folding Wall On Wheels
We are pretty proud of how nice this Wall On Wheels turned out! It meets all the criteria we hoped for!
- Folds
- Rolls
- Easy to transport
- Easy to set up


My niece was happy with the way this Photo Backdrop Wall On Wheels turned out and it has seen lots of shows and smiles as a backdrop wall!
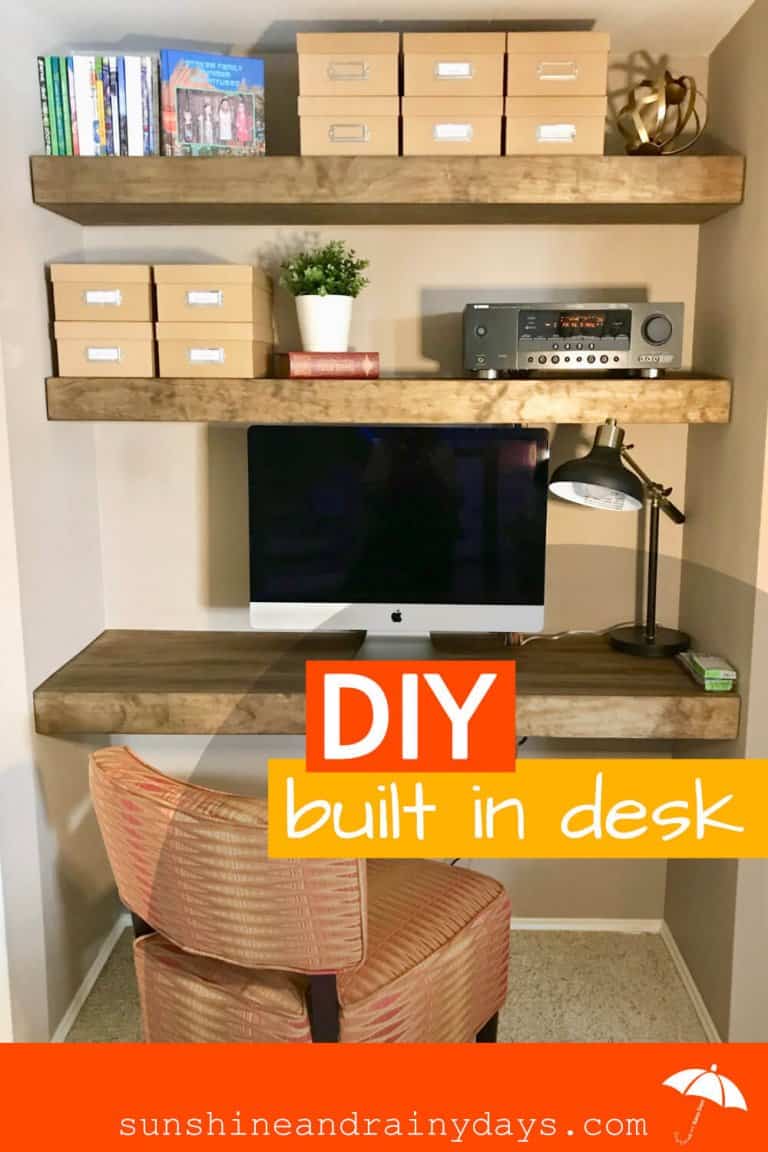
I also built these Laundry Room Shelves for my niece to give her more storage space.
If you’d rather not build a backdrop wall, check out these easy and affordable backdrop wall ideas.
Frequently Asked Questions
Hi! I’m Bridget!
I create printables and DIYs to help you get organized and celebrate special occasions! It’s my mission to inspire you to get creative and find joy in every day!