How To Make 4X4 Reindeer

A friend sent me a picture of a reindeer made out of wood and I was inspired to make one out of a 4X4 since I’ve made quite a few 4X4 wood crafts. They turned out super cute, and we ended up making 15 4X4 Reindeer to give as gifts. Then, when we hosted a craft party with family, we made more 4X4 Reindeer!

Supplies
This post contains affiliate links. When you purchase through an affiliate link, we receive a small commission at no additional cost to you. Disclosure.
- 4 X 4 – Just your standard untreated 4 X 4 fence post. You should be able to get about nine reindeer out of each eight-foot 4X4.
- Miter Saw
- Sander
- Sand Paper – We started with 80 grit then moved to 120 grit before finishing off with 220 grit.
- Tea Bags – If you plan to make homemade stain.
- Steel Wool – For homemade stain.
- Vinegar – For homemade stain.
- Jar With Lid – For homemade stain.
- Stain – If you don’t want to make your own.
- Wood Circles – These are for the reindeer noses.
- Red Paint – For the reindeer nose.
- Sponge Brush – This is used to paint the reindeer nose.
- Wood Glue – To attach the nose.
- Cutting Machine – I used my Silhouette to cut the eyes out of vinyl.
- White and Black Vinyl – For eyes and mouth.
- Transfer Tape – For the reindeer’s eyes and mouth.
- Fake Pine Branches – For reindeer antlers.
- Wire Vine – For reindeer antlers.
- Wire Cutters – To cut the wire vine for antlers.
- Wide and Narrow Ribbon – For the bow. (I used the ribbon we had on hand.)
- Jingle Bells – For the bow.
- Jute – For the bow.
- Glue Gun – To attach reindeer antlers and bow.
How To Make 4X4 Reindeer
These reindeer were a lot of fun to make and my husband got involved, too!
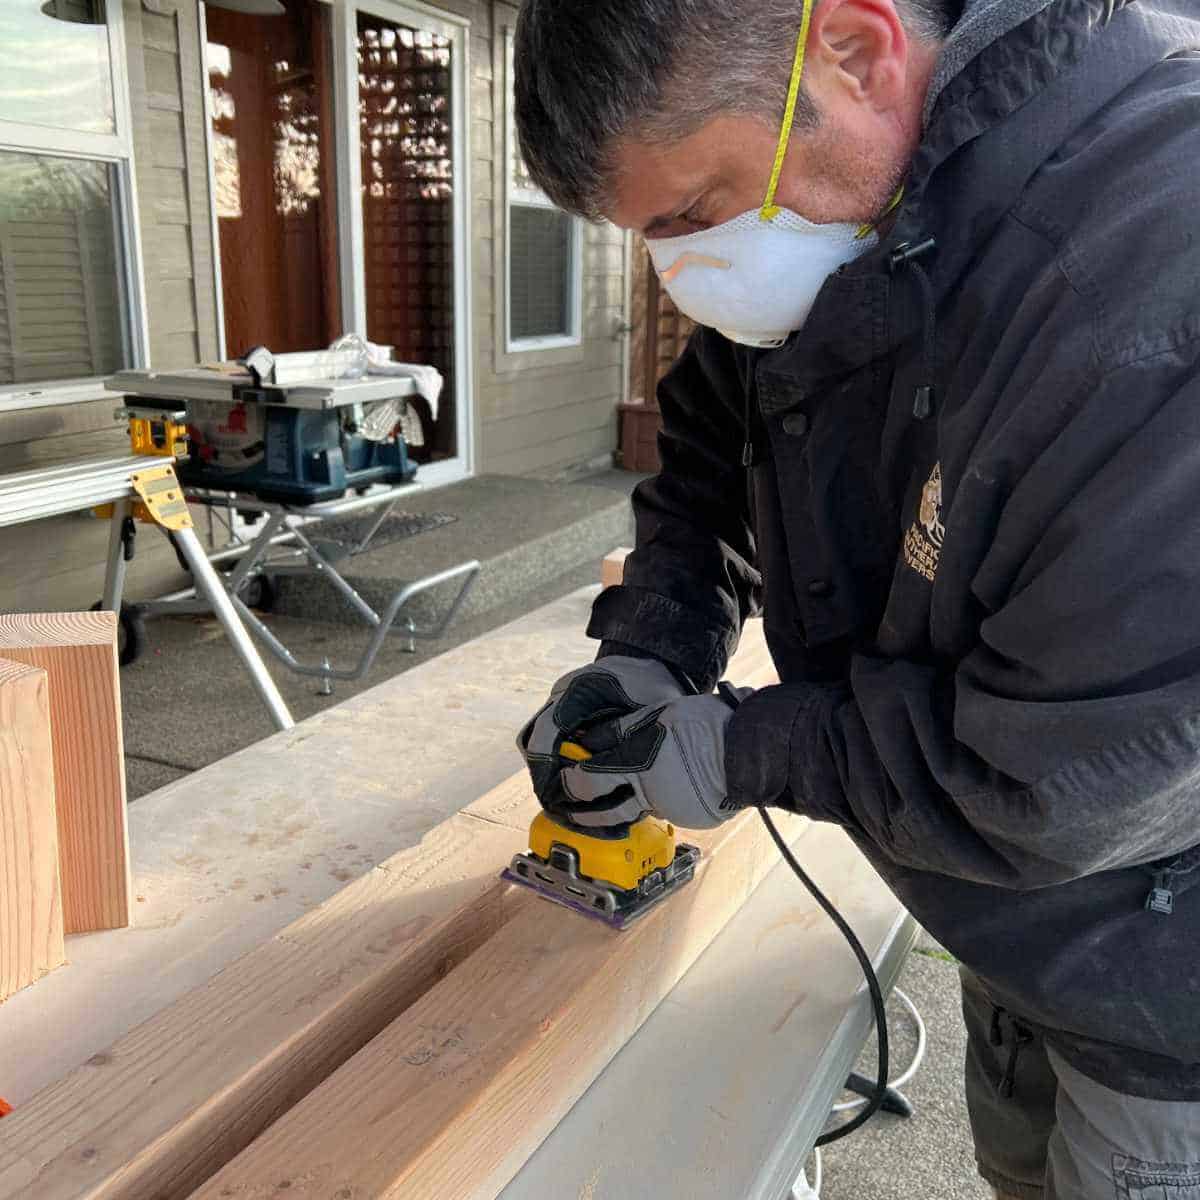
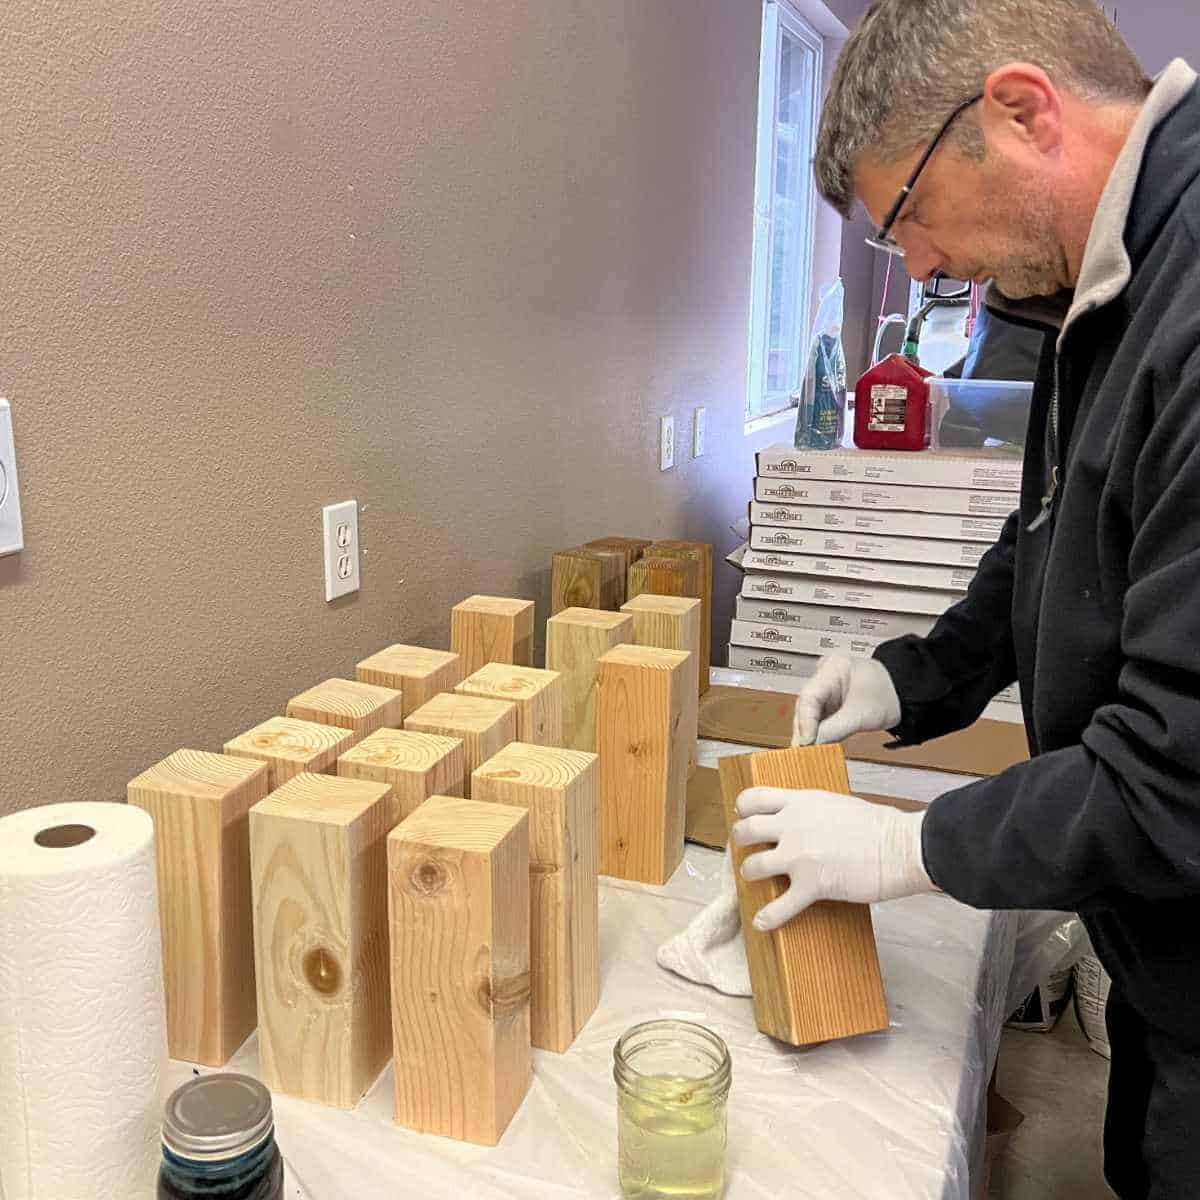
1. Sand the 4X4.
We chose to sand the 4X4’s first to make sanding easier. We started with 80 grit, then moved to 120 grit, before finishing with 220 grit.
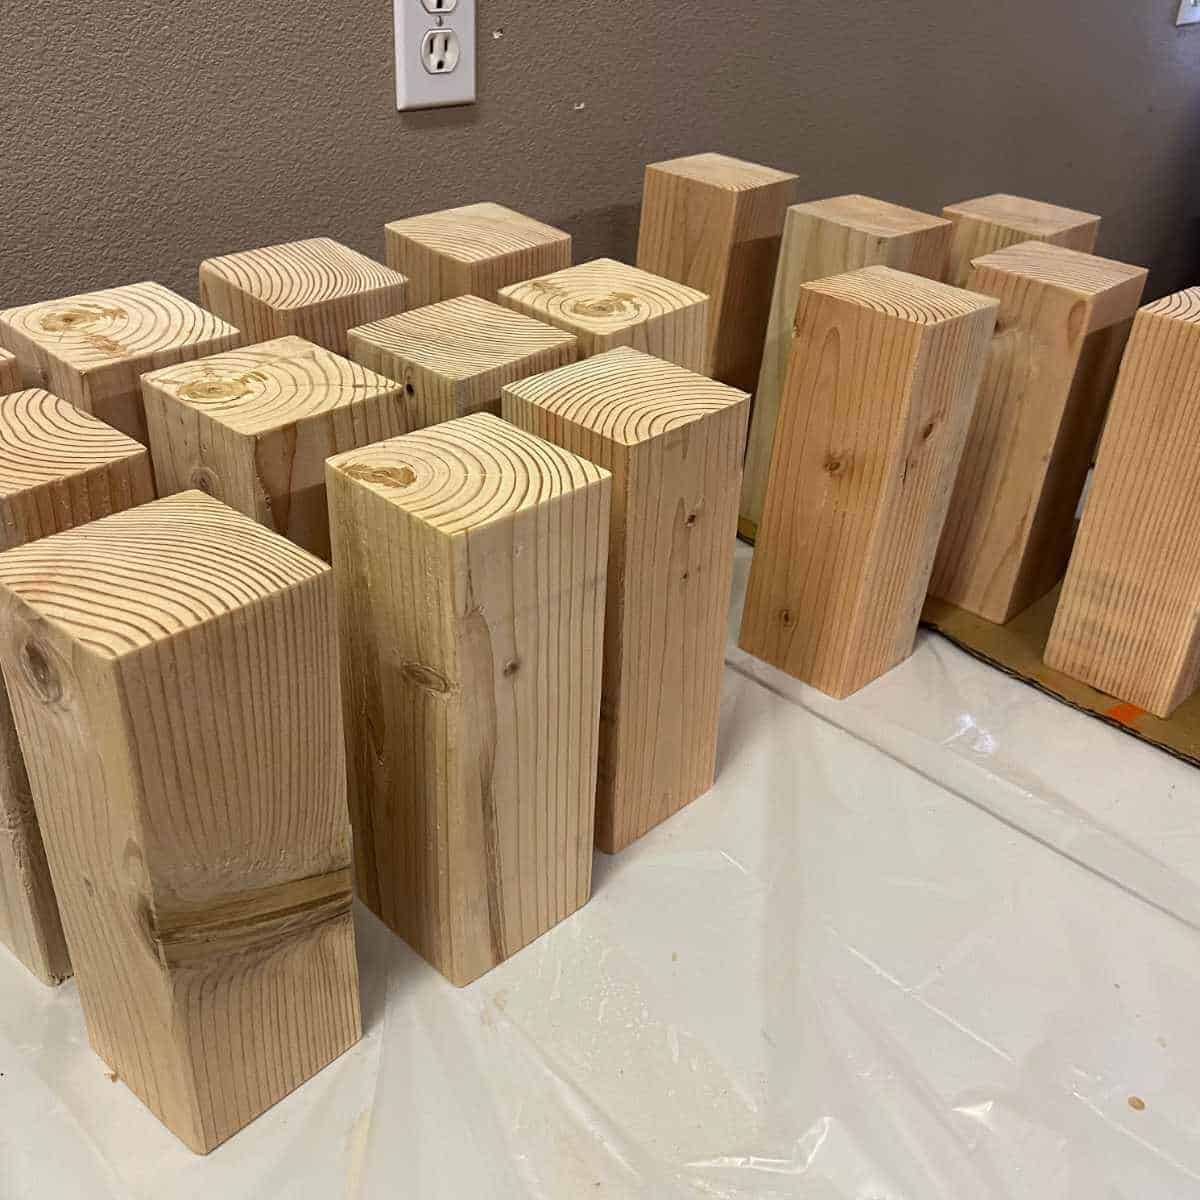
2. Cut the 4X4 into 10-inch pieces.
You should be able to get nine pieces out of one eight-foot 4X4.
3. Sand the tops and bottoms of each piece.
Since you’ve already sanded the sides, you’ll just need to sand the top and bottom of each piece after cutting.
4. Stain the 4X4 pieces.
We chose to use homemade wood stain. First, we brewed four bags of tea in a pot of water. Once the tea cooled, we rubbed the tea on the 4X4 pieces. It doesn’t really show anything but you can read about why you should use tea on our homemade wood stain post.
Next, Steve used a rag to stain the pieces with vinegar that had steel wool soaked in it for 24 hours. It takes a few hours to see the full effects of the stain but in the picture above, you can see it starting to take effect on the pieces in the back.
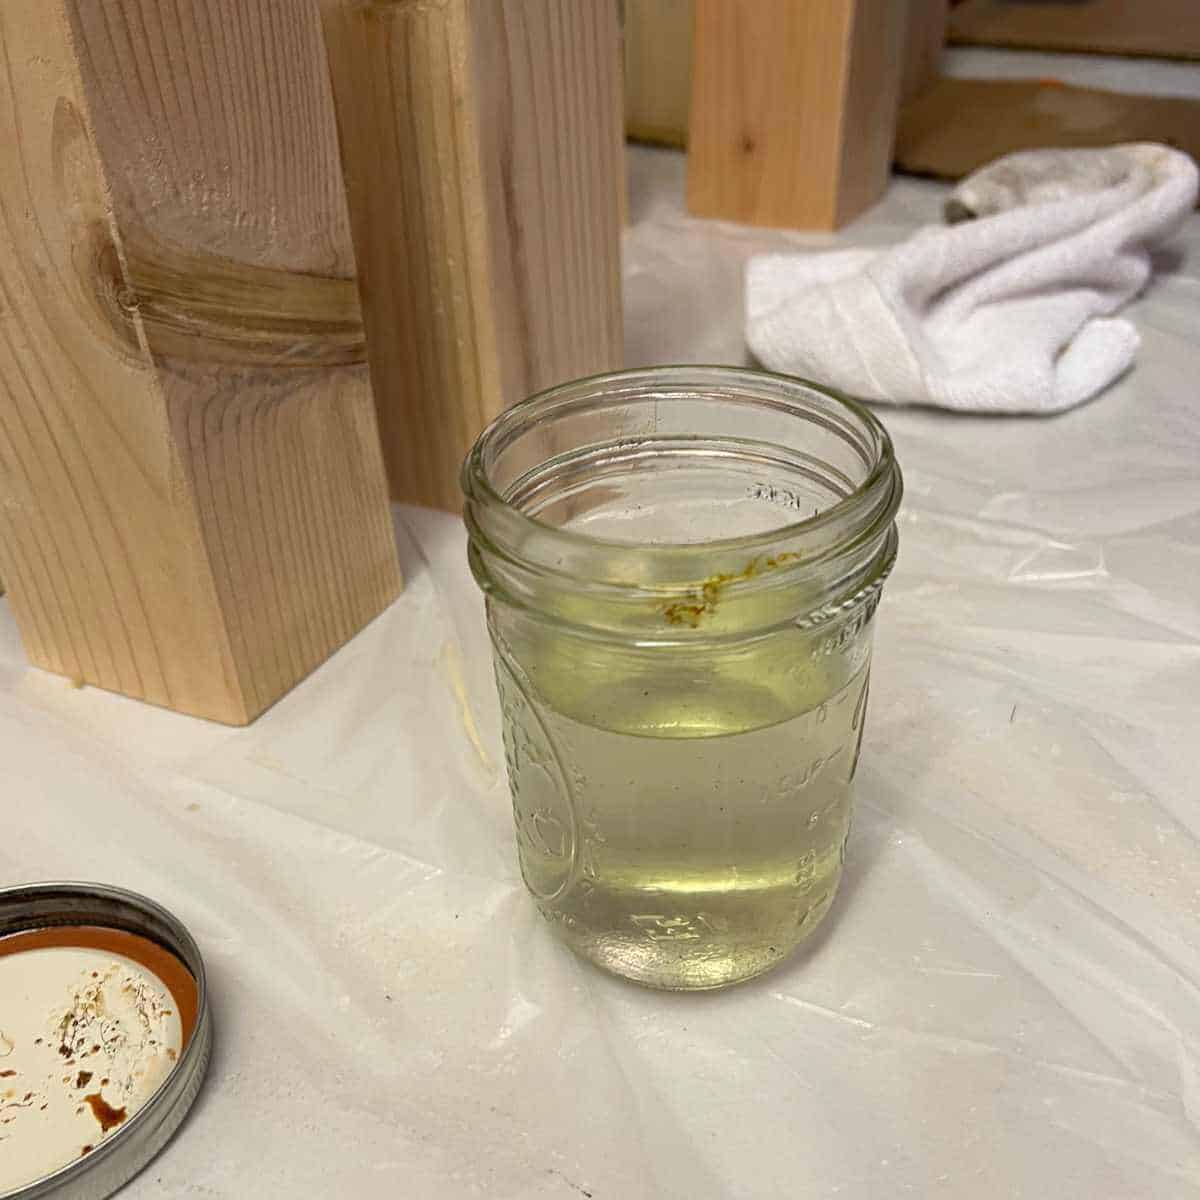
Above is a picture of the vinegar that had steel wool soaked in it. It doesn’t look like it would do much but the results are great!
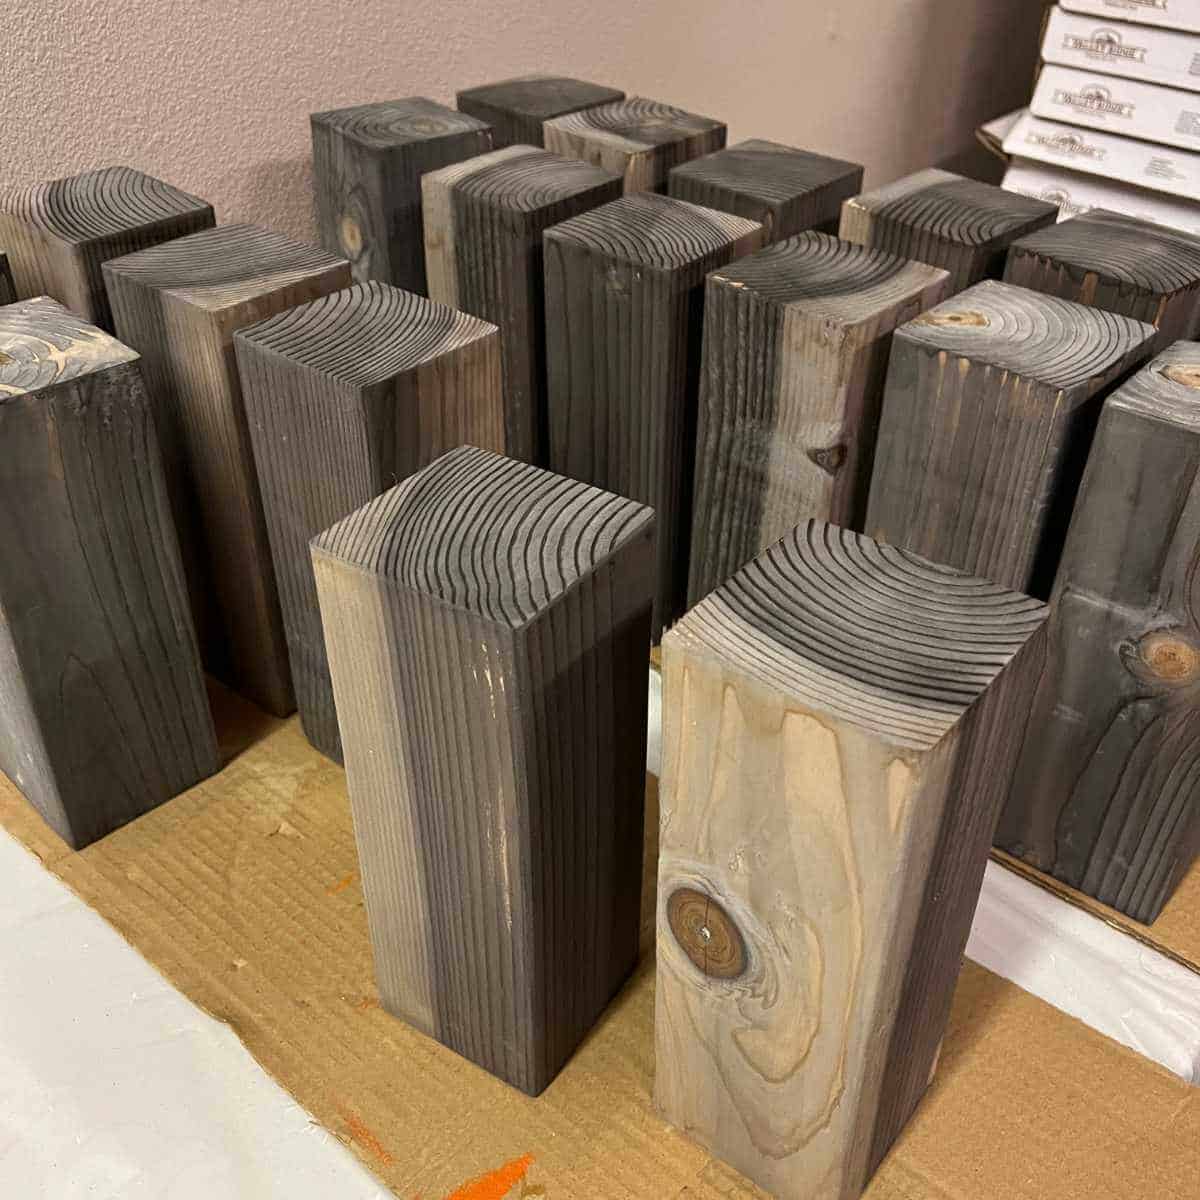
Pictured above is just a few hours after applying the homemade wood stain. I like how it brings out different colors in the wood that will give our reindeer character!
You can also use wood stain or paint if you prefer!
5. Paint the 3″ circles red.
I used red paint that I had on hand and a simple sponge brush. I wouldn’t worry too much about the edges of the wood circles, especially if you plan to sand the edges a bit to give your reindeer a more rustic look.
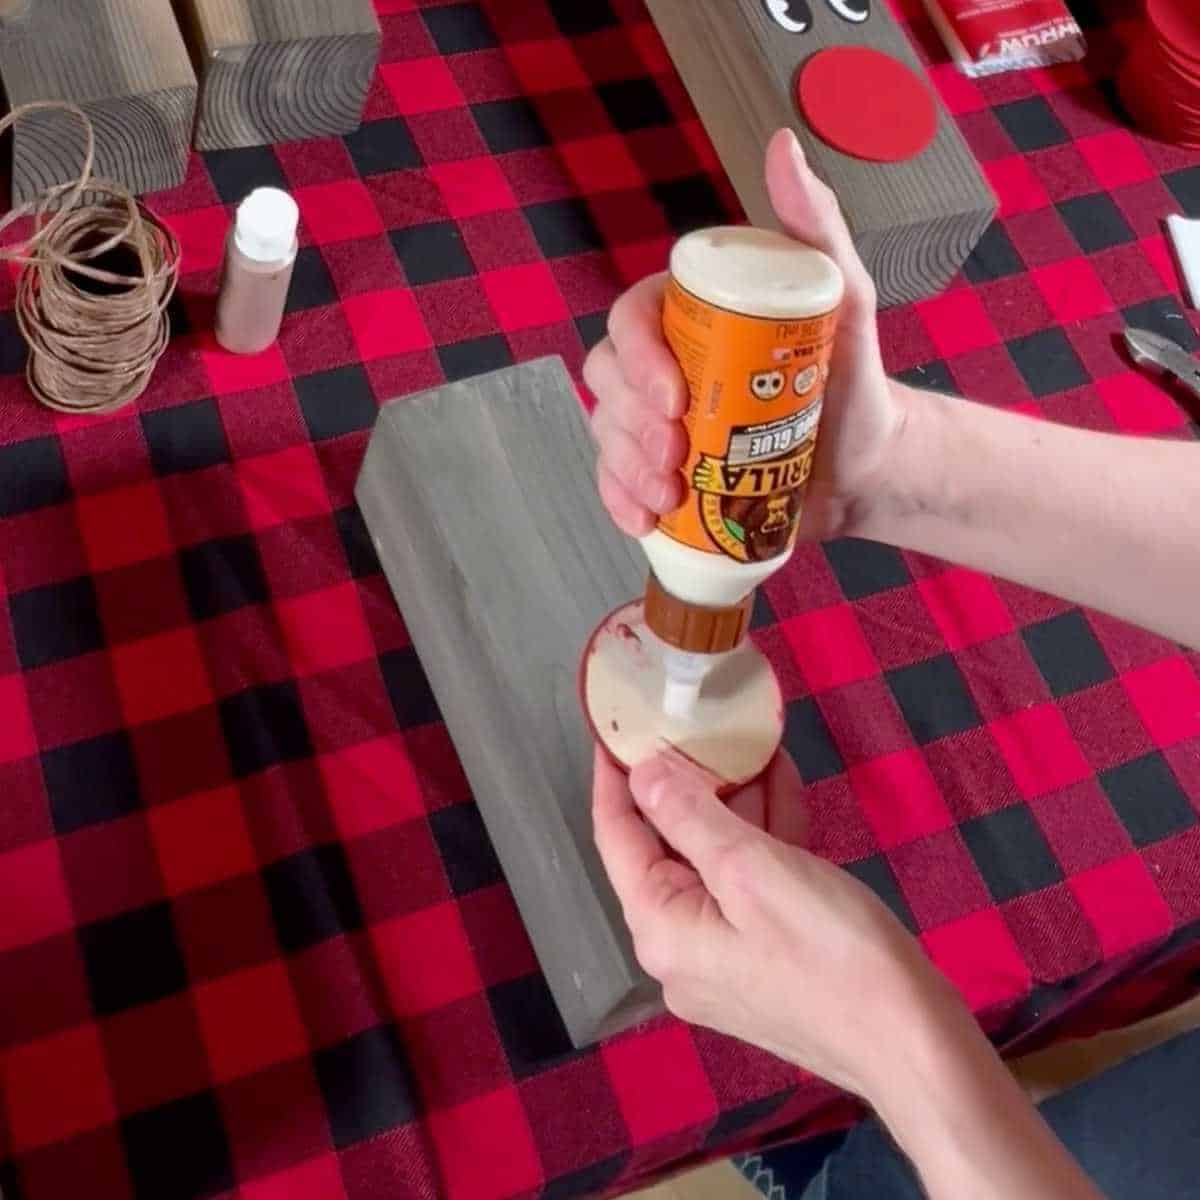
6. Attach the nose to the 4X4.
I used wood glue to attach the noses so they would fit nice and flush. Sometimes, when you use hot glue, things don’t sit quite as flush.
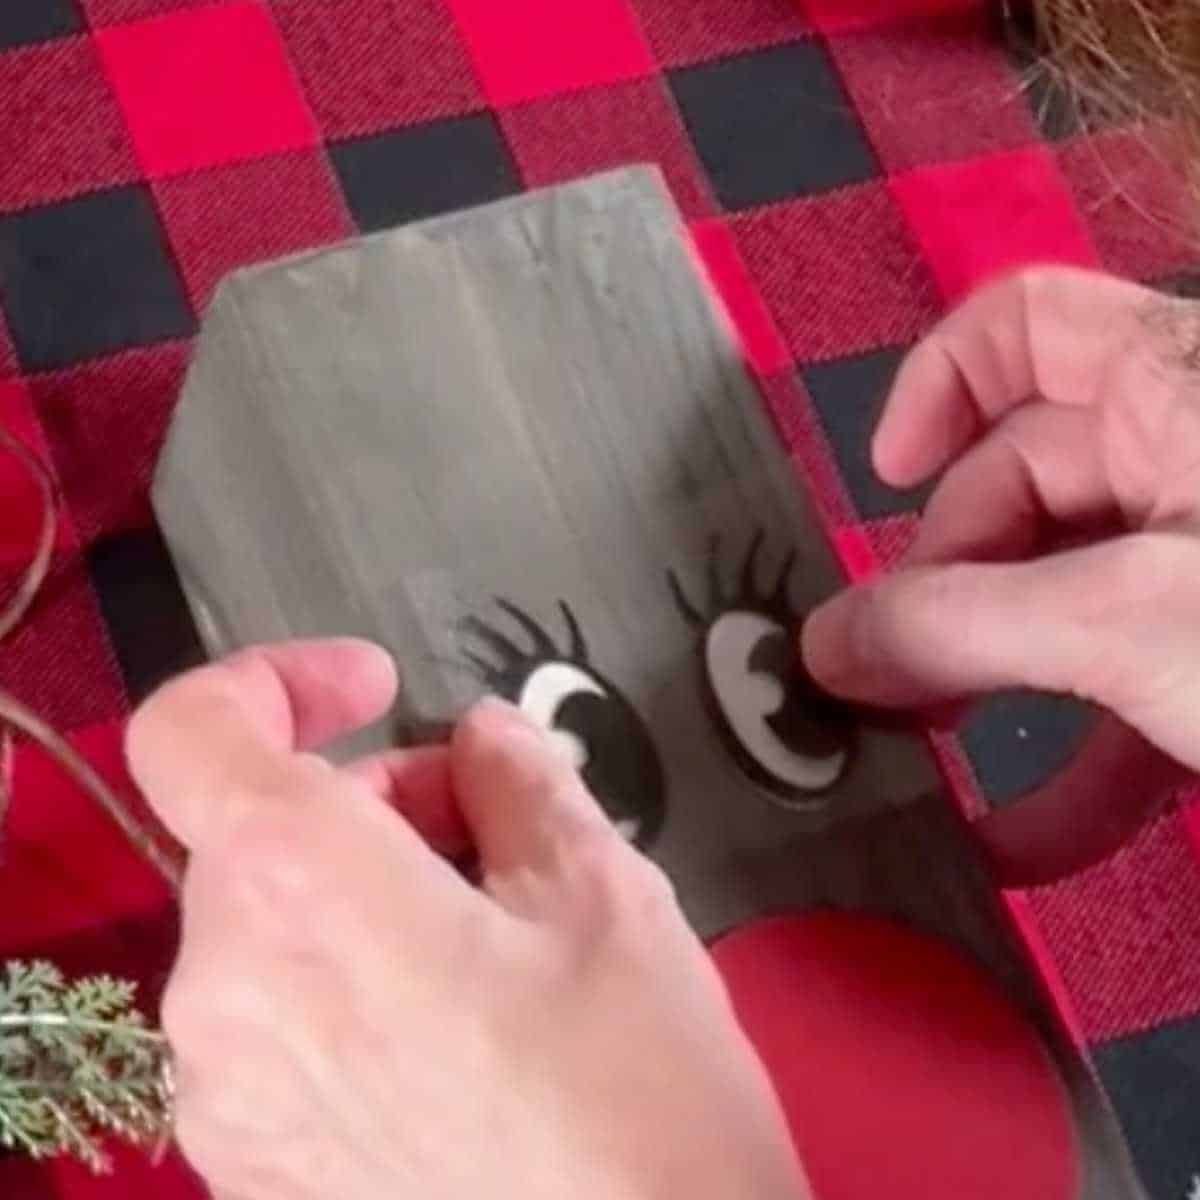
7. Attach eyes and mouth to the reindeer.
I chose to design and cut eyes using my Silhouette cutting machine. I cut ovals for the whites of the eyes and then black vinyl for a black outline with lashes. I chose to do this because I was making quite a few and thought it’d be easier than painting eyes. Another option could be using buttons like I did when I made 4 X 4 Snowman.
At the last minute, we added mouths to the reindeer, which I also designed and cut using my Silhouette and black vinyl.
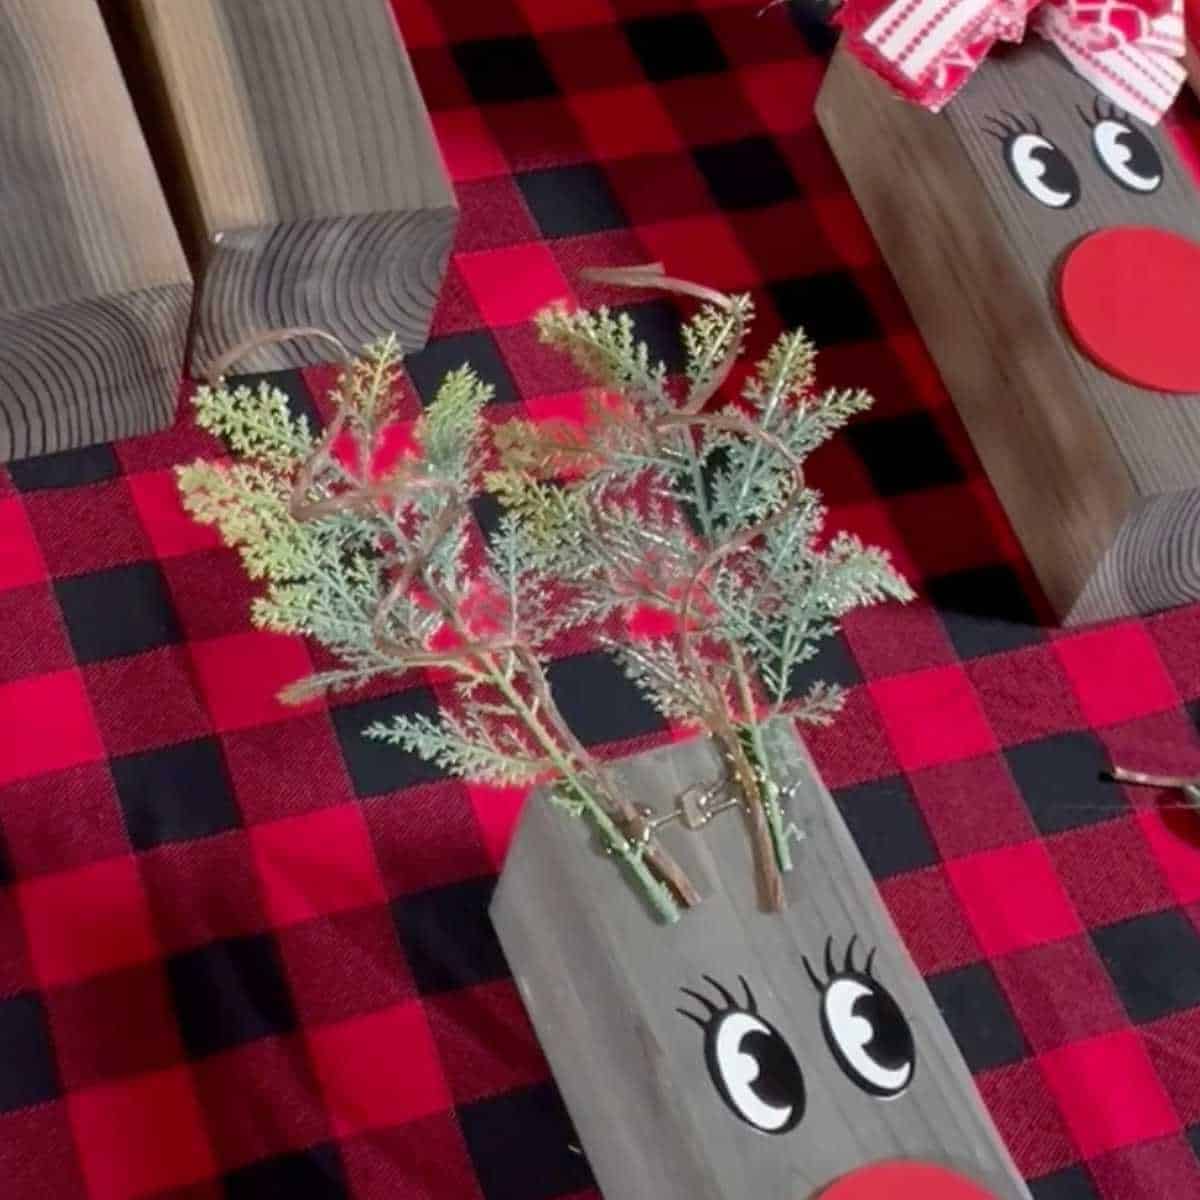
8. Attach antlers to the 4X4 reindeer.
I used both fake pine branches and wired jute. I wrapped the wired jute around a bottle of acrylic paint three times, left a little tail, and then cut it with wire cutters. Once you stretch it out, it makes a perfect complement to the pine branches. A glue gun works great for attaching the antlers.
9. Attach a bow over the antler ends.
For the bow, I used wide and narrow ribbon I had on hand. I chose three wide and three narrow ribbons. The wide I cut at 20″ long and the narrow at 18″ long. I tied the ribbon together with a bell that was attached to jute. You can see how I created the bow on the TikTok below. A glue gun works well to attach the bow.
Making 4X4 Reindeer was a fun and festive Christmas craft that was fairly easy to do!
Christmas Craft Party Idea
We cut enough 4 x 4 blocks so that we could make reindeer at our Christmas craft party! Because we wanted to be able to complete the reindeer at the craft party, we had the blocks stained and the noses painted so they just had to assemble the pieces and make a bow. We also had the supplies to make Magic Reindeer Food for the little ones at the craft party.


Frequently Asked Questions

Hi! I’m Bridget!
I create printables and DIYs to help you get organized and celebrate special occasions! It’s my mission to inspire you to get creative and find joy in every day!