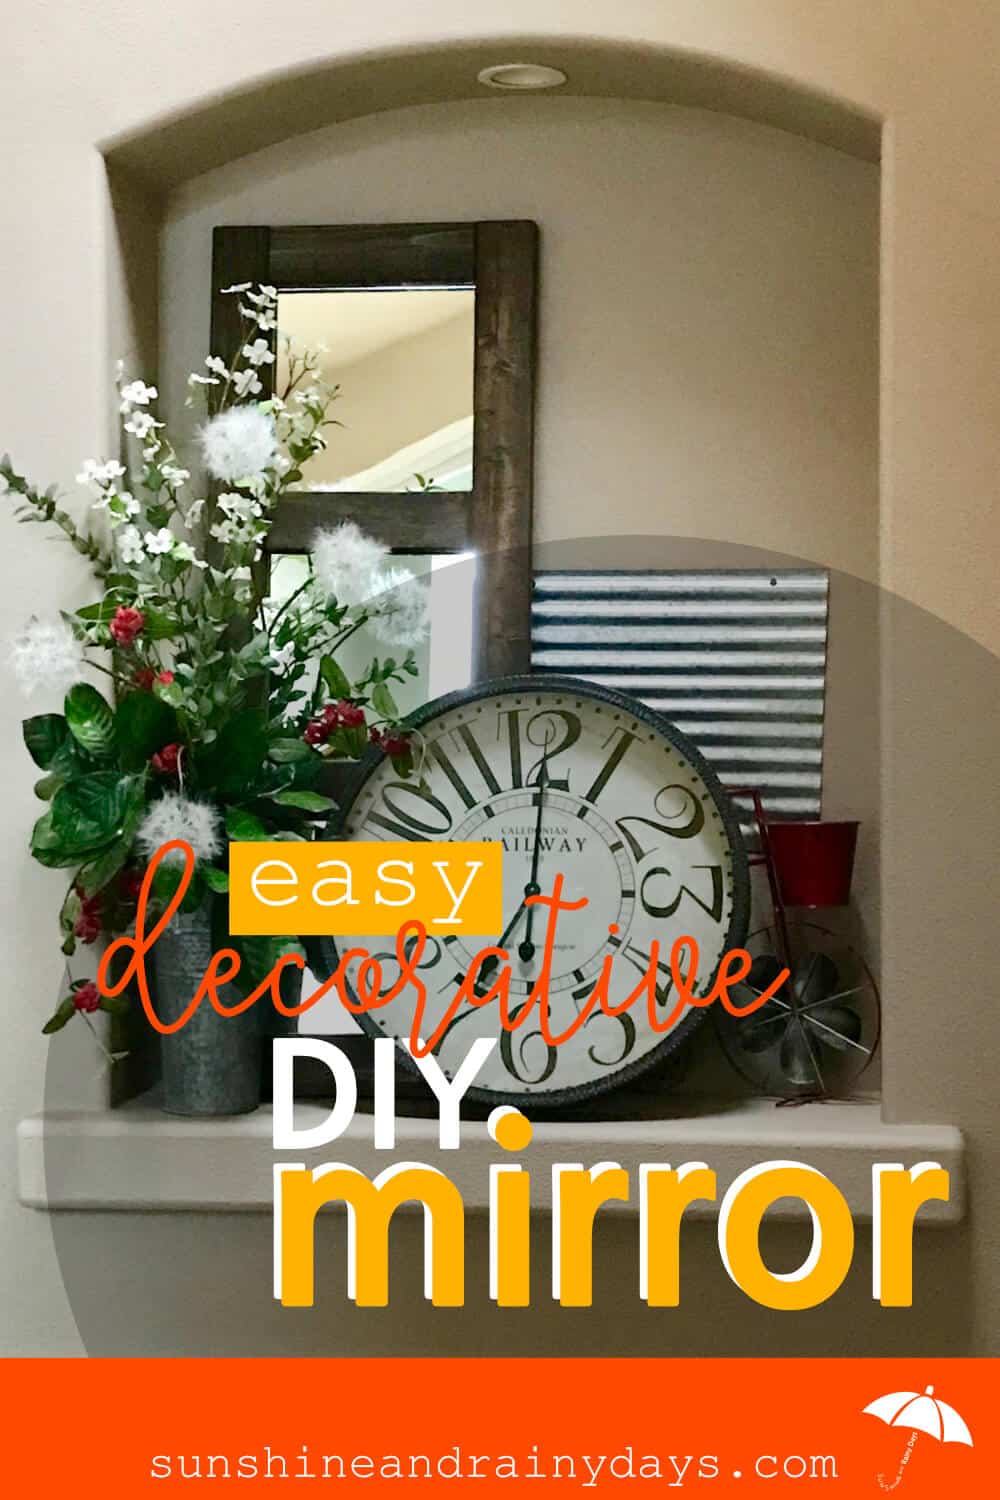
Easy Decorative DIY Mirror

There’s a huge art niche above our stairwell that has sat empty for the last year. It looked so blah and boring but I wasn’t sure what to do with it. We aren’t into fine art or the stuff you would normally adorn an art niche with so we got creative! We started with An Easy Decorative DIY Mirror and went from there! DIY is our jam when it comes to house projects. I think we hit it out of the park with this one!
Easy Decorative DIY Mirror
After building a Hallway Mirror, I was ready to DIY some more! This time I chose to build the mirror as inexpensively as I could by using simple whitewood 2 X 4’s. After all, I had distressed the select pine boards for the last mirror so … why spend good money for wood I planned to beat up anyway?
Using supplies on hand, I spent a whopping $17 to build this mirror! AND I have three mirror squares left. Woot!
DIY Mirror Supplies
This post contains affiliate links. When you purchase through an affiliate link, we receive a small commission at no additional cost to you. Disclosure.
- 2 inch X 4 inch X 96 inch Whitewood (2) – Actual size .75″ X 3.5″
- 2-1/2 inch Kreg Pocket Screws
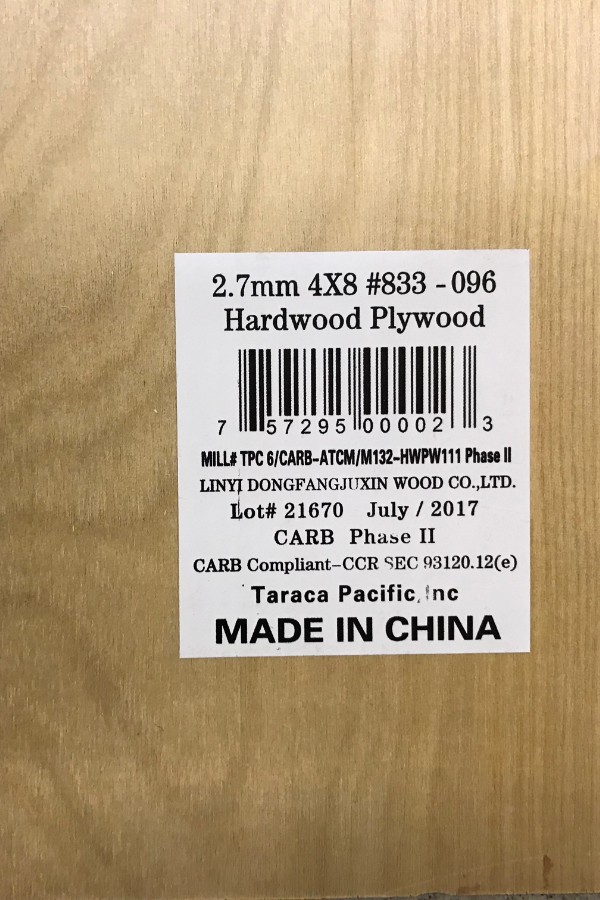
- 2.7mm Plywood or Project Board Approximately 48″ X 17″
- 220 Grit Sandpaper
- 12 inch X 12 inch Plain Edge Mirror (although, in hindsight, I may have purchased these 12 inch X 12 inch Beveled Edge Mirrors)
- Mirror Mastic
- Wood Glue
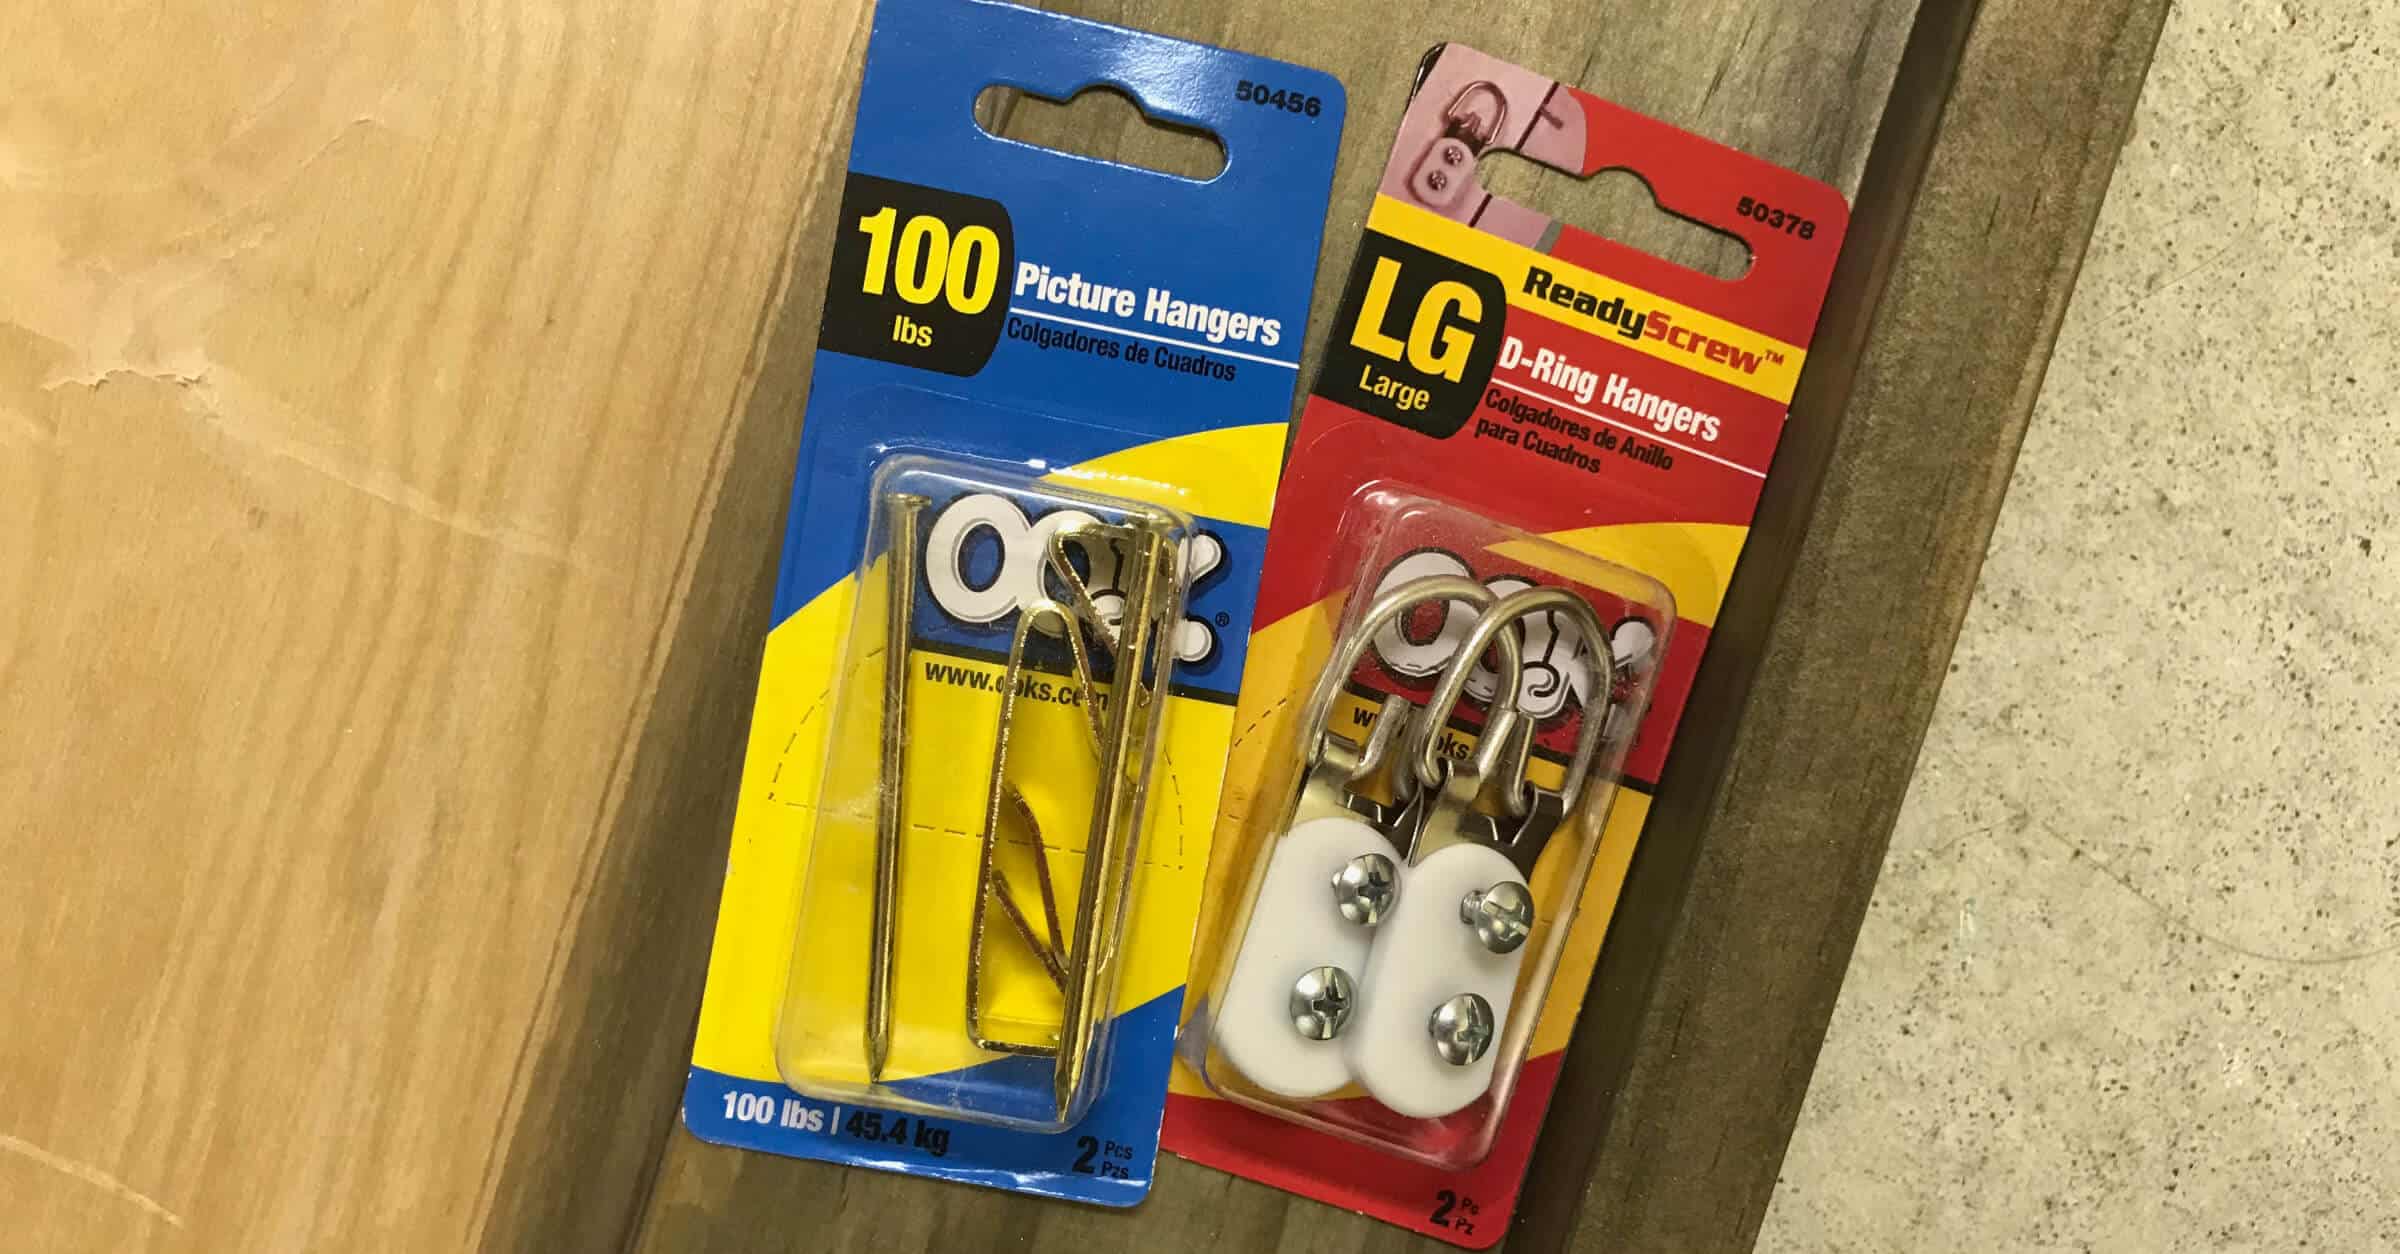
- D-Rings – We used heavy duty D-Rings.
- Finish Nails
- Stain
- Rags
Tools Used
- Kreg Jig K5
- Drill
- Sander
- Compound Miter Saw
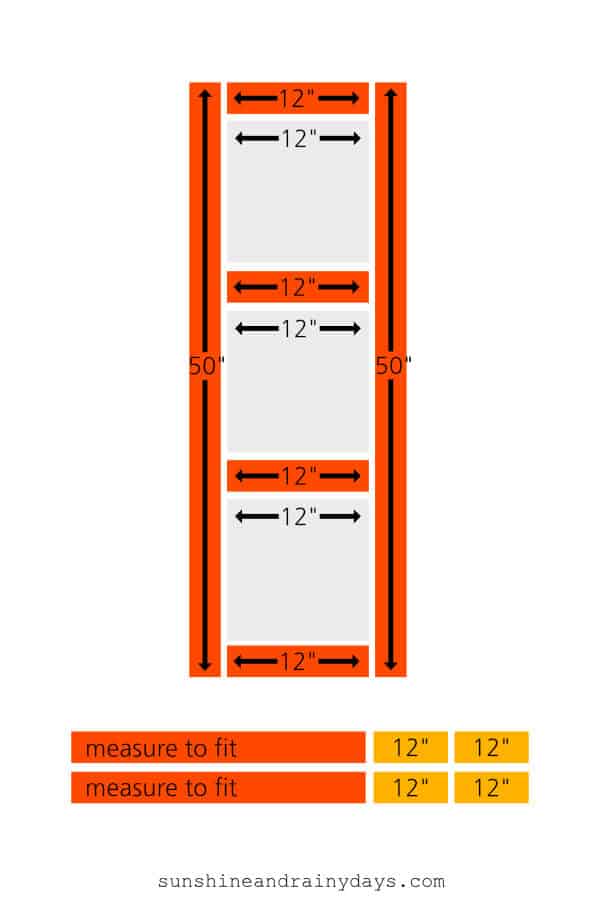
DIY Mirror Cut List
How To Build An Easy Decorative DIY Mirror
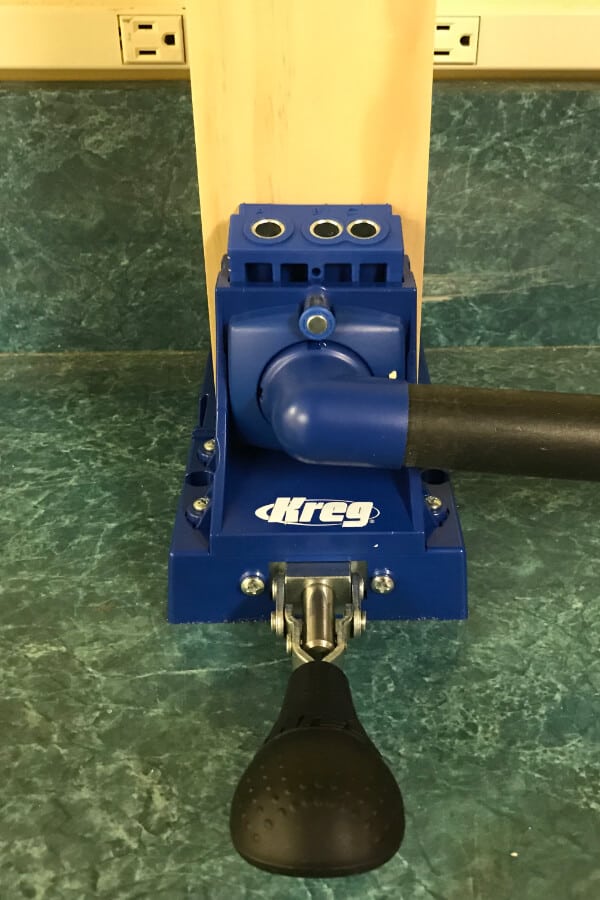
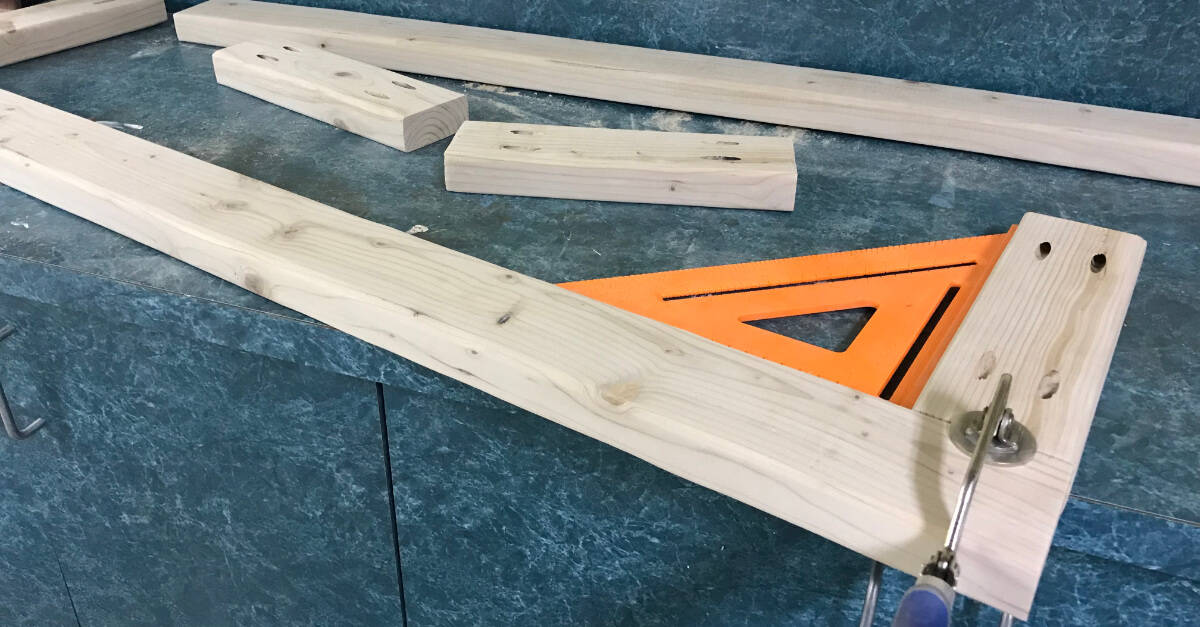
Use the Kreg Jig to create two pocket holes in both ends of your four 12″ 2 X 4’s. You will end up with four pocket holes on each 12″ board.
If you’ve never seen the Kreg Jig in action, check this out! I saved my monthly allowance to buy one of these and I’m so glad I did!
At this point, you may choose to sand each individual 2 x 4 piece as it will be easier to sand now. I used 220 grit sand paper.
Next, use the Kreg Jig driver bit that comes with the Kreg Jig to attach 12″ pieces to 50″ pieces. You will use 16, 2-1/2″ pocket hole screws. You may use a little wood glue at this point too. I skipped the glue this time. Bad example, I know! I used the 12 inch X 12 inch mirrors as a guide.
Attach the back of your mirror by lining the edges with wood glue and then nail in place. I used finish nails. This is the wood I used for the backing. A 1/4″ Plywood would do too.
Do a final sand.
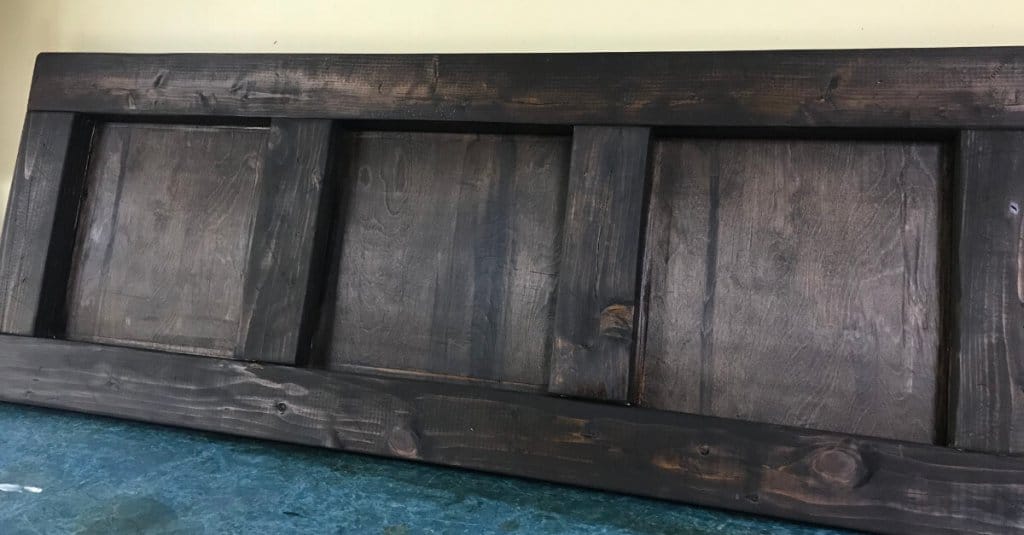
Rough it up! You may choose to distress your mirror frame. This is the FUN part! I used a long screw and hammered it into the frame to create indents. I also used a hammer on the frame and anything else I thought might make a cool effect!
Make sure your square mirrors fit in the spaces you’ve created. If they don’t, sand as necessary to make them fit.
Stain the frame. Unfortunately, I got impatient at this step and used a store-bought stain we had on hand. I still smell the stuff two weeks later. Yuck! I much prefer homemade wood stain!
Run a continuous bead of Mirror Mastic on the back of your frame where the mirrors will go. I suggest doing one mirror at a time.
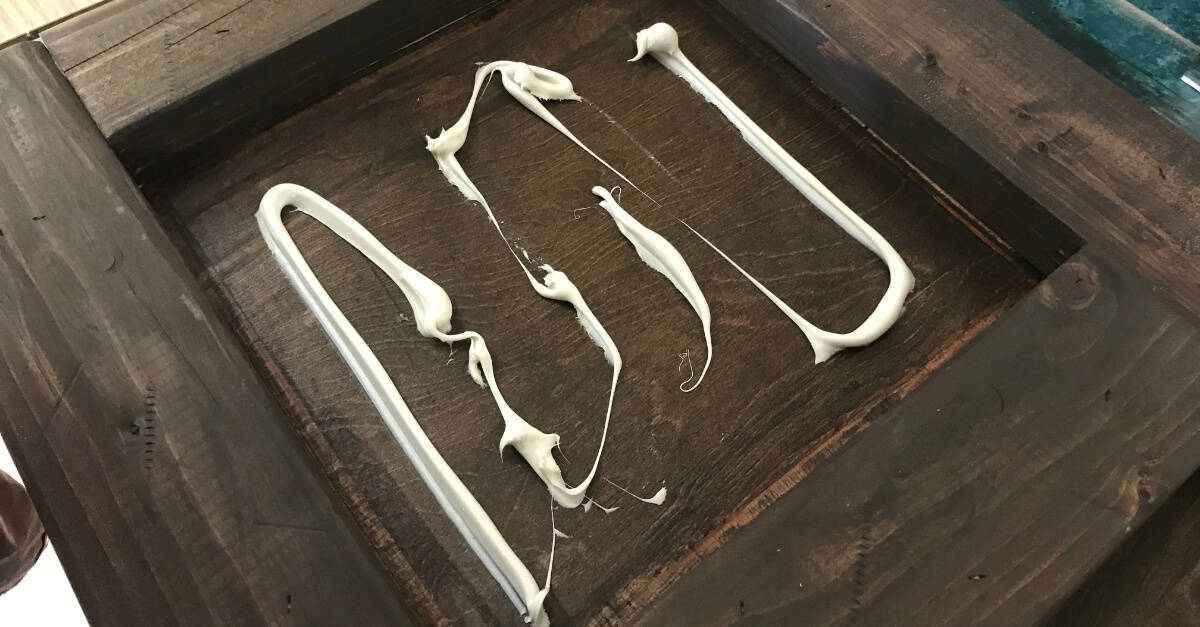
Place mirrors on Mirror Mastic and press firmly. Not too firmly! Don’t break it! I placed towels over the mirrors and then paint cans to weigh them down. I let them sit this way for a good 48 hours.
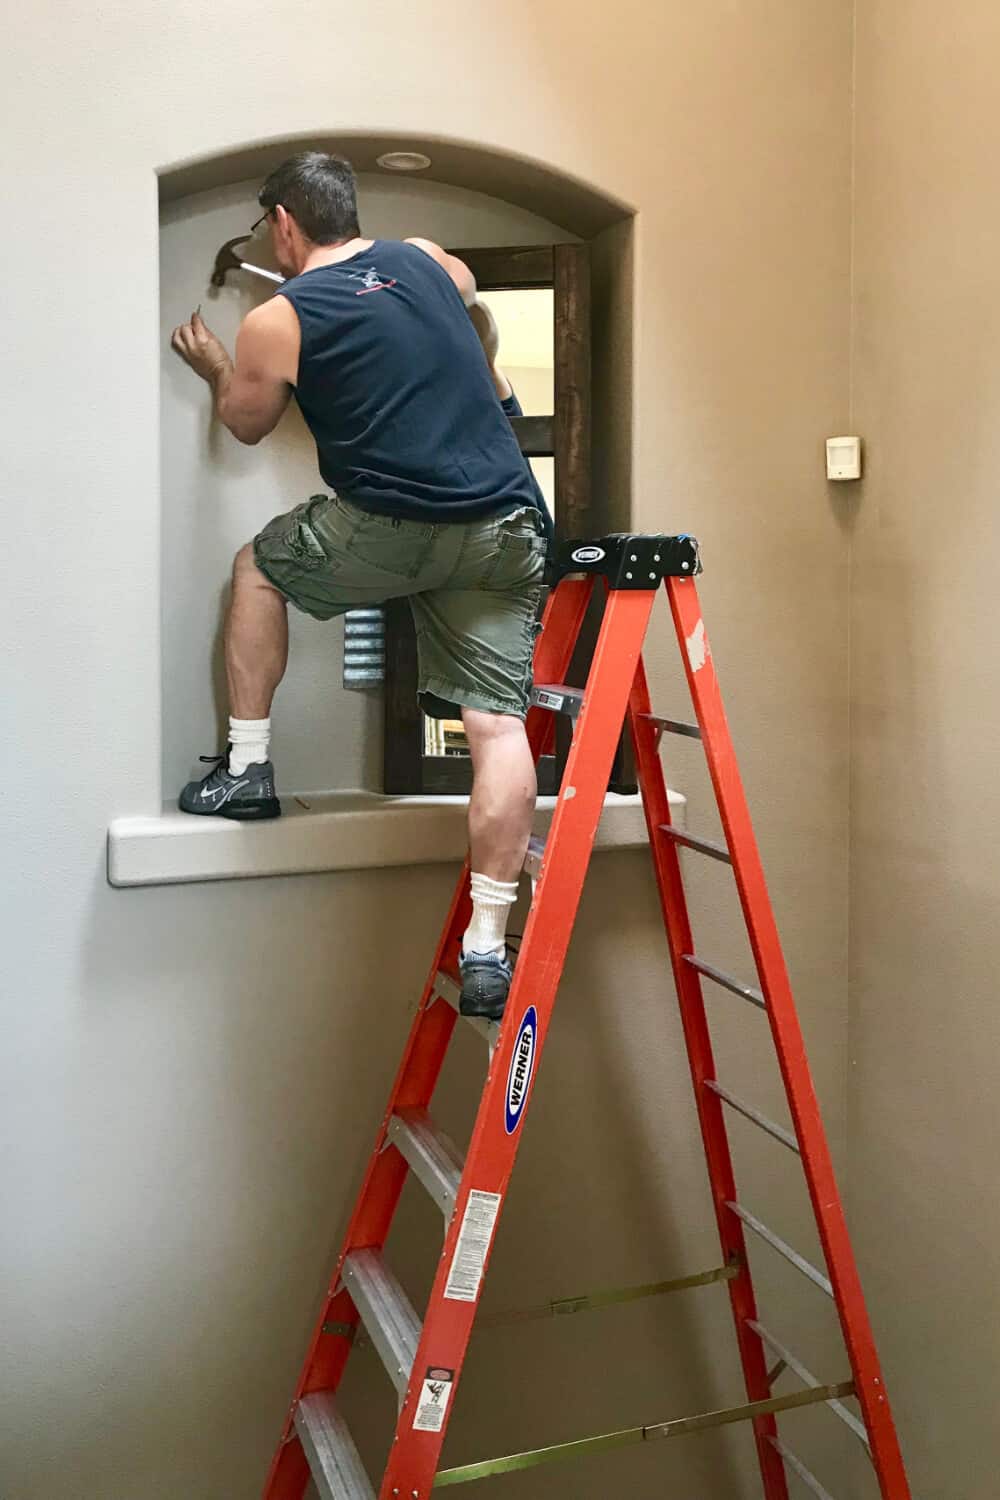
Adhere heavy-duty D-Rings to the back on each side. I screwed them directly into the 2 X 4’s and then placed the D-Rings on Picture Hangers on the wall. Well, my husband did!
We wanted the mirror to look as though it was leaning against the wall in the art niche but also wanted it to be stable so we hung the mirror in a leaning position.
We love the way this mirror turned out and it is perfect in our art niche with a few other additions!
What I Would Do Different
If I was to build this mirror again, there are a few things I would do a different way.
- Practice Patience. I would definitely be patient and use homemade wood stain to avoid the gross smell of commercial stains.
- Spend double the money for beveled-edge mirrors. If you look closely at this mirror, you see the raw edges. It isn’t a big deal with this mirror because of where it’s placed but I feel beveled edges would be a bit nicer.
That’s it! Not too shabby for a mirror I dreamed up in my head!
That art niche is now the best-decorated spot in the house! The spot is decorated with things we like and a mirror I made with my own two hands!