DIY Bench – Perfect For Your Entryway!

My wood scrap pile was growing out of control so I decided to find projects that would help me use some of that scrap wood. Then, I found the 731 Woodworks Bench For Beginning Woodworkers and realized we could totally use a small DIY Bench for our entryway.
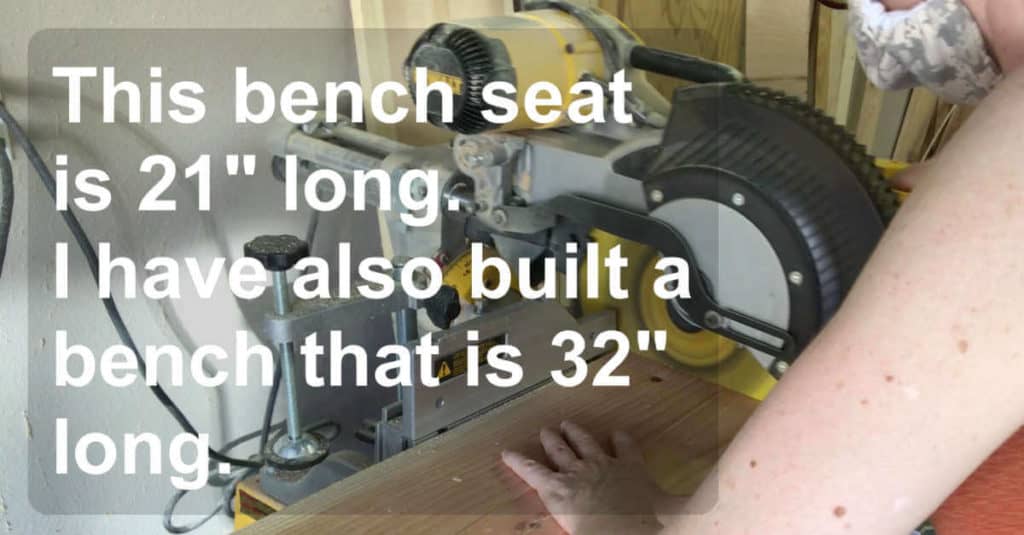
I rummaged around in the garage and found I had the lumber to build both a 21″ and 32″ bench. I’m not sure what I’ll do with the second bench, yet … but they are so fun to build … I couldn’t help myself!
Tools Used For This DIY Bench
This post contains affiliate links. When you purchase through an affiliate link, we receive a small commission at no additional cost to you. Disclosure.
- Planer – optional
- Miter Saw
- Table Saw – optional
- Tape Measure
- Pencil
- Kreg Jig
- Woodworker’s Square
- Drill
- Right Angle Drill Adaptor
- Kreg Clamp
- Sander
- Paint Supplies
Small DIY Bench Supplies
- 2 x 4’s (2 – 8′ length – I used scraps I had on hand)
- 2 x 8 (1 – depending on your bench length)
- 2″ Kreg Screws
- Wood Glue
- Plastic Wood
- Pocket Hole Plugs – optional
- Sand Paper
- Primer
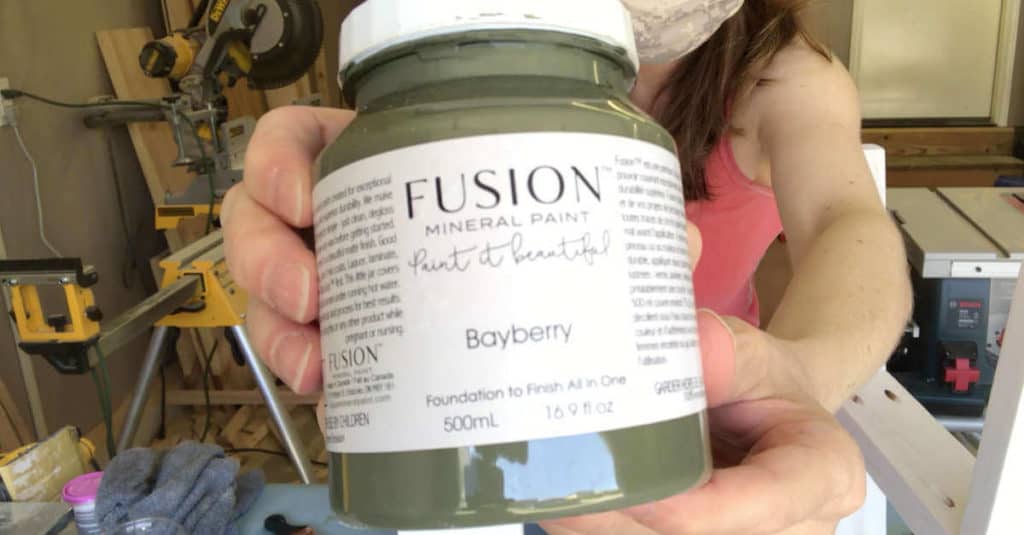
- Paint (I used Fusion Mineral Paint – Bayberry or Midnight Blue)
Video Tutorials Of The DIY Bench
This is the SHORT and sweet version of the DIY Bench build! For the LONG version, where I share the mistakes I made, scroll down a bit!
This is the LONG version of this bench build that walks you through, step-by-step, how I built this small bench and the mistakes I made, along the way.
How To Build A Small DIY Bench
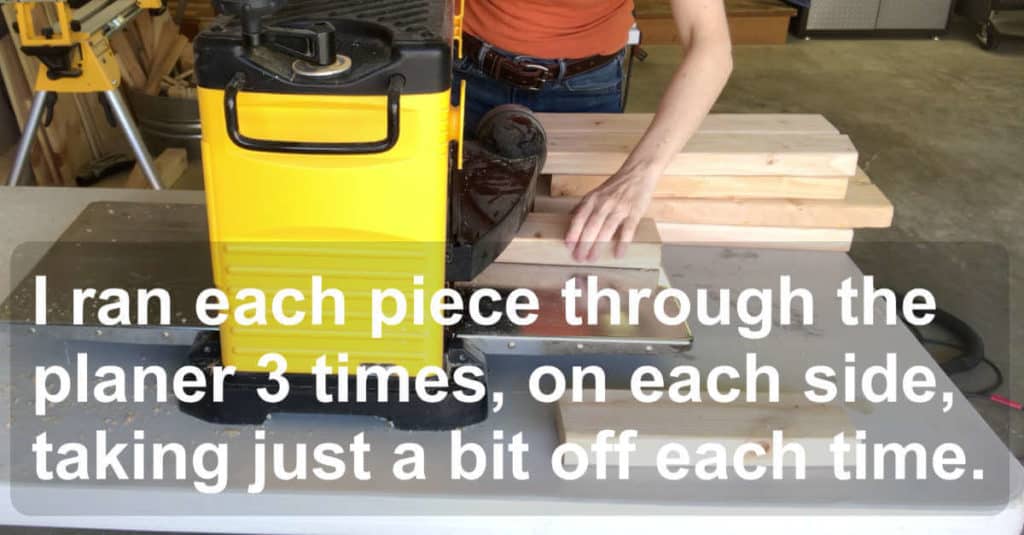
1) Run each piece of your lumber through a planer.
This step is completely optional. If you’re going for more of a farmhouse look, you may want to leave your lumber, as is. I wanted a sleeker look so chose to plane each of my pieces of scrap lumber. I ran each piece through the planer three times, on each side, taking just a bit off each time.
The planer I use was purchased at a garage sale. Even though I’ve replaced the blades, it still leaves a few streaks on my lumber but it’s still beneficial to use because sanding goes SO much faster!
2) Make your cuts.
Decide how long you would like your bench to be. I built both a 21″ and a 32″ bench because that’s what worked with the lumber I had on hand. The pictures I share here are mostly from the 21″ bench but I have to say that I prefer the 32″ length!
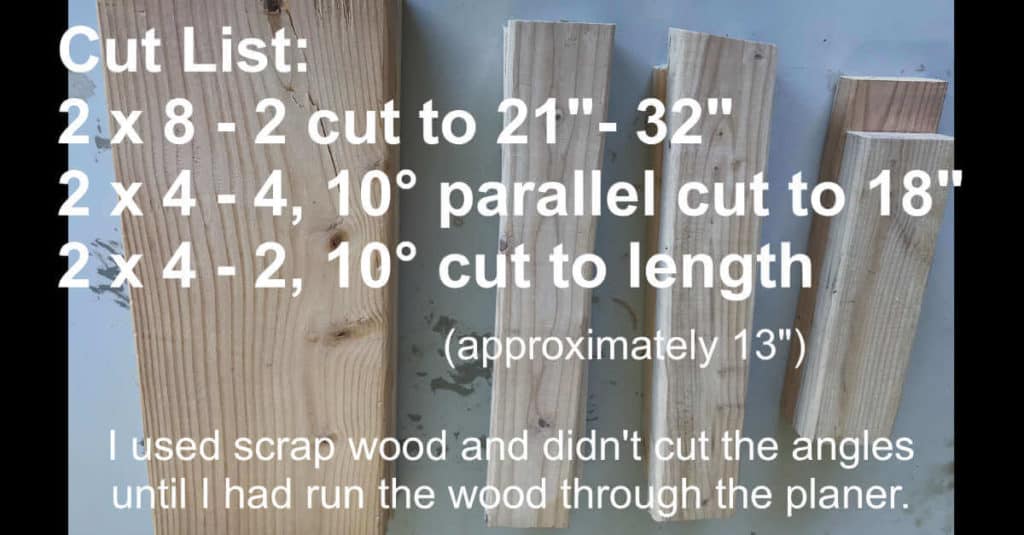
Cut List
- 2 x 8 – 2 cut to the length you prefer (I built both 21″ and 32″ and prefer the 32″ but you need to decide what works best for your space.)
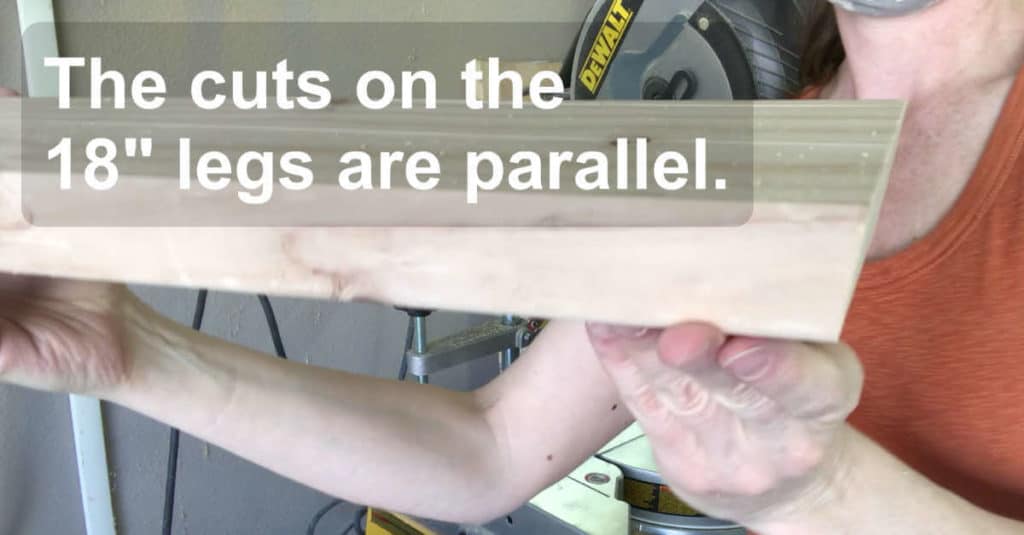
- 2 x 4 – 4, 10° parallel cut to 18″ for the legs
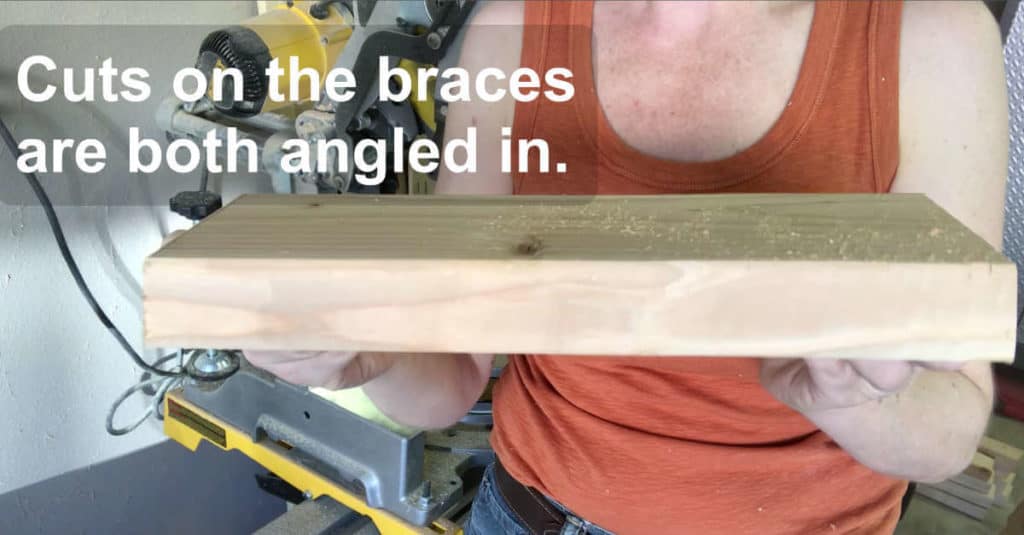
- 2 x 4 – 2, 10° angled in, cut to length for the braces – (Mine were cut with the longest edge at 12″ but I felt it would have been better at about 13″.)
I had never used my compound miter saw for 10° cuts and was pretty stoked at how easy it was!
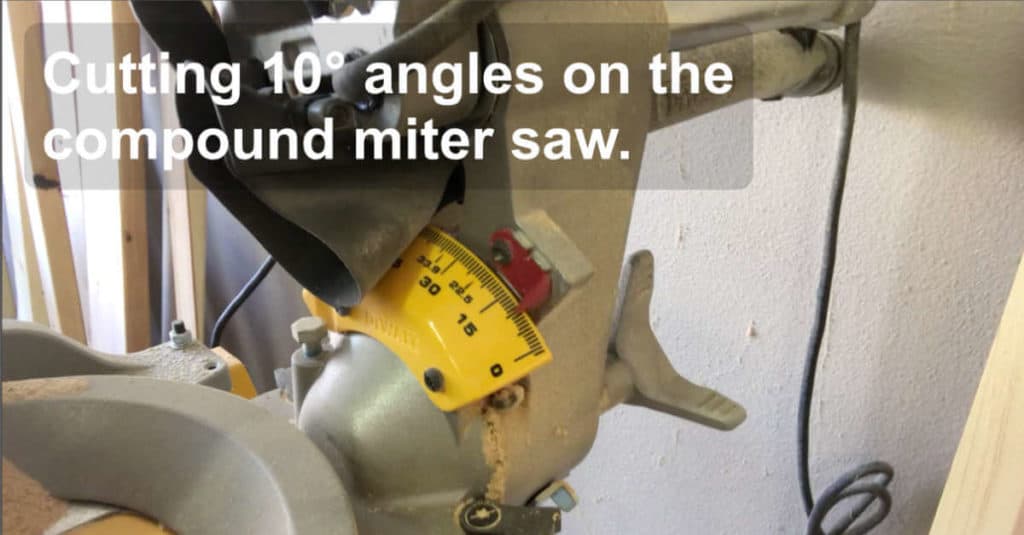
It’s hard to tell, in this picture, but both sides are angled in. The long side will face the floor.
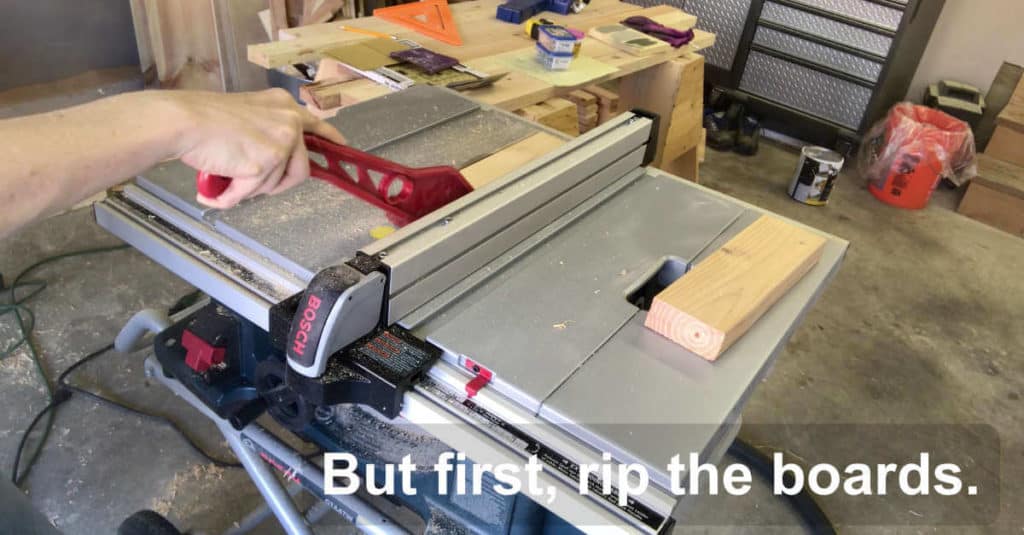
3) Rip your lumber pieces.
This is also an optional step. I chose to rip each 2 x 4 down to 3″ wide. A 2 x 4 is actually 1-1/2 x 3-1/2 so I ripped 1/4″ off each edge to take off the rounded edge that 2 x 4’s have.
It is a good idea to rip the inside of each bench seat piece so they sit together nicely, without the ridge from the rounded edges.
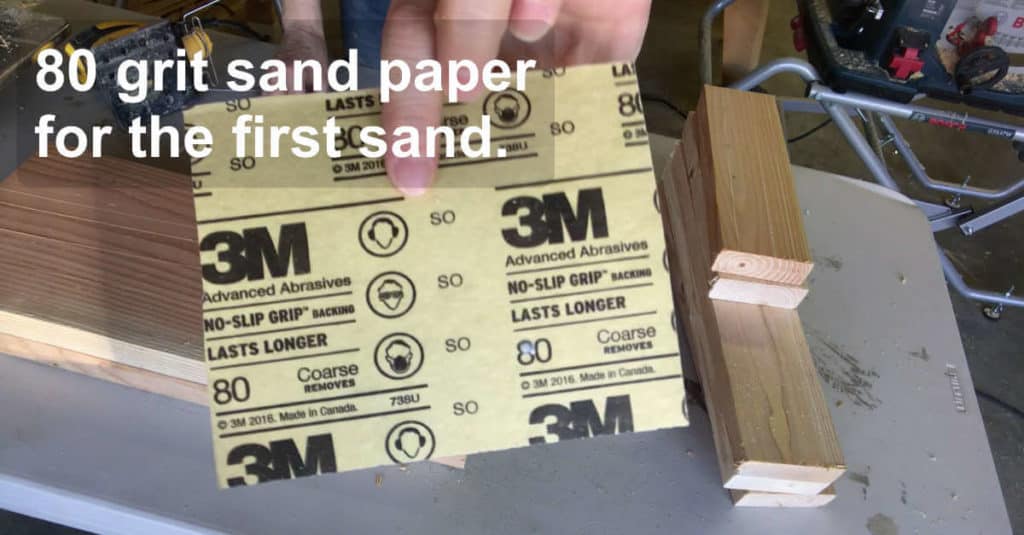
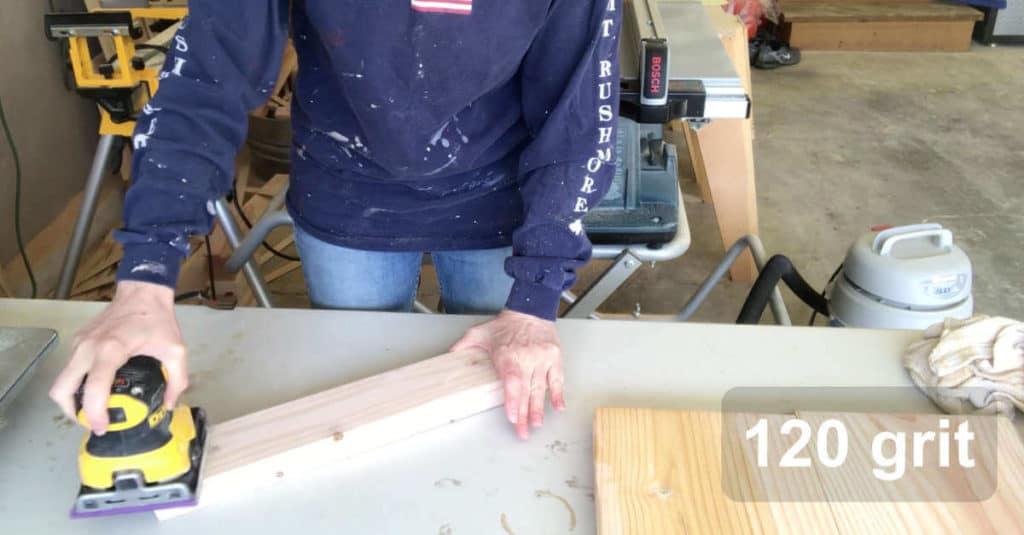
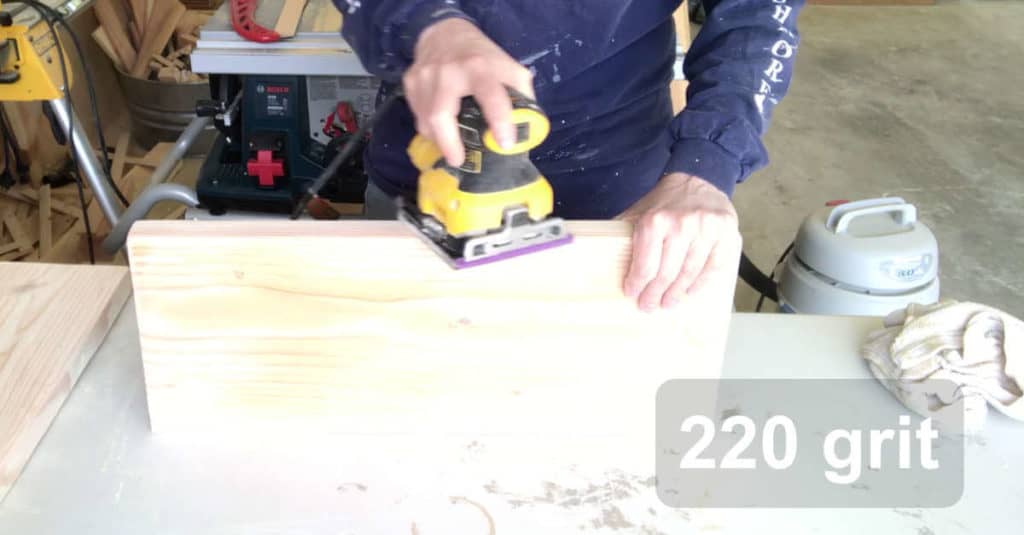
4) Sand your bench lumber pieces.
I find it easiest to sand lumber pieces, before building. Since I planed the lumber, sanding was a breeze! I started with 80 grit sandpaper, then moved to 120 and 220, wiping each piece down with a wet rag between each grit. Wiping the lumber down not only cleans the dust off but also raises the wood grain, making your next sand do a great job of creating a smooth surface.
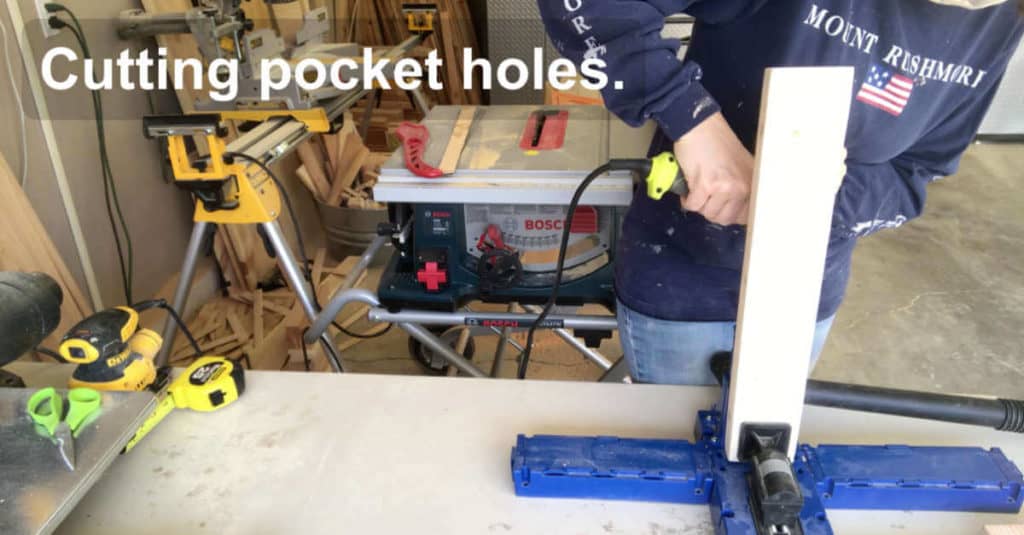
5) Cut pocket holes.
The Kreg K5 is a great tool to create pocket holes for attaching your bench pieces. Be sure to lay each piece out, on the bench top, so you know exactly where the pocket holes should go.
Since I planed my lumber pieces, I used 2″ pocket hole screws. If you choose not to plane your lumber, a regular 2 x 4 would use 2-1/2″ pocket hole screws.
- Drill two pocket holes on the inside top of each 18″ leg.
- The brace will have two pocket holes on each end, on the long side, for a total of four holes on each board.
- Drill four pocket holes (depending on how long your bench top is) on the inside edge of ONE of the bench top boards.
6) Build your bench top using pocket hole screws.
Apply wood glue to the inside edge of one of your bench top pieces and place your two bench top pieces together.
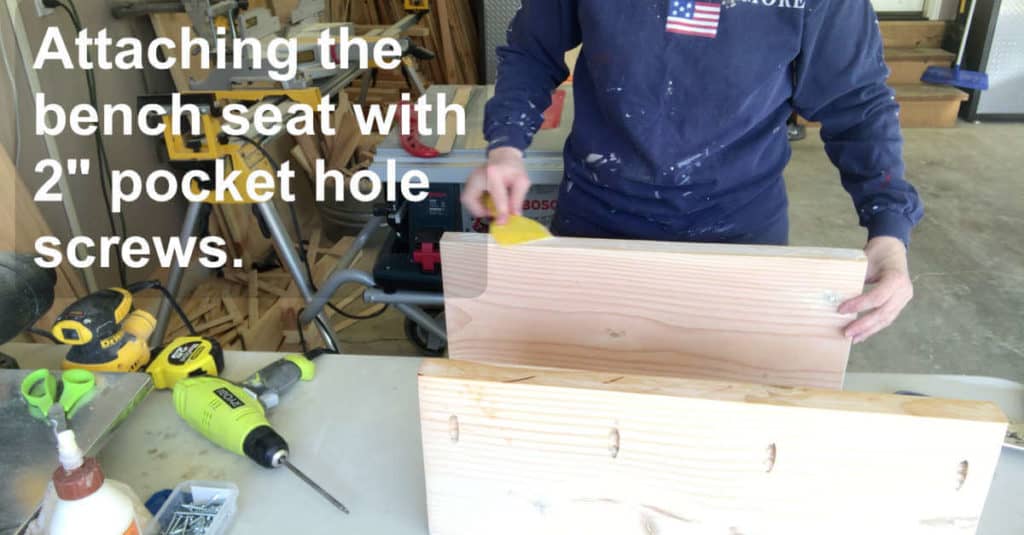
It works well to use a Kreg Clamp, as close to the pocket hole as possible, straddling the two boards, in order to have a smooth surface. I also used Dewalt clamps to hold the two pieces together because I have them, so I used them. They aren’t necessary though and I’ve built many things using just the Kreg Clamp.

7) Attach the bench legs.
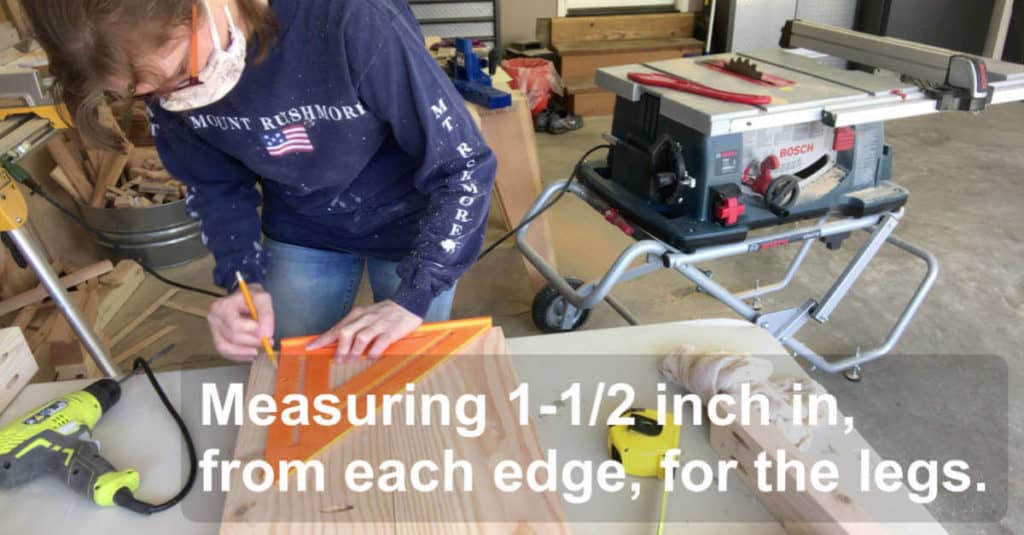
Use a woodworking square to measure in 1-1/2″ on the corner of each edge. Then, draw lines so you can line up each leg, right where it needs to go.
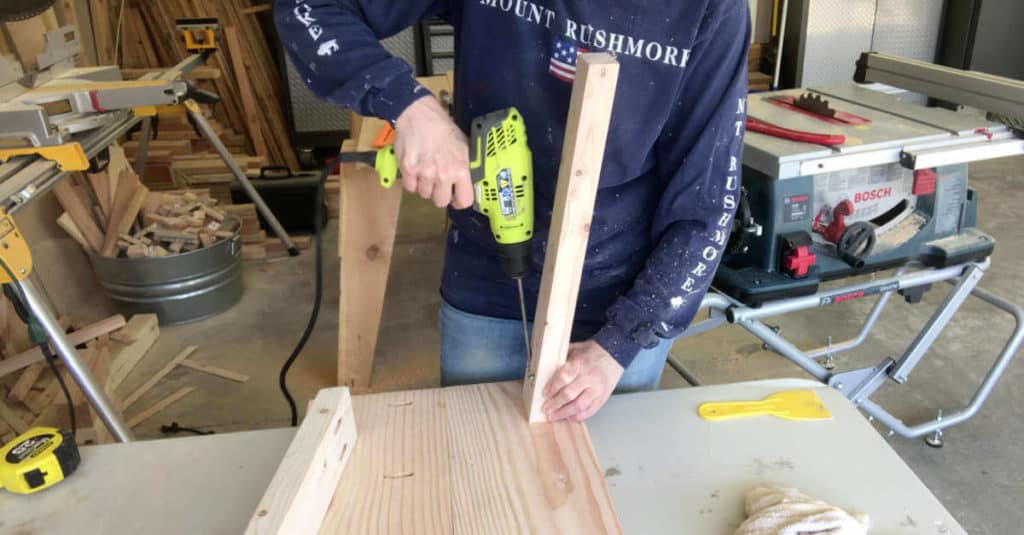
Spread wood glue on the top of one leg and line it up with your pencil lines before drilling in your first screw. At this point, I only placed one of the two screws in each leg. Then, I dry fit the brace to make sure it fit properly. Once I knew it fit well, I went ahead and placed the second screw in each leg.
8) Attach brace to legs.
For this step, I set the brace where it naturally wanted to sit and measured each side to make sure it was the same measurement. Next, I drew a pencil line on each leg, where the brace should sit before gluing each end and attaching with pocket hole screws. You will need a right angle bit, in order to attach the braces with pocket holes, because your drill will not fit otherwise. On another bench, I simply used 2″ Deck Screws drilled from the outside and into the brace.
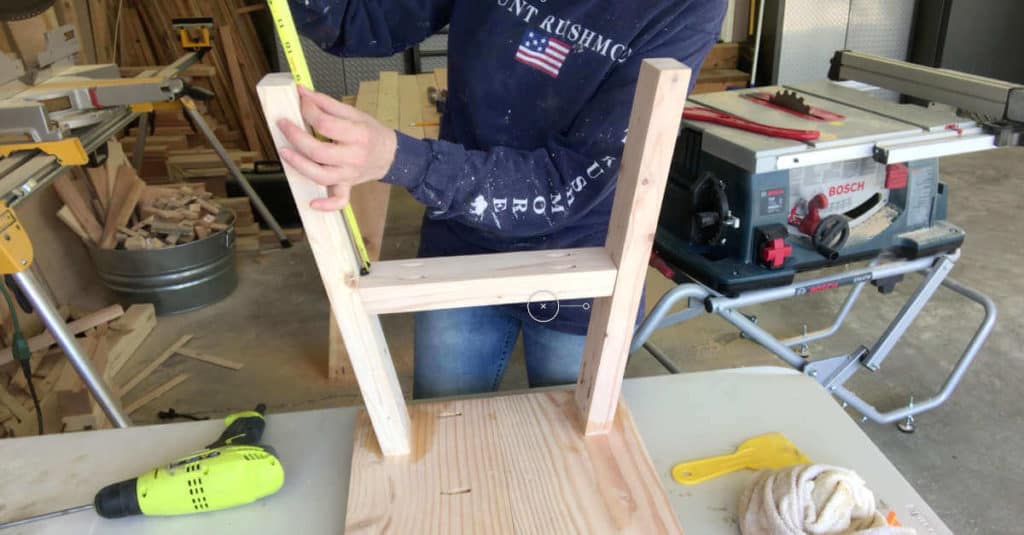
For this bench, I felt the braces sat a little high, at about 9″ from the bottom of the legs, and would recommend you cut your braces a little longer than the 12″ mine were cut at (on the long side). I’m guessing that a 13″ brace would sit at a better level.
9) Fill visible pocket holes with pocket hole plugs and wood fill.
If you don’t mind visible pocket holes, you can skip this step. I chose to use pocket hole plugs to fill the pocket holes at the top of each leg. I did this by adding a bit of wood glue and then inserted the pocket hole plugs. Once that dried, I used wood fill to smooth it out. I did not fill the pocket holes on the bottom of the seat bench or the braces.

10) Fill any knots or imperfections with wood glue.
This is the time to fill any spots, on your bench, with wood fill. Of course, many people like the more rustic look and prefer to leave the imperfections. I’m choosing to paint my DIY bench and am going for a sleeker look.
11) Do a final sand.
After the wood fill dries, it’s time to do a quick final sand to smooth out the spots with wood fill. I used 220 grit sandpaper to do this.

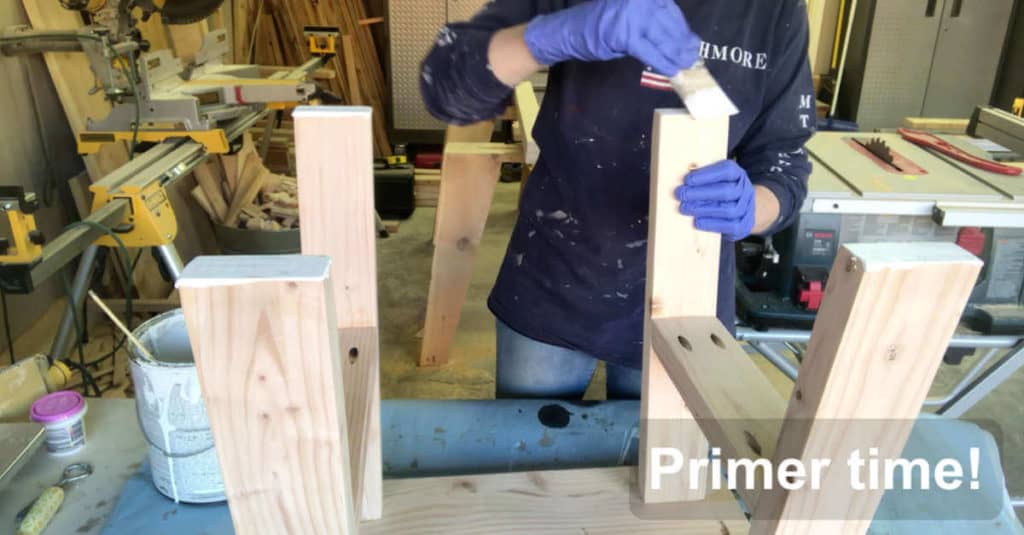
12) Prime the bench.
If you plan to paint your bench, this is the time to use primer. If you choose not to use primer, your bench will soak up more paint and may require more coats of paint.
Of course, stain is an option too but, if you use stain, make sure you use wood fill and wood glue that is stain friendly.
13) Paint your DIY Bench.
My daughter used Fusion Mineral Paint to refinish a chest of drawers to use in her college house. I was totally impressed with this paint and even more excited that there is a lot left to use on future projects!
If you start with the bottom of the legs, by the time you get the underside done, they may be dry enough to turn over on your drop cloth so you can paint the top.
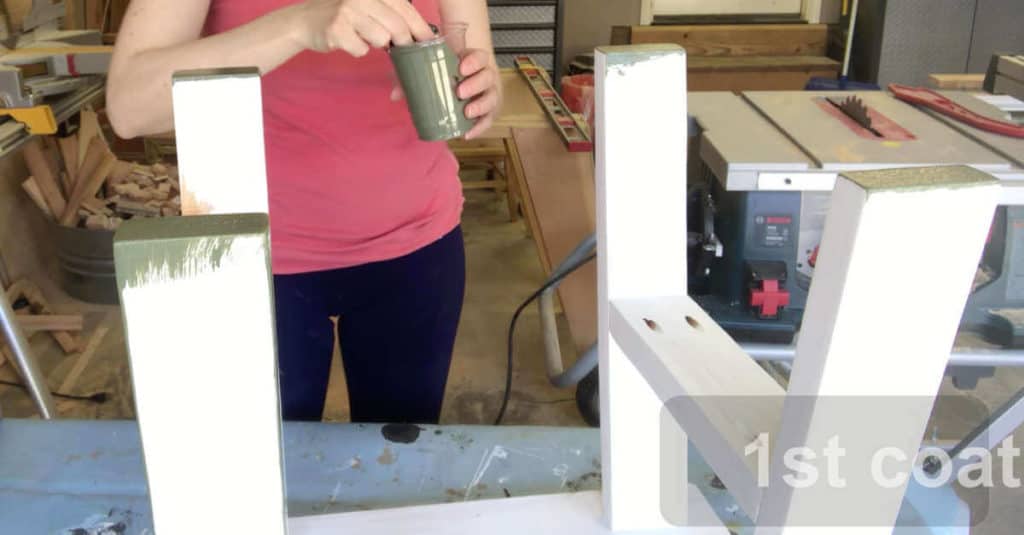
After two hours, it’s safe to apply the second coat of Fusion Mineral Paint.
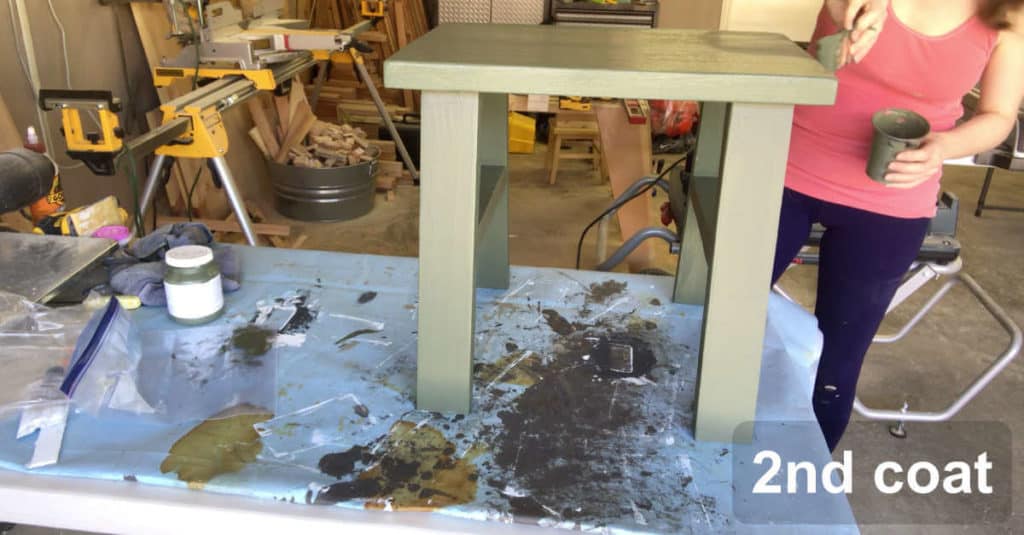
You can easily make this a DIY Farmhouse Bench by painting the bottom white and staining the top!
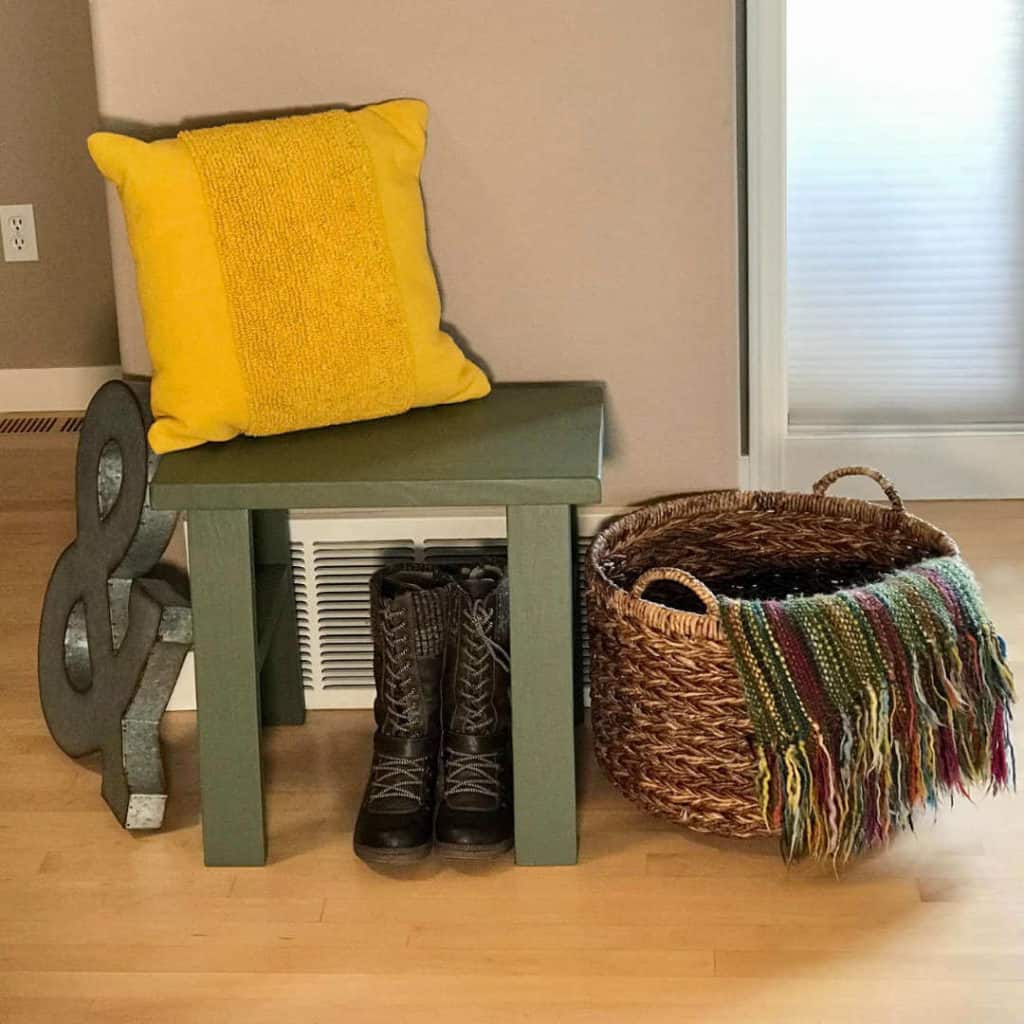
14) Style your DIY Bench!
The most exciting part of building is seeing your project get real, practical use! It’s even better if you can style your project in a way that is useful and eye appealing!
If you want guests to take their shoes off at the door, a DIY Bench is a great piece to allow them to take their shoes off without doing a great balancing act.

We love the way these DIY Benches turned out and I think TeddiBear approves, too!
Inspiration for this build came from: 731 Woodworks Bench For Beginning Woodworkers