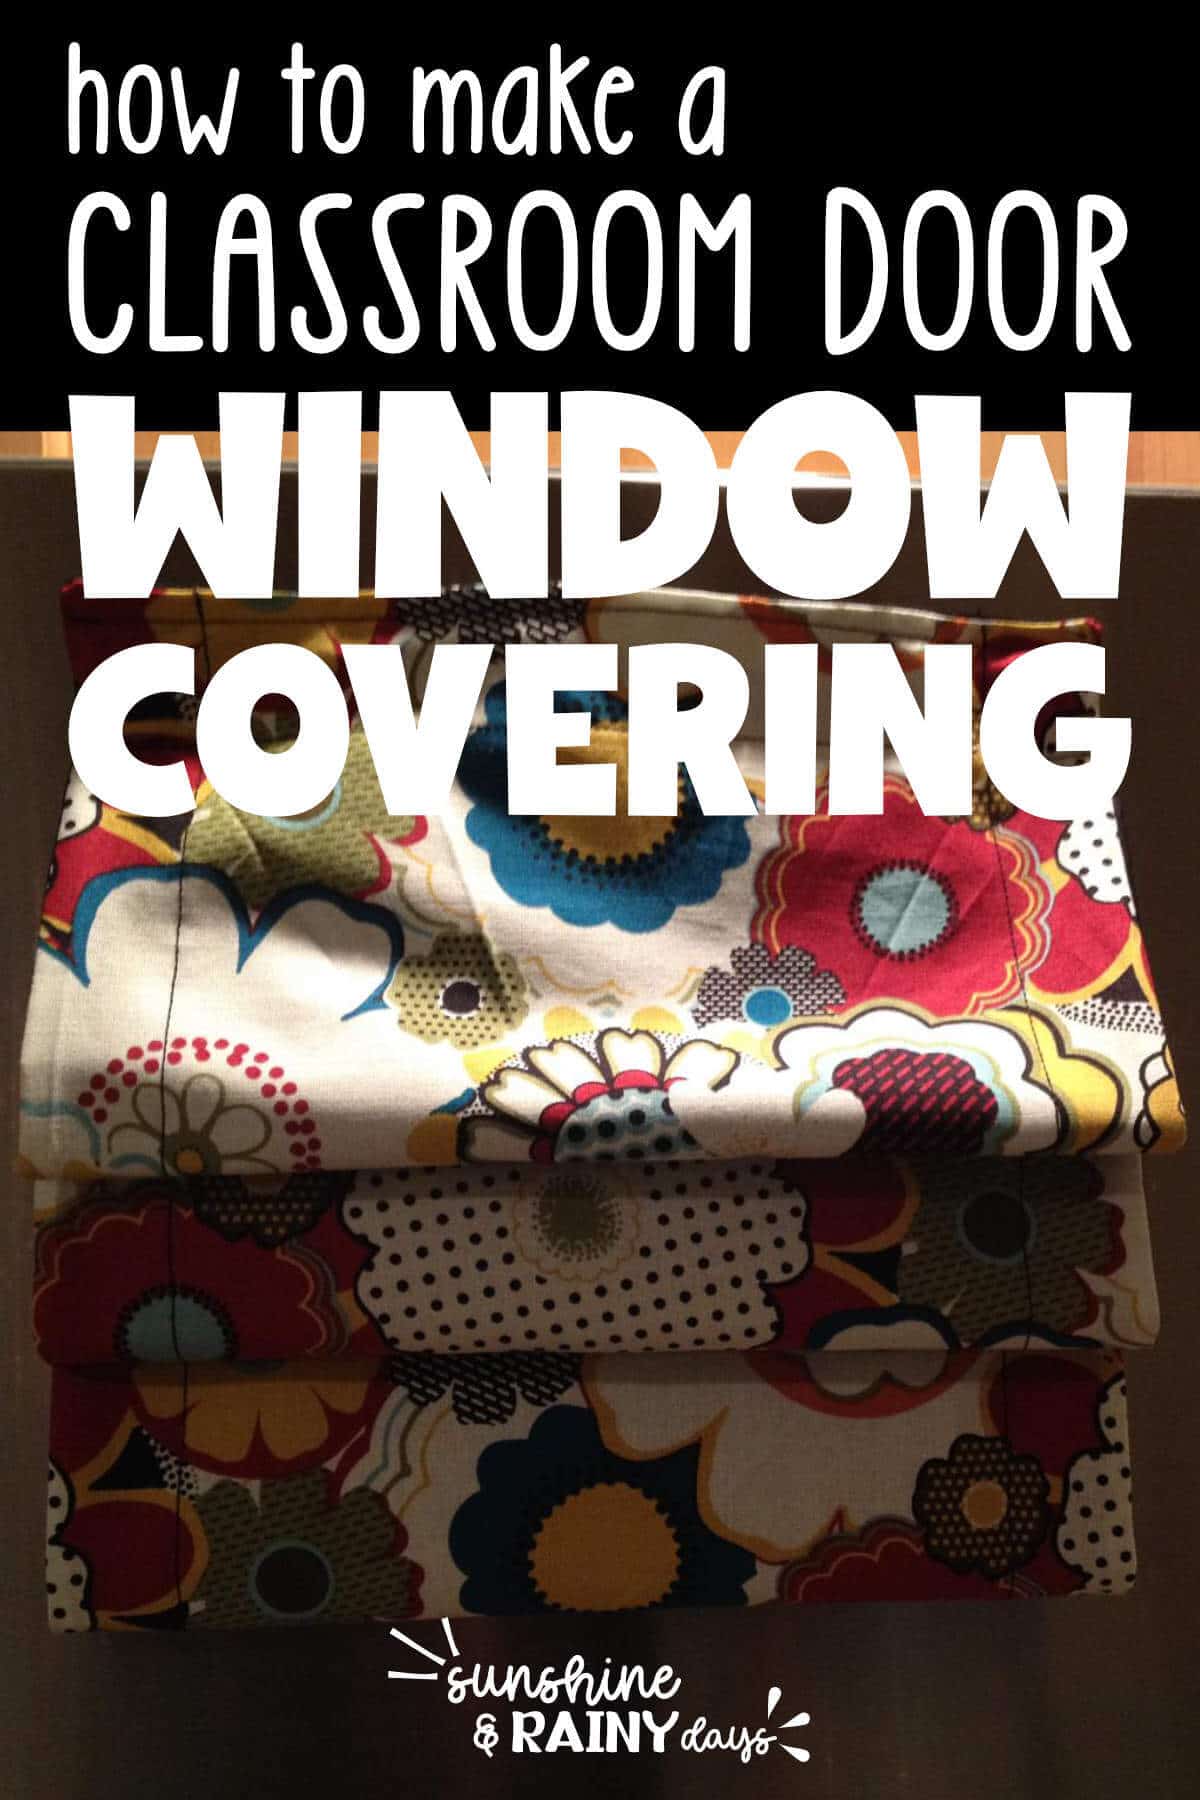
Classroom Door Window Covering
Learn how to make your own magnetic Classroom Door Window Covering! Every school I’ve been in has classroom doors with a window. Those windows must be covered during a lockdown so a potential ‘bad guy’ can’t see in the classroom.
On most classroom doors you will see a piece of black construction paper rolled up with a paper clip. In a lockdown situation, the teacher rolls down the paper and tapes it at the bottom. I knew there had to be an easier way!
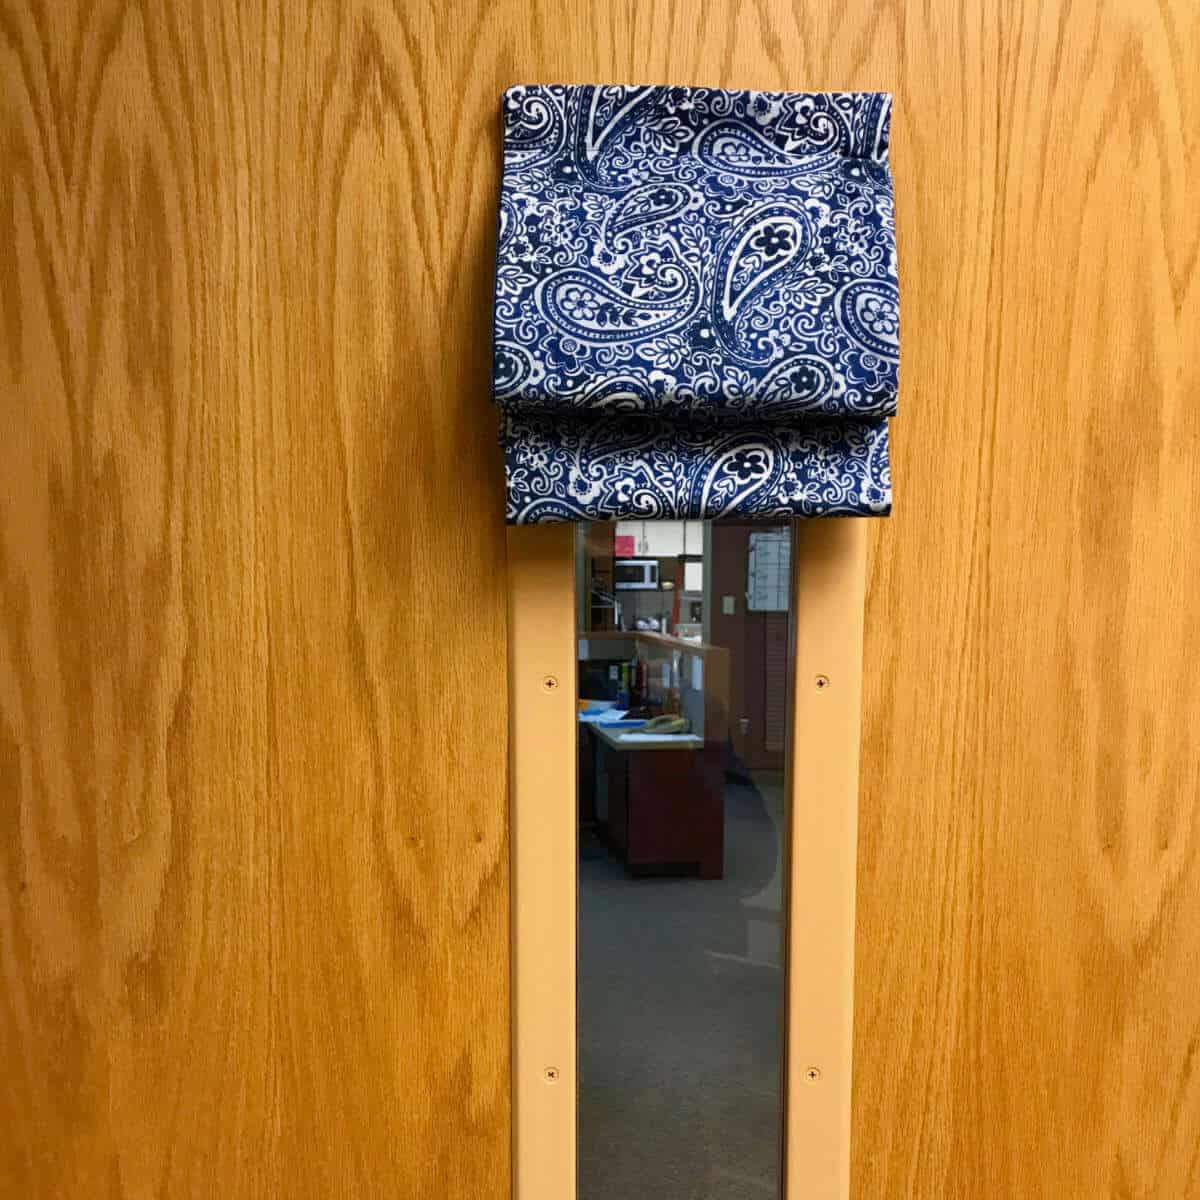
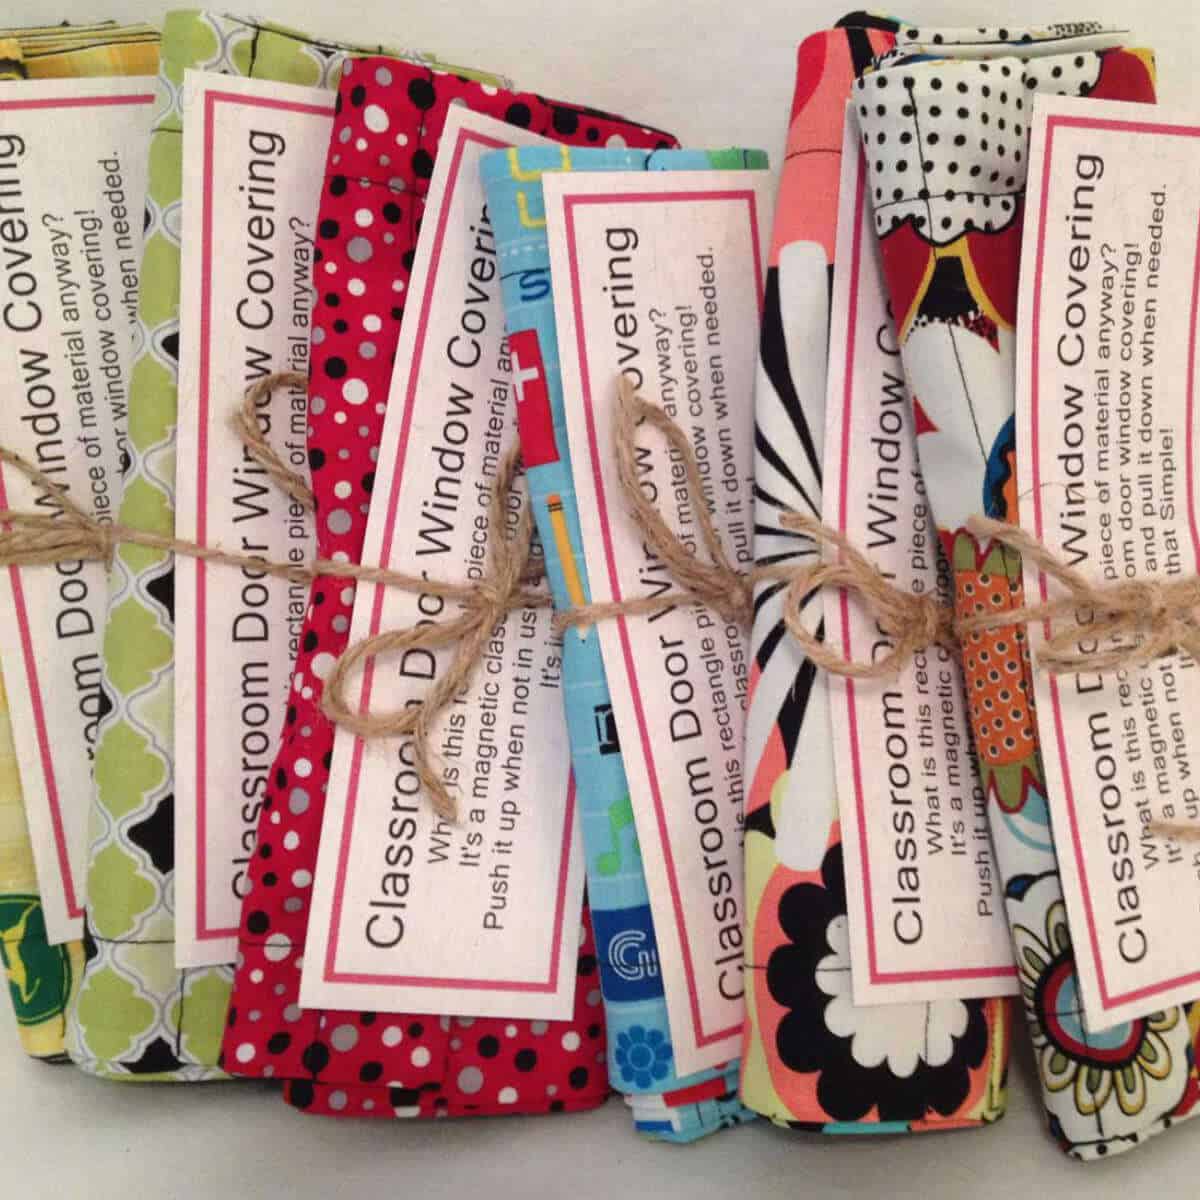
These magnetic classroom door window covers simplify the process for teachers during drills or lockdowns as they just need to pull the curtain down over the window, and the magnets will securely hold it in place. There’s no paper to unroll and tape, no strings to untie, and no velcro to adhere to. Then, when the drill or lockdown is over, you just push the curtain up for a fun folded look.
This post contains affiliate links. When you purchase through an affiliate link, we receive a small commission at no additional cost to you. Disclosure.
Classroom Door Window Covering Supplies
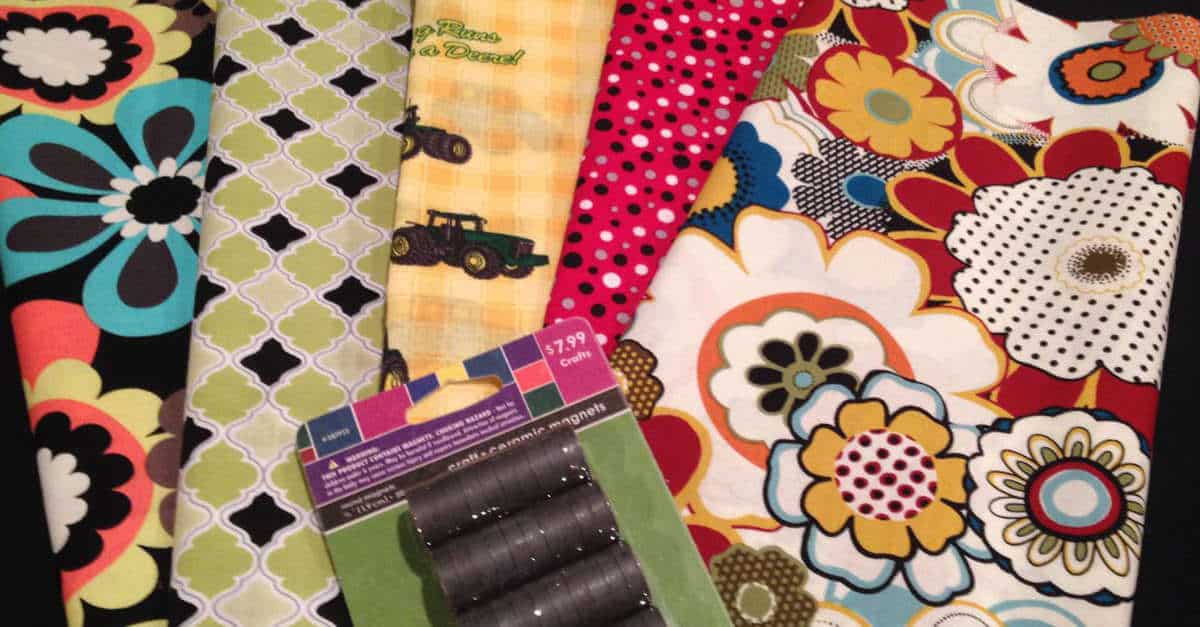
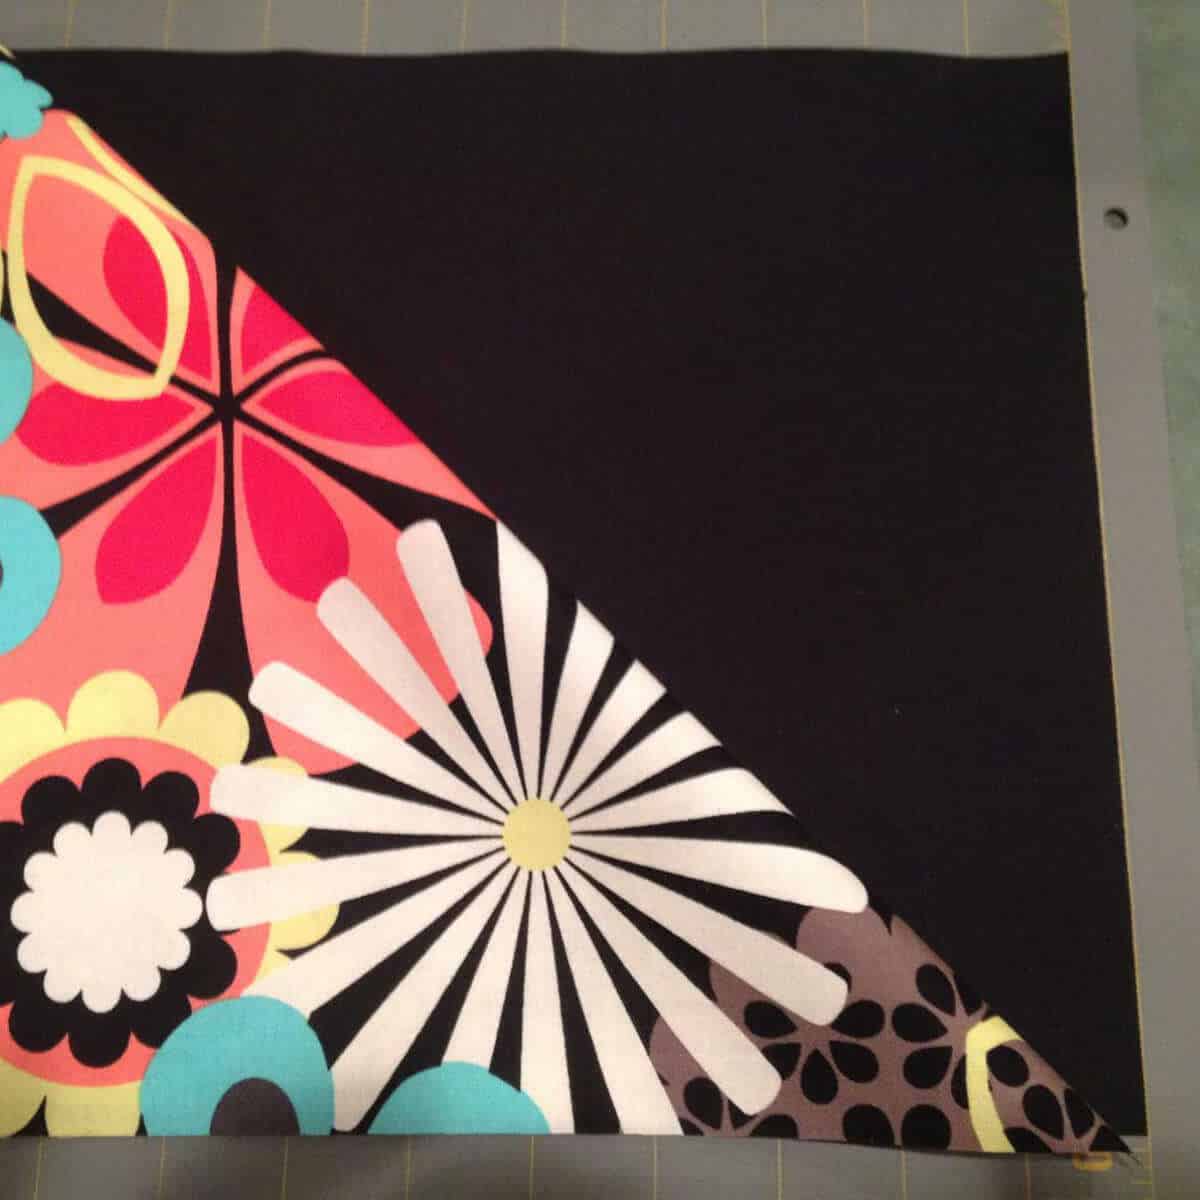
- Thick black material – This material is what you would see from the outside of the door.
- Fun material – This material will be facing the inside of the classroom.
- Magnets – I used 8 round, ceramic, .75″ magnets per classroom door window covering.
- Sewing Machine – Mine isn’t anything fancy. I bought it at Costco years ago and it’s still crafting with me!
- Thread – I used black.
- Cutting Mat – I use this cutting mat for so many projects, like these Flax Seed Heating Bags. It’s been worth the investment as it makes cutting so much easier.
- Acrylic Ruler – This is an excellent compliment to the cutting mat.
- Rotary Cutter – The rotary cutter is also a complement to the cutting mat and acrylic ruler. This is precision cutting at its finest!
- Scissors
- Iron
How To Make A Classroom Door Window Cover
I don’t claim to be a seamstress but I can sew a semi-straight line. My lines may be a little wavy but perfection isn’t the goal here. If I can do it, you probably can too!
Step 1. Measure the frame of the door window.
In my case, the frame is a little over 33″ x 9″. Each school is different so be sure to measure.
If there isn’t a metal frame around the window, this is not the window covering you need instead, try one of these classroom door window shades without magnets.
Step 2. Purchase material.
A thick, black material is best for the side facing out. A fun material for the inward-facing side just makes it more enjoyable!
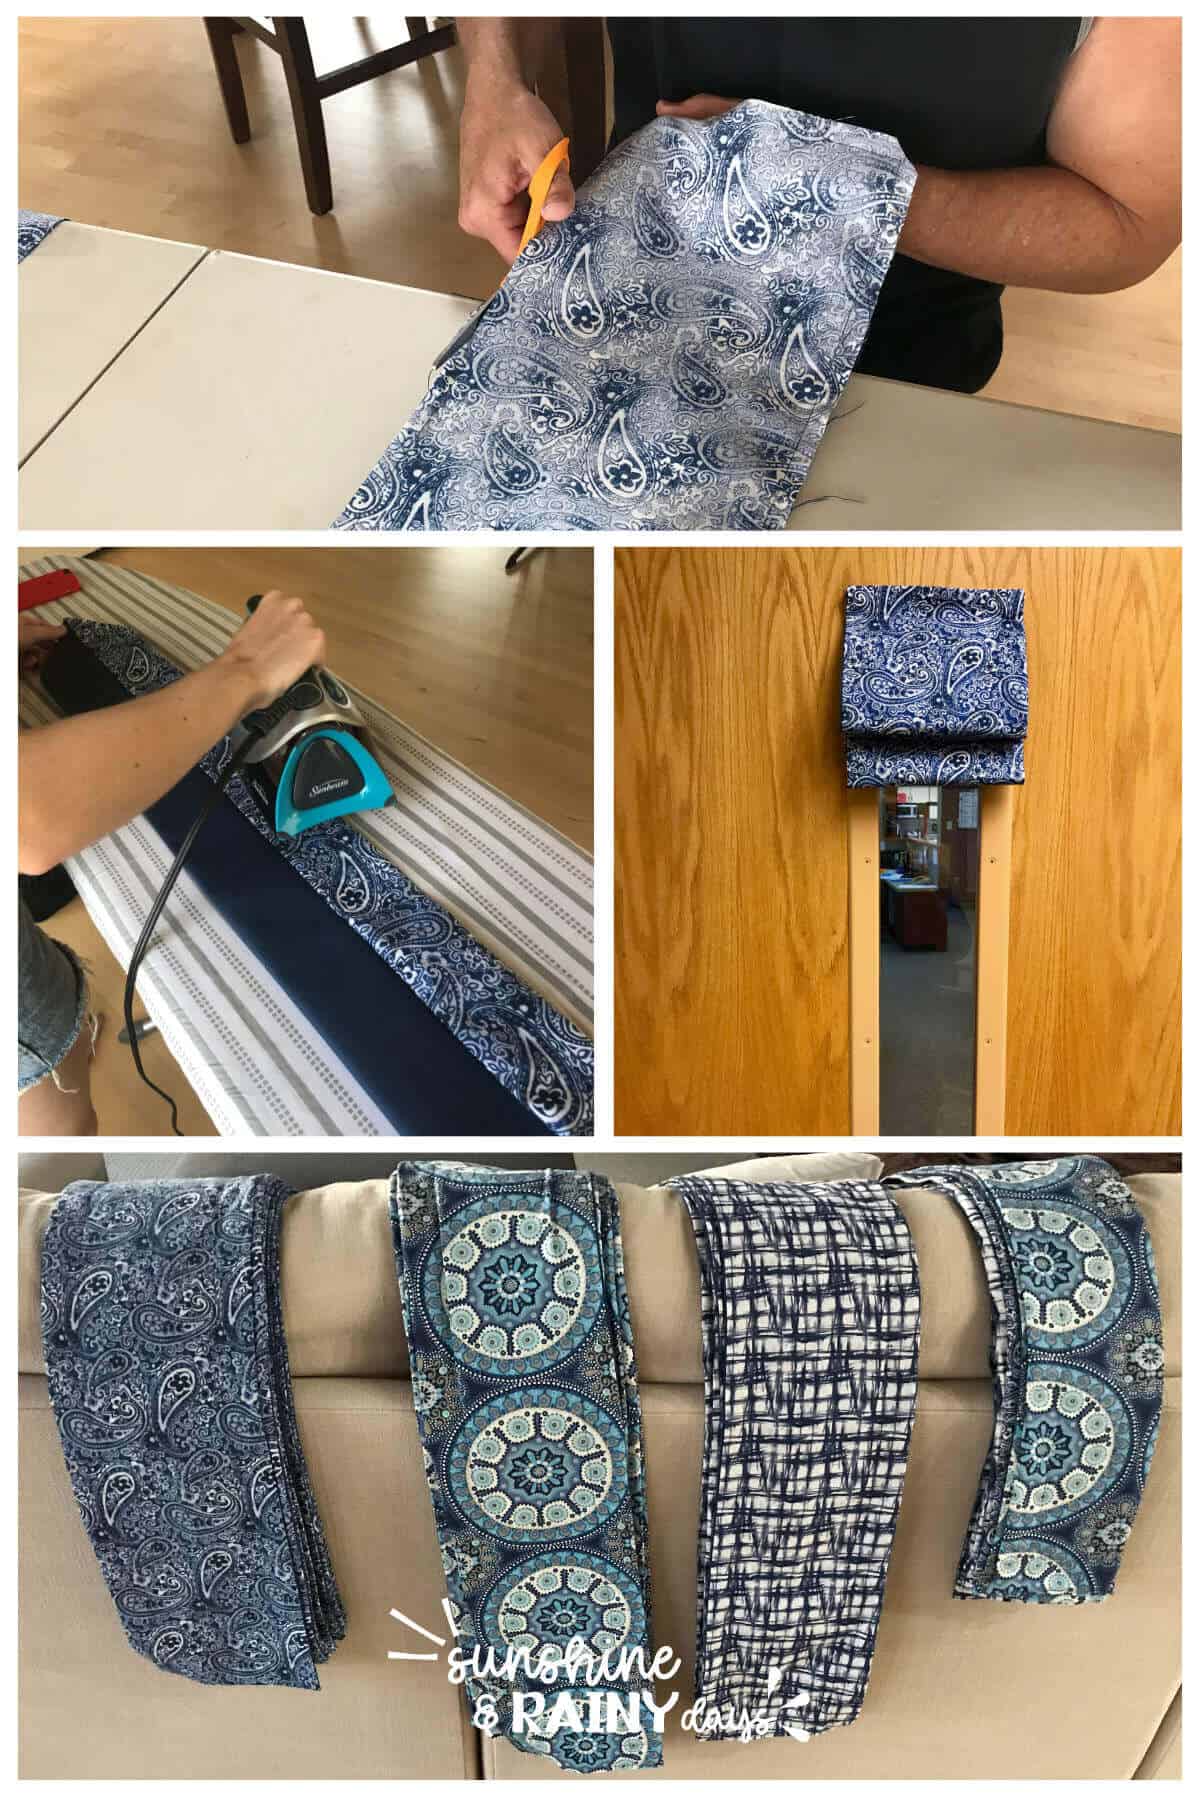
Step 3. Wash the material.
It’s always a good idea to wash material before you sew it to avoid shrinkage once your curtain is complete. More than likely, the Classroom Door Window Covering will never be washed because it has magnets in it but it’s still a good idea to wash the material before you cut it!
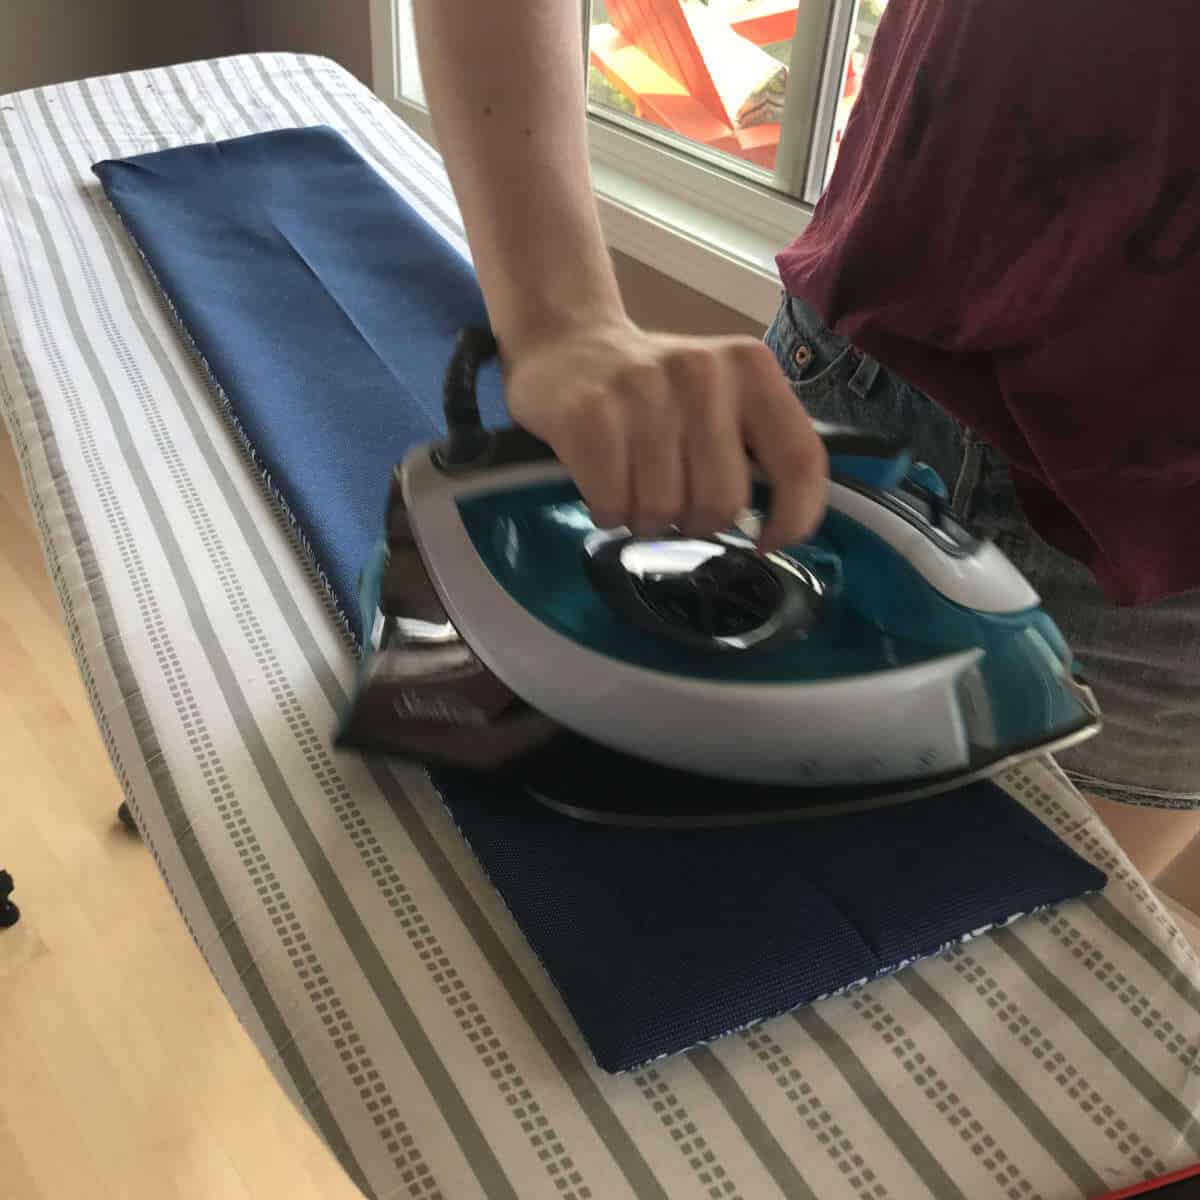
Step 4. Iron your material.
Your cuts will be more accurate if you iron your material first.
Step 5. Use a cutting mat, acrylic ruler, and rotary cutter to cut your material.
I cut the material 1 inch bigger than the actual frame for seam allowance. Remember, our frames were a little bigger than 33″ x 9″ so a little extra was good!
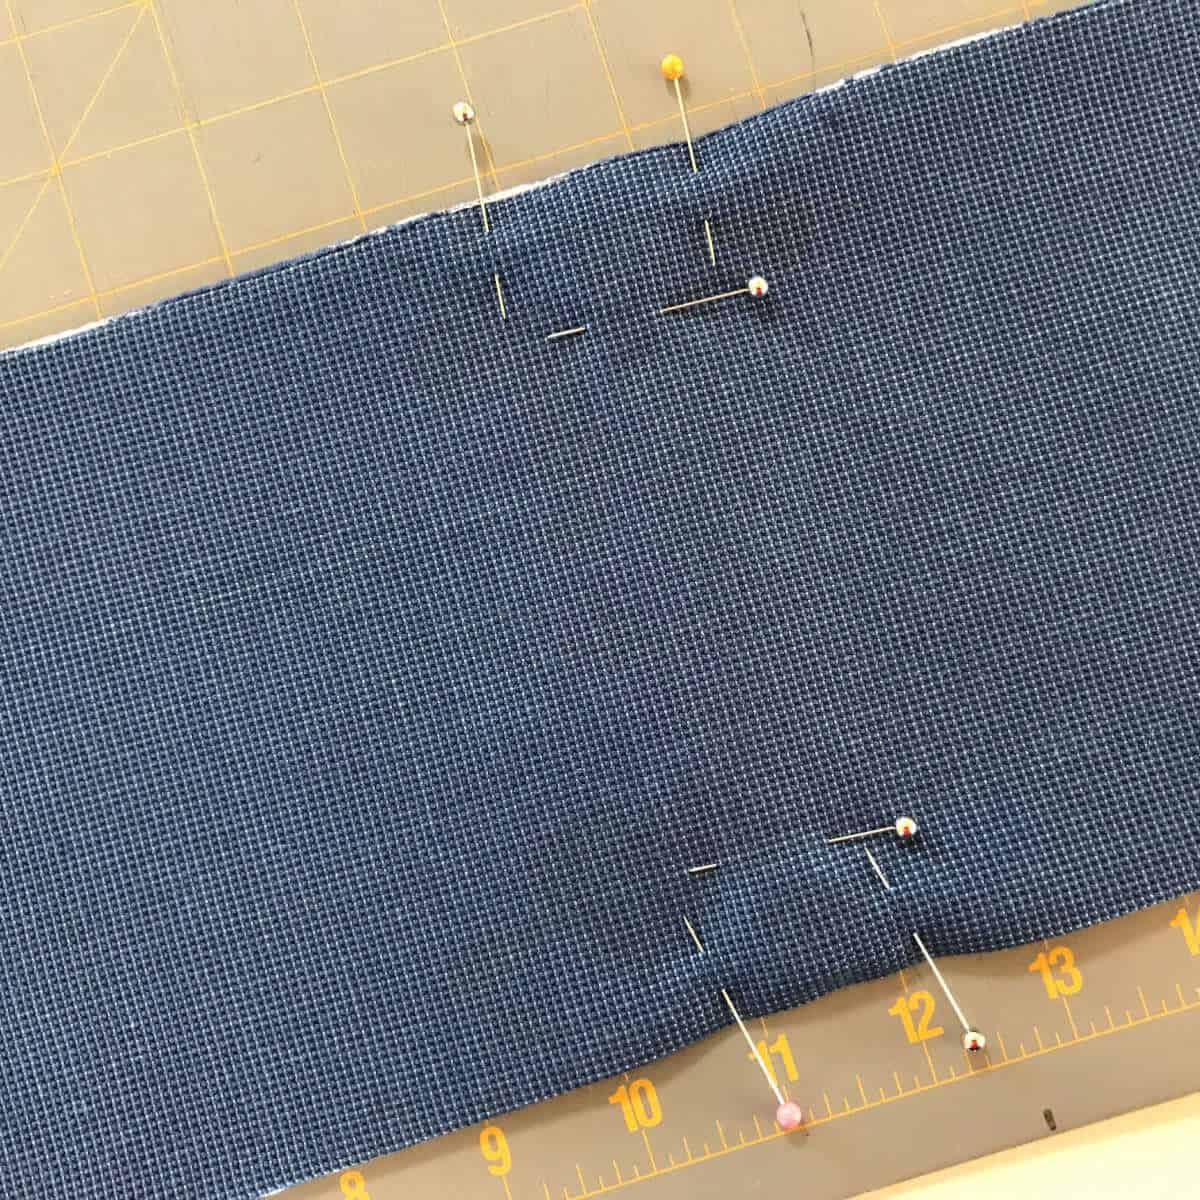
Step 6. Place the right sides of your fabric together and pin.
Step 7. Begin sewing on the short end, leaving a space for turning.
I used a quarter-inch guide for three sides and about a half-inch guide for the turning end. The bigger seam allowance on the turning end makes it easier to fold and press without burning your fingers. Trial and error taught me that one!

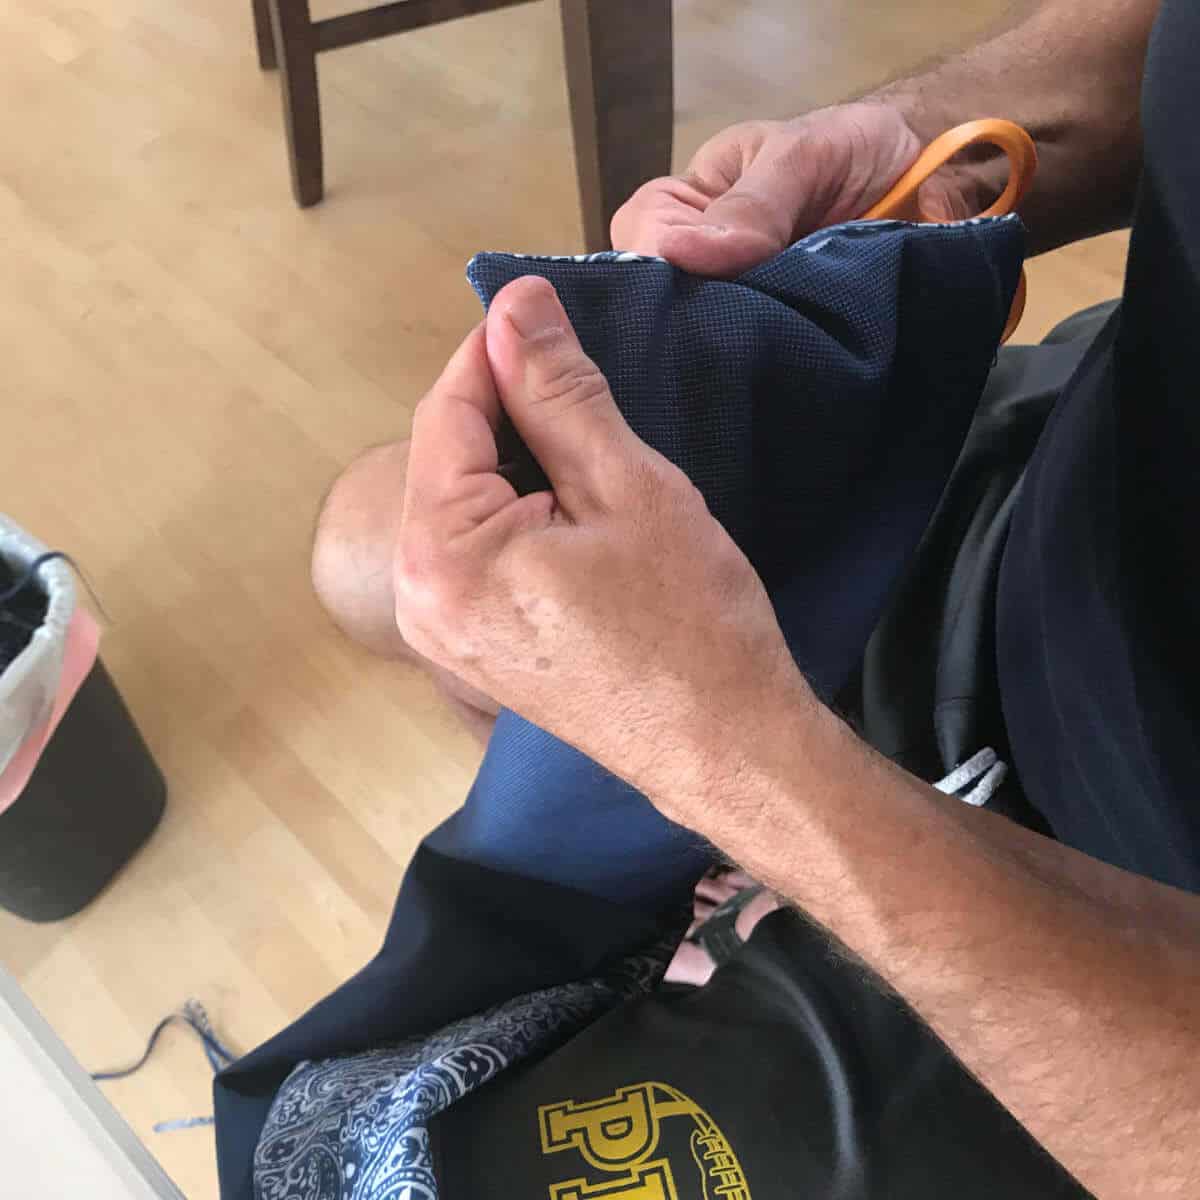
Step 8. Clip the corners.
It’s best to clip on the colorful side so you can see your thread. I clipped on the black side for one and ended up restitching a corner. Learn from my mistakes!
Step 9. Turn the curtain right side out.
A crochet hook or precision scissors work fabulous for pushing the corners out.
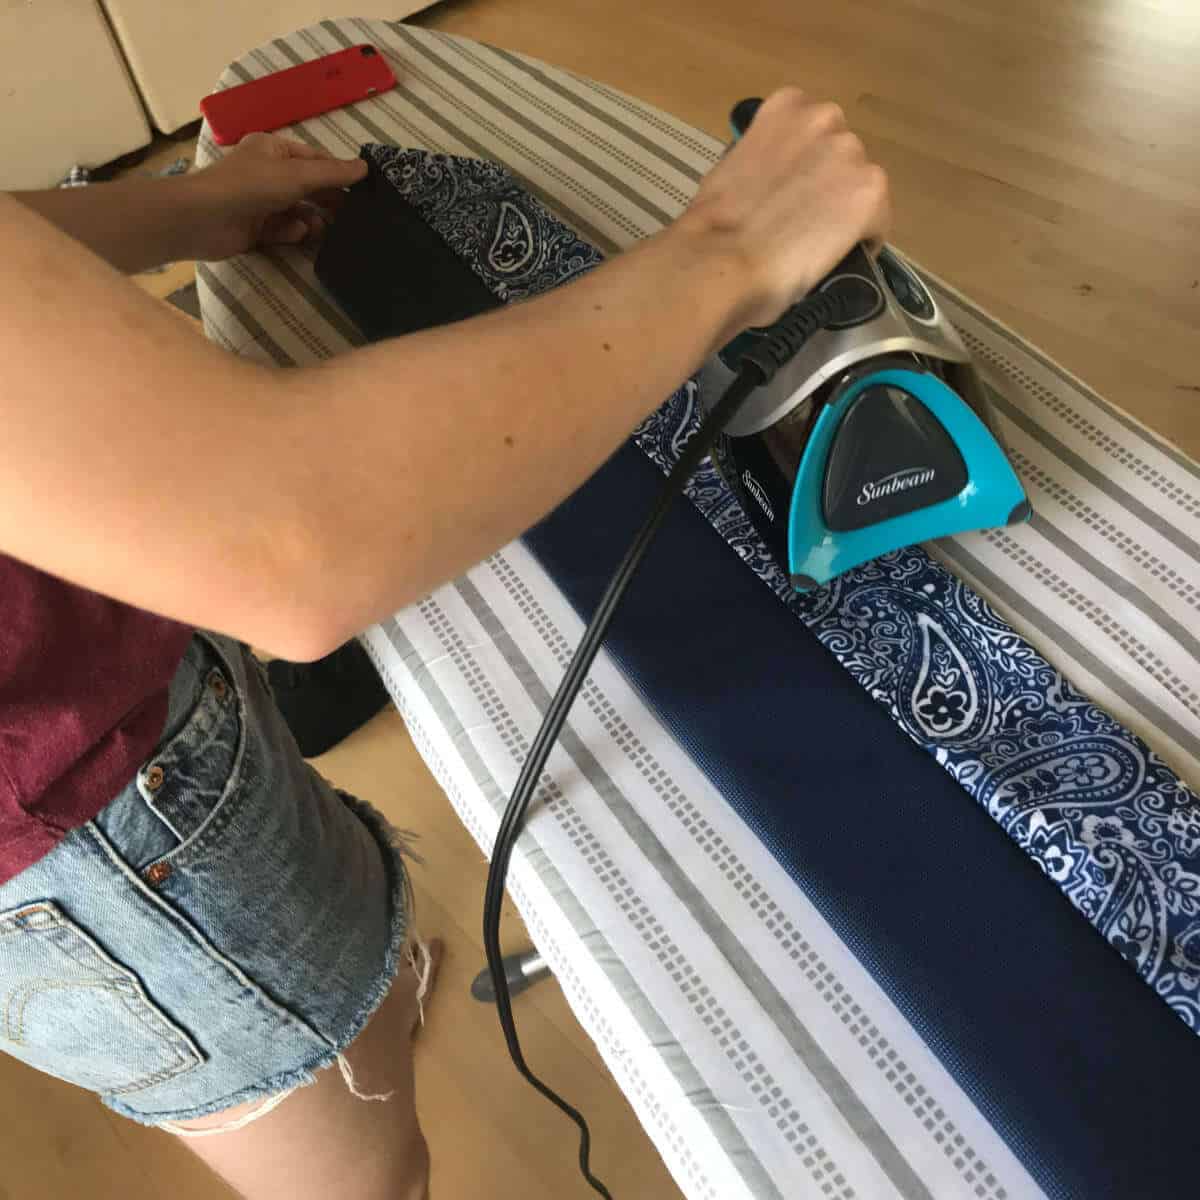
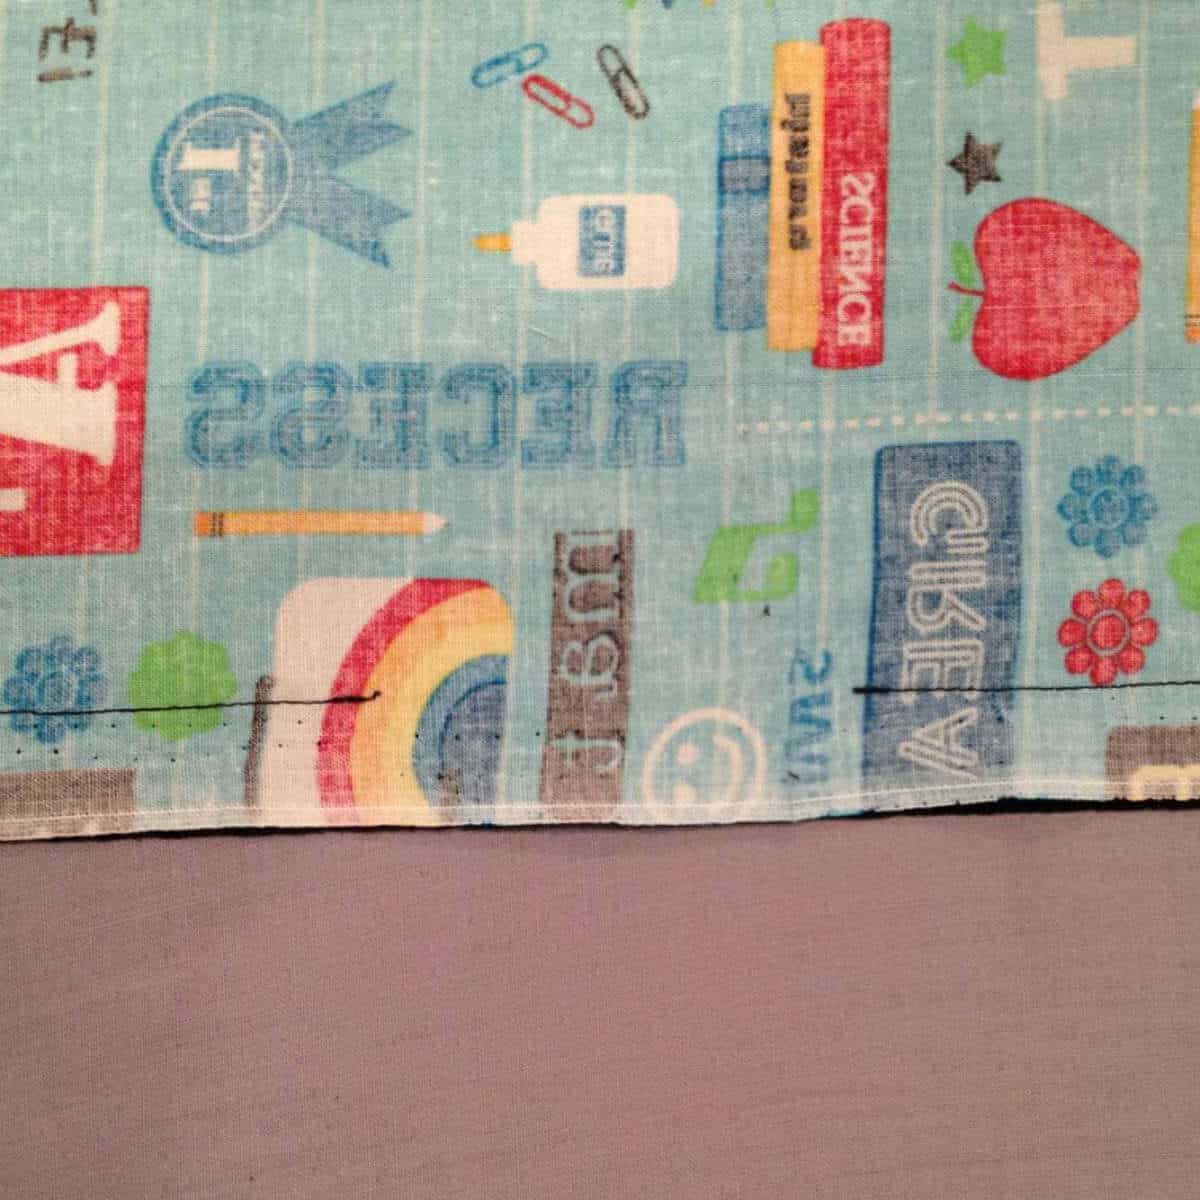
Step 10. Press the seams.
Press the seams flat to make it easier to press the curtain flat.
Step 11. Turn in the opening and press.
At this point, you can press the curtain flat so it will be ready to sew in the magnets.
Step 12. Place magnets through the opening (one at a time) and pin in place.
Set magnets in place using pins. I placed four magnets in even increments down each side.
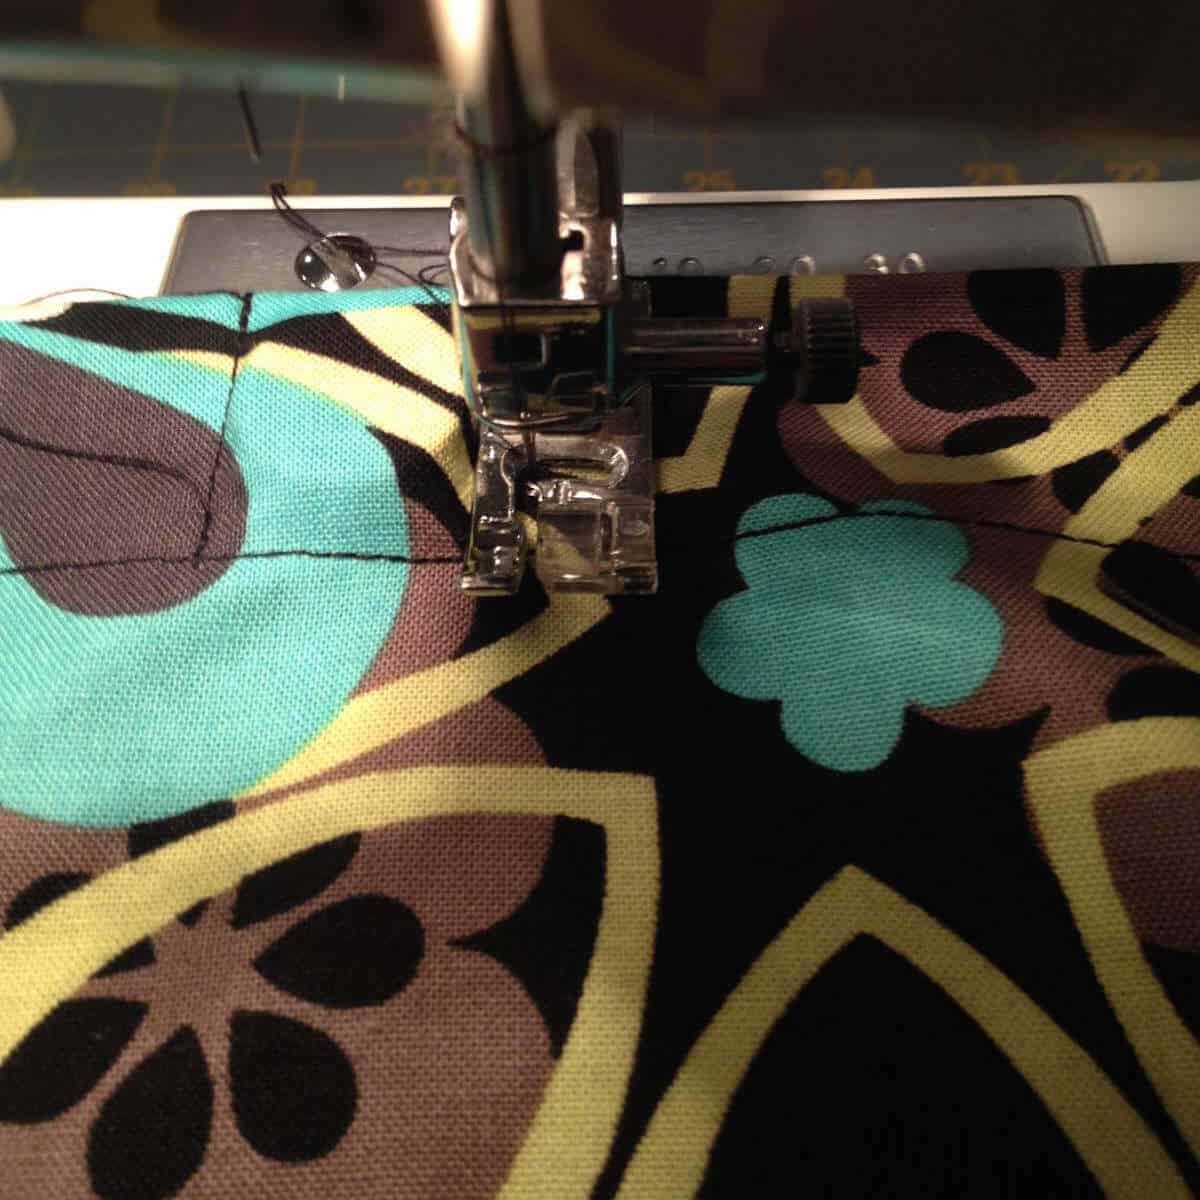
Step 13. Sew the opening closed.
After all the magnets are placed, sew a line across the bottom to close the opening.
Note: Use caution and be sure to give yourself plenty of space for the magnets so they don’t stick to your sewing machine plate.
Step 14. Sew the magnets into place.
Note: Use caution and be sure to give yourself plenty of space for the magnets so they don’t stick to your sewing machine plate.
Pick a long side and sew a straight (or semi-straight in my case) line just on the inside of the magnets, removing pins as you go.
Do the same for the remaining three sides.
You should still have pins in place on either side of the four magnets in the center of the covering.
Step 15. Sew the middle magnets into place.
Sew a short line on either side of the magnet to hold the magnet in place.
Note: Use caution and be sure to give yourself plenty of space for the magnets so they don’t stick to your sewing machine plate.
Step 16. Clip all threads and press.
There you have it! A classroom door window covering that’s super easy for teachers to use in lockdowns or drills.
One year I made a classroom door window covering for each of my son’s teachers for Christmas. What’s better than combining classroom safety with a gift for teachers? It is a super practical gift I hope they will appreciate for years to come.
If you’re looking for gift ideas for teachers, you may also want to check out this All About My Teacher Appreciation Coloring Page Printable or these Teacher Appreciation Cards To Color.
Principals always enjoy a little appreciation too! These Principal Card Ideas are fun and easy to print!
When my husband became the principal of a school, we made Classroom Door Window Covers for the entire school! The whole family got involved and we got them done in one weekend!
We even put together a video of the process so you can get a better idea of how to make a window cover for your classroom door!
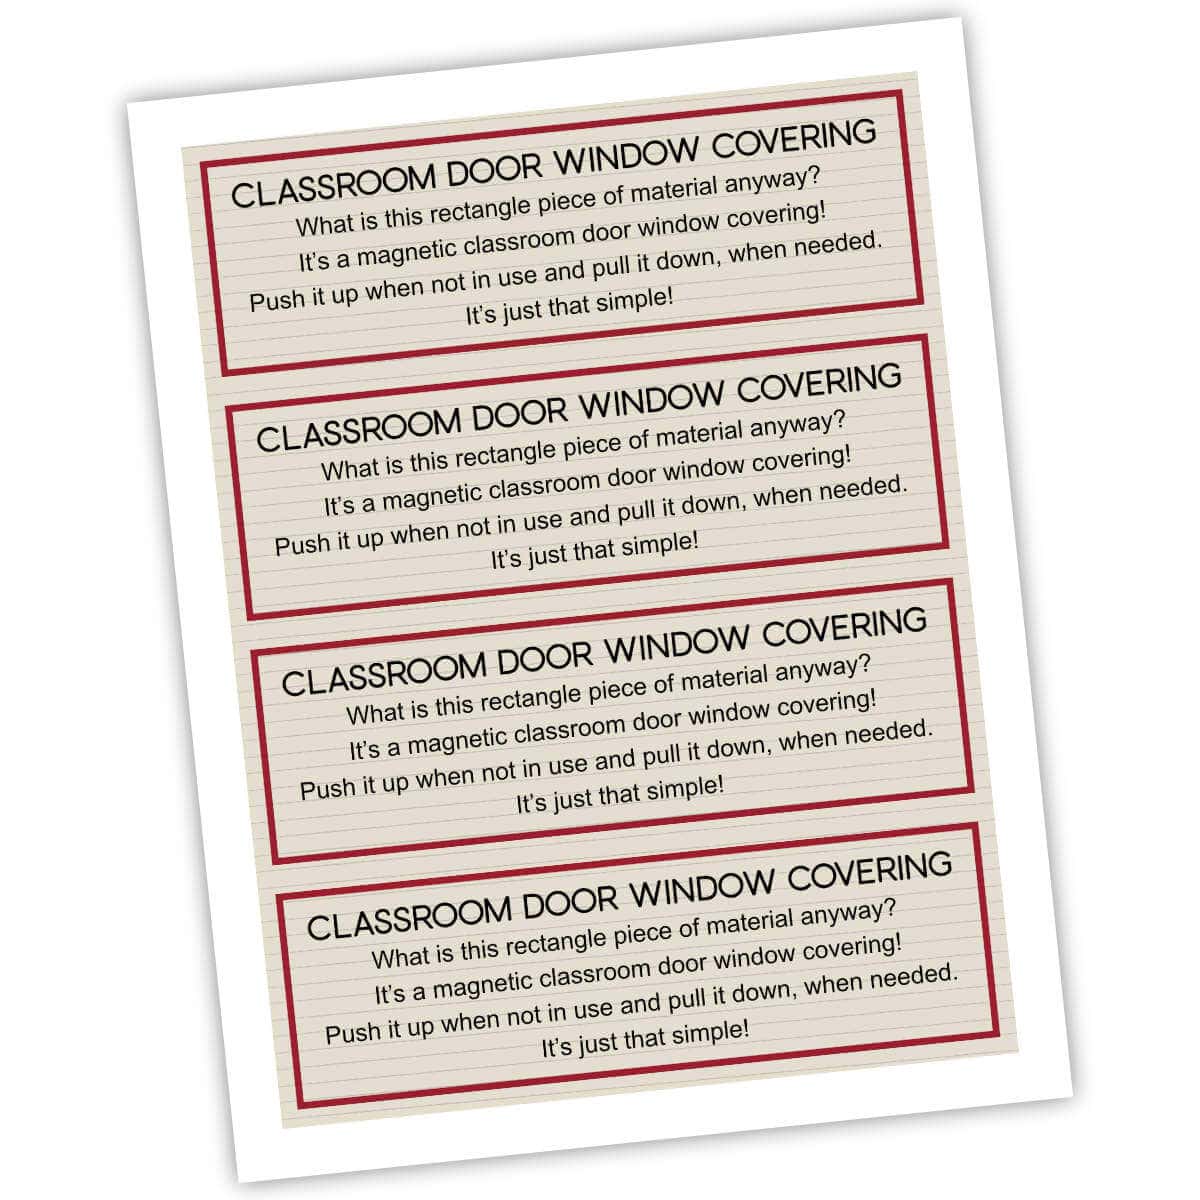
Classroom Door Window Covering Tag
If you have the gumption to make a classroom door window covering for the teachers you know, feel free to use this free printable Classroom Door Window Covering tag so teachers will know what this rectangular piece of fabric is for!
If your classroom door does not have a magnetic frame, check out these classroom door window coverings or this velcro window cover.
I am not guaranteeing that if your child’s classroom has a classroom door window covering, they will be safe from any harm at school. I can’t make that guarantee but it is a step in the right direction.
Frequently Asked Questions
More Teacher Gift Ideas
- For elementary students, this All About My Teacher Appreciation Coloring Page Printable is an excellent way to express their thanks in a fun and creative way!
- If you want to show your thanks with more than kind words, this Teacher Appreciation Gift Box Idea is super fun to create and receive!
- It’s not fun to think about, but most classrooms are required to have a Classroom Door Window Covering in case of emergency. This is a practical classroom gift that is so much easier to use than a rolled-up piece of paper.
- These Teacher Appreciation Cards To Color combine simplicity and creativity for a gift teachers will treasure.
- Free Printable Teacher Appreciation Cards are easy to print and give to the teachers you know with nice words inside.
- When you want to give every teacher a small token of appreciation, these Teacher Appreciation Popcorn Tags – Popcorn Gift Ideas For Teachers are designed with every kind of teacher in mind.

Hi! I’m Bridget!
I create printables and DIYs to help you get organized and celebrate special occasions! It’s my mission to inspire you to get creative and find joy in every day!


How did you get it to bunch up on the window? Did you sew magnets down the long sides of it? If so, how many did you sew in on each side?
Hi Becky! Yes, I placed four magnets, in even increments, down each side so it would bunch up on the window. To do this, I placed them through the opening one at a time and pinned them in place, then I sewed each magnet into place.
yes.
If the windows don’t have a magnetic frame, you can get self adhesive magnetic strips. The simply frame the window. This allows for a wider curtain.
If you have a wall with windows but no screens, simply use velcro and screens. We had a child that if stung by a bee or wasp that would have sever reactions. The classrooms were very warm; no air conditioning, but the teacher was afraid to open the windows because of this student. The school wouldn’t buy new window. So, the PTO simply bought screening, velcro and glue. We made one window screen for each of the windows. We just asked that they move with child the following year. Each year we were able to make three of these covers. It didn’t take to long before we made 50.
Thanks for the lovely tutorial! When sewing the magnets in, how do keep the magnets from getting stuck on the metal sewing plate? My machine is locking up.
Hi Trina! I’m sorry to hear you’re having trouble with the magnets. We didn’t have that trouble. Could it be the type of magnets you are using? I’m sorry I don’t know how to help!
@Trina, I had the same issue to the point that my Brother sewing machine got damaged. Be careful!! The project is lovely but unfortunately I have to send my machine to be repaired.
Oh my! I’m sad to hear you had trouble creating your window cover. I also have a Brother sewing machine I purchased from Costco years ago but haven’t had this issue.
Thank you for this how to! I’m moving from a classroom with no window in the door to one with a long rectangular window. I’m going to put the school name in the window with vinyl but want something behind it to block the room. It will be down at all times since my kids don’t need the outside distractions. This is PERFECT! I already emailed my principal to see if my door is magnetic or not so I know which design to make. Again, thank you! It’s brilliant! 🙂
Hi Tiffany! I’m so happy to hear this idea is helpful for you!
Thank you for the tutorial! What do you recommend for the “thick” black fabric? Thanks!
Hi DeeDee! I used cotton fabric for both sides. I held the two together up towards the light to make sure you couldn’t see through them. Very scientific, I know!
This is exactly what I was looking for so I could make a “lockdown shade” for my classroom. Thank you!
I’m so happy this post was helpful to you, Amy! Have fun making your window covering!
I’m currently making 2 of these… How did your teachers attach them to the doors?
Awesome, Elizabeth! These work great on doors with metal window frames! The magnets attach to the metal frames quite nicely!
It’s a shame schools need these, but they sure are decorative. Nice job, Jayleen! 🙂
Thank you Kay! It is a shame to even have to think about it, but if we have to, we might as well do it up right!
These are so cute!
I’d love if you would stop by and enter my giveaway today =)
Awesome! I’ll head your way!