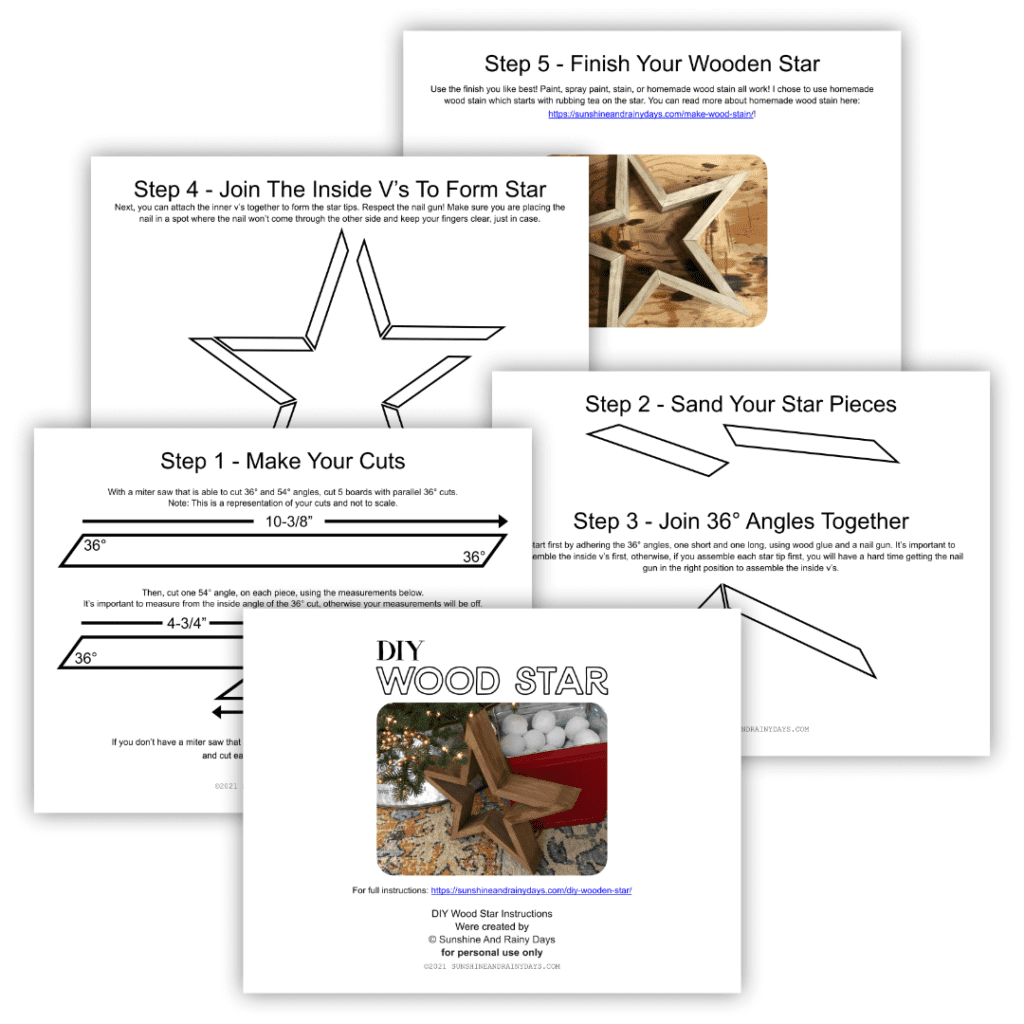
DIY Wooden Star
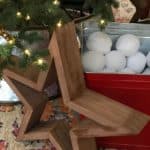
Every year I look for a fun way to DIY Christmas gifts and this year, I’ve learned how to build a DIY Wooden Star. My goal is to make them on a small budget and these rustic wood stars have been the perfect choice.
It was a bit tricky to figure out the angles, without wasting wood, but I was ready for the challenge and am ready to share exactly how I built these wood stars.
If you aren’t ready to take on angles and would like to learn How To Make A Star From Paint Sticks instead, you can easily transform the patriotic star into a star that is perfect for Christmas or any day of the year!
Wood Star Supplies
This post contains affiliate links. When you purchase through an affiliate link, we receive a small commission at no additional cost to you. Disclosure.
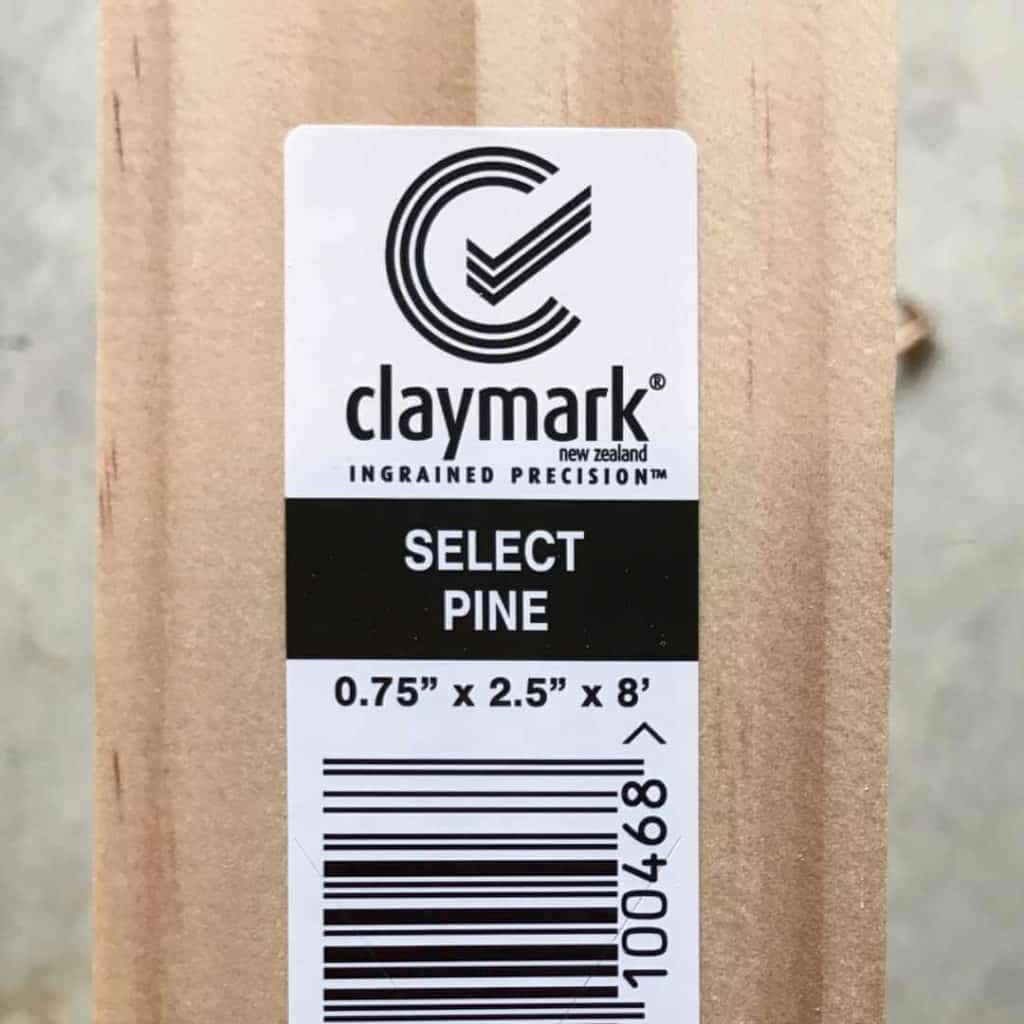
- 1 x 3 Select Pine – actual dimensions are .75 x 2.5 (Please note that these angles are meant specifically for .75″ thick boards.)
- Miter Saw that cuts 36° and 54° angles or a jig to create angles
- Paper
- Pencil
- Ruler
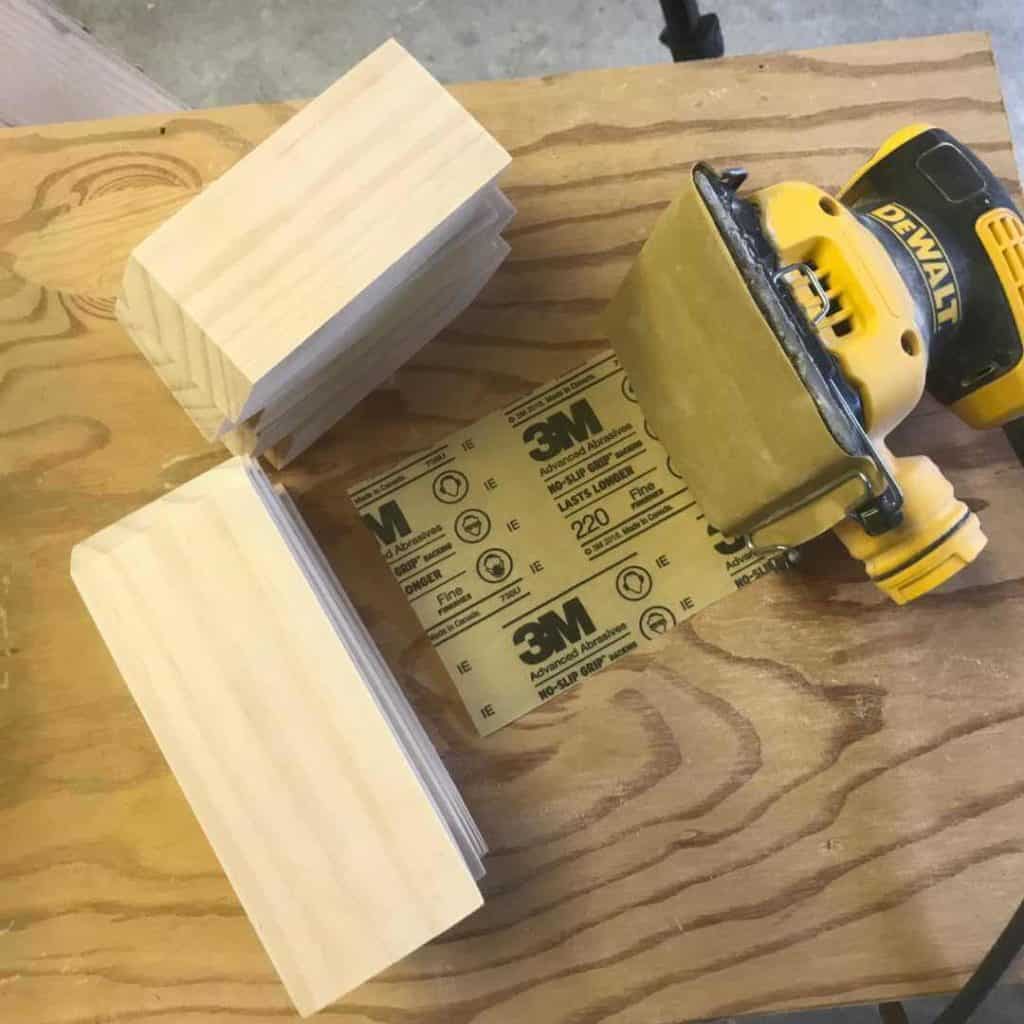
- Sander and Sandpaper
- Scrap Wood – to use as stop blocks
- Flat Surface – for placing pieces together
- Wood Glue
- Nail Gun
- 1″ Nails for Nail Gun
- Stain or Homemade Wood Stain
How To Build A DIY Wooden Star
Set your miter saw to 36 °.
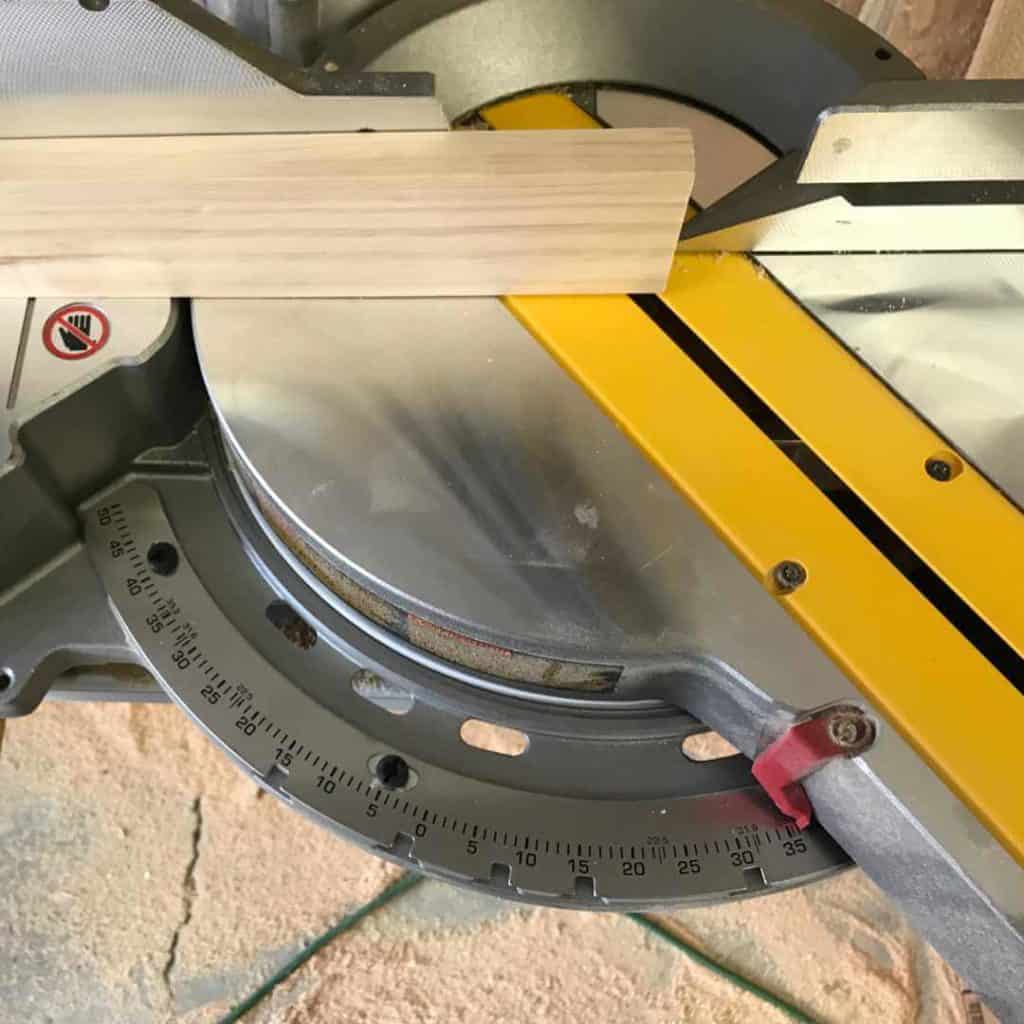
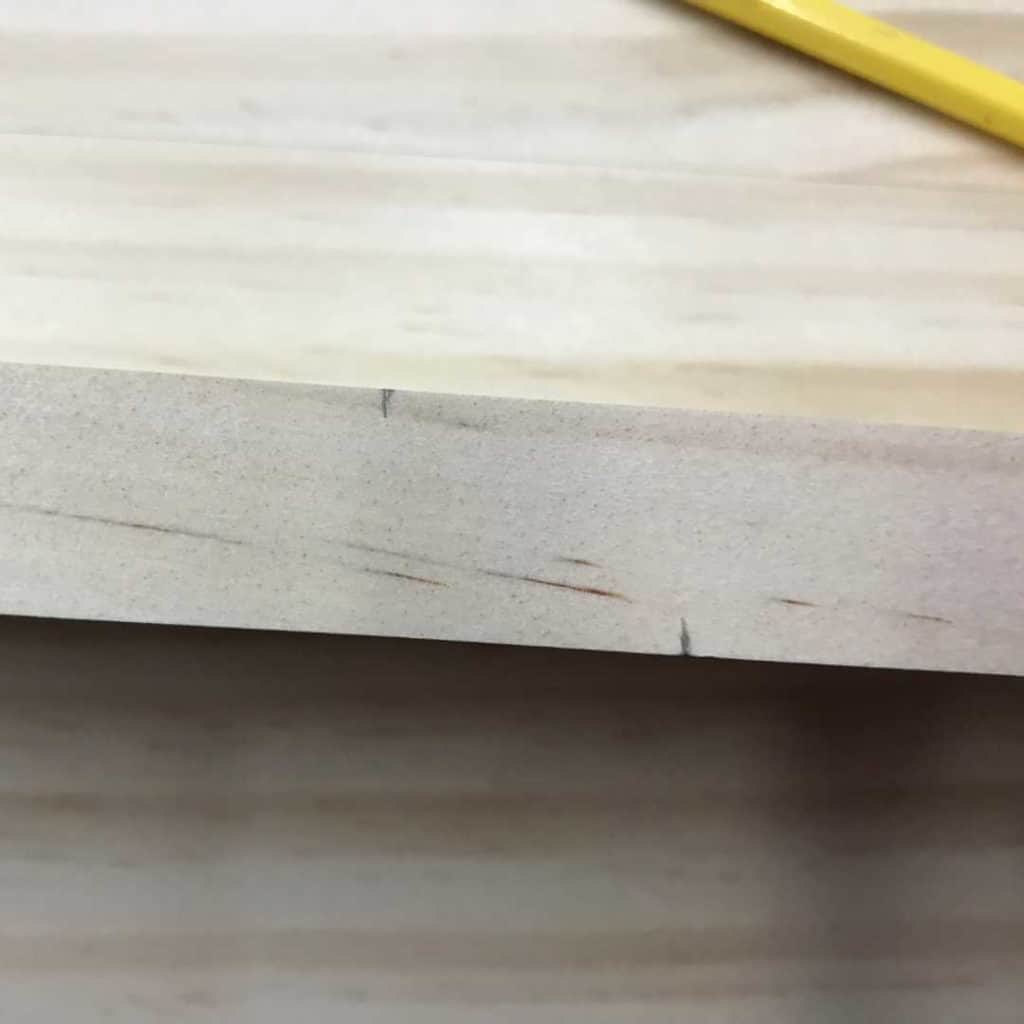
2. Cut the end of your 1 x 3 to 36°.
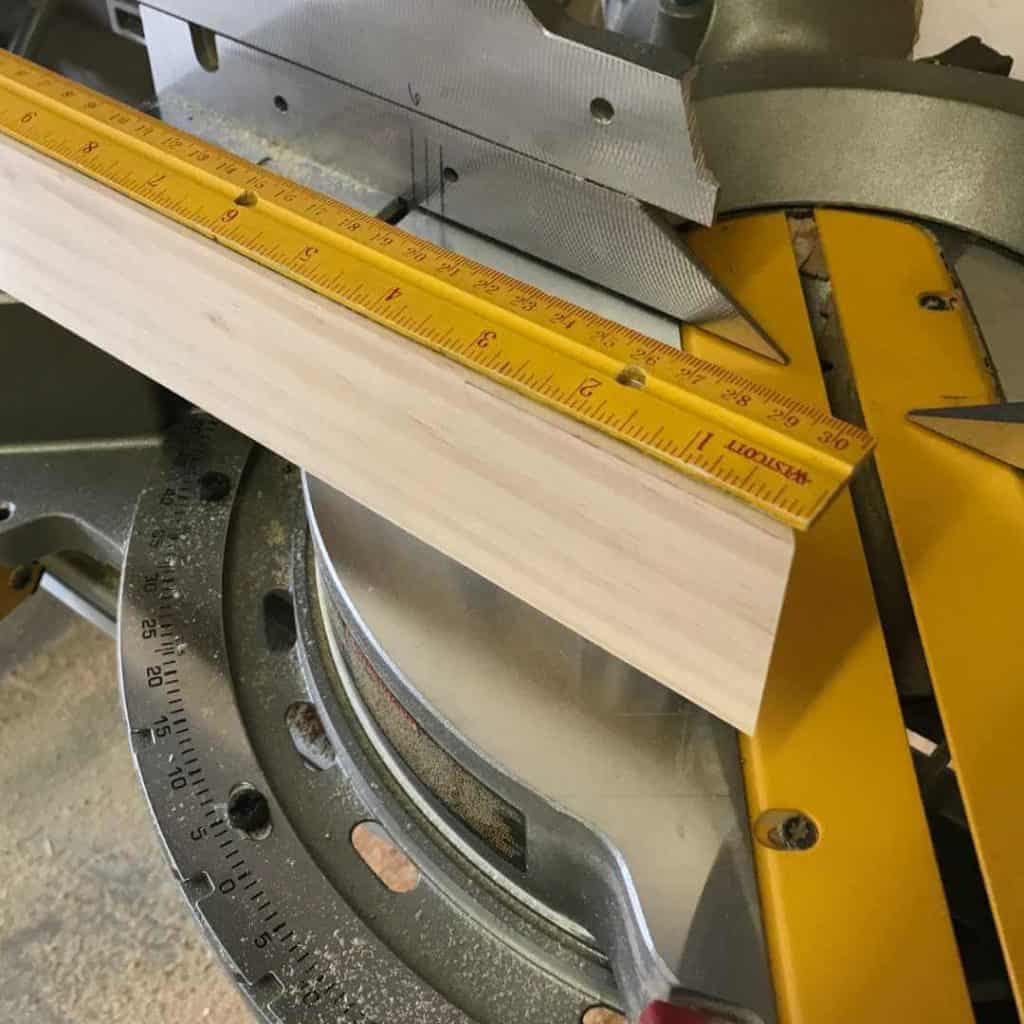
3. On the edge of your 1 x 3, measure 10-3/8″ from the long tip of your 36° angle and make a mark with a pencil.
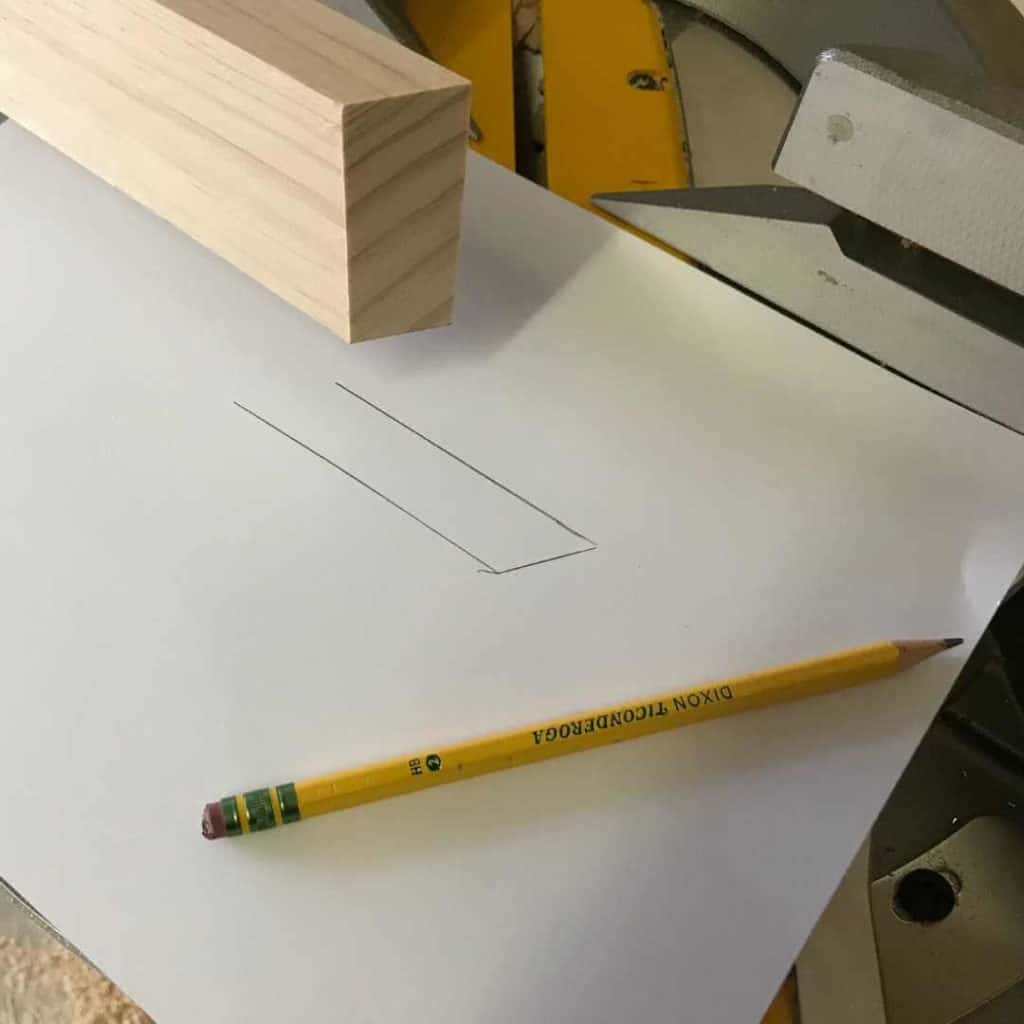
4. Use paper and a pencil to draw the 36° angle, from your first cut, and cut it out to use as a template.
5. Line the template up on your 10-3/8″ mark and draw your 36°, parallel to the first. This may seem unnecessary but getting these first cuts right, will help you later.
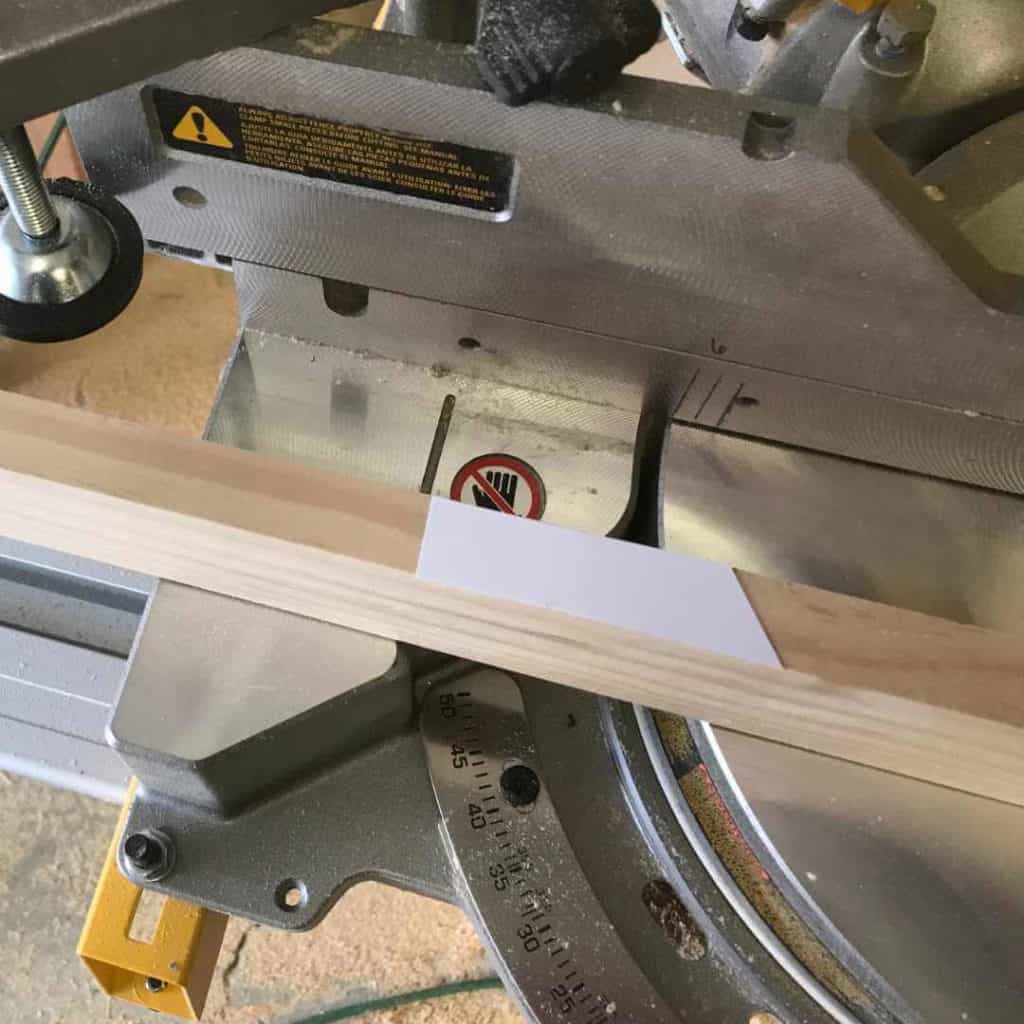
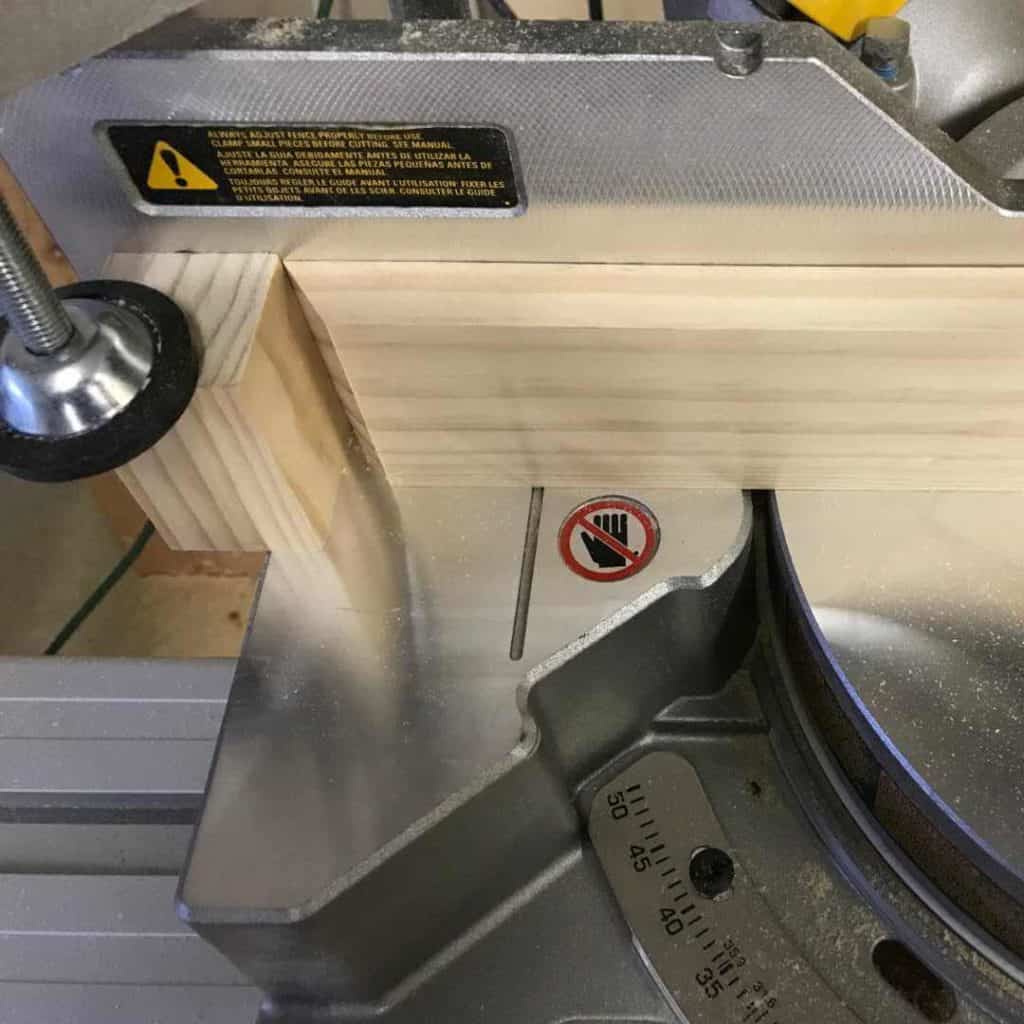
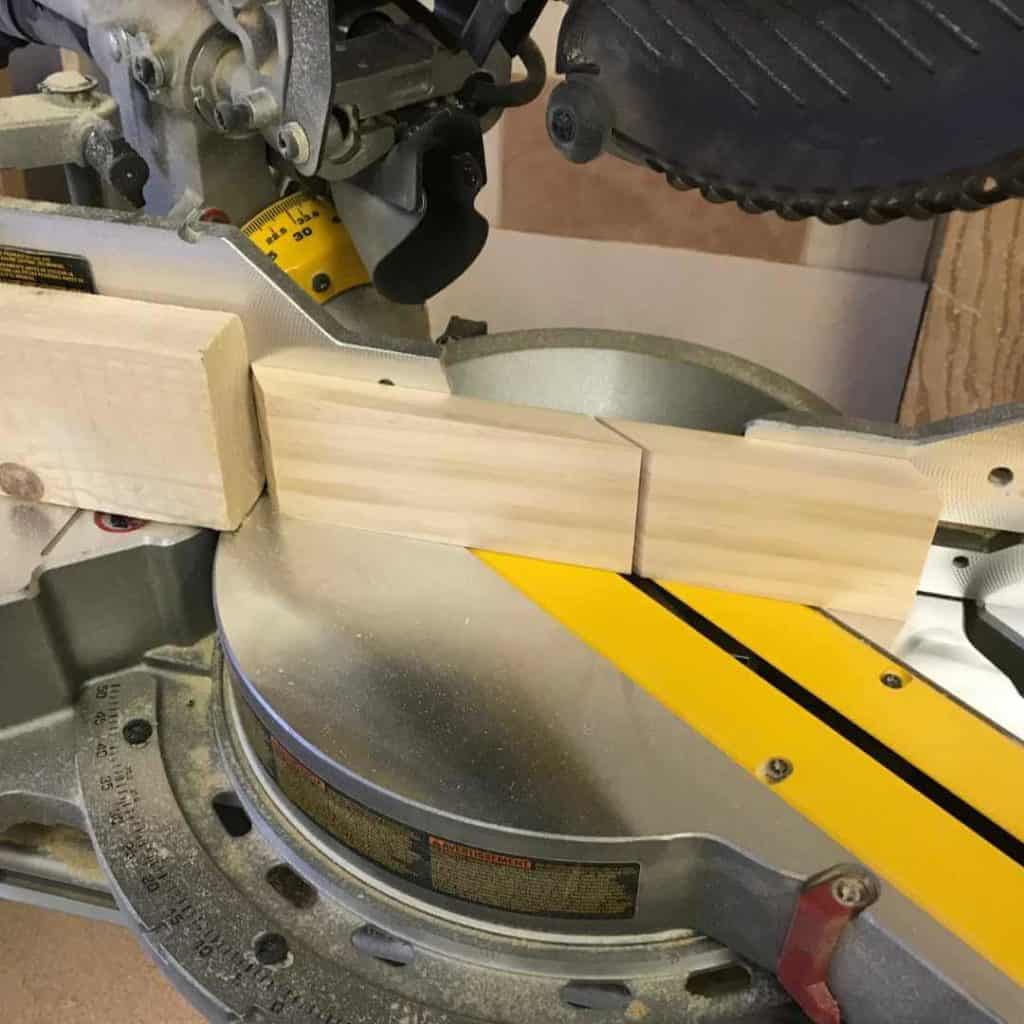
6. Line your miter blade up just to the right of your cut line and set up a stop block. A stop block will make your next five cuts easier and more accurate.
Pictures can play tricks on you when it comes to angles. The picture below shows the long side of the first 36° angle against the back of the miter saw guard and against the stop block so the two 36° cuts will be parallel.
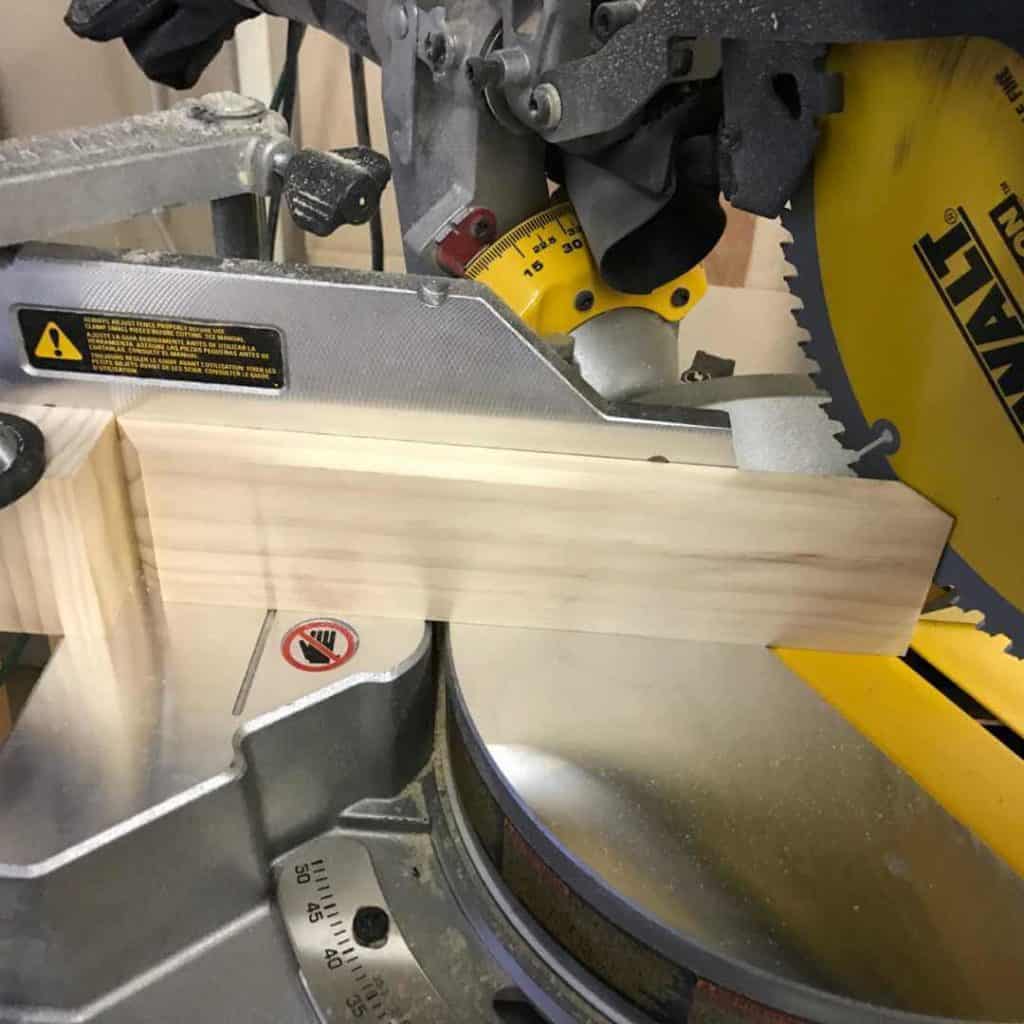
Here’s a closer view to help visualize your angles.
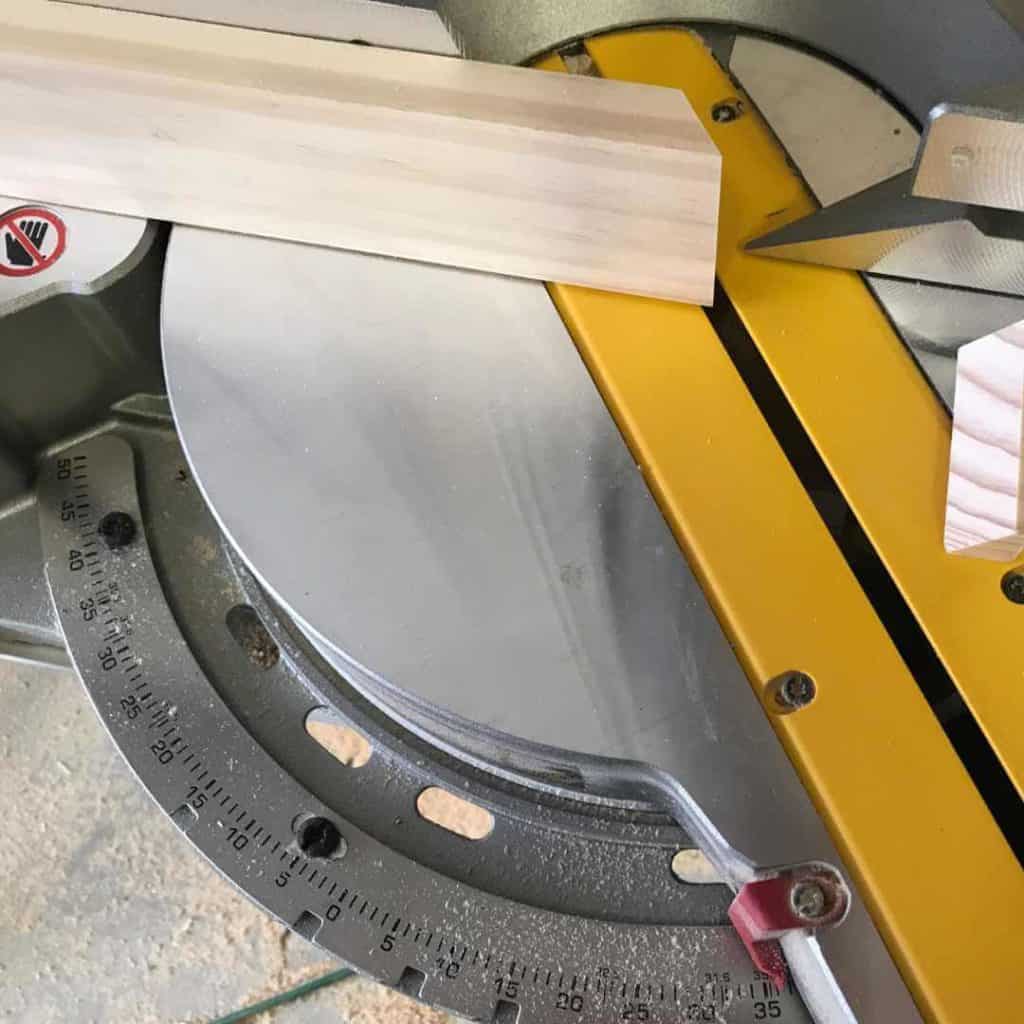
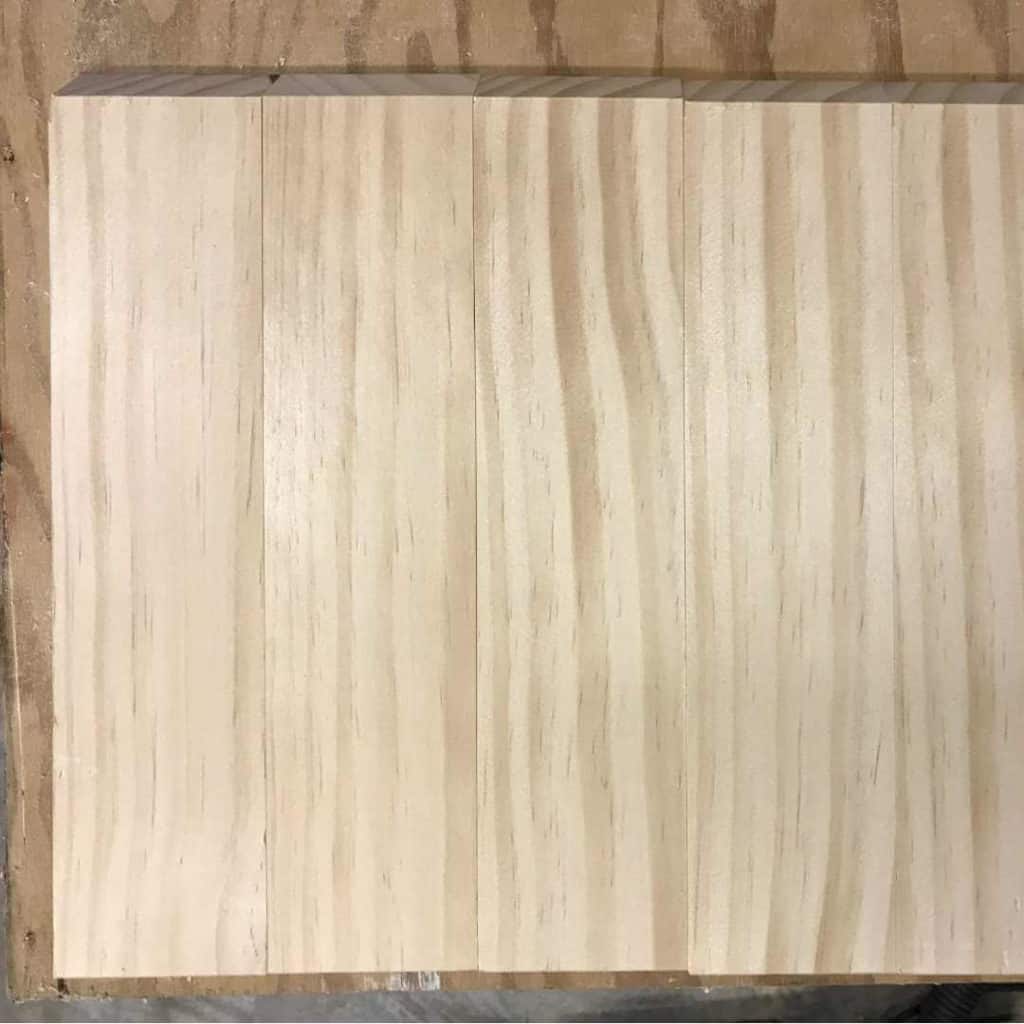
7. Next, you will use the stop block to cut a total of 5 pieces that should be the exact same length with 36° parallel cuts.
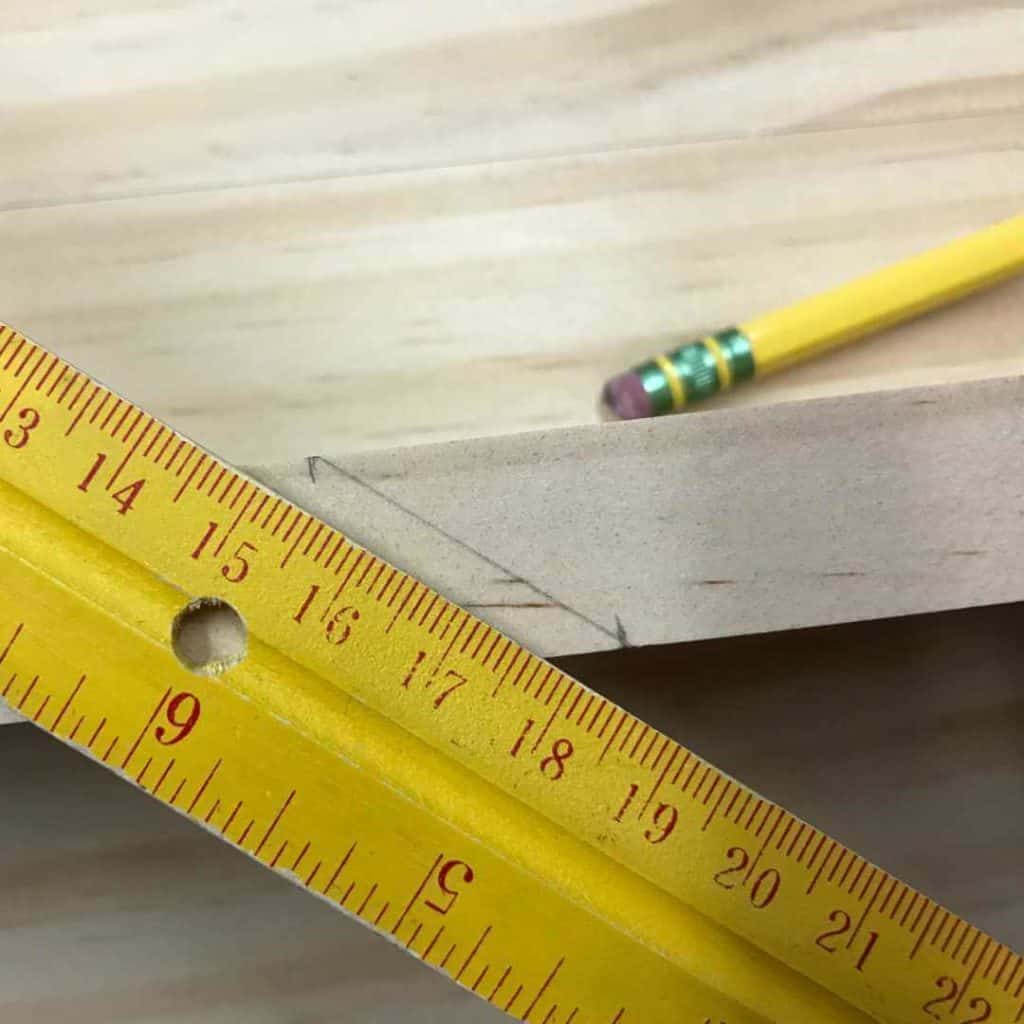
8. From the inner angle, measure 4-3/4″ and make a mark on the edge.
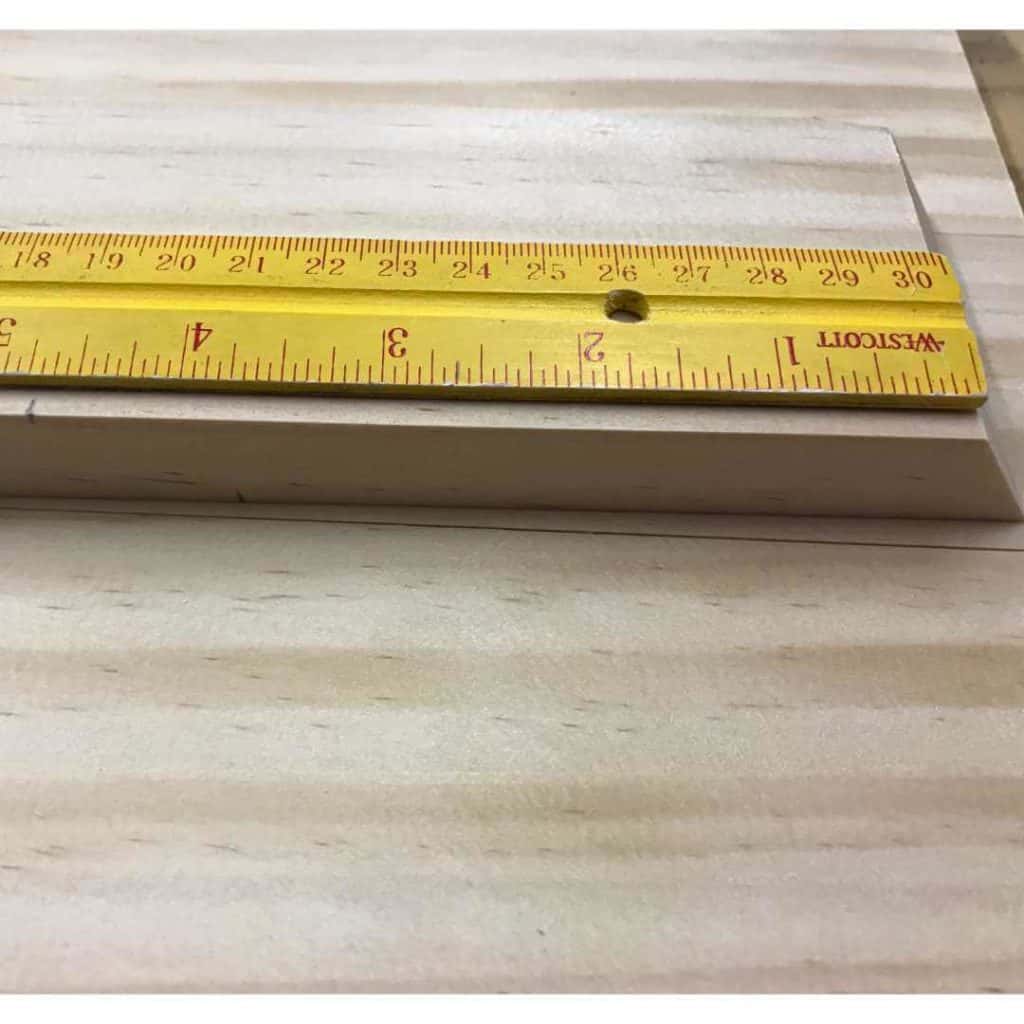
9. Flip your board over and mark 6″ from the inner angle on the opposite end of the board.
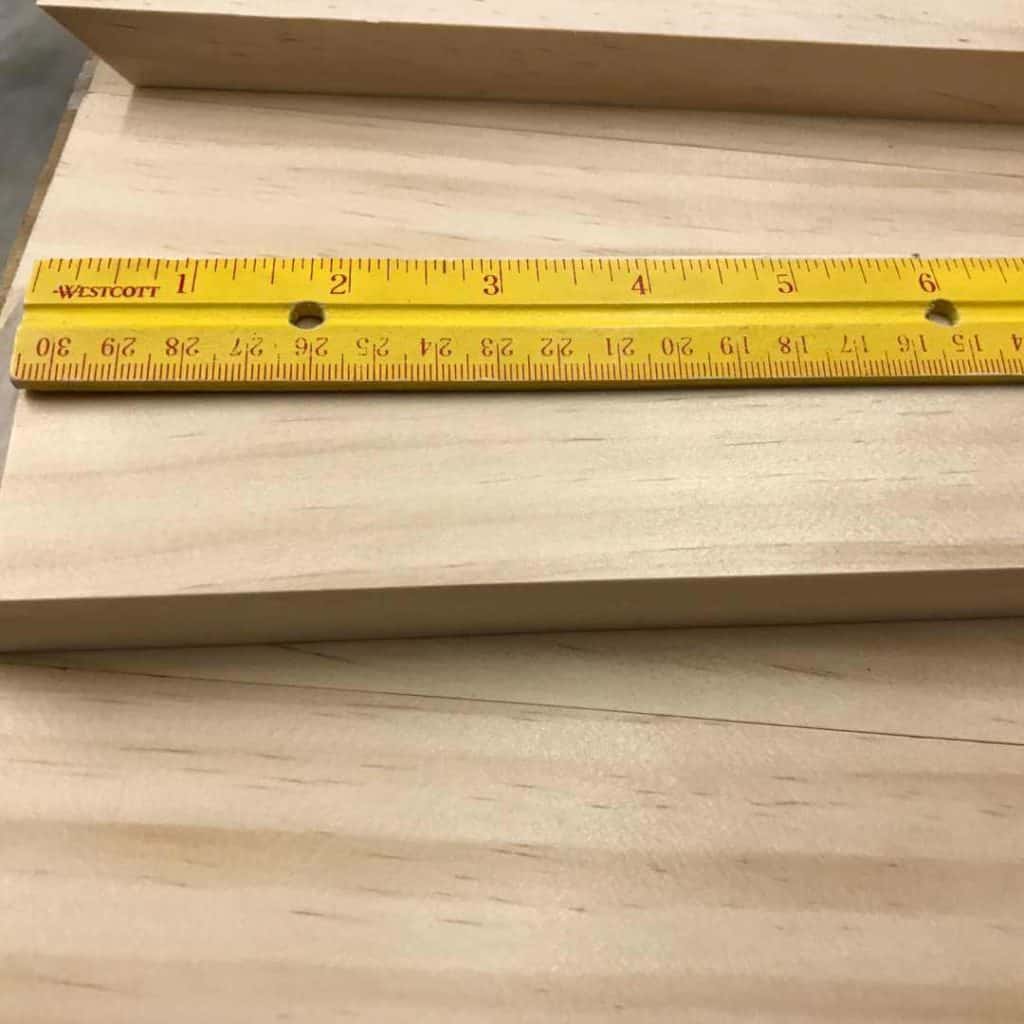
10. You should now have two marks on the edge of your board.
11. Use a ruler and pencil to connect the marks, for a 54° angle.
12. Move your miter saw to a 54° angle. If your miter saw doesn’t go to 54°, check out this quick video on how to create an angle jig. It’s the best explanation I’ve seen!
13. Line the blade up on the pencil line.
14. Set up a stop block.
15. With the long angle at the back of the miter guard, make your 54° cut.
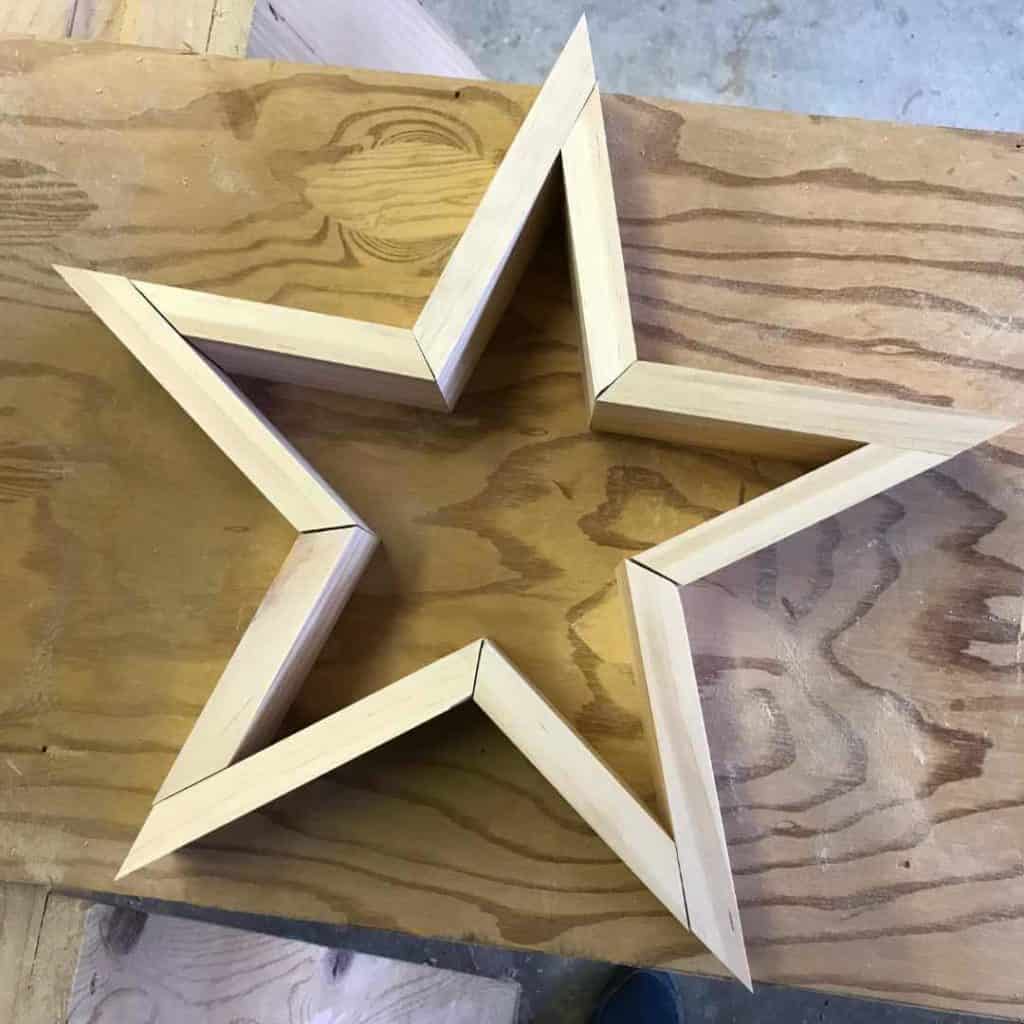
16. Repeat this cut for each piece so you end up with a total of 10 wooden star pieces, 5 short and 5 long.
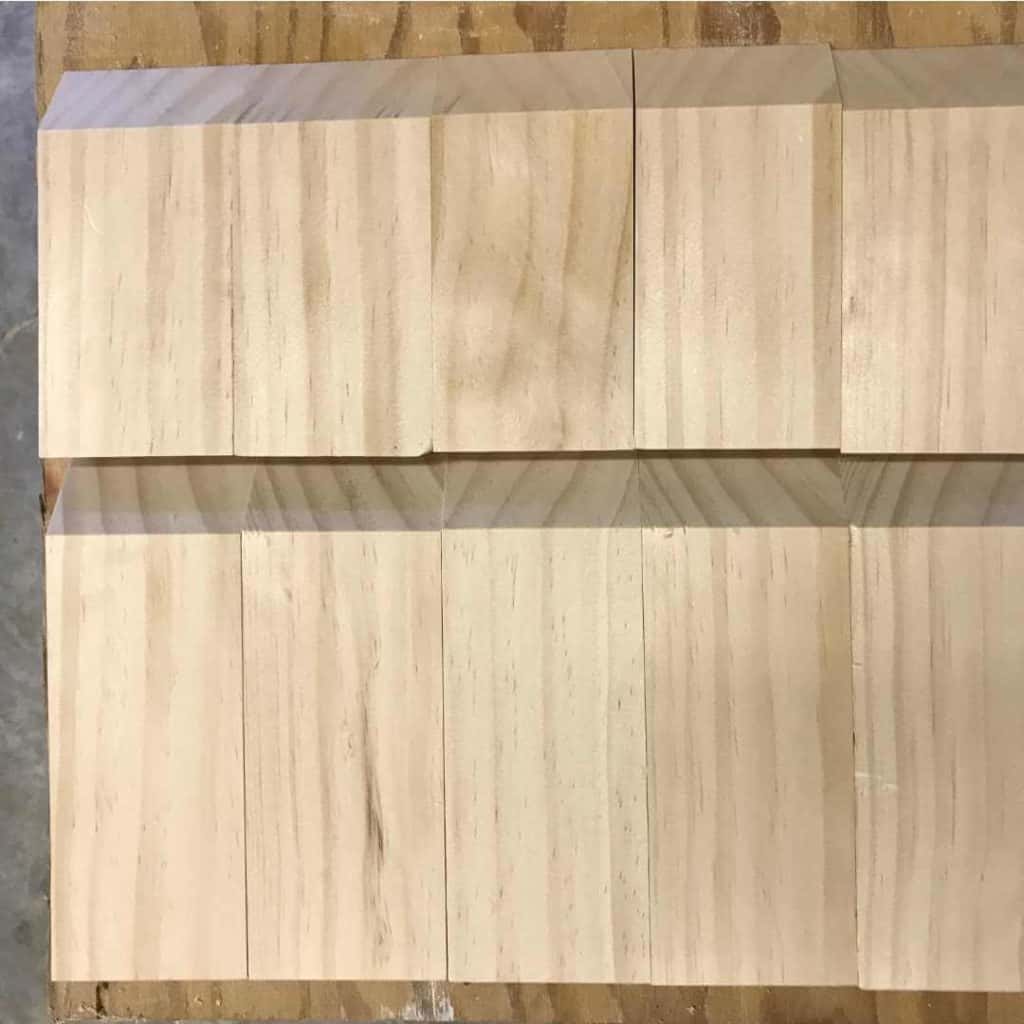
17. Since we purchased nice wood for this star and have a good blade on the miter saw, there isn’t much sanding to do but I went over each piece with 220 grit sandpaper. Since I plan to use homemade wood stain, a quick sand will help the stain.
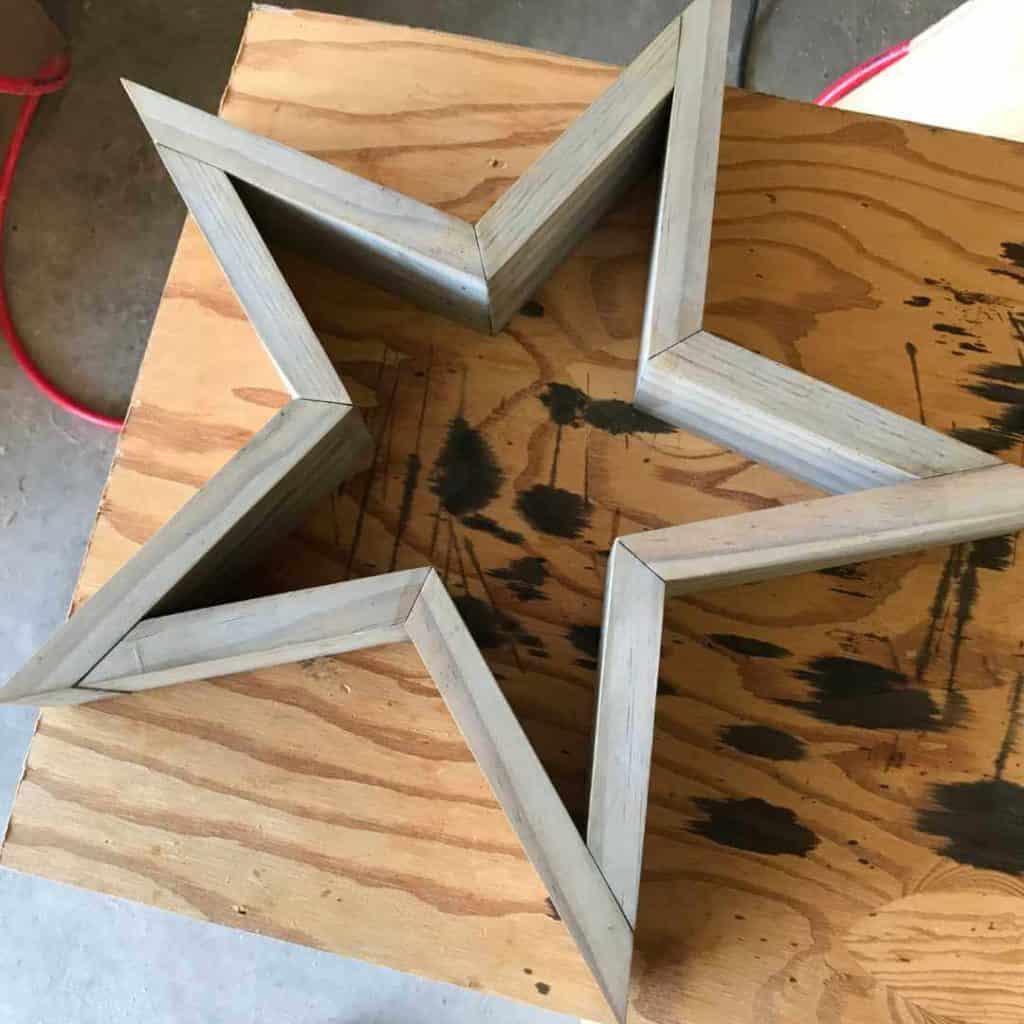
How To Assemble Your Wood Star
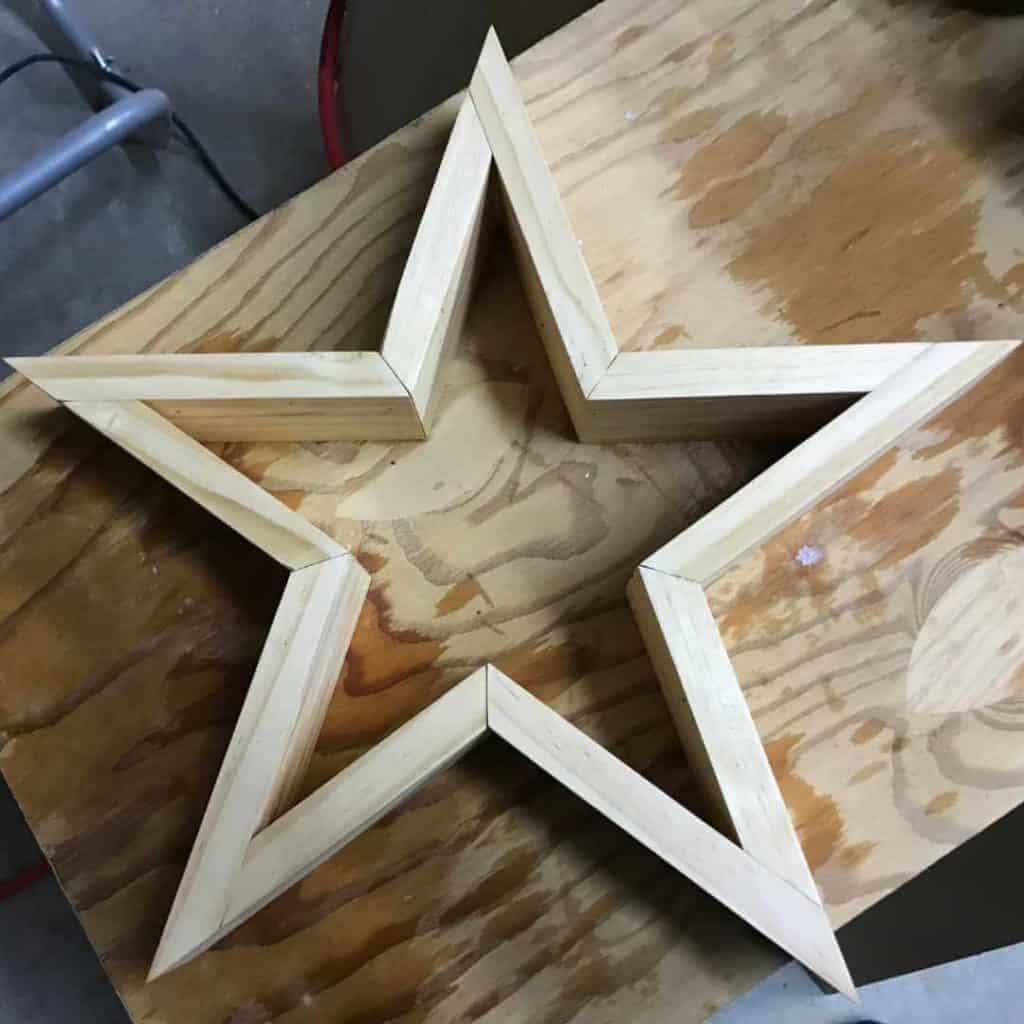
It’s a bit of a puzzle and fun to put the star pieces together!
18. Do a dry fit of your wood star, lining one short piece to one long piece. For the star pattern to fit together nicely it goes long, short, long, short, all the way around.
It’s important to work on a flat surface when placing your pieces together.
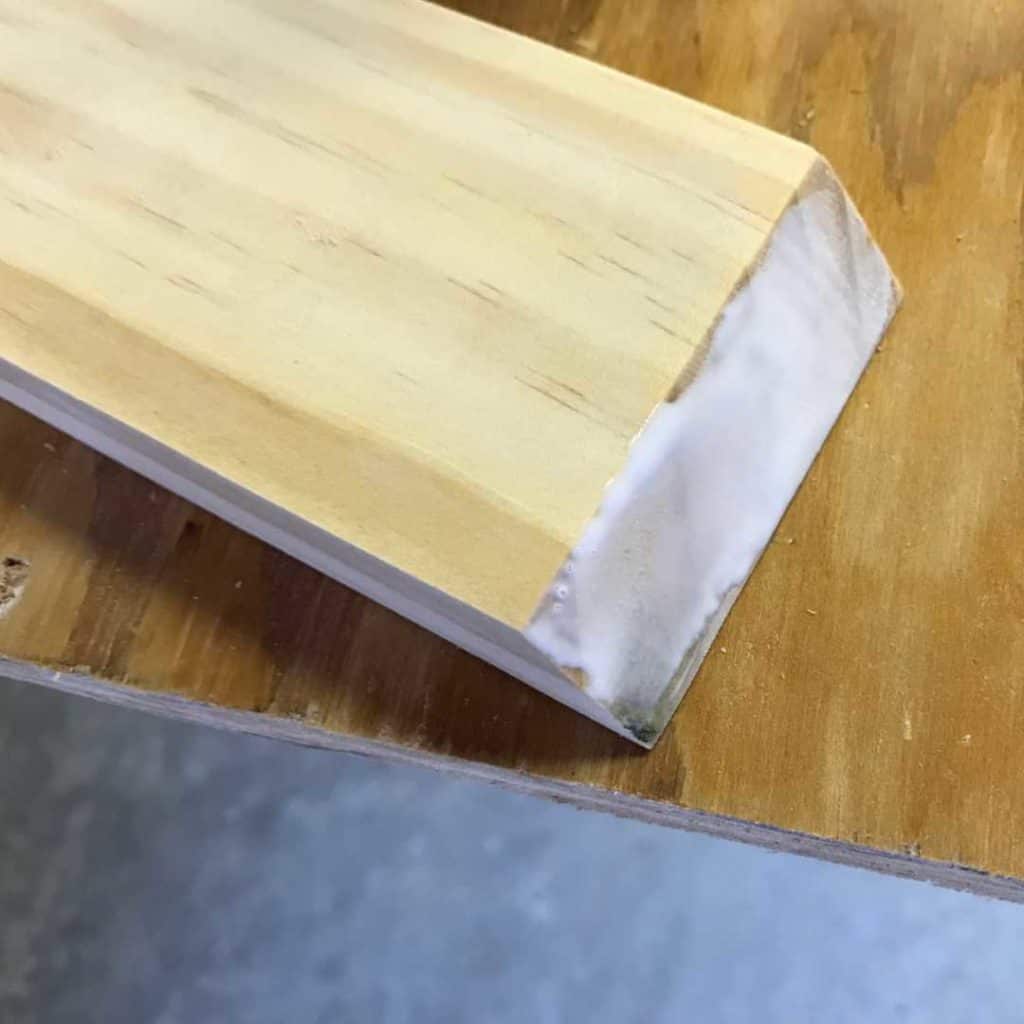
19. Now it’s time to assemble your wood star! Start first by adhering the two 36° angles, one short and one long, using wood glue and a nail gun.
It’s important to assemble the inside v’s first, otherwise, if you assemble each star tip first, you will have a hard time getting the nail gun in the right position to assemble the inside v’s.
20. Next, you can attach the inner v’s together to form the star tips.
Respect the nail gun! Make sure you are placing the nail in a spot where the nail won’t come through the other side and keep your fingers clear, just in case.
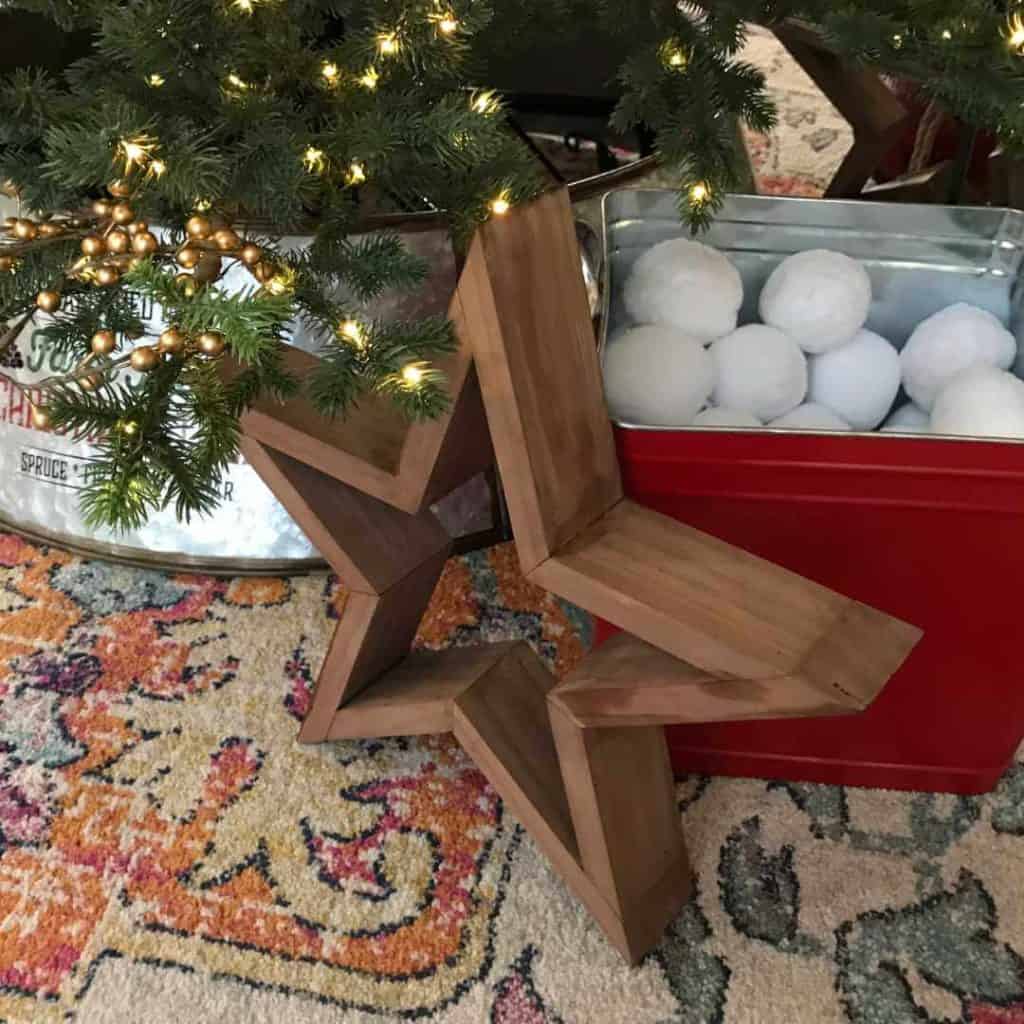
Finish Your Wooden Star
21. Use the finish you like best! Paint, spray paint, stain, or homemade wood stain all work!
I chose to use homemade wood stain which starts with rubbing tea on the star. You can read more about homemade wood stain here!
The picture below has one coat of tea on it. Tea doesn’t change the color much, if at all, but it does prepare the wood for the coat of vinegar, soaked with steel wool.
This is the wooden star with one coat tea and one coat of vinegar, soaked with steel wool.

Here’s the DIY wooden star with one coat tea and two coats of vinegar, soaked with steel wool. The lighting is playing tricks on us but I love the final color!
The next picture is a better representation of the true color of the wood star. With homemade stain, the color changes and deepens over time so you won’t see the true color until it has sat a bit, working its magic!
If you miss a spot of tea on the wood, it will not be the same color as the rest but you can go back over the spot with tea and vinegar soaked with steel wool to correct it. In these pictures, those spots are still a bit damp. I was too excited to take pictures and didn’t want to wait.

It may be a bit challenging to have every angle line up perfectly but I feel like it adds to the rustic look!
I plan to make at least 30 wood stars to give as Christmas gifts this year!
Download Wood Star Instructions Here
These DIY Wooden Stars are a fun way to expend your homemade Christmas energy and give a gift your friends and family will love to use year after year!
Imagine, every time your friends and family unpack their Christmas storage boxes, they will find their wood star and think of you!
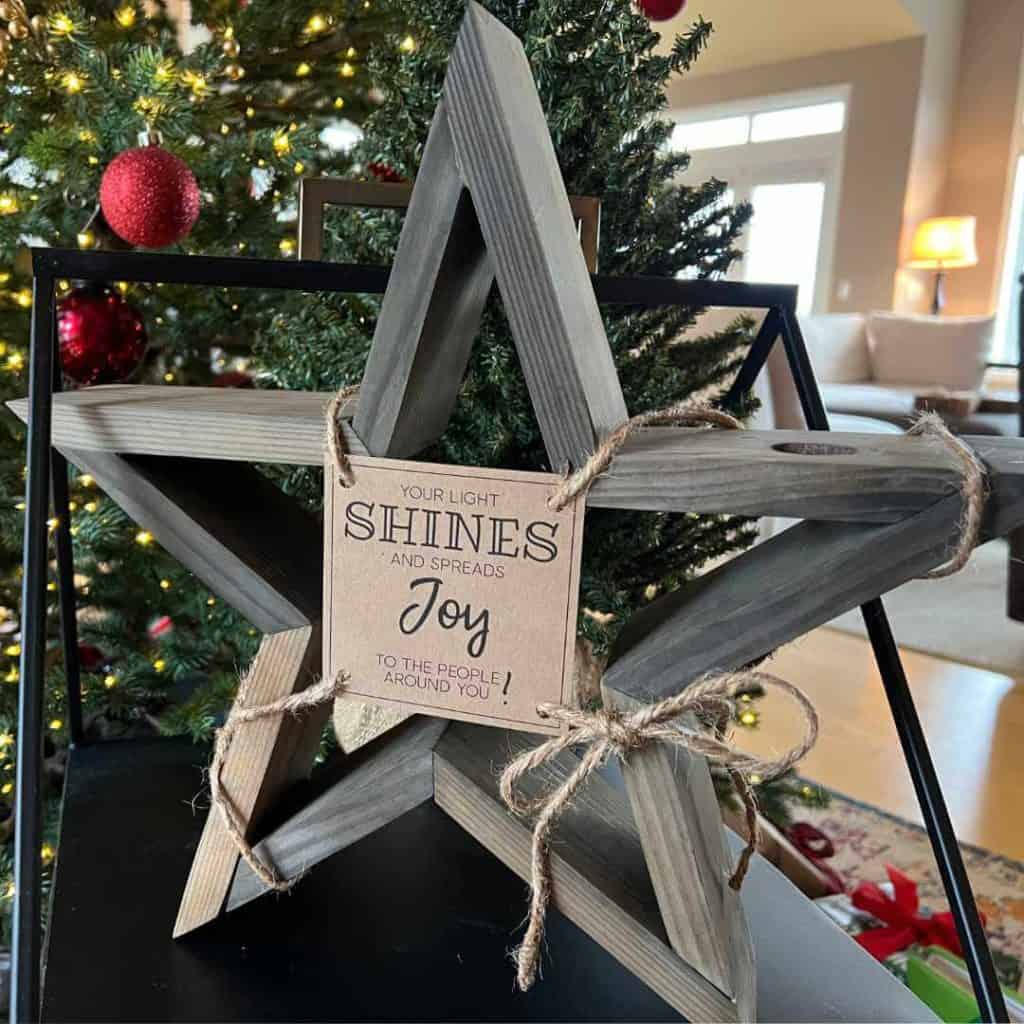
Want To Add A Gift Tag To Your Wooden Star?
These Your Light Shines gift tags are the perfect addition to this wooden star and an excellent way to let someone know you’ve noticed how much their light shines!
More DIY Gift Ideas

Hi! I’m Bridget!
I create printables and DIYs to help you get organized and celebrate special occasions! It’s my mission to inspire you to get creative and find joy in every day!