How To Make A Star From Paint Sticks
Learn How To Make A Star From Paint Sticks with this simple DIY project! Paint paint sticks red, white, and blue, then add white vinyl star stickers for a perfect patriotic touch. This fun and easy craft is great for decorating your home for the 4th of July or any patriotic celebration. It’s the perfect activity for kids and adults, bringing a burst of color and pride to your decor. Get creative and show off your patriotic spirit with this handmade star!
Star Supplies
This post contains affiliate links. When you purchase through an affiliate link, we receive a small commission at no additional cost to you. Disclosure.
- Paint Sticks – You will need five paint sticks to make one star. Hardware stores often have packs of paint sticks you can buy, or, if you’re buying paint, they will usually give them to you for free.
- Red, White, and Blue Paint – We used paint samples we had on hand from other projects. Pick the shades you like best or check out the paint colors I used in the 4th of July 4 X 4 Firecrackers I made. Acrylic paints would work well too!
- Foam Paint Brushes
- Sanding Sponge – Use a sanding sponge to make your stars look a little rustic and to hide any imperfections.
- Wood Glue
- White Star Stickers – We used my Silhouette cutting machine and white vinyl to make the star stickers but if you don’t have a cutting machine, you can find white star stickers to buy or paint stars.
Creativity is the spark that turns simple supplies into something worth celebrating.
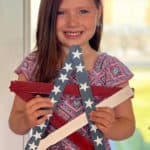
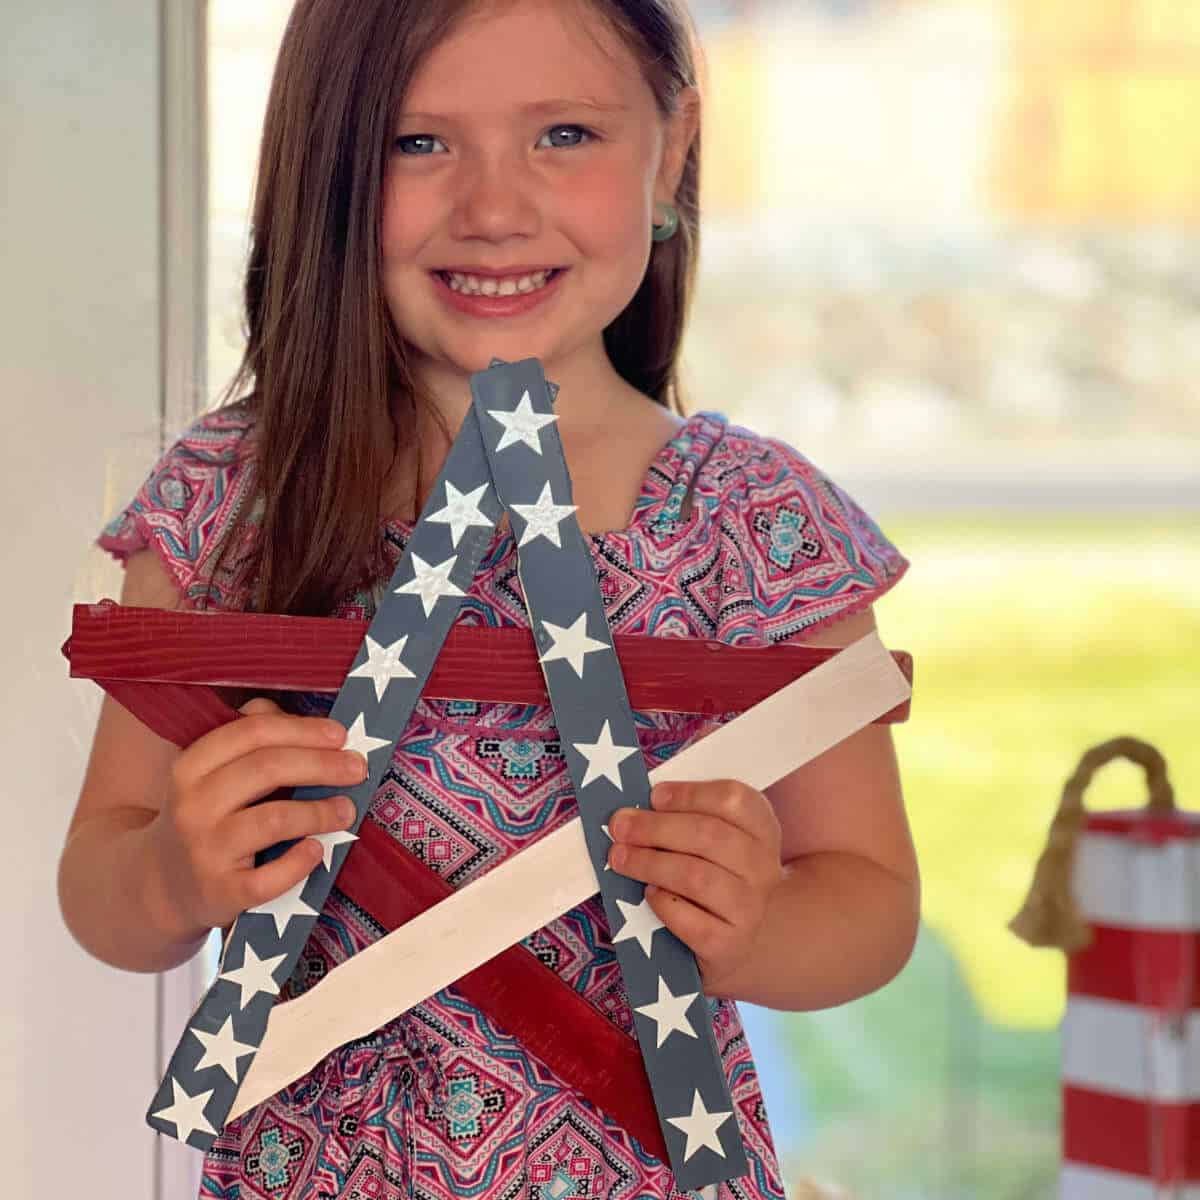
How To Make A Patriotic Star Out Of Paint Sticks
These stars are the perfect 4th of July project for any age. I made these patriotic stars with my 4-year-old great niece and two-year-old great nephew. My 4-year-old niece did great at painting with just a little guidance, and my 2-year-old nephew loves to paint and needed just a little extra help to get full coverage. We didn’t worry too much about paint drips or getting the paint perfect because this project was uniquely theirs, and you can always hide little imperfections with a bit of light sanding.
If you’d rather find a 4th of July craft for little ones that doesn’t include paint, you might want to learn How To Melt Crayons Into Shapes and use a star-shaped mold with red, white, and blue crayons. Or, print a copy of this free 4th of July Coloring Page to encourage a little focus and patriotism!
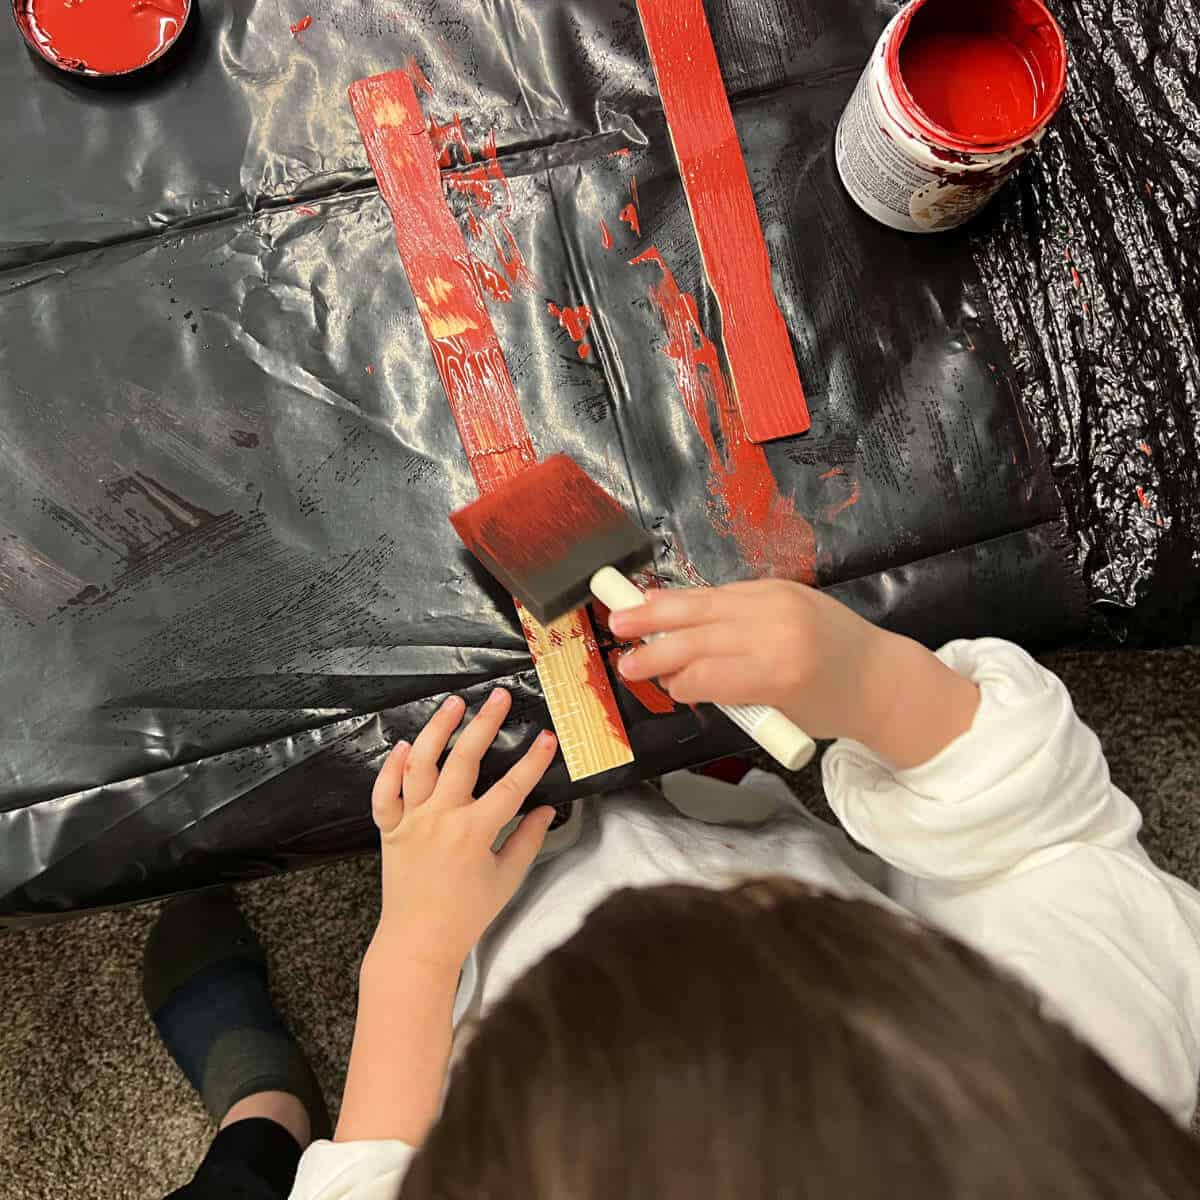
Step 1: Paint two paint sticks red. Paint one side, then paint the edges and the other side once the first side dries. (We used a black garbage bag as a drop cloth.)
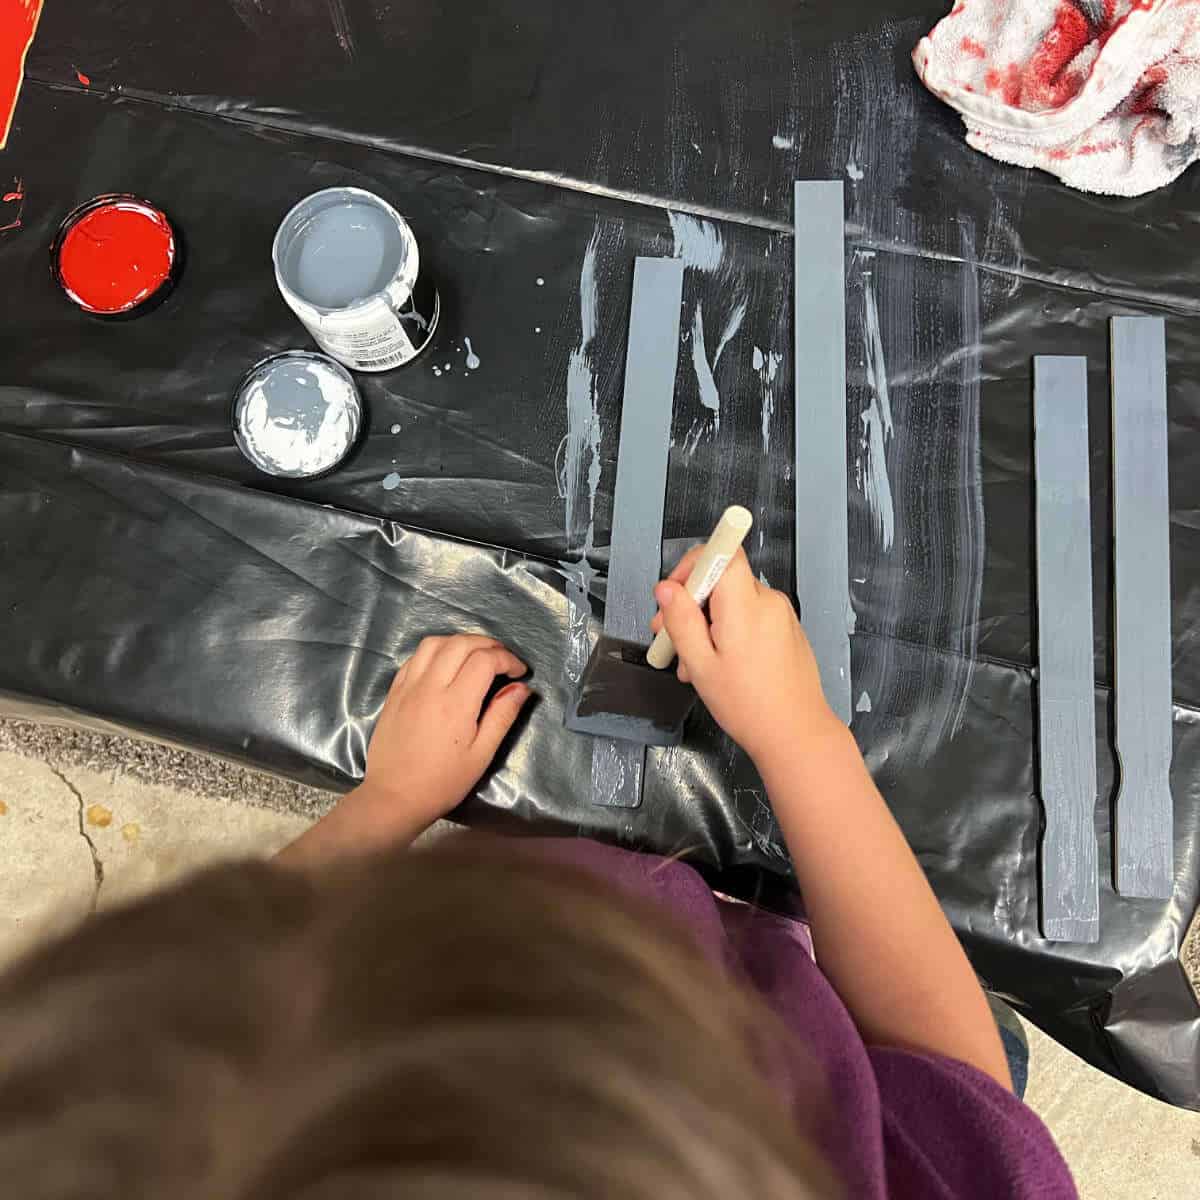
Step 2: Paint two paint sticks blue. Once one side is dry, paint the other side and the edges.
Step 3: Paint one paint stick white. Once the first side dries, paint the other side and edges.
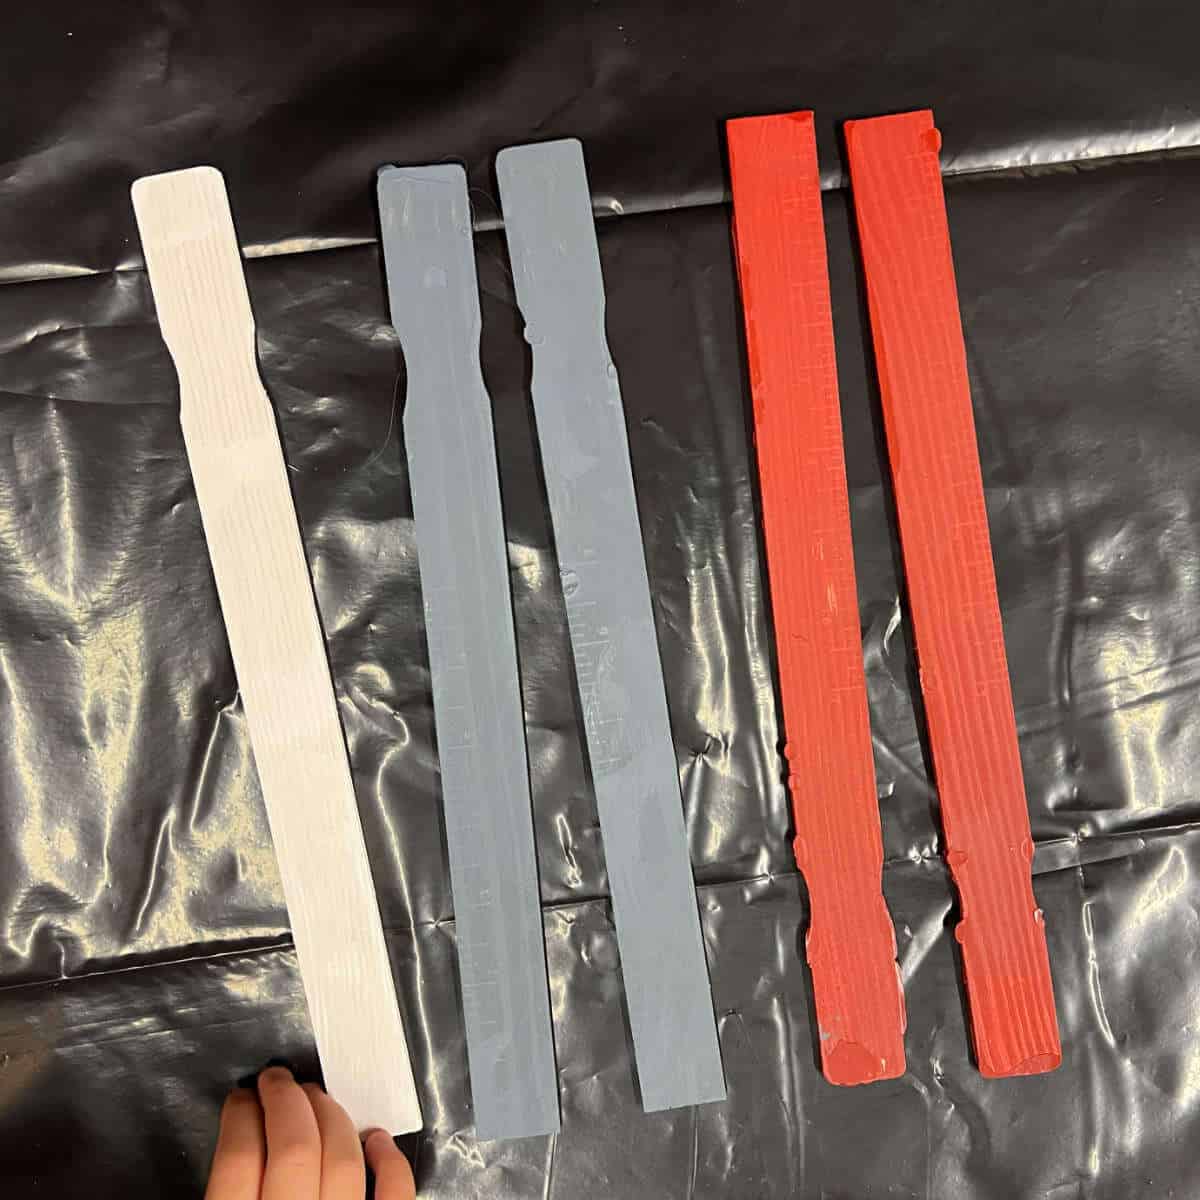
Step 4: Once the paint is dry, do a light sand with a sanding sponge to give your star a rustic look and hide any imperfections. (This is where you can sand off paint drips.)
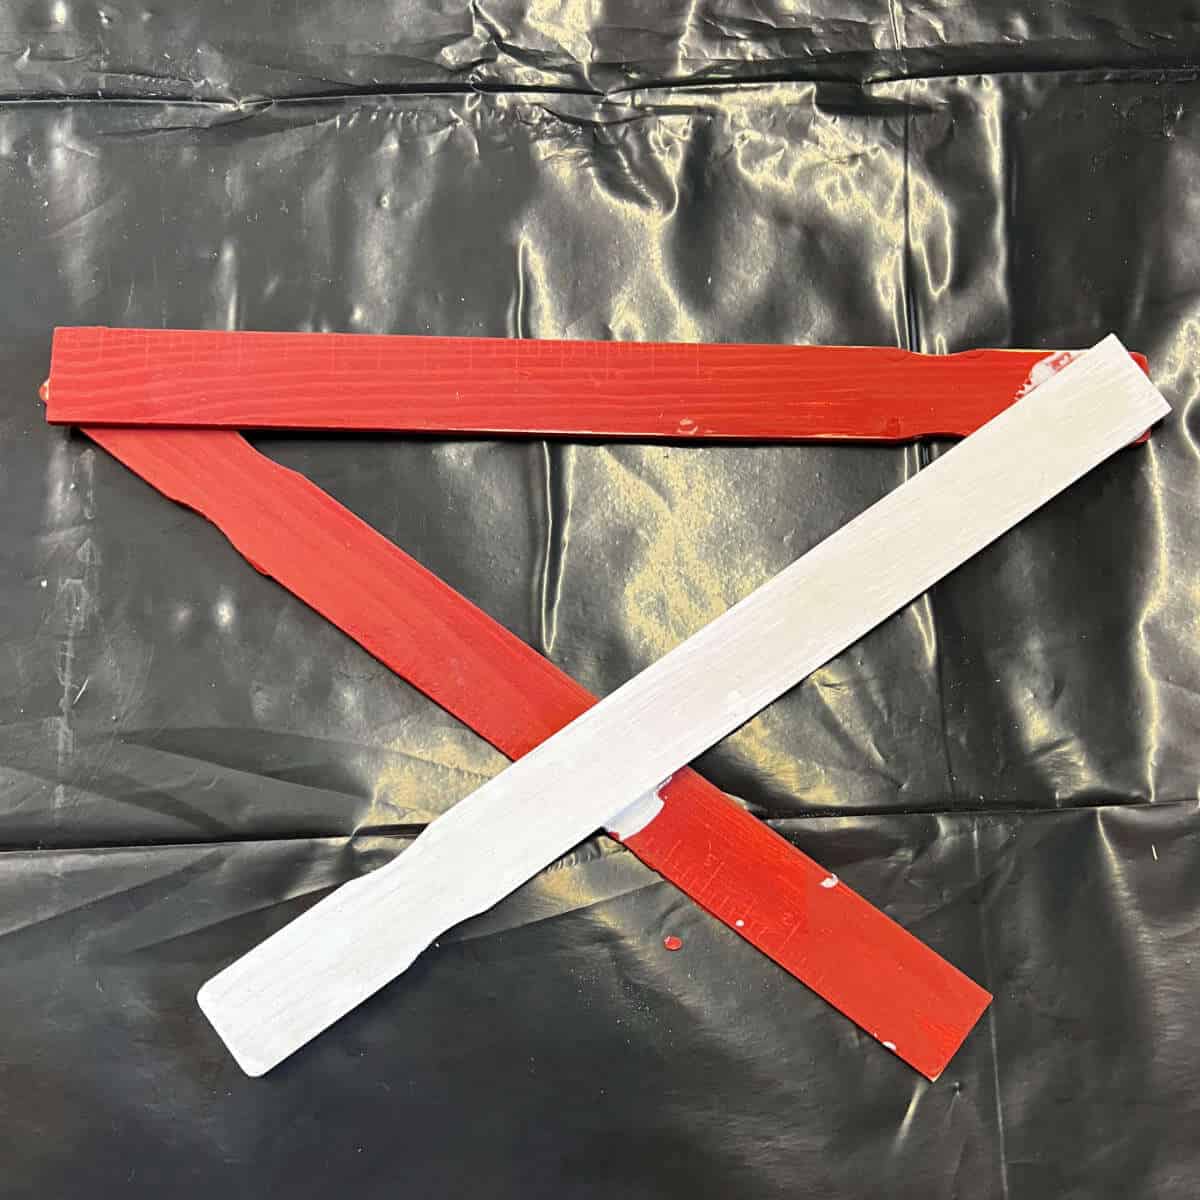
Step 5: Create a V shape with the red paint sticks and glue them together. Then, make the same V shape with the two blue paint sticks and glue them together with wood glue. For our DIY paint stick stars, the opening of the V was six inches (on the inside of the paint sticks).
Step 6: Once the wood glue dries on the V shapes, lay the pieces of your star out to make sure everything lines up. It is very helpful to have both sides of your paint sticks painted because you may need to flip them so your pieces all touch and can be glued at each intersection.
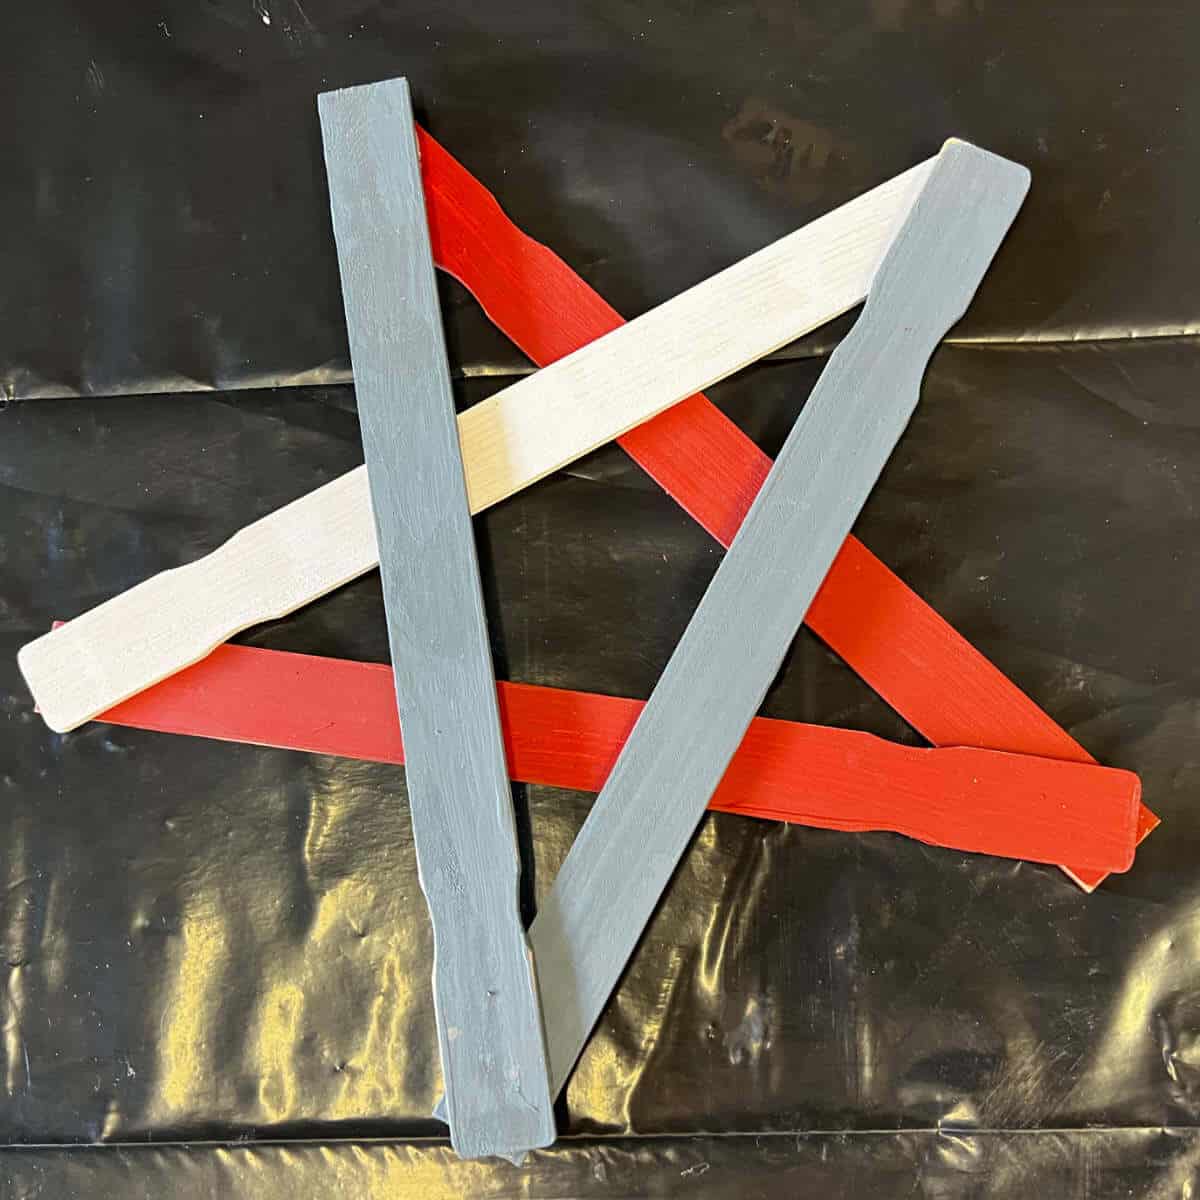
Step 7: Glue the remaining pieces together. We chose to glue the pieces into V shapes first to have better control of the star shape.
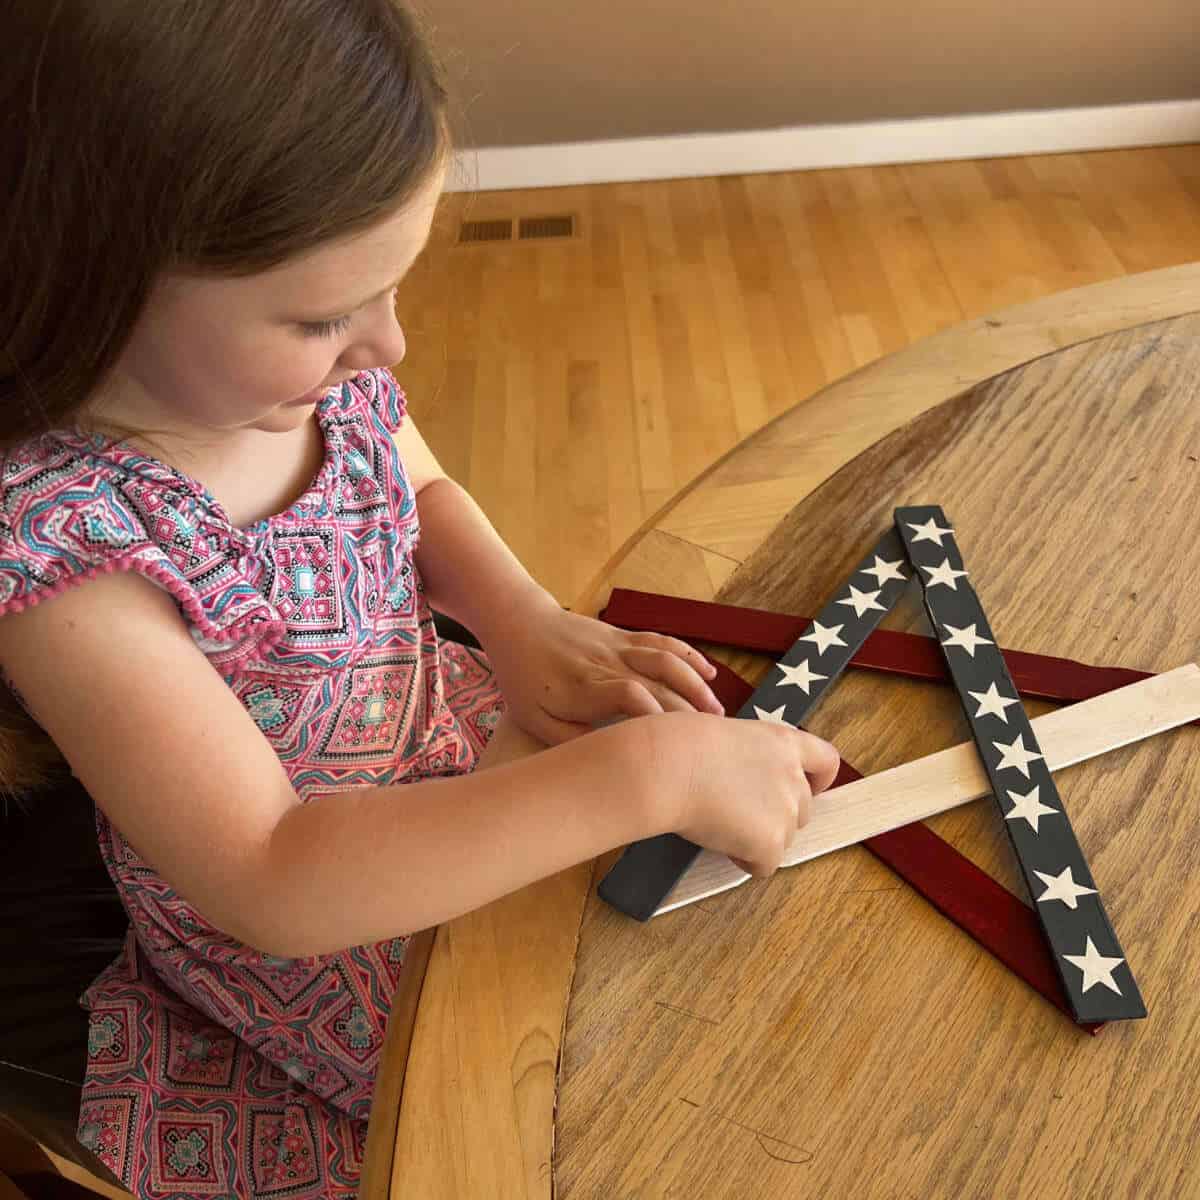
Step 8: Place white vinyl star stickers on the blue paint sticks. I created white stars using my Silhouette cutting machine and white vinyl. My niece had fun placing the stickers on!
How Do You Use These DIY Stars?
These paint stick stars make the perfect 4th of July decoration for home or work, along with this Printable 4th of July Banner. Use these DIY Stars with a centerpiece, on your fireplace mantel, hang them on a door or a wall, or prop one up on your desk to keep you smiling! If you are planning a 4th of July Party, be sure to check out our 4th of July Party Planner and these 4th Of July Party Game Ideas.
Add a touch of patriotic charm to your home with this easy DIY star project. It’s a fun activity for all ages and a great way to celebrate the 4th of July.
Frequently Asked Questions
4th of July Party Ideas
- Planning a 4th of July Party? This 4th of July Party Planner is ready to help you make it a great celebration!
- Print copies of this Who Is The Most Like A Firecracker game and determine who has the fiery spirit of a firecracker. If you are less free-flowing, you might prefer this straightforward version of the game: Who Is Most Like A Firecracker 4th of July Game.
- Find more 4th Of July Party Game Ideas to make your party sparkle with fun!
- This 4th of July Word Search is perfect to have on hand for parties, the office, or at home. Once you find all the words in this word search, you’ll reveal a special surprise!
- Print a few copies of this 4th of July Coloring Page for a little relaxation before the fireworks start.
- End your celebration with a pop of fun with these 4th of July Party Favor Ideas.
4th of July Decor Ideas
- With a little creativity and a few simple supplies, you can learn How To Make A Star From Paint Sticks.
- I printed these Printable 4th of July Banner Flags quite a few years ago and love getting it out each year to decorate our home!
- This Happy 4th of July Sign To Print At Home is the easiest way to decorate your mantel this 4th of July. Just frame it in a standard 8-1/2 x 11″ frame for simple and festive decor!
- These 4th of July 4 X 4 Firecrackers make the perfect DIY for the 4th of July! Over the years, I’ve made different sizes for the porch and mantel and love pulling them out each year!
- When the 4th is over, be sure to save your decor in a storage box. Make it easy to find next year with these 4th of July Storage Box Labels. We always love opening our holiday boxes. It’s fun to see what’s inside!
4th of July Gift Ideas
- If you want to wish someone afar a Happy 4th, this Printable Happy 4th of July Card is free to print!
- Do you know someone who has a Birthday on the 4th of July? This Printable 4th of July Birthday Card is perfect for the occasion!
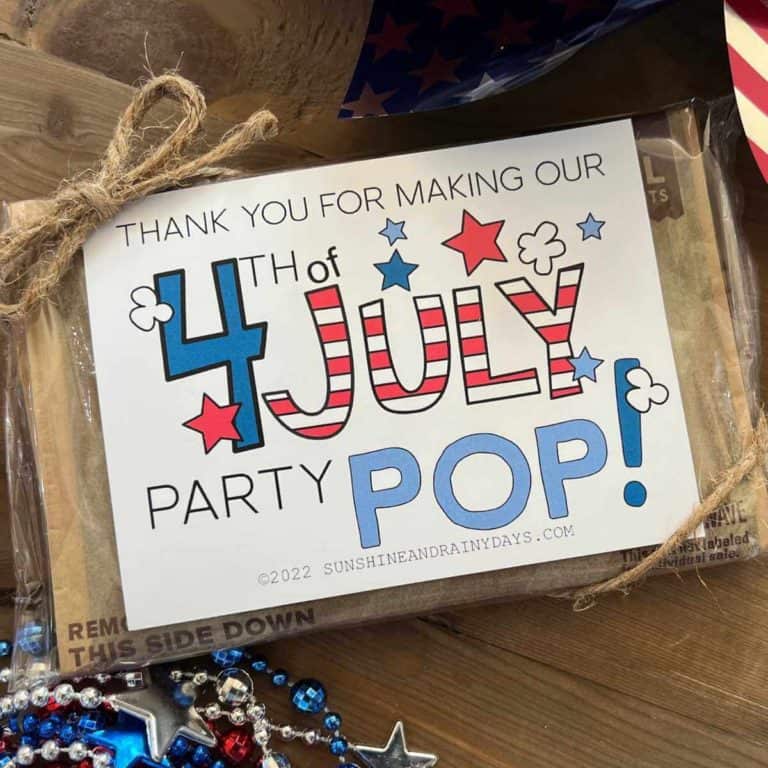
- Want to make the 4th of July pop at work, school, church, and everywhere you go? Put this Poppin’ 4th Of July Microwave Popcorn Tag on bags of microwave popcorn for a simple and inexpensive gift that everyone will love!

Hi! I’m Bridget!
I create printables and DIYs to help you get organized and celebrate special occasions! It’s my mission to inspire you to get creative and find joy in every day!