How To Build A DIY Corner Bookshelf Out Of Wood
How to build a DIY Corner Bookshelf that is a functional piece of art!
When we started moving things back into our remodeled daylight basement, we discovered Justine needed a new bookshelf. We were also concerned about noise levels coming from the drum set, where my son’s band practices. So, we decided to build a bookshelf to put in the basement living area to hold books and absorb noise.
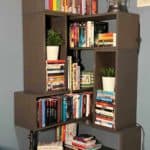
I had the idea of building simple boxes to create a bookshelf and suggested we make it a corner bookshelf in order to maximize sound absorption. My daughter, Justine, came up with a design, and what she came up with was a beautiful piece of furniture that is more like an art piece!
If you’re interested in building a DIY corner bookshelf, Justine has written out the steps!
1. Measure available space for your corner bookshelf.
Our first step was to measure the space we had to work with. We determined that we wanted a corner bookshelf that spread across both walls it was against. We determined how tall and wide the bookshelf could be on each wall, taking into consideration a speaker and outlet on the right and a gas stove on the left.
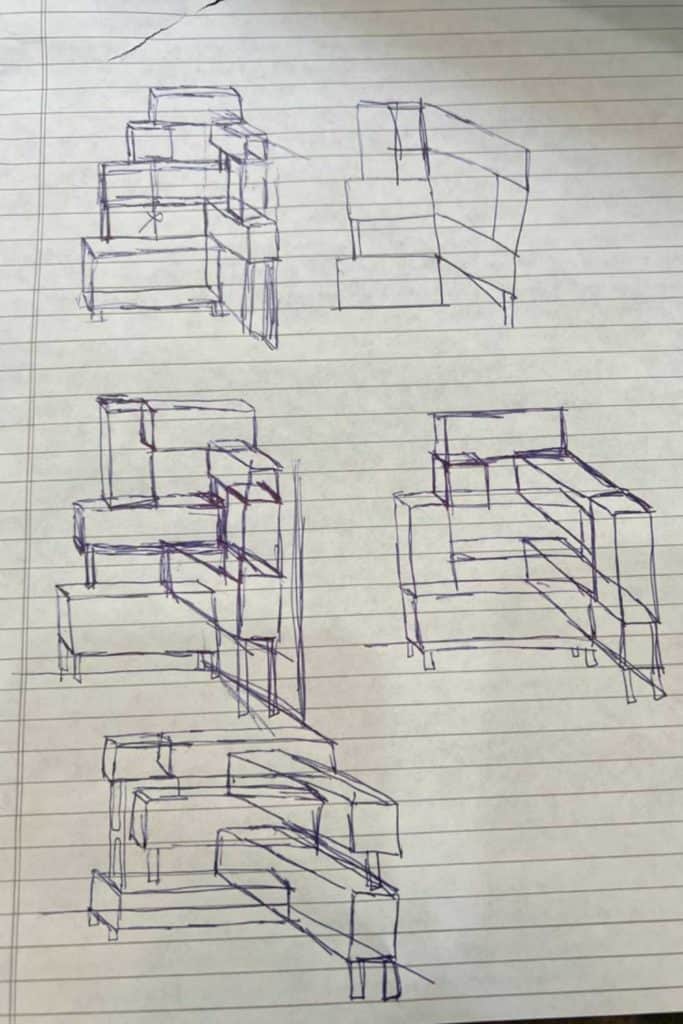
2. Come up with a feasible design, with specific measurements.
After measuring our space, we came up with a design, including the number of boxes we wanted to build and how they would be structured together.
3. Buy the necessary boards for your design.
This post contains affiliate links. When you purchase through an affiliate link, we receive a small commission at no additional cost to you. Disclosure.
We used 1″ x 12″ select pine boards for our bookshelf, in 8′ lengths. One thing to keep in mind is that we found the 1 x 12 select pine boards in 8′ and 4′ lengths were different widths (at Lowe’s). So, if you purchase both lengths, off the shelf, you will likely need to rip the 4′ to match the 8′ width. If you don’t have a table saw, you may want to avoid this altogether and go with one length or the other, for consistency.
4. Cut the boards to the desired lengths for each box.
Using the design created in step 2, we cut our pine boards to the length we needed for each of our boxes.
The long boards fit inside the short end pieces, so we deducted 1-1/2″ to come up with our long board lengths. For example, if we wanted our box to be 29″, we deducted 1-1/2″ (the width of two end pieces) and cut the long board at 27-1/2″.
Find our exact box dimensions below!
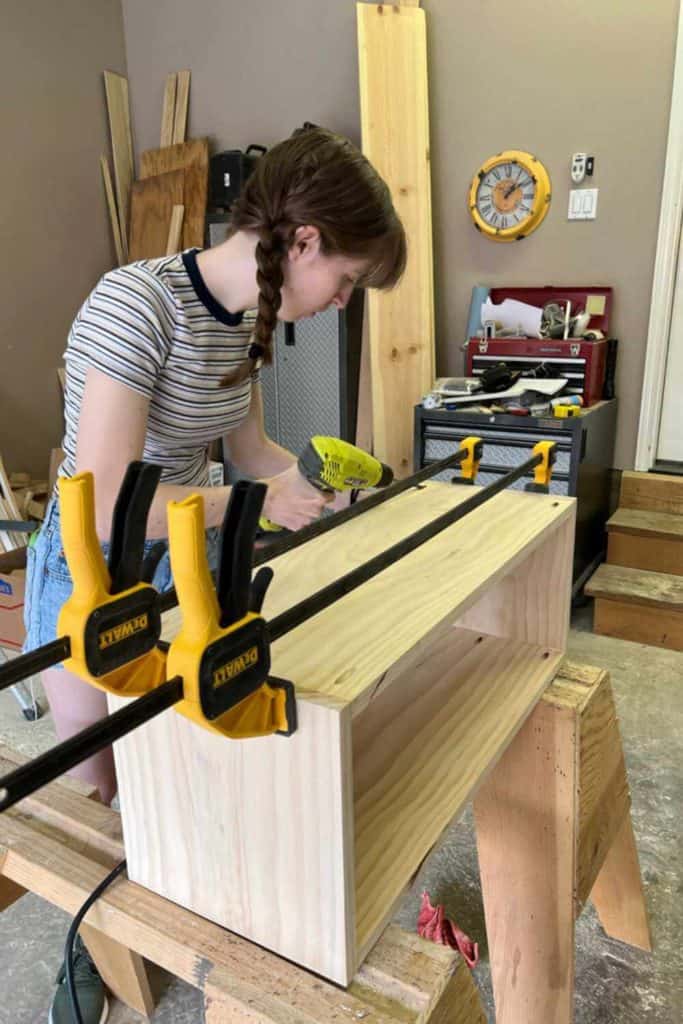
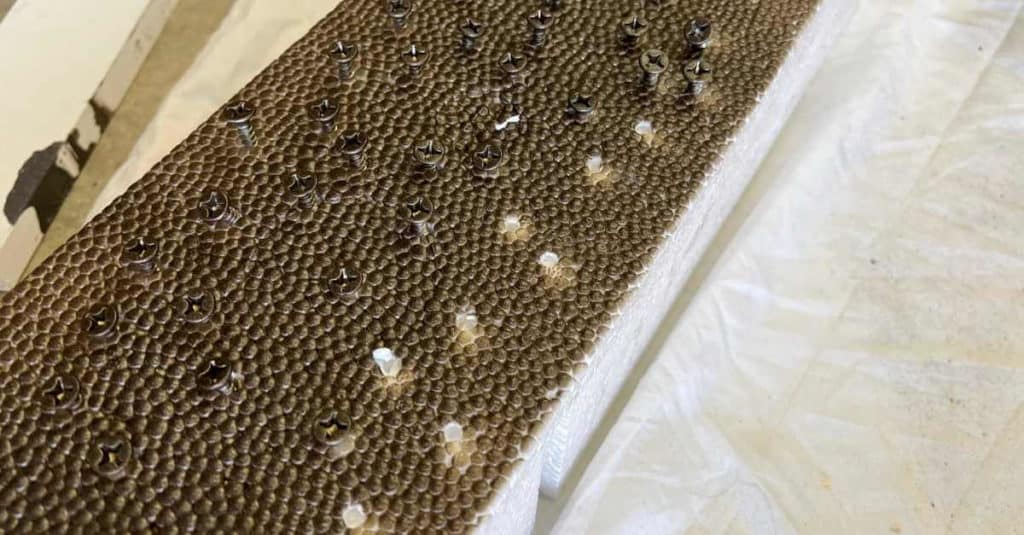
5. Drill pocket holes.
We drilled three pocket holes at each end of the long boards, using a Kreg Jig.
6. Sand each board.
After the boards were cut and had pocket holes, we sanded them to remove any rough edges. Select pine boards usually don’t require a lot of sanding but we gave them a quick sand with 220-grit sandpaper.
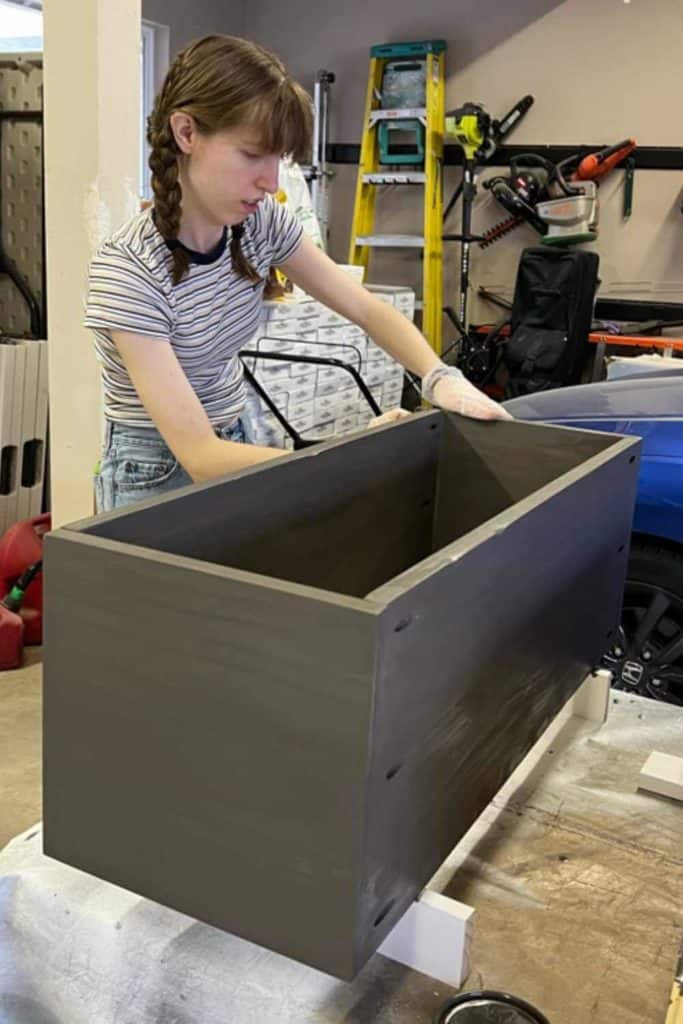
7. Assemble the individual bookshelf boxes.
After sanding, we took one long board (the top of the box) and attached it to the short boards of the box, using pocket holes. We attached the boxes so the pocket holes would face down. Then, we attached the last long board to the short boards at the bottom, with pocket holes facing down.
8. Stain the wood boxes.
When all the boxes were assembled, we used a dark stain and applied it to all of them. The stain we used was Briarsmoke by Varathane. This step is really up to preference. You can use a darker stain, like us, or use a lighter stain, or even paint using your desired color.
Often, we use homemade wood stain, but find, with select pine, it takes many coats to get a dark, rich color, so we opted for Varathane on this bookcase.
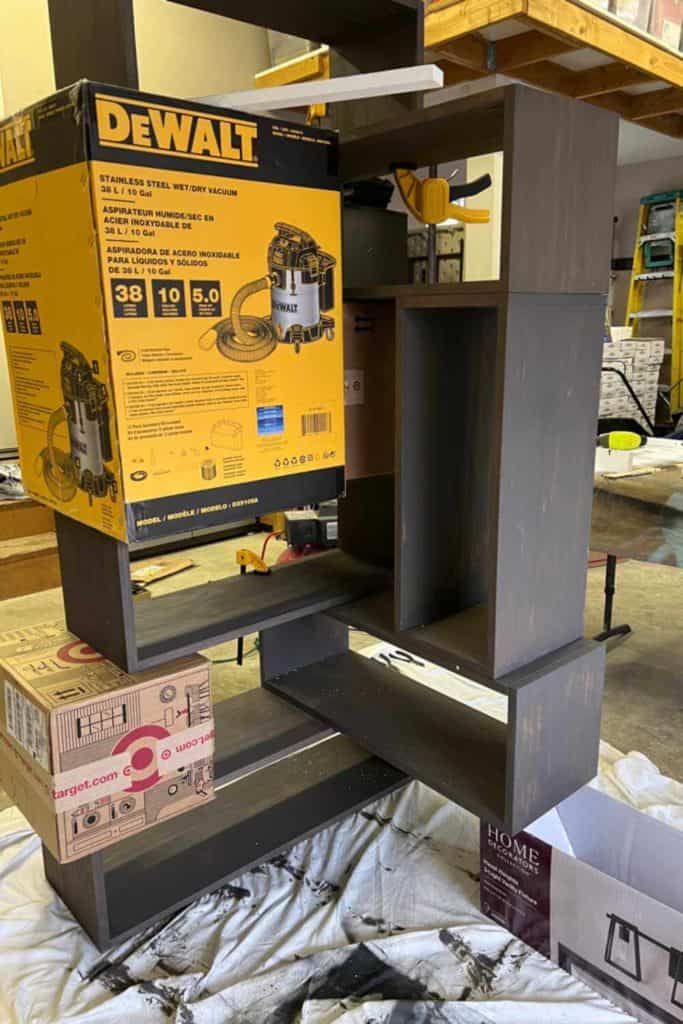
9. Attach the boxes together.
This step is when the bookshelf really starts to come together. We waited 24 hours for the stain to dry before putting the boxes together. Using our design, we attached all the boxes together. We decided to drill from the bottom up. So the top of a bottom box was drilled into the bottom of the box above it. To accomplish this, we first drilled holes where we wanted to put finish screws, at the top of the boxes. Then, we screwed in our finishing screws that were long enough to screw into the box above, attaching two boxes together.
We attached the boxes, upright, stabilizing each layer with cardboard boxes as we went. We found it was easier to make sure the bookshelf was straight/level by building it the way it was going to be presented.
10. Figure out the necessary height for the iron pipes and stability.
First, we determined the height necessary for the iron pipes attached, as legs, to the bottom box of the bookshelf. We determined that we needed 4″ iron pipes on the bottom shelf box so the bookshelf would be higher than the baseboards. We wanted the bookshelf boxes to sit against the wall, so we set the pipe legs in enough to clear the baseboard.
Based on the leg height of the lowest box, we determined the height needed for the iron pipes between the second box and the ground.
Finally, we measured the spaces between boxes where we needed to attach an iron pipe for support.

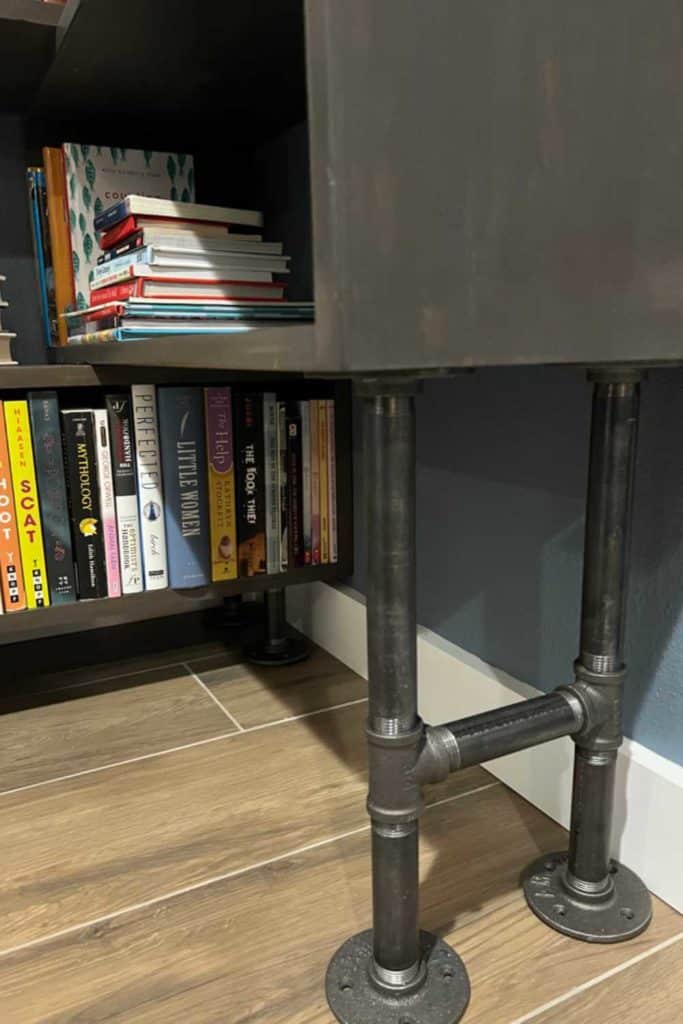

11. Drill holes in wooden boxes where iron flanges will be placed.
We attached iron pipes to the main wooden structure of our bookshelf by using flanges. The iron pipes twist into the flanges, and the flanges can be attached to the wood using screws. We determined where we wanted our iron pipes to be attached to our wood structure.
12. Attach flanges to the bottom wooden box.
Four iron pipes would be the ‘legs’ for our bottom box. We placed our iron flanges where we desired them to be at the bottom of the box and drilled holes through the screw openings. We then drilled four screws into each flange, attaching them to the bottom box. Lastly, we twisted on the iron pipes and bottom flanges for stability.

13. Configure iron pipes and attach flanges.
For our second box up, one side was resting on the first box below. On the other side, we attached two iron legs that were connected via a crossbar iron pipe. We attached the flanges to the box without realizing that we couldn’t attach the iron pipe structure to the flanges that were already screwed in. So, we had to detach the flanges and assemble the legs as a whole, then screw them back into the second box.
We also used two iron pipes for structural support between different boxes on the bookshelf. We measured the gap between the boxes that needed pipe support. Since the measurements were unique, we had to build support using multiple iron pipes connected together. For example, one gap was 11-1/2 inches, so we used three 3-inch iron pipes with two connectors in between (at an inch each). The structure added up to 11-12 inches and fit snugly in the opening.
14. Attach all iron pipes to the bookshelf.
Once all the iron pipe supports were constructed, we determined where to attach them to the wooden structure. We placed the pipes where we wanted them to be and drilled holes into the wood structure.
Then we drilled screws into the holes of the flanges, attaching them to the wood structure.
Note: We bought #10 x 3/4″ wood screws, in silver, so we spray painted the screw heads in the same color as the iron pipes so they would match.
15. Apply Wipe-On Poly to your shelf.
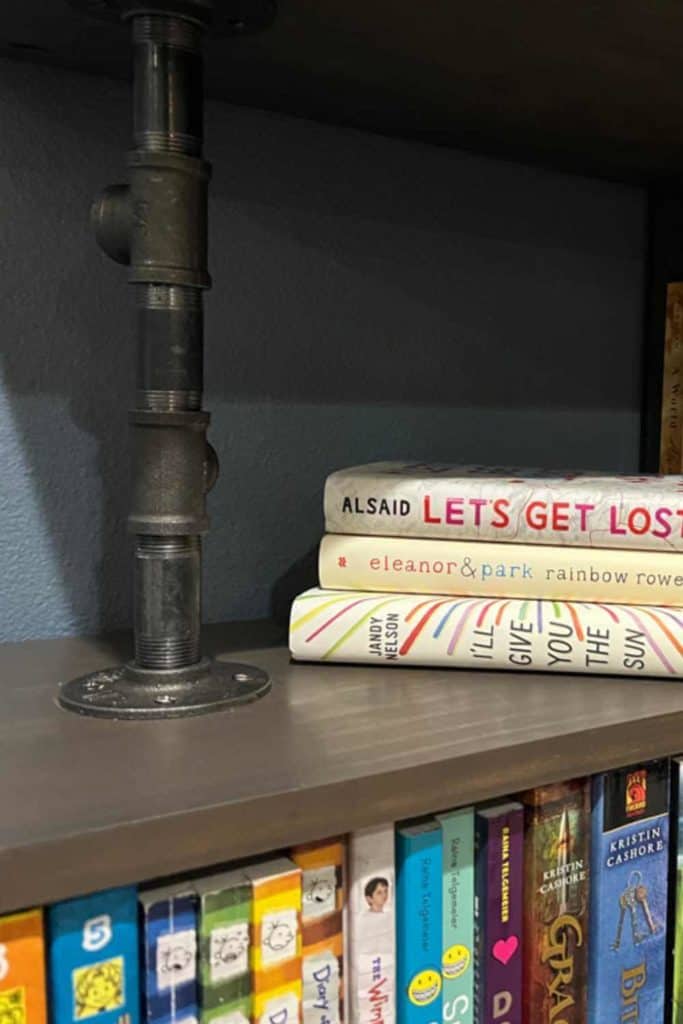
Once the DIY Bookcase was built, we applied Wipe-On Poly in satin by simply rubbing it in with old t-shirt material. We waited 2-3 hours, lightly sanded with a sanding sponge, wiped with a damp cloth to remove dust, and then reapplied Wipe-On Poly. We repeated this step a third time, let it dry overnight, and then moved the bookcase into its place in our home.
We let the finish fully cure for another 24 hours before loading it with books. It was hard to wait, but we knew it was best!
16. Attach felt pieces to the bottom flanges.
We happened to have 1″ round felt pads that are sticky on one side, so we attached two to each bottom flange.
What Went Wrong Building The DIY Corner Bookcase
This was our first time building a bookshelf, so naturally, we made mistakes along the way. Here are some of the biggest ones we made. Hopefully, you can learn from them.
We were not specific enough in our design.
The design ideas we created were very haphazard and simple. Be specific with the measurements in your design! Especially the length and height of each wooden box. It saves headaches further on in the process, and you won’t have to worry as much about whether your boxes will all fit together.
Also, we did not include the necessary height of support iron pipes in our design. It was a challenge to figure out the right configuration of iron pipe lengths to create the necessary height for the in-between wooden boxes. If you want to save time, determine the required length of your supportive iron pipes in the design process.
We did not twist the iron pipe structures to the flanges before screwing them to the wooden base.
It was easy to attach flanges to the bottom wood box and then twist in the iron pipe legs, on the wood box closest to the floor, because the bottom flange was not attached to anything, but was to be placed on the ground. However, for the rest of our iron pipe supports, this did not work. For our second box, we screwed in the flanges to the wood before attaching the iron pipe legs. Since the two iron pipe legs were supposed to connect to one another, with a crossbar, it was impossible to twist the two into the already attached flanges. We had to unscrew the flanges from the wood structure and twist them into the pipe structure, and then reattach them.
Tools Used To Build This DIY Corner Bookshelf
This post contains affiliate links. When you purchase through an affiliate link, we receive a small commission at no additional cost to you. Disclosure.
- Sliding Miter Saw (make sure it can cut a 12″ board)
- Kreg Jig
- Drill
- Clamps
- Sander
- Table Saw (optional – we used the table saw to rip 4′ boards that were wider than the 8′ boards we purchased)
Supplies We Used To Build This DIY Corner Bookshelf
I will link the pipe material below, but keep in mind you can also purchase individual pieces at Home Depot.
- 1″ x 12″ Select Pine – we purchased 6 – 8′ boards, but you may be able to get away with 5, with careful planning
- 1-1/4″ Kreg Screws
- 8 x 1-1/4″ Trim Head Screws
- 220 Grit Sandpaper
- Wood Glue
- Varathane Briarsmoke Stain
- T-Shirt Material – to apply stain
- 3/4″ Flanges (16)
- 3/4″ Pipe Fitting Tee (5)
- 3″ Pipe (3)
- 3-1/2″ Pipe (1)
- 4″ Pipe (4)
- 5″ Pipe (3)
- 8″ Pipe (2)
- 10″ Pipe (1)
- #10 x 3/4″ Wood Screws – to attach flanges to wood boxes
- Spray Paint – to paint screw heads to match flanges
- Wipe-On Poly – Satin
- Sanding Sponge
- Felt Pads
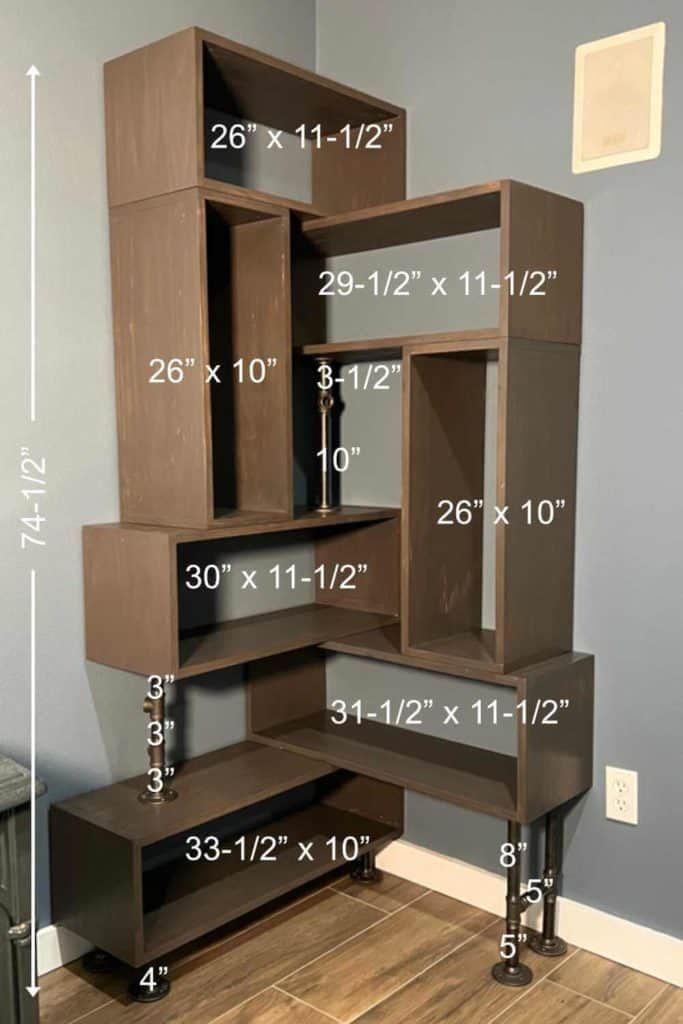
Exact Dimensions Of DIY Corner Bookshelf Boxes
We suggest you customize your DIY corner bookshelf to fit the space you have, but if you’d like to know the exact dimensions of our bookshelf boxes, we have them listed for you, below!
- 1 – 33-1/2″ x 10″
- 1 – 31-1/2″ x 11-1/2″
- 1 – 30″ x 11-1/2″
- 2 – 26″ x 10″
- 1 – 29-1/2″ x 11-1/2″
- 1 – 26″ x 11-1/2″
When making your cuts, remember that the long width should be reduced by 1-1/2″ to make up for the short end pieces, added to the ends of your long boards. For example, the wood box that is 33-1/2″ x 10″ would have these cuts: 2 – 32″ and 2 – 10″.
Exact Pipe Dimensions
- Bottom Legs (4″) – 4 – 4″ pipes with 8 flanges to place on each end
- Side Bottom Legs (14-1/2″) – 2 – 8″ Pipe, 3 – 5″ pipe, 2 – pipe fitting tees, 4 flanges
- Bottom Brace (11-1/2″) – 3 – 3″ pipe, 2 pipe fitting tees, 2 flanges
- Upper Brace (14-1/2″) – 1 – 10″ pipe, 1 – 3-1/2″ pipe, 1 pipe fitting tee, 2 flanges
The convenient thing about using pipe fittings is that you can easily unthread them a bit in order to make everything sit flush!
How Much Does It Cost To Build A DIY Corner Bookshelf?
Because we had the tools and a few of the supplies on hand, I estimate that we spent about $400 to build this corner bookcase. It may seem like a lot, but if you wanted to purchase something like this at a furniture store, it would be substantially more to buy … if you could even find it.