DIY Industrial Pipe Curtain Rod

A DIY Industrial Pipe Curtain Rod is an excellent choice for an awesome-looking and sturdy curtain rod that can be made to fit large windows.
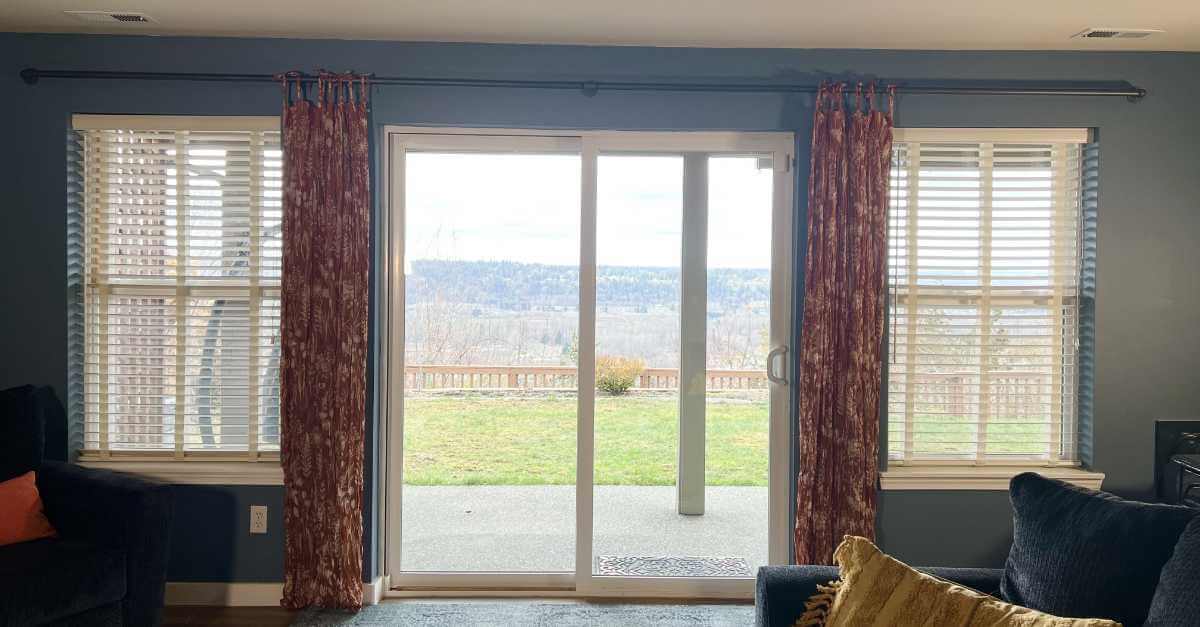
After remodeling our basement, we needed to do something to cover our sliding glass door. We had removed the old busted-up vertical blinds and decided to install an iron pipe curtain rod. The DIY corner bookshelf my daughter and I built was industrial style and used iron pipe, so we figured an industrial pipe curtain rod would go nicely.
This post contains affiliate links. When you purchase through an affiliate link, we receive a small commission at no additional cost to you. Disclosure.
We found an Industrial Curtain Rod you could buy pre-made but we needed it to be longer than any we could find. So, creating our own out of steel pipe and iron fittings was our answer. However, I wasn’t quite sure how we could get the right size pipes. I knew you could buy a pipe cutter and a gadget that helps you thread pipes but the costs of those items would make this project an expensive one.
We went to Home Depot on a fact-gathering mission to check out steel pipes. Right next to the pipes was a machine that cut and threaded the pipes. Then, a young girl who works at Home Depot asked if she could help. I was thrilled to learn that Home Depot will cut and thread the steel pipes for you. Since she was there and ready to help we jumped on the opportunity. It was a fun process to watch.
Tools used to install an iron pipe curtain rod.
- Drill
- Drill Bits
- Level
- Measuring Tape
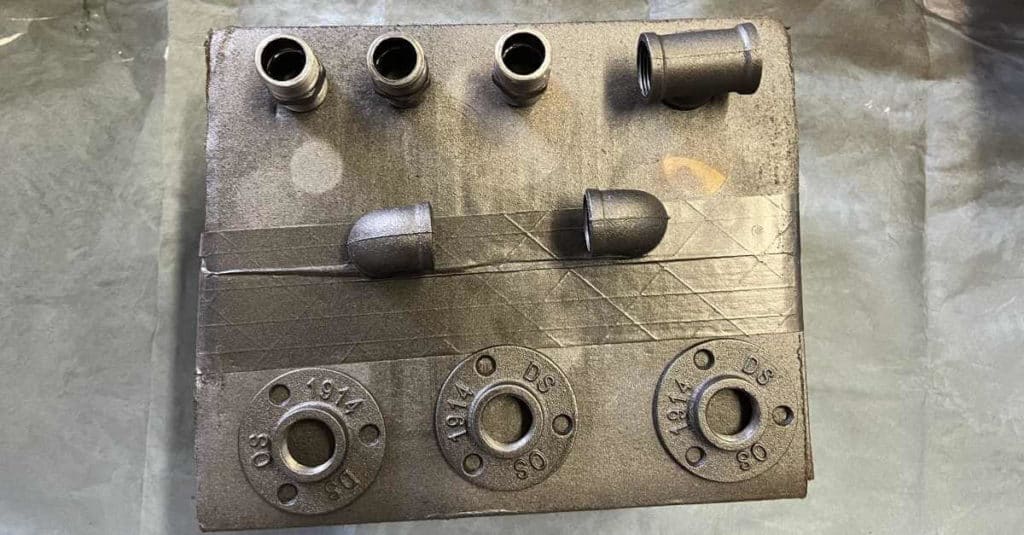
Supplies needed to create an industrial-style curtain rod.
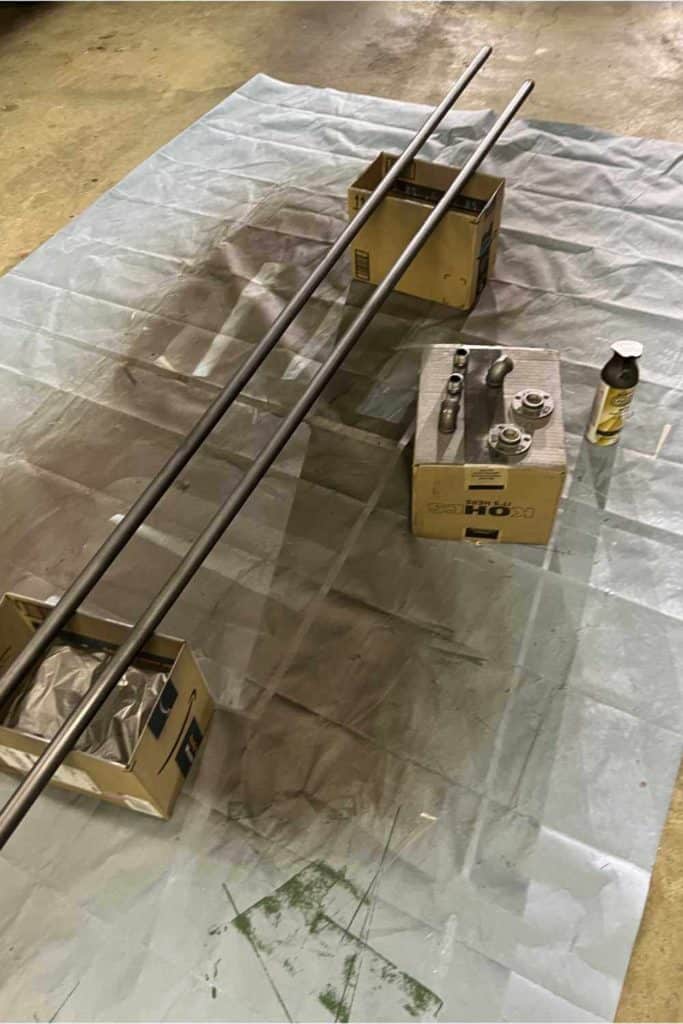
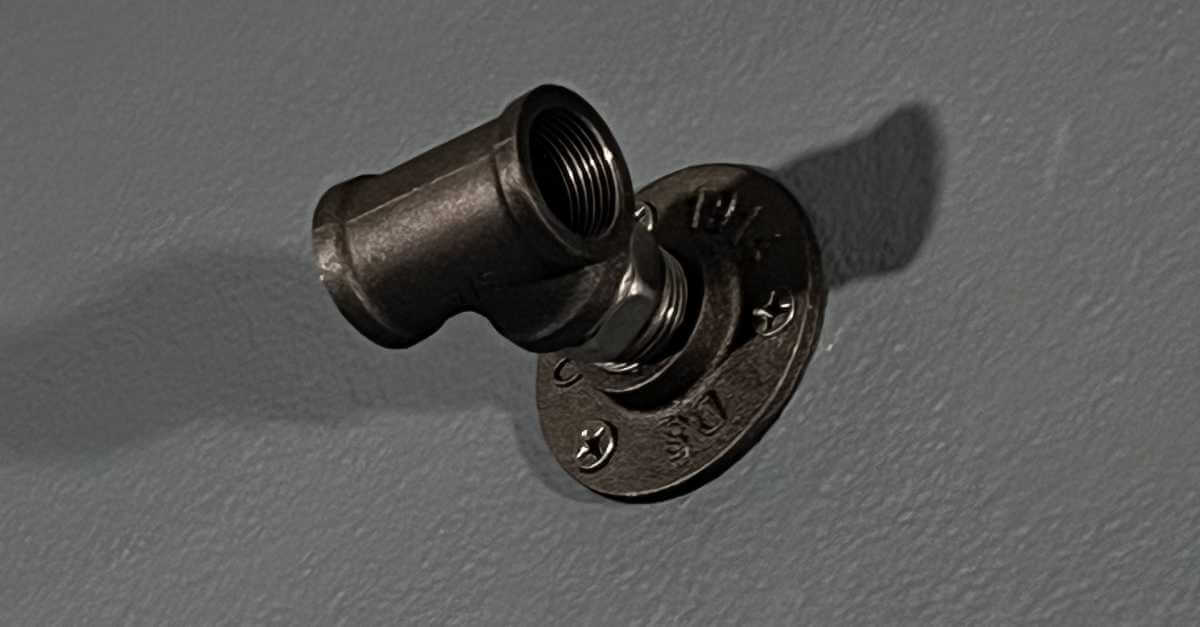
- Iron Pipe Flanges
- Pipe Fitting Elbows
- Threaded Pipe Nipples
- Pipe Fitting Tee – You will need this if your curtain rod is long enough to need a brace.
- Steel Pipe
- Pipe Cleaner
- 220 Grit Sandpaper
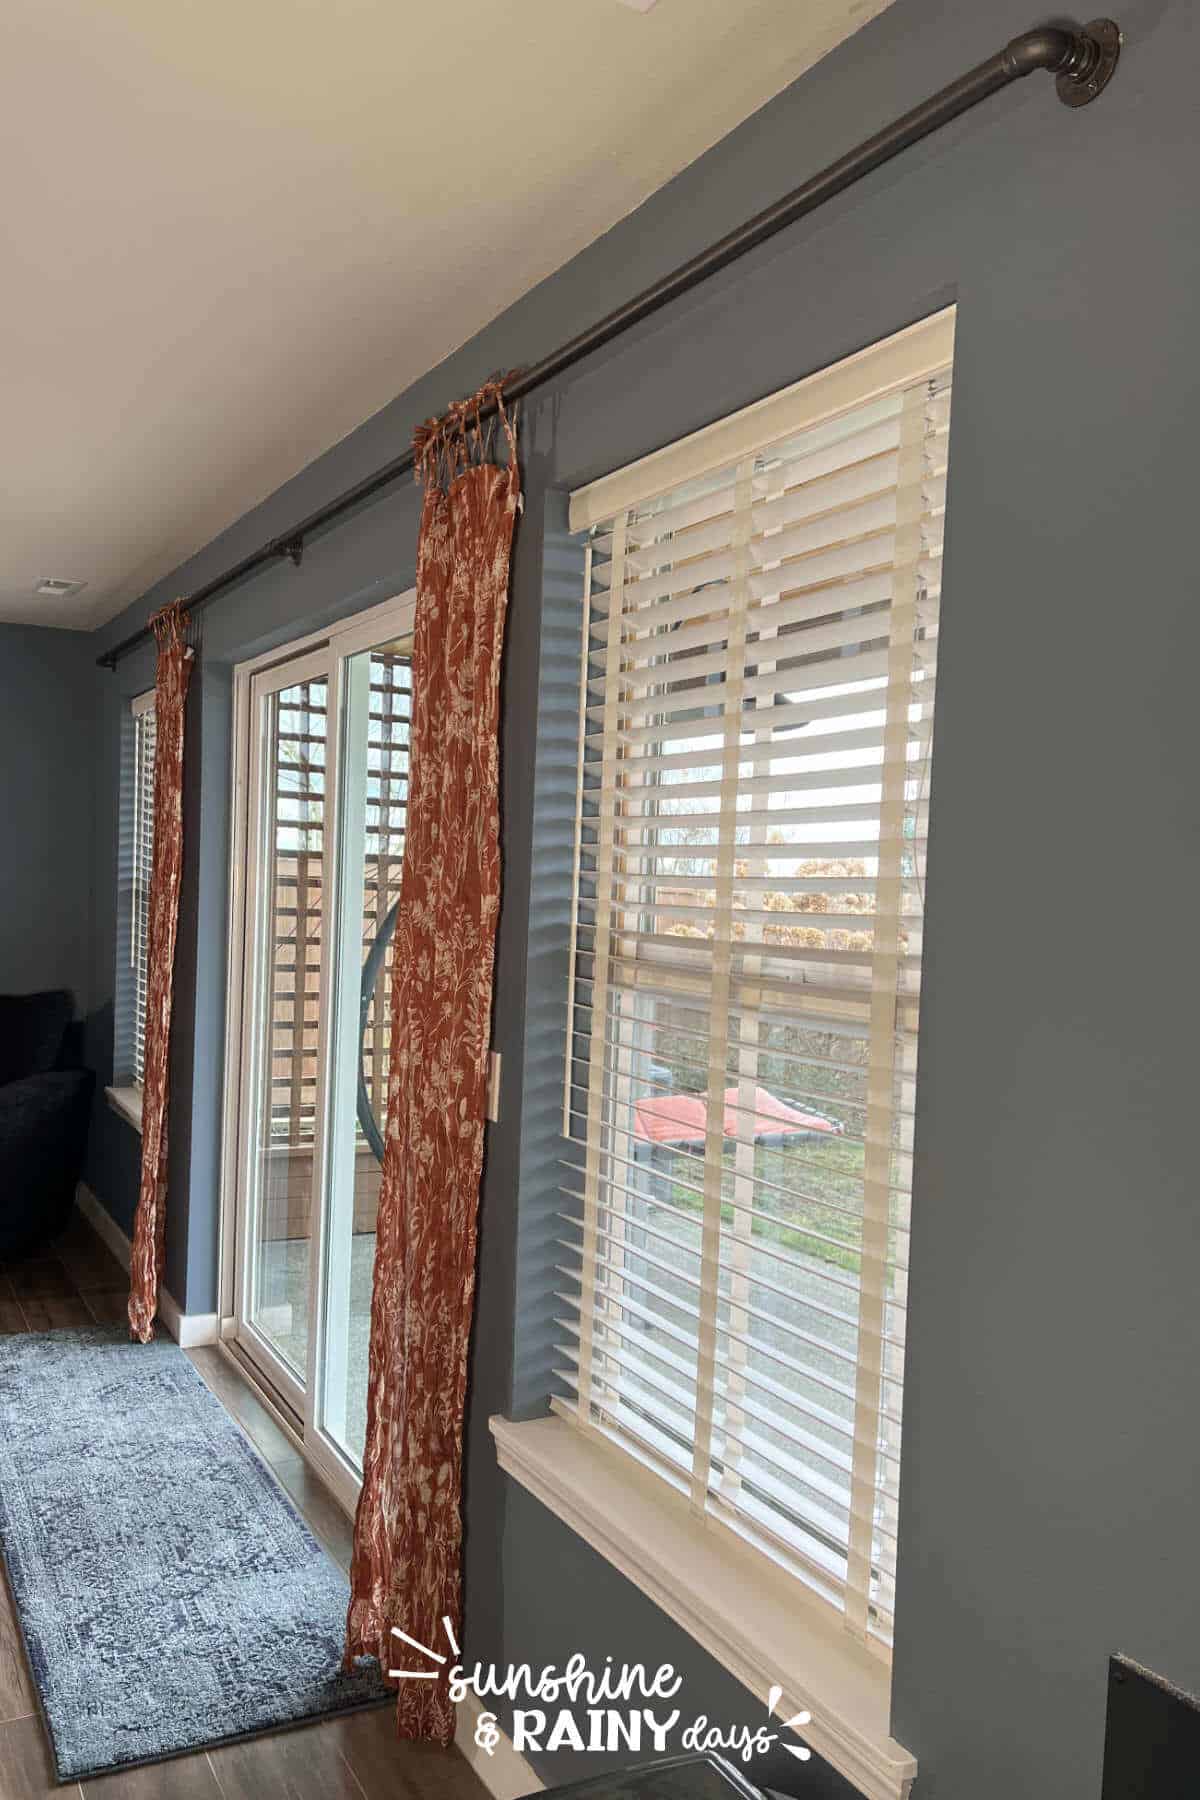
- Paint – I used Rust-Oleum Universal in Flat Soft Iron
- Anchors – This curtain rod will be heavy so if you don’t have studs to screw into, you will want to place anchors in your wall.
- Screws – We used a #12 screw head size which worked beautifully with the flanges listed above.
How do you make a curtain rod out of a metal pipe?
1) Measure the length you need for your curtain rod.
Generally, you’ll want to have a bit of an overhang on each side of your window.
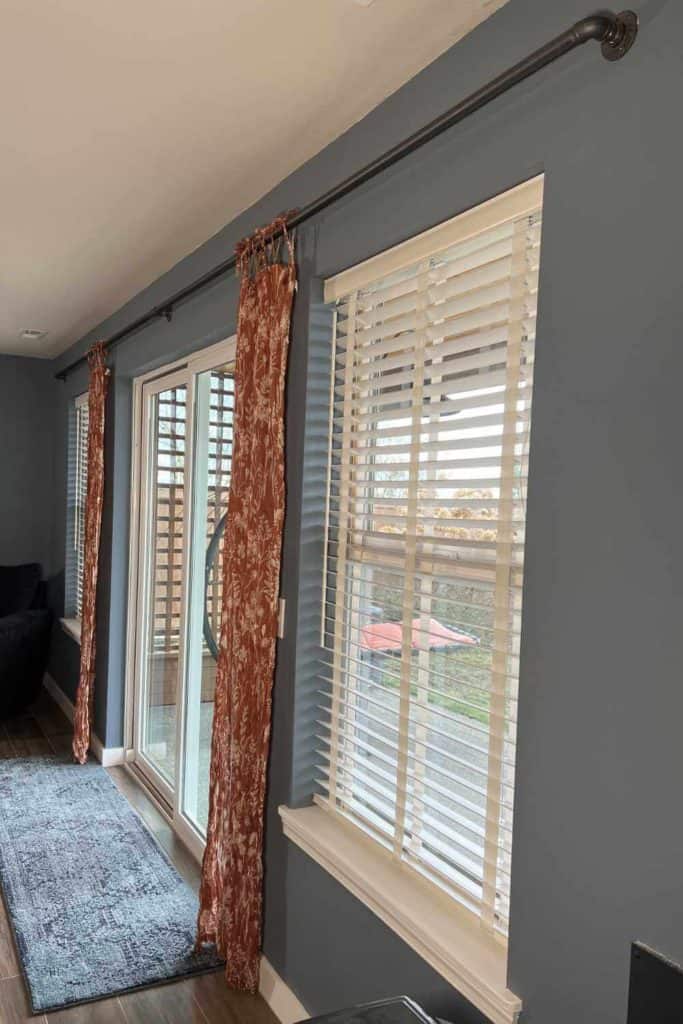
Our wall has a window on each side of the sliding glass door so we chose to cover the entire length of the windows and door because I thought it would look weird to just have the curtain rod over the door. We went with a 6″ overhang on each side.
2) Gather your supplies.
We chose to purchase the Iron Pipe Flanges, Pipe Fitting Elbows, Threaded Pipe Nipples, and Pipe Fitting Tee online. We ended up with more than we needed but the price was better than purchasing them individually from a big box store. Plus, I’m sure we will want to do more with iron fittings so it will be nice to have the extras on hand. The links above are the exact fittings I purchased and used. Unfortunately, I had purchased from another seller and the flanges that came were not the flanges that were pictured so I sent them back. Note that the seller listed above will send you what’s pictured!
The Steel Pipe was purchased, cut, and threaded at Home Depot. It was a nice surprise to find that Home Depot will cut and thread the pipe to size for you.
Pro Tip: Be sure to purchase the same size for all fittings and pipe. We chose to use 3/4″.
We found the Rust-Oleum Universal Spray Paint in Flat Soft Iron at Lowes.
Thankfully, we had #12 Screws and Anchors on hand.
3) Clean the steel pipes and fittings.
The fittings may be okay as is but the steel pipes definitely needed a good clean. Be careful as they may have sharp pieces.
4) Sand the steel pipes.
I used a sanding block and 220 grit sandpaper to quickly sand the steel pipes. They had a few weird bumps on them and stamping. Be sure to sand in a spot that you can easily clean up because it makes a mess.
Pro Tip: Instead of using a sanding block, next time I would wrap the sandpaper around the rod to sand or use a sanding sponge to do the same. It was a bit cumbersome with the sanding block.
5) Paint the steel pipes and iron fittings.
The steel pipes we purchased were black and the fittings were more like the Rust-Oleum in Flat Soft Iron paint that we purchased. We went over it all so they would be uniform in color.
We also painted the tops of the #12 screws by sticking the points in a box so they would match the rest of the hardware.

6) Assemble your steel pipes and fittings.
It’s important to go ahead and assemble your pieces how you want them to go before you attach the iron flanges to the wall. This is because the fittings may not screw in at the angle you need them if you attach the flanges first.
7) Determine the height you want to hang your iron curtain rod.
For this step, we held the assembled curtain rod up, with the curtain attached, to find where the curtain would just barely touch the floor. That’s how we decided on the height.
8) Mark the iron flange holes.
While you have your rod held in place, mark where the flange holes are on your center brace. Use a level to make sure your rod is straight and make sure it is centered over your window. Likely, your rod will be heavy and awkward to screw in with everything attached so you will want to mark the holes before taking it apart.
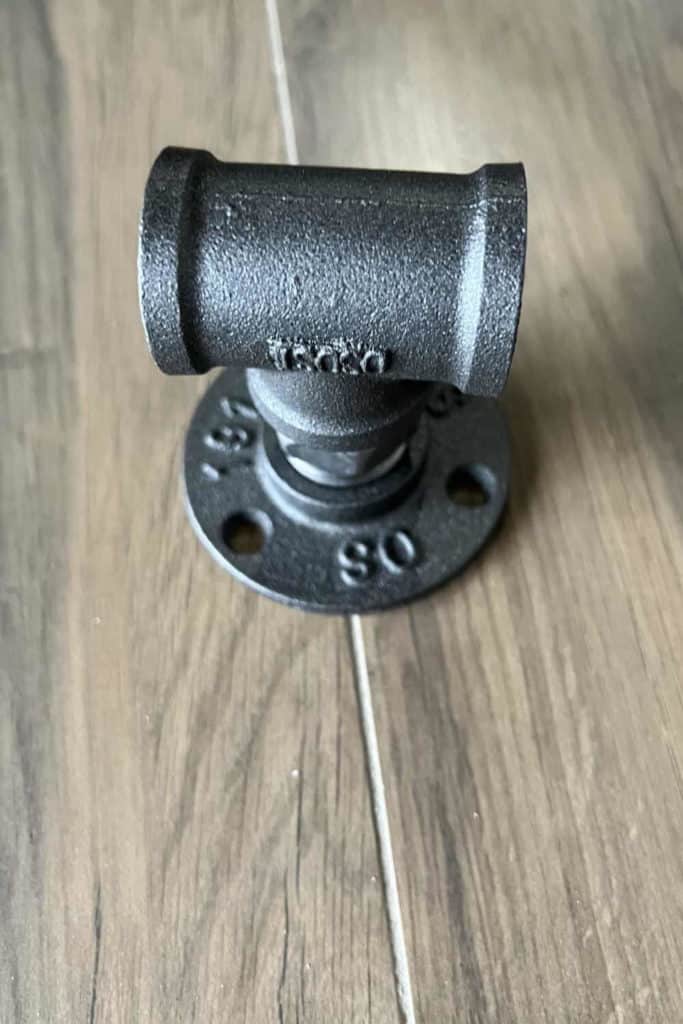
9) Remove the center brace iron flange from your industrial curtain rod.
We started with the iron flange for the center brace and, since it was above a sliding glass door, we made sure the center brace was lined up with the center of the door.
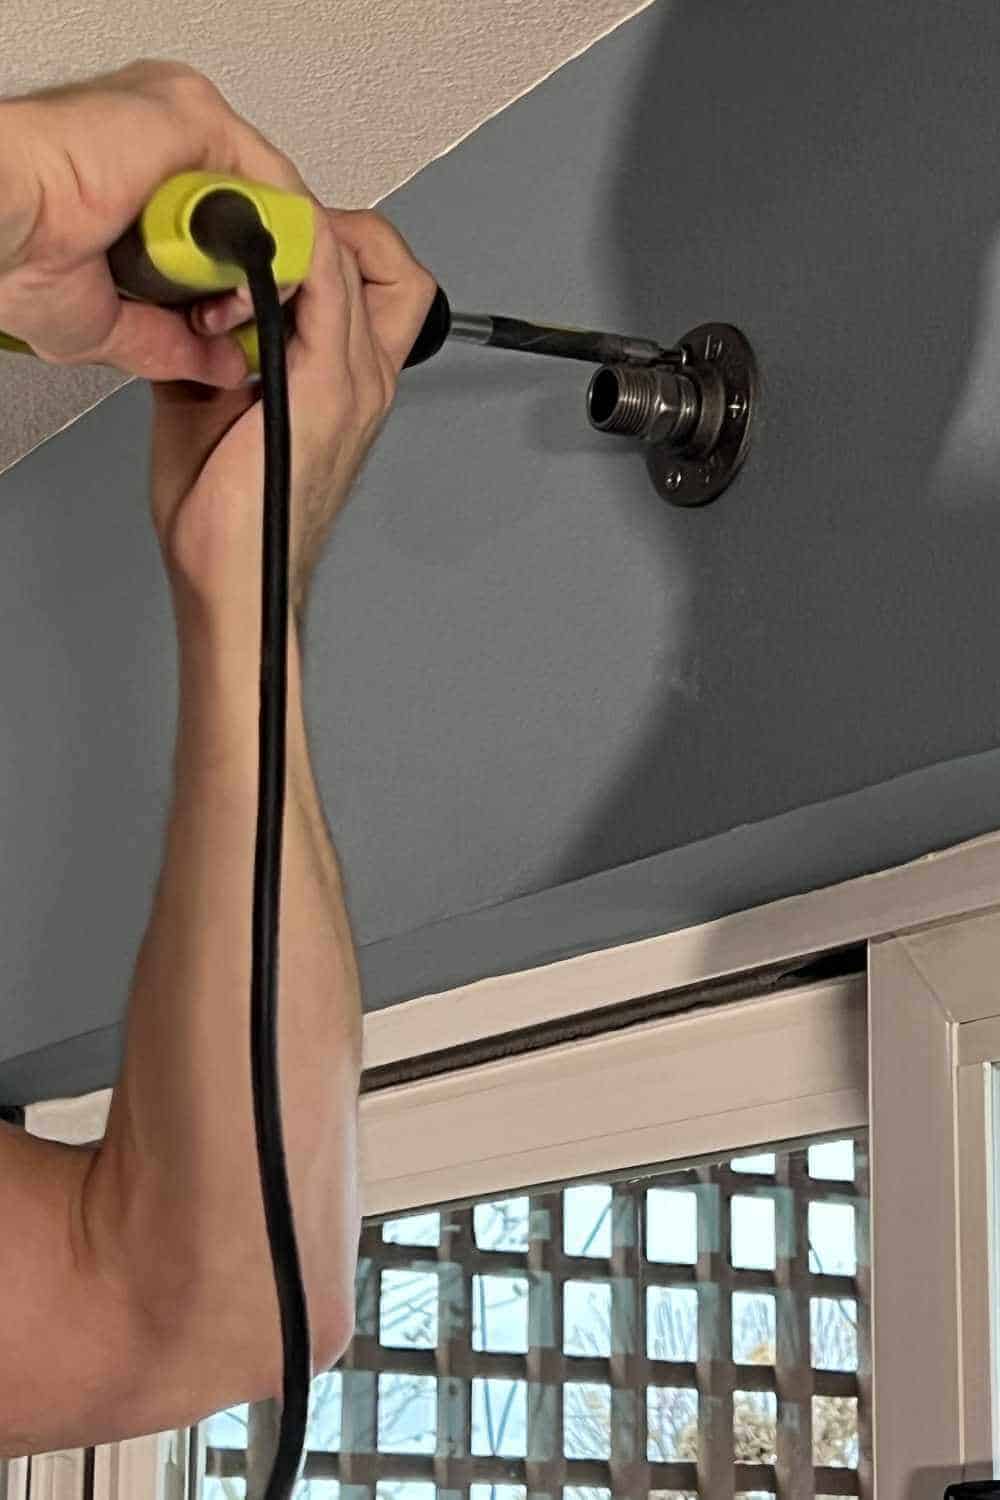
Once installed, we attached the center brace tee.
Because we had marked the iron flange holes, the center brace tee was lined up perfectly when we screwed it in.
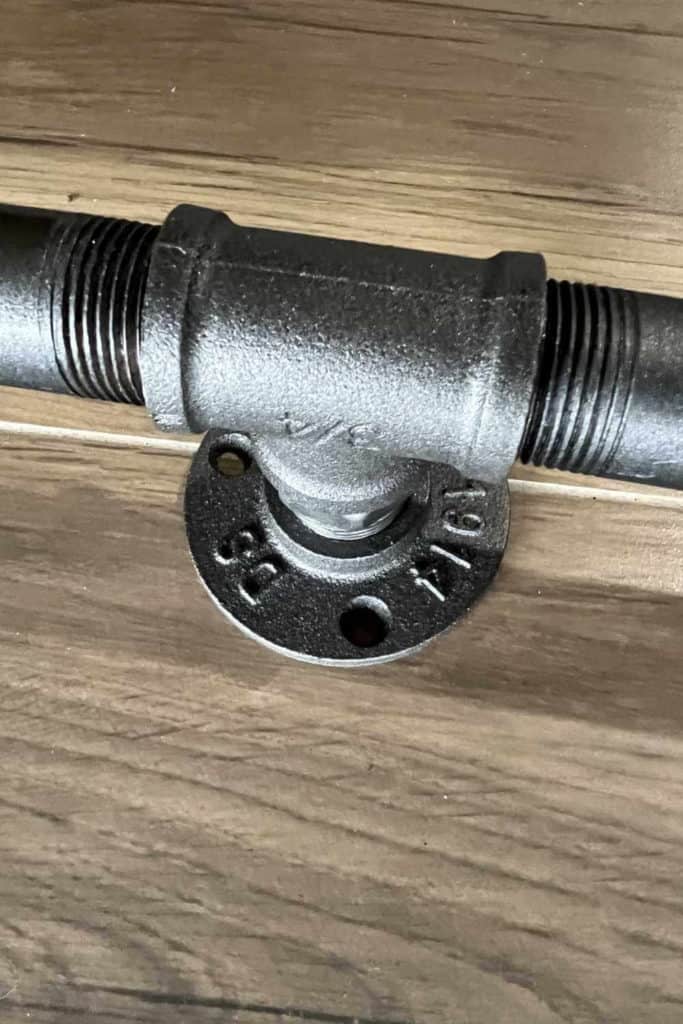
10) Attach one half of the iron curtain rod.
After the center brace was attached to the wall, we screwed the steel pipe (with elbow, nipple, and flange still attached) into the center brace and attached the left flange to the wall, using a level to make sure it was straight. It is much easier to work in sections with such a long curtain rod. Luckily, we hit a stud and didn’t need anchors on this side.
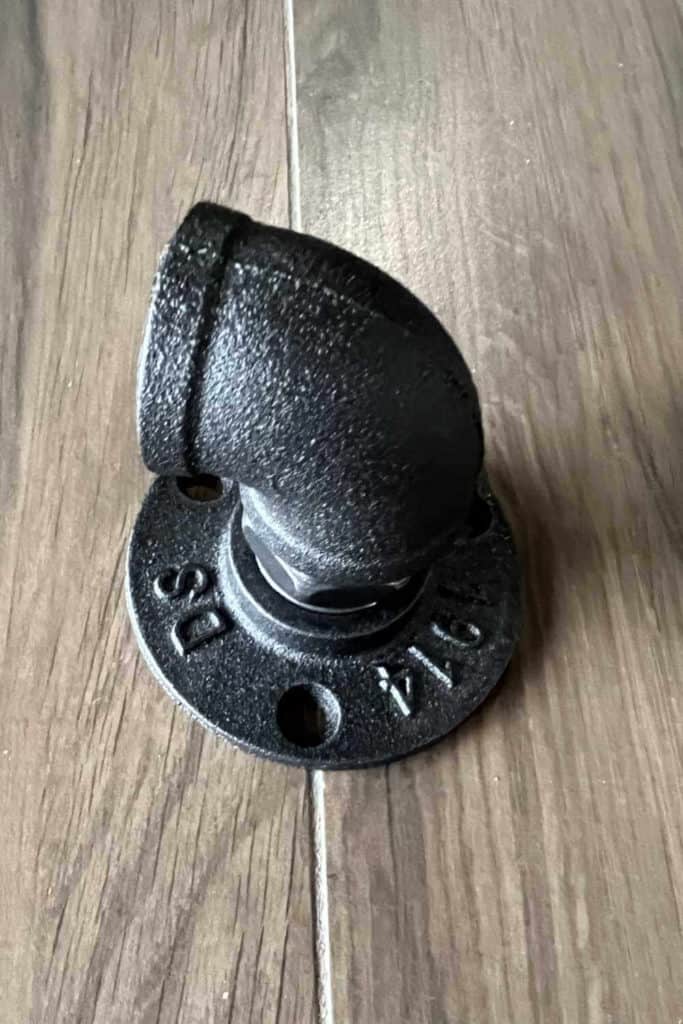
11) Attach the other half of the iron curtain rod.
Next, screw in the right side of your curtain rod, using a level to make sure it is straight, and attach the flange to the wall. If you don’t hit a stud, you can have a helper hold the rod while you place anchors in the wall.
Pro Tip: If you’re using curtain rings or curtains with grommets, you will want to place them on the rod BEFORE you attach the flanges to the wall.
It is my opinion that it would be best to use curtain rings or curtains with ties (shown below) so you don’t have to take your industrial pipe curtain rod off the wall every time you need to clean your curtains.
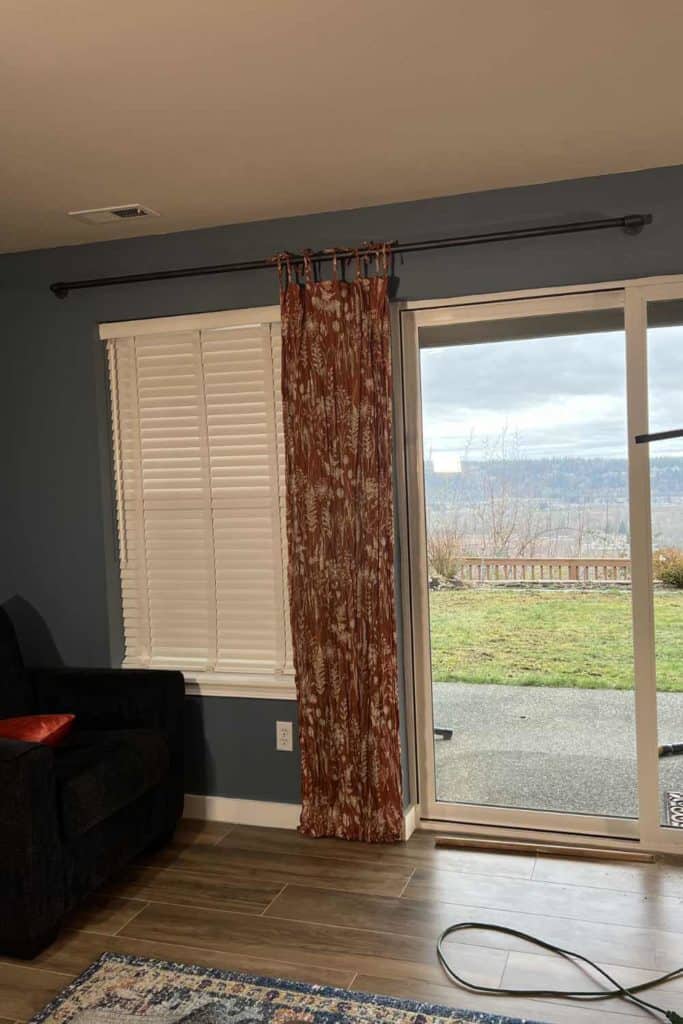
12) Attach your curtains to your new industrial-style curtain rod.
If you haven’t already, attach your curtains to your rod!
Can you use a metal pipe as a curtain rod?
Although heavy, metal pipe works great as a curtain rod, especially if you have dimensions that aren’t available to buy off the rack.
Cons of using steel pipe as a curtain rod.
- It isn’t easy to remove curtains to change out or wash unless they are attached to rings or tied on.
- Steel pipe is heavy and cumbersome.
- You will likely need help to install a steel pipe curtain rod.
- It will take a bit more time to prep your materials for a DIY industrial pipe curtain rod than an off-the-shelf curtain rod.
Pros of a DIY industrial pipe curtain rod.
- Easy to customize to the length you need which makes it perfect for extra-long windows.
- Can be less expensive than purchasing a good quality, customized curtain rod.
- Doesn’t have an extension rod with different circumferences that curtains get stuck on like many off-the-shelf curtain rods.
- When installed correctly, is a very sturdy curtain rod that can be used for years.
- It is a fairly easy DIY project that you can be proud of!
Our DIY Industrial Pipe Curtain Rod Mishap
I found curtains that fit the room perfectly at World Market. It was even more perfect that they tied on, which is exactly what a DIY steel curtain rod needs. BUT … since we purchased a ‘crinkle’ curtain, its dimensions actually cover much less than I had anticipated. Meaning, the actual dimensions should have allowed the curtains to cover the sliding glass door but since they are meant to be crinkly, they don’t do the job.
No worries though, right? We could run and pick up two more panels to do the job. Not so fast. These particular curtains are not available to ship and couldn’t be found at a World Market anywhere near our home. Believe me, we tried!
So, although we really like these curtains, we are looking for something different that will be functional and actually cover the door.