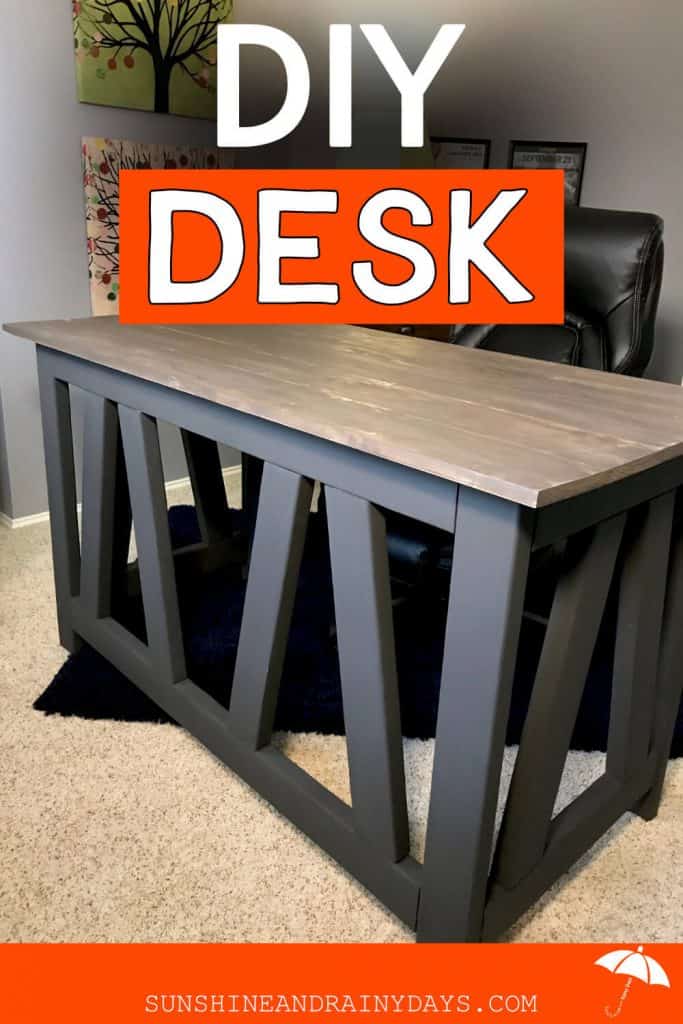
How To Build A Desk
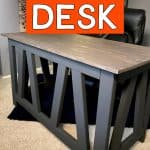
My son is starting his freshman year of college and, since all of his classes will be online, he has decided to study from home the first quarter. In an effort to make studying at home more exciting, we decided to turn our guest bedroom into a study room and went desk shopping. The cost of desks surprised us so, it worked out perfectly that Jack didn’t like any of the desks we found and asked if I could build a desk, instead. I was happy to oblige since I’ve built DIY House Projects, in the past!
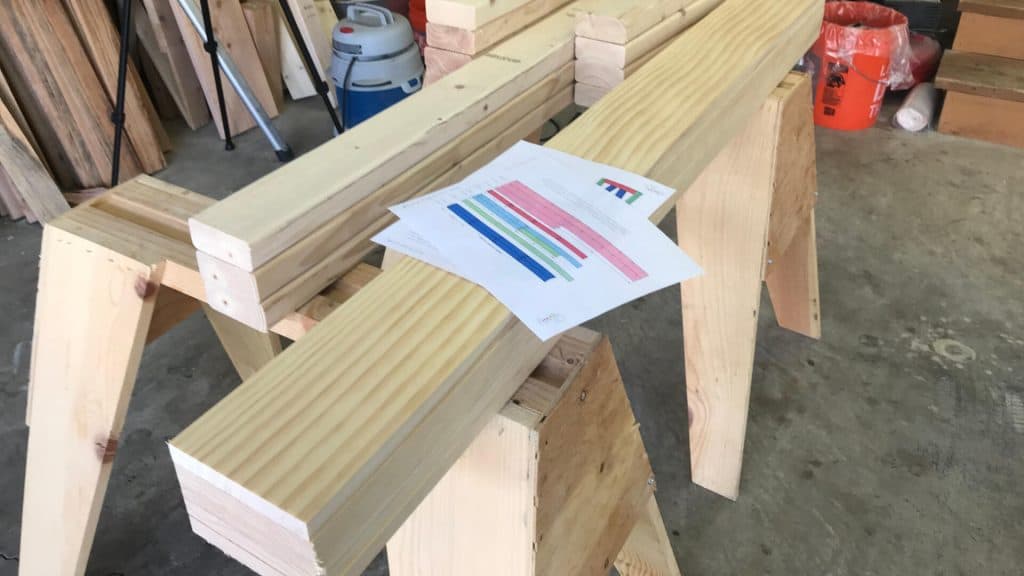
A few years ago, I had built the DIY Truss Desk, which was designed by Shanty 2 Chic, and Jack decided that was the design he would like for his study room. The Shanty 2 Chic gals have great printable plans for this desk, complete with a shopping and cut list. They make it super easy!
How To Build A Desk
This post contains affiliate links. When you purchase through an affiliate link, we receive a small commission at no additional cost to you. Disclosure.
If you’d like to build this DIY Truss Desk, head over to Shanty 2 Chic and download their plans.
For the most part, I followed the plans to a T, trusting that the desk would come together right. I had built this same desk a few years ago and loved the way it turned out.
Here, I will show you the steps I took, following the Shanty 2 Chic plans, mistakes I made, and things I did a little different.
Purchase Lumber For The DIY Desk
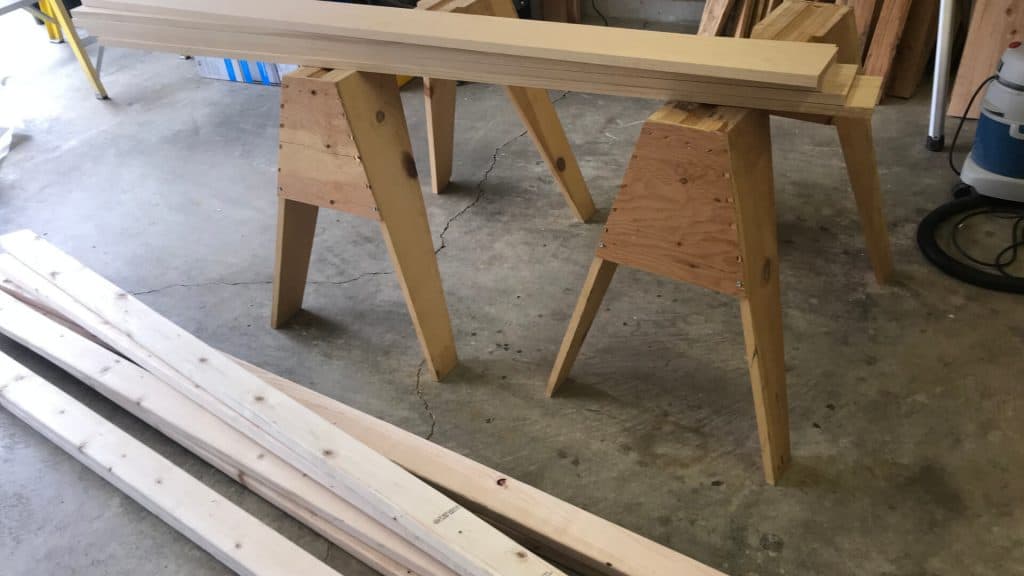
It’s amazing what you can do with a few pieces of lumber.
The plans called for 2 – 1 x 6 x 10′ and 1 – 1 x 6 x 6′ but our local store didn’t have the 10′ length so we went with:
- 5 – 1 x 6 x 6′ Select Kiln-Dried Square Edge Whitewood – This is for the desktop
- 6 – 2 x 4 x 8′ – These are for the desk base
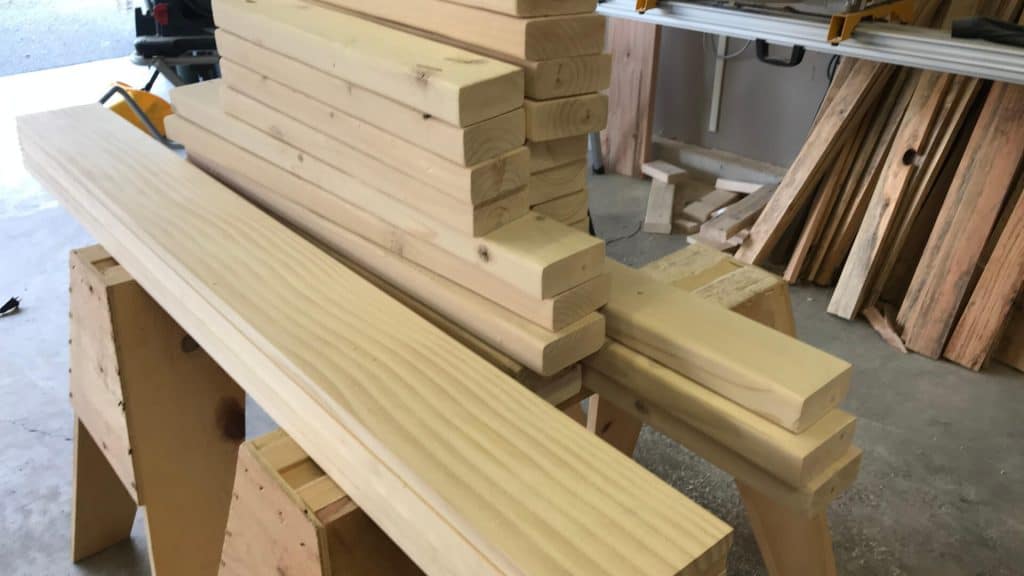
Cut The Lumber
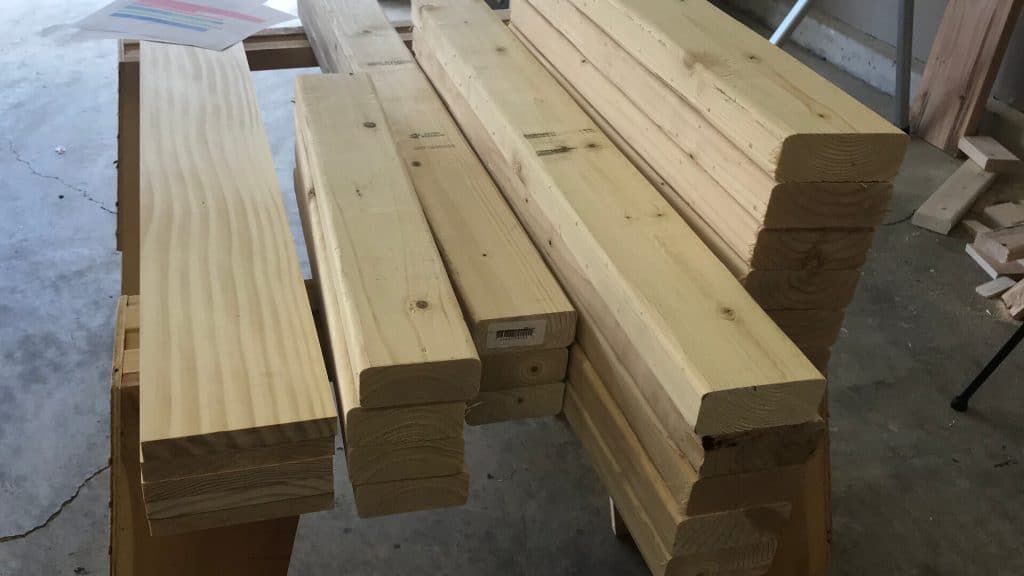
Once we got the lumber home, I used my miter saw to cut the lumber, according to the plans.
After reading through Shanty 2 Chic’s comments, on this desk, I found that a few people said the desk height is a little too high and they adjusted the height by taking a few inches off the 2 x 4 leg pieces. Of course, I read those comments AFTER I had already finished the desk … what was I thinking … but my son is tall and has an adjustable chair so … he’s good to go. If you choose to build this desk, take the height into consideration.
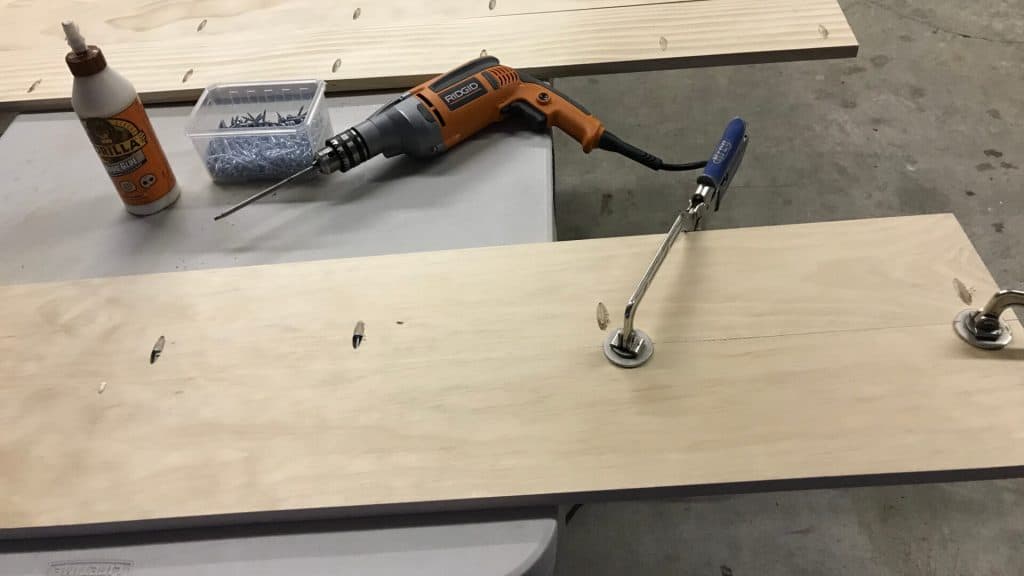
Drill Pocket Holes
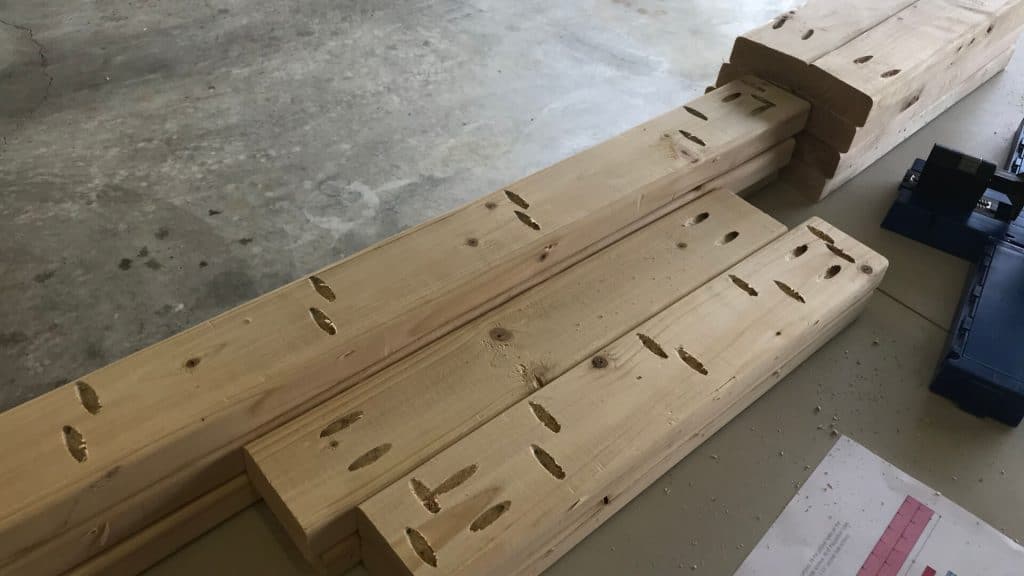
Next, I used my Kreg Jig to drill pocket holes, according to the Shanty 2 Chic plans.
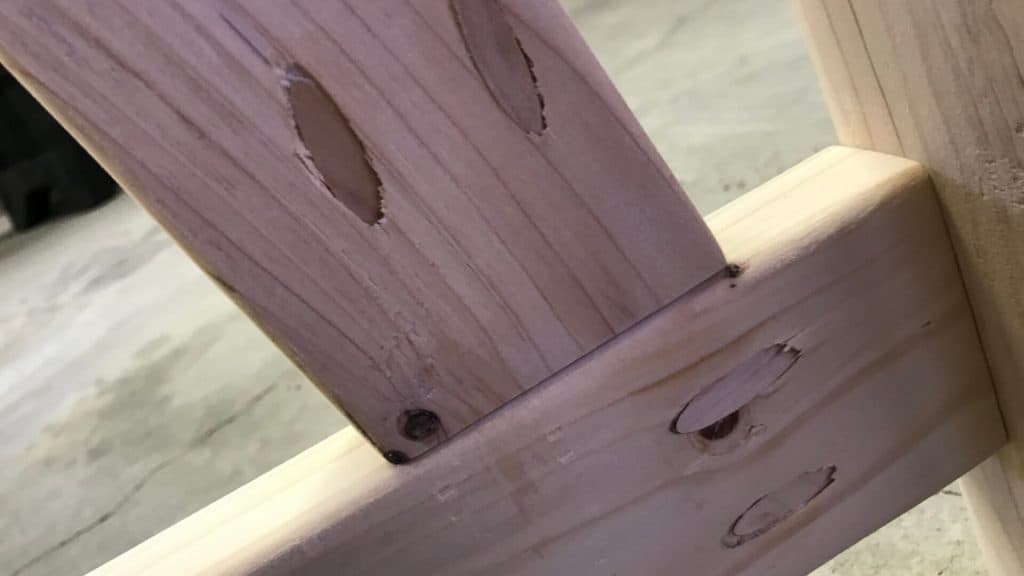
On the long edges of the 2 x 4’s, I was supposed to drill pocket holes for 1-1/4″ pocket hole screws, since they would be attached to the 1 x 6 boards. I failed miserably and drilled pocket holes for 2-1/2″ pocket screws. Thankfully, I caught the mistake and redrilled the appropriate pocket holes. However, I was left with quite an abundance of pocket holes.
Here’s the deal: if you are attaching two pieces of lumber with two different thicknesses, I think you’re supposed to use the setting for the smaller board. Still, this didn’t come out quite right for me, as you’ll see later.
Sand The Desk Pieces
One thing that doesn’t get talked about a lot is SANDING. When you use rough cut lumber, like 2 x 4’s, it can take quite a bit of sanding to make it smooth.
I like to sand my boards, with 220 grit sandpaper, BEFORE I start building. I might be weird that way but I find it easier to sand pieces of wood than a piece of furniture. That way I don’t have to try to get my sander in tight spots. I also do a FINISH sand, once the piece is built.
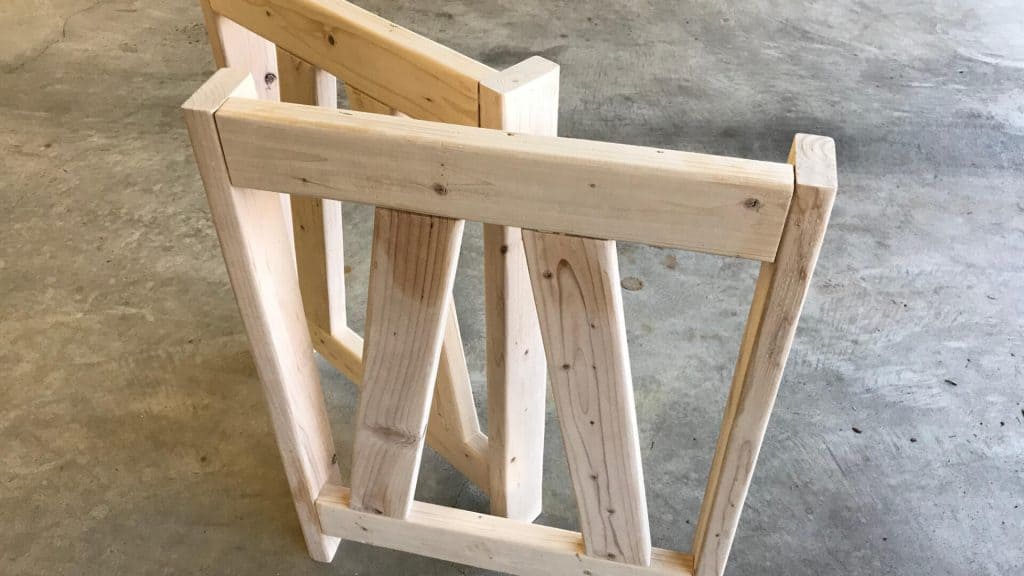
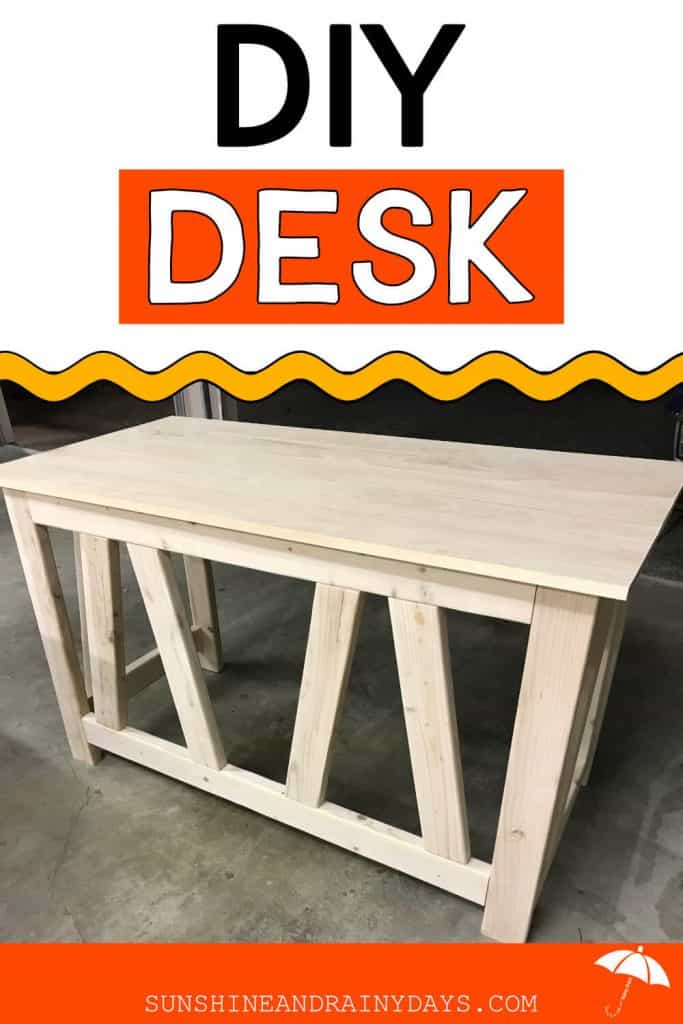
Assemble The Desk Legs
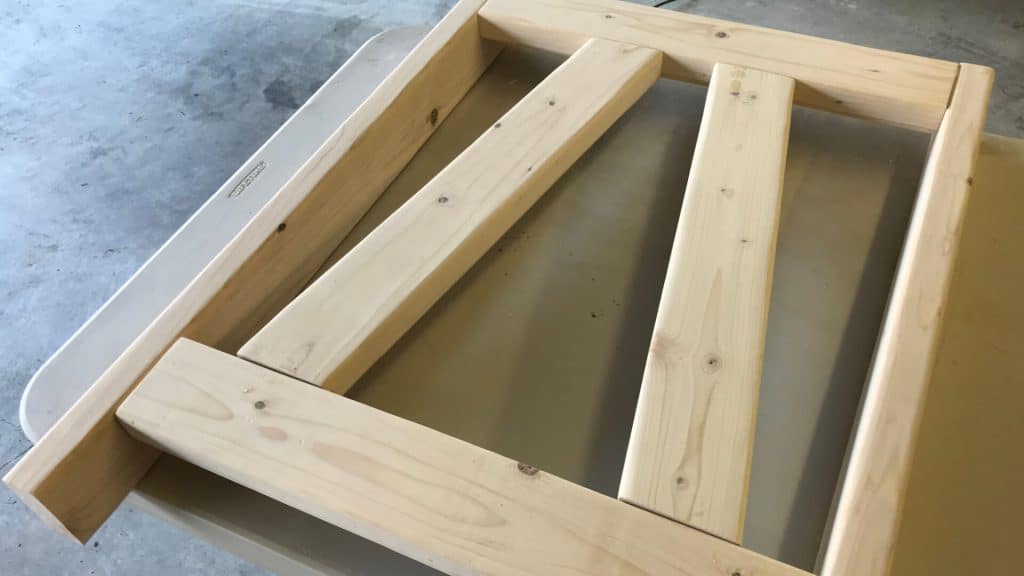
Here’s one side of the desk built. I chose to attach the diagonal pieces to the top board, 6″ in from each side, then attached the bottom horizontal board to the diagonal boards, and, finally, attached the bottom horizontal boards to the sides. On a previous build of this desk, I attached the two horizontal boards first and had a hard time making the diagonal boards fit right.
Attach Stretcher Boards
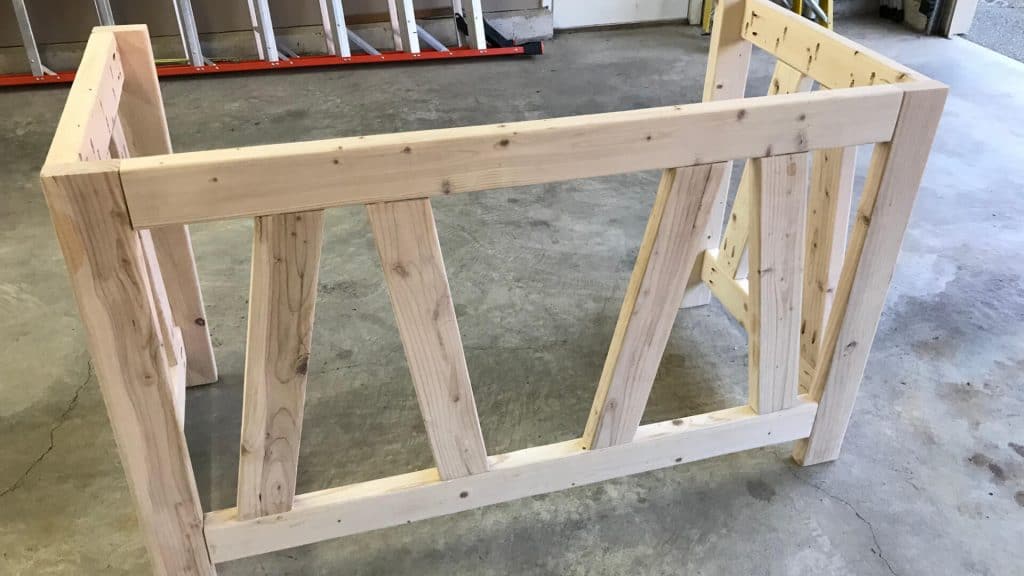
Next, I connected the two leg pieces with the top stretcher board, with the pocket holes facing up, to attach to the desktop. Then, I attached the diagonal boards to the top stretcher, the bottom stretcher to the diagonal boards, and, finally, the bottom stretcher to the legs. I built this the same way that I had built the legs.
Next up was attaching the top stretcher to the front of the desk, with pocket holes facing up.
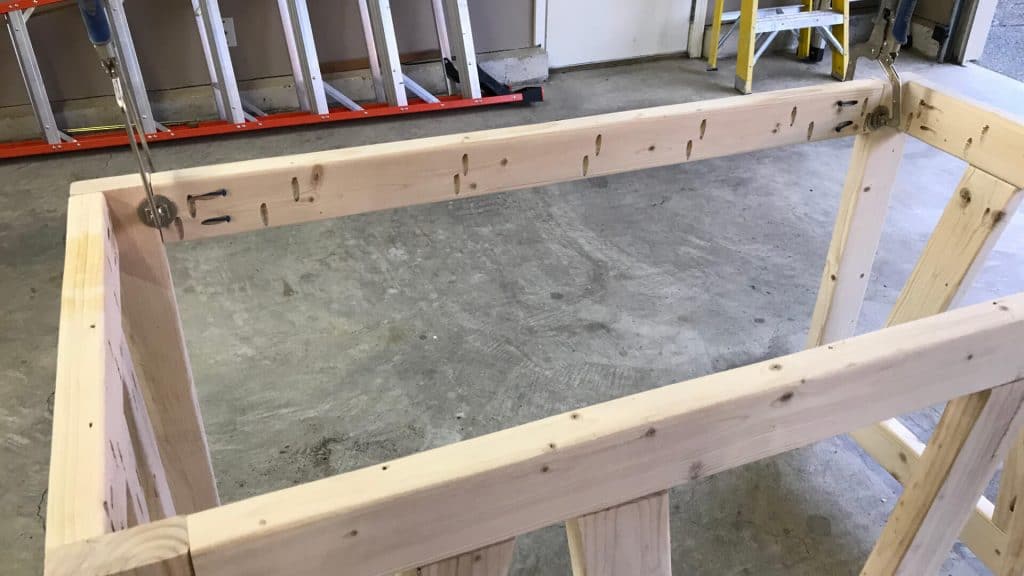
You might notice, in this picture, that I am using blue pocket hole screws. This is simply because I ran out of screws and the blue ones were the only ones in stock at my local store. The blue pocket hole screws are weather resistant and made for outdoor use. It isn’t a big deal to use them for indoor use, other than they are slightly more expensive.
Fill Pocket Holes
Since I would be painting the desk base, I used Pocket Hole Plugs – Paint Grade on the bottom pocket holes of the desk. I didn’t worry about the pocket holes at the top because they won’t be visible.
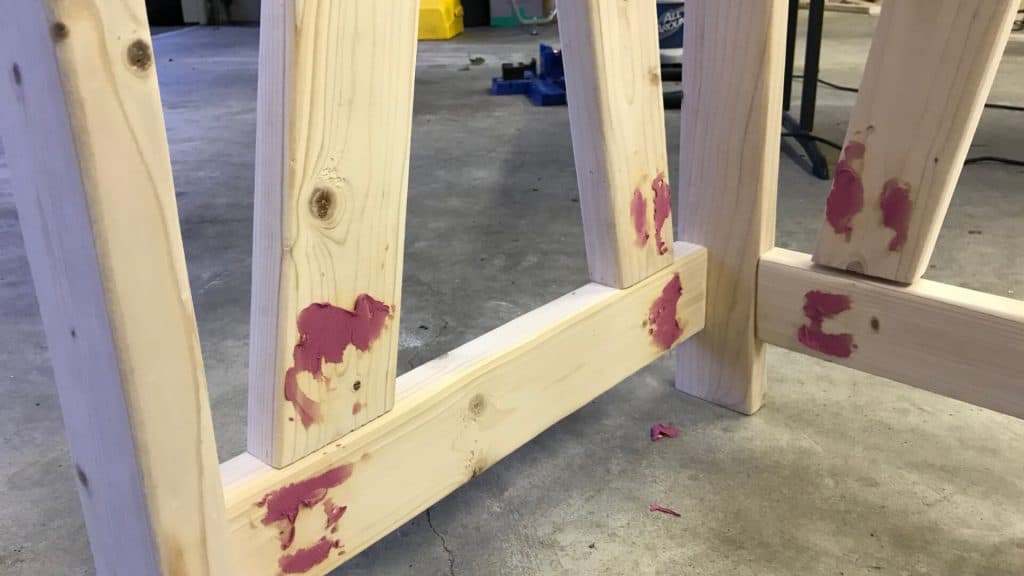
Then I used Plastic Wood over the Pocket Hole Plugs. Kind of a sloppy job, I know …
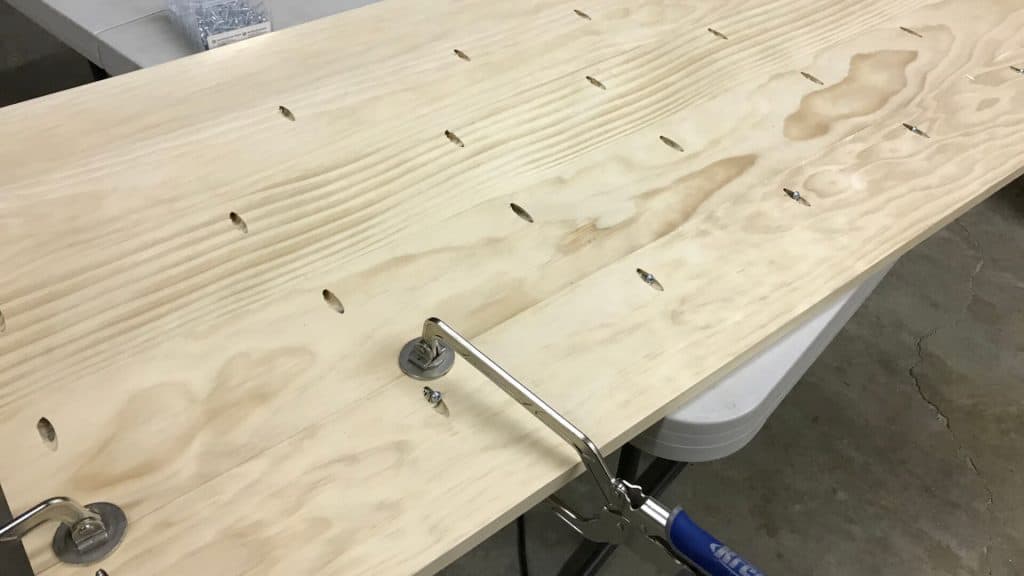
Assemble The Desktop
While the plastic wood dried, I began assembling the desktop, one board at a time, using 1-1/4″ Pocket Hole Screws. I have two Kreg Clamps and moved them along the boards, as I joined them. This kept the seams nice and flat.
Use Finish On The Desk
Next, I gave a final sand to both the desktop and base, using 220 grit sandpaper. Then, wiped everything down with a wet rag to remove any sand particles.
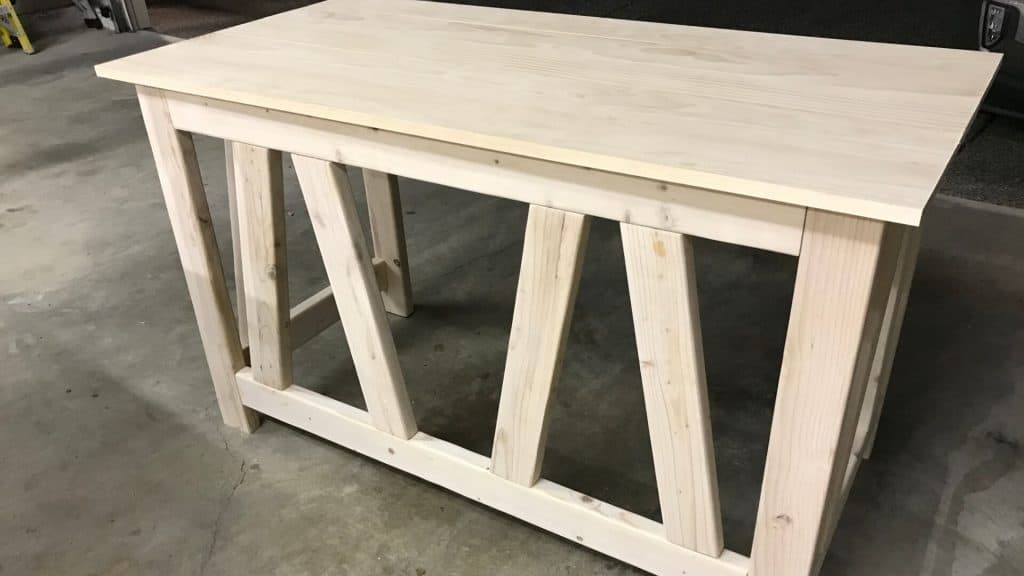
The desk build is now complete, except, I waited to attach the top to the bottom since I used different finishes for each.
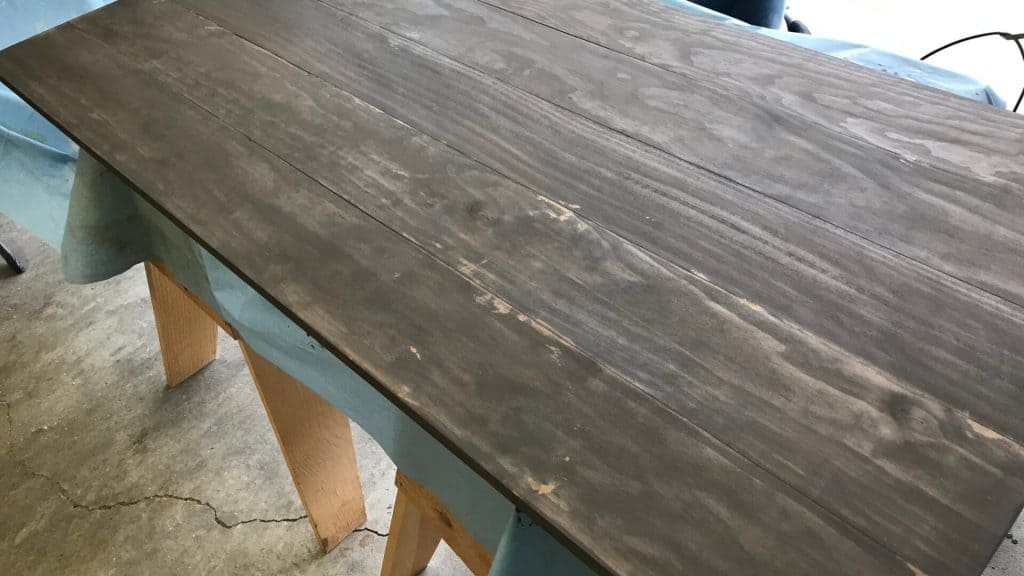
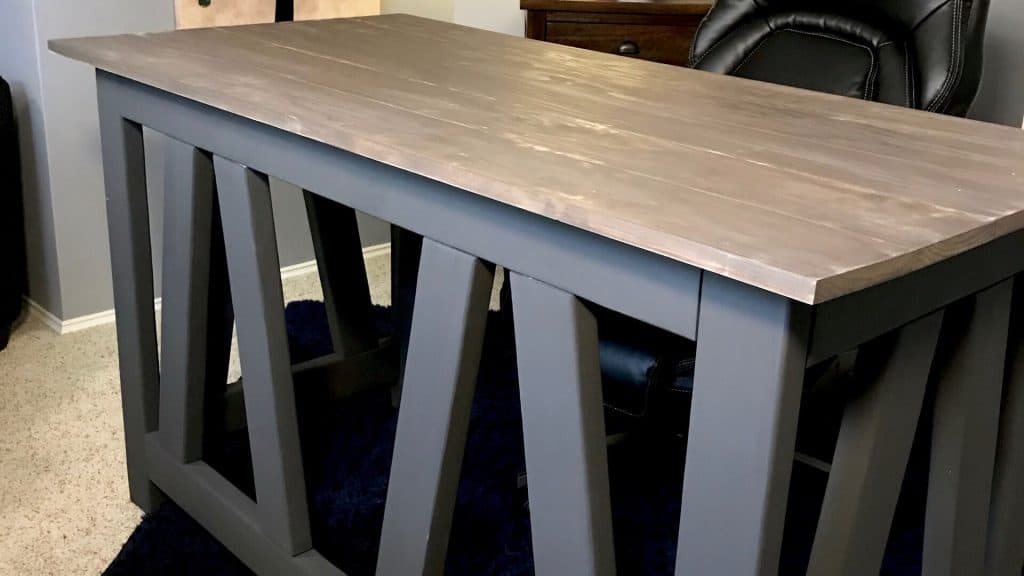
For the desktop, I used Varathane Wood Stain in Briarsmoke.
As you can see, there were quite a few weird splotches on the desktop. I’m thinking this is from wood glue that seeped through. I had used a wet rag to wipe off the wood glue, that had seeped through, and gave the top a finish sand, before staining, but still ended up with these funny splotches. We decided to leave it, as it added to the rustic look we were going for. Plus … the alternative would have been to paint the desktop and we really didn’t want to do that.
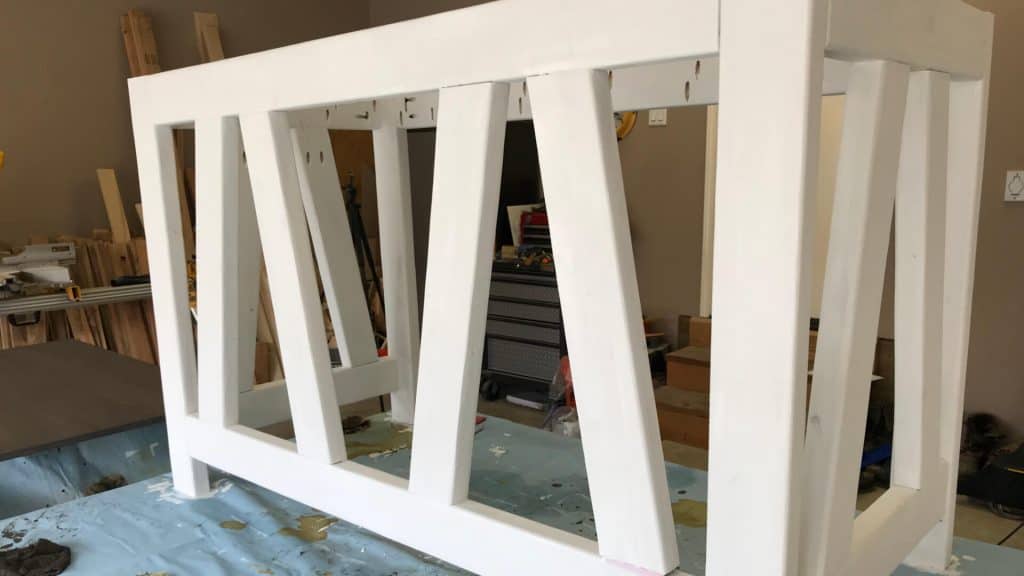
While the desktop stain was drying, I painted a primer base coat on the base of the desk.
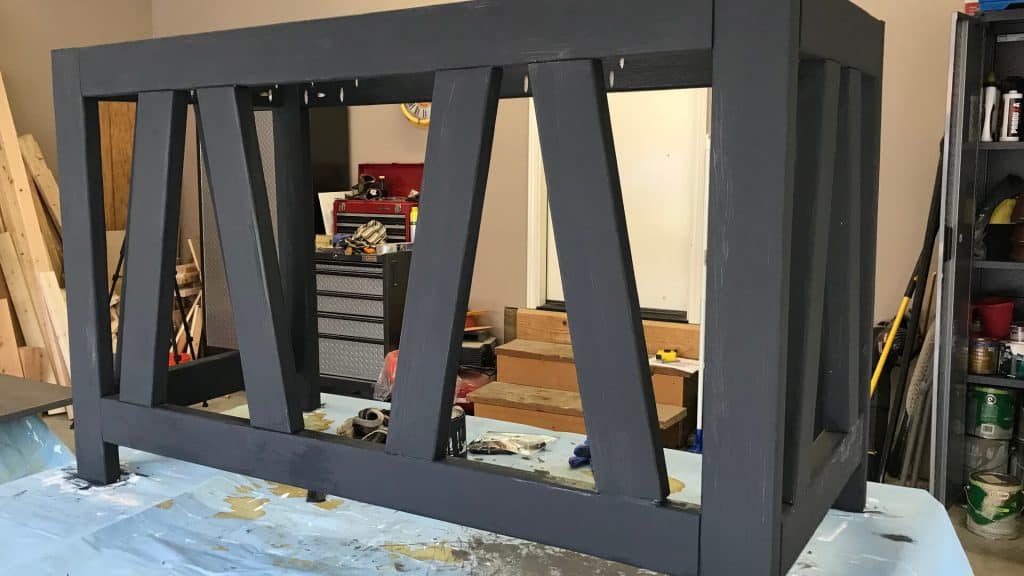
Once the primer was dry, I painted two coats of Chalked Paint on the base, giving it plenty of time to dry between coats. I used Rust-Oleum Charcoal Chalked Paint.
After 24 hours, I used Minwax Wipe-On Poly in Clear Gloss to finish the desktop. I applied one coat, waited 3 hours, gave it a quick sand, wiped it off, and applied a second coat.
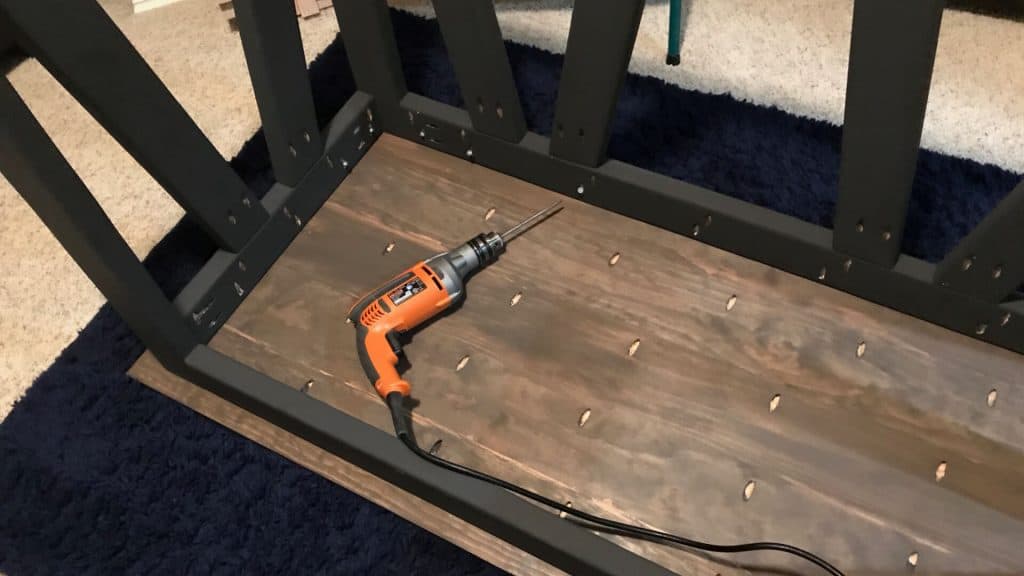
When everything was good and dry, we took the two desk pieces down to my son’s new study room, where I attached the top to the bottom, using 1-1/4″ pocket hole screws.
The big BUMMER is that … the screws went a little bit through the top. UGH! I’m still not sure where I went wrong on this part but, to remedy, I just backed the screws out a bit. They did leave a few small holes on the top, which made me glad we are going for the rustic look anyway.
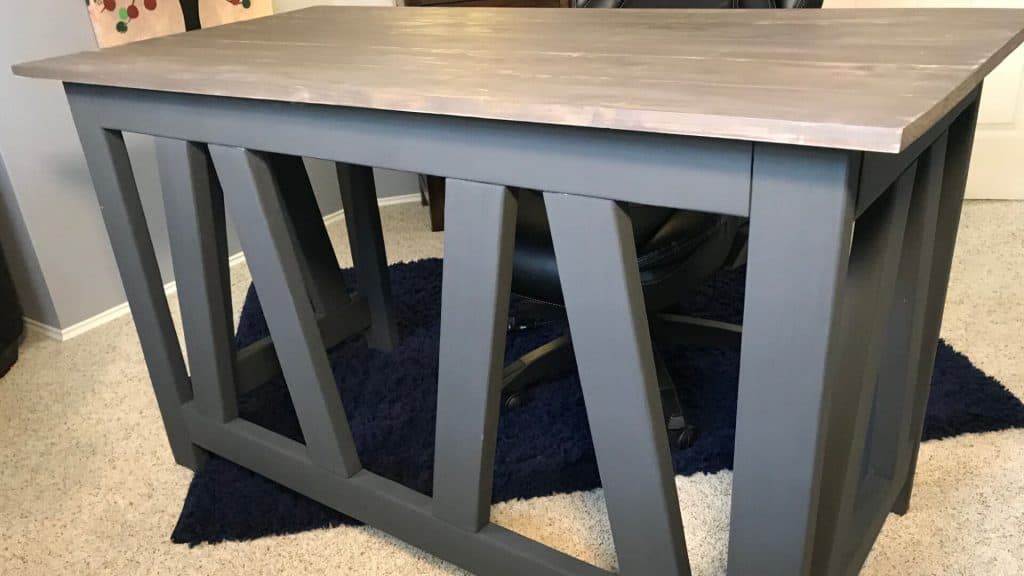
I love the look of the finishes we chose for this desk. I think it kind of has that Industrial Rustic vibe that I like.
How Much Did It Cost To Build This DIY Desk?
At the time of this desk build, prices on 2 x 4’s were a bit high. We ended up spending about $130 on lumber for this desk. Most of the other supplies we already had on hand.
Considering the fact that most desks we found, at a local furniture store, were in the $500 range, we are super happy that this desk didn’t break the bank.
The cost to build this desk will go up if you need to purchase a Miter Saw, Kreg Jig, Kreg Screws and Clamps, Sander, Sandpaper, Wood Glue, Wood Fill, Paint, Stain, and Poly. The cool thing is … once you build up your library of tools and supplies, your next projects will be more cost effective.
What Tools Did You Use To Build The DIY Desk?
- Miter Saw
- Sander
- Kreg Jig
- Kreg Clamps
- Drill
What Supplies Did You Use To Build This Desk?
- 5 – 1 x 6 x 6′ Select Kiln-Dried Square Edge Whitewood
- 6 – 2 x 4 x 8′
- Sandpaper
- 1-1/4″ Pocket Hole Screws
- 2-1/2″ Pocket Hole Screws
- Wood Glue
- Pocket Hole Plugs – Paint Grade
- Plastic Wood
- Stain
- Primer
- Rust-Oleum Charcoal Chalked Paint
- Minwax Wipe-On Poly in Clear Gloss
- Paint Brushes
- Rags
- Drop Cloth
How Long Did It Take To Build The Truss Desk?
It took me six hours to build this desk. We picked up the lumber Sunday morning and by 2:00, I was in the garage working. I called it a day at 8:00. By that point, the desk was built but I hadn’t attached the top to the base, since I wanted to paint and stain them first. Over the next few days, I painted, stained, and applied poly to the desktop. It didn’t take a lot of time to paint and stain but dry times are time-consuming.
We placed the desk in Jack’s study room the following Sunday … it was done by Wednesday but I waited a few days to get help to move it. All in, it was one week to get the desk in the room and in use.
Although we are kind of bummed that Jack won’t get to experience campus life … yet … studying at home will save us quite a bit of money in housing fees … AND he has a great study room, here at home … Yay!