DIY Wood Tray

This DIY Wood Tray has been very versatile and comes in handy to use for many occasions!
Originally, I built this DIY Wood Tray to use for my son’s band merch table. It works great to hold hats and CDs. Then, I decided to make use of the tray between shows for other things, like treats for trick-or-treaters! I also plan to use it in our living room so guests have a place to put drinks!
Since this wood tray has been so useful in our home, I figured it would be a great gift to give others, too!
Tools Used To Build A Wood Tray
This post contains affiliate links. When you purchase through an affiliate link, we receive a small commission at no additional cost to you. Disclosure.
- Miter Saw
- Kreg Jig
- Sander
- Clamps
- Kreg Hardware Jig
- Drill
Supplies Used To Make A Wood Tray
- 1 X 12 in your desired length
- 1 X 4 – 8′ depending on the length of your tray
- Sandpaper
- Wood Glue
- Plastic Wood
- Pocket Hole Plugs – optional
- Kreg Screws
- Primer
- Paint – I used Fusion Mineral Paint in Bayberry
- Handles – I couldn’t find gold handles that I liked, so I spray-painted these with Rust-Oleum Metalic Spray Paint
Steps To Make A DIY Wood Tray
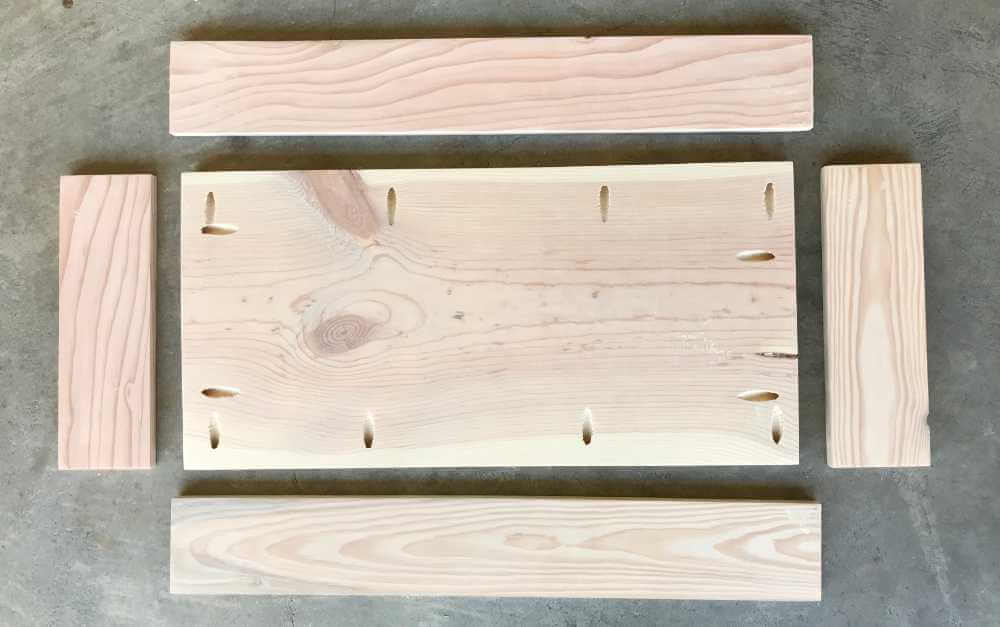
1) Cut 1 X 12 to your desired length.
You can choose a different board size, if you like.
2) Cut 1 X 4 end pieces for your tray.
Either measure the ends of your bottom piece or hold your 1 X 4 up to the end and mark where it should be cut. Be sure to cut OUTSIDE your cut line.
3) Cut 1 X 4 edge pieces for your tray.
With the end pieces standing at the edges of your tray bottom, hold your 1 X 4 up to the three pieces and mark your cut lines. You may choose to assemble your end pieces before you make this mark to make sure your cut line will be the most accurate.
4) Drill pocket holes in your bottom tray piece to attach to the edge and end pieces.
My tray is approximately 12″ X 22″, so I put 4 pocket holes on each long side and 2 pocket holes on the ends.
5) Sand each tray piece.
It is much easier to sand the pieces before you build the wood tray. My wood was in decent shape, so I used 220-grit sandpaper.
6) Attach end pieces to the tray bottom, using pocket hole screws, clamps, and wood glue.
Put wood glue on each end of the bottom tray piece and attach the end pieces, using clamps. Note that the pocket holes are on the bottom of the tray, so they won’t be visible from the top. You can fill these in later, with pocket hole plugs, if you’d like.
Use your Kreg screws to attach the end pieces.
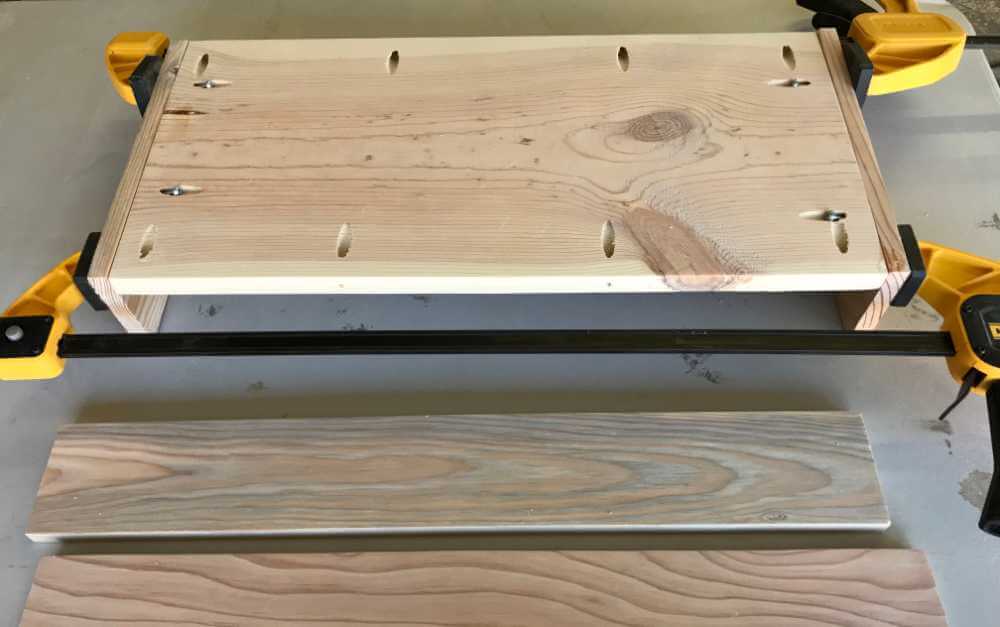
7) Attach the tray edge pieces using wood glue and pocket hole screws.
Line the long tray bottom edges and the end edges with wood glue and attach the edge pieces, using clamps and Kreg screws.
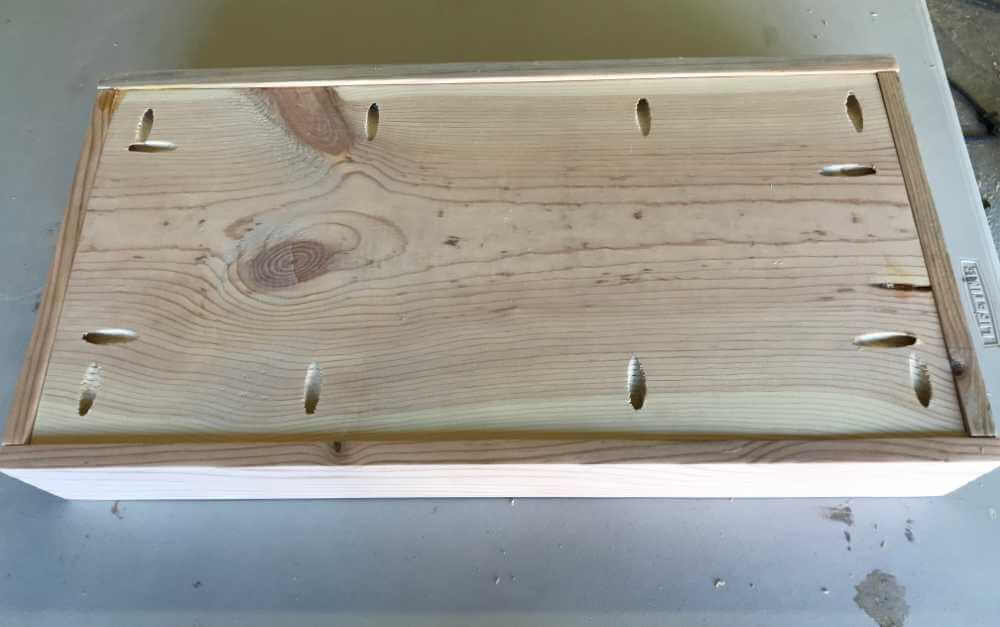
8) Use plastic wood to fill any holes or spots in the wood.
For a more rustic look, you can skip this step.
I chose to use pocket hole plugs and plastic wood to fill the pocket holes on the bottom of the tray.
9) Do a quick finish sand.
Your tray pieces have already been sanded. Now it’s time for a quick sand to prep your tray for painting!

10) Prime your wood tray.
If you plan to paint your tray, it’s important to first paint primer on; otherwise, the wood will soak up a lot of paint and require extra coats of paint.
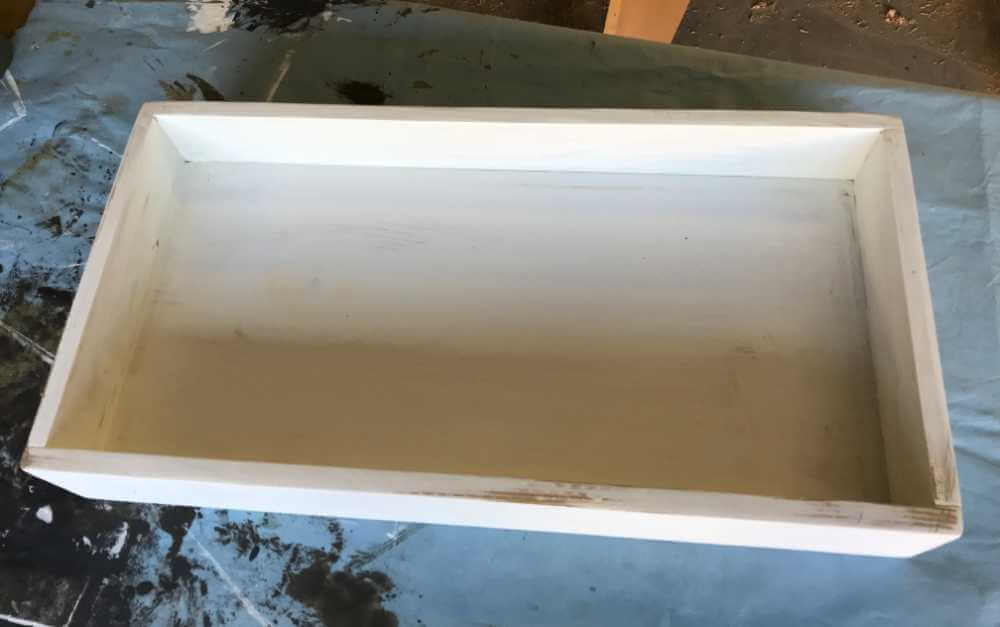
11) Paint your tray!
I used Fusion Mineral Paint that I had leftover from my daughter’s chest of drawers makeover. I really like the way Fusion Mineral Paint looks!
12) Add handles to each end of your wood tray.
To add handles to the wood tray, I first measured the end and marked the center with blue tape.
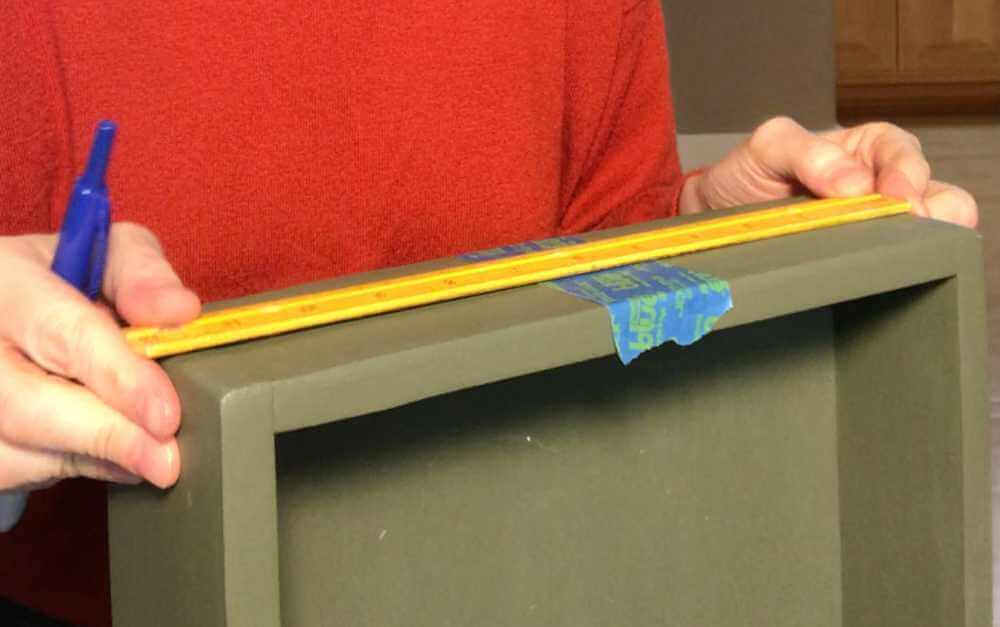
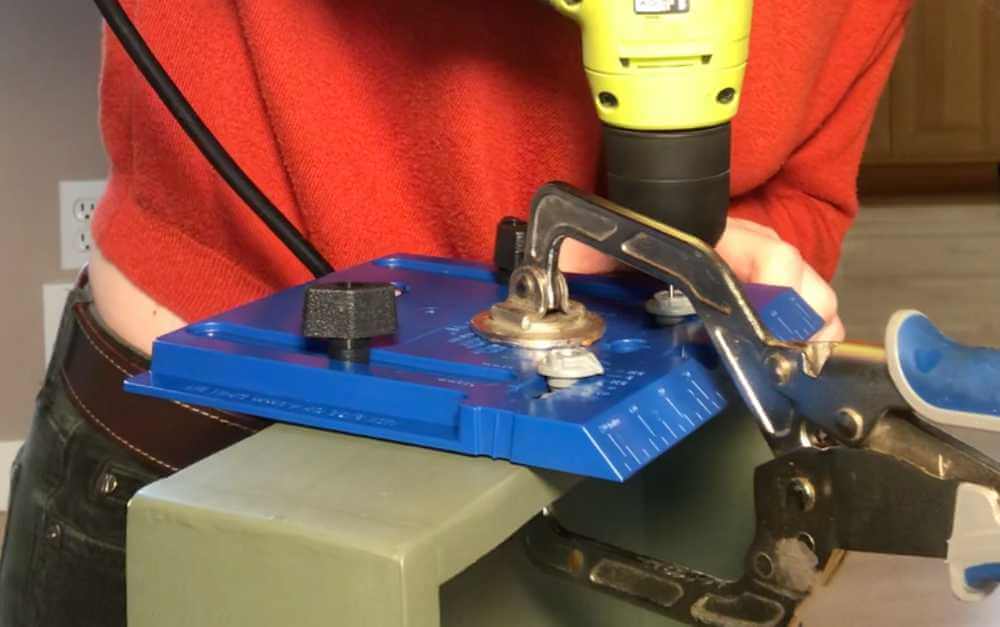
Next, I used the Kreg hardware jig and lined it up on the center line to find the correct placement of the handle holes.
I clamped the jig in place and drilled holes at a very shallow depth. The holes didn’t need to go all the way through because the handles I purchased screw in from the outside.
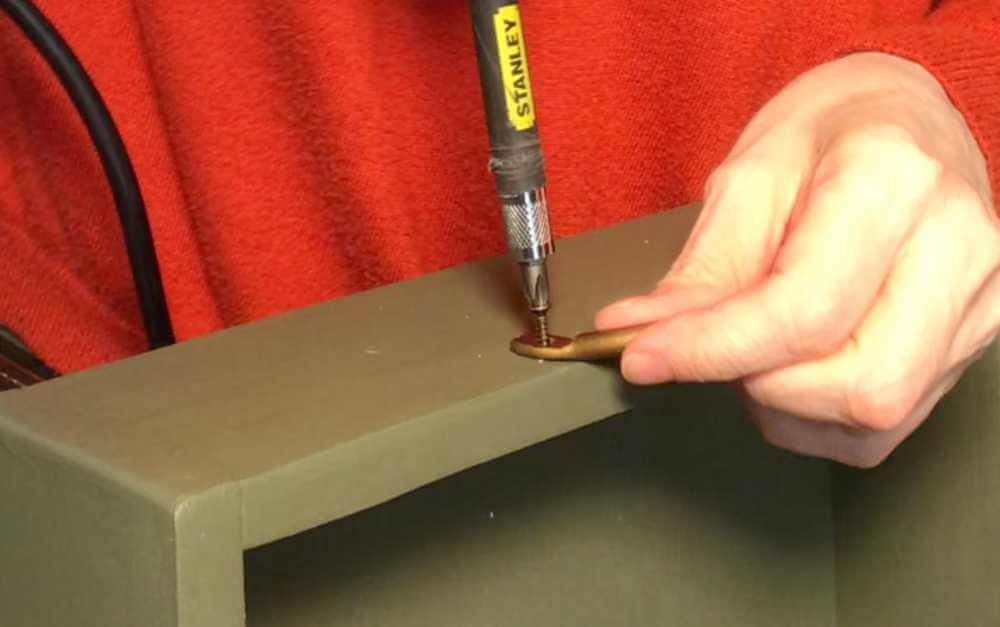
Finally, I attached the handles, with the screws provided.
This tray was easy to build and has been used for many different things and will continue to be used in creative ways!
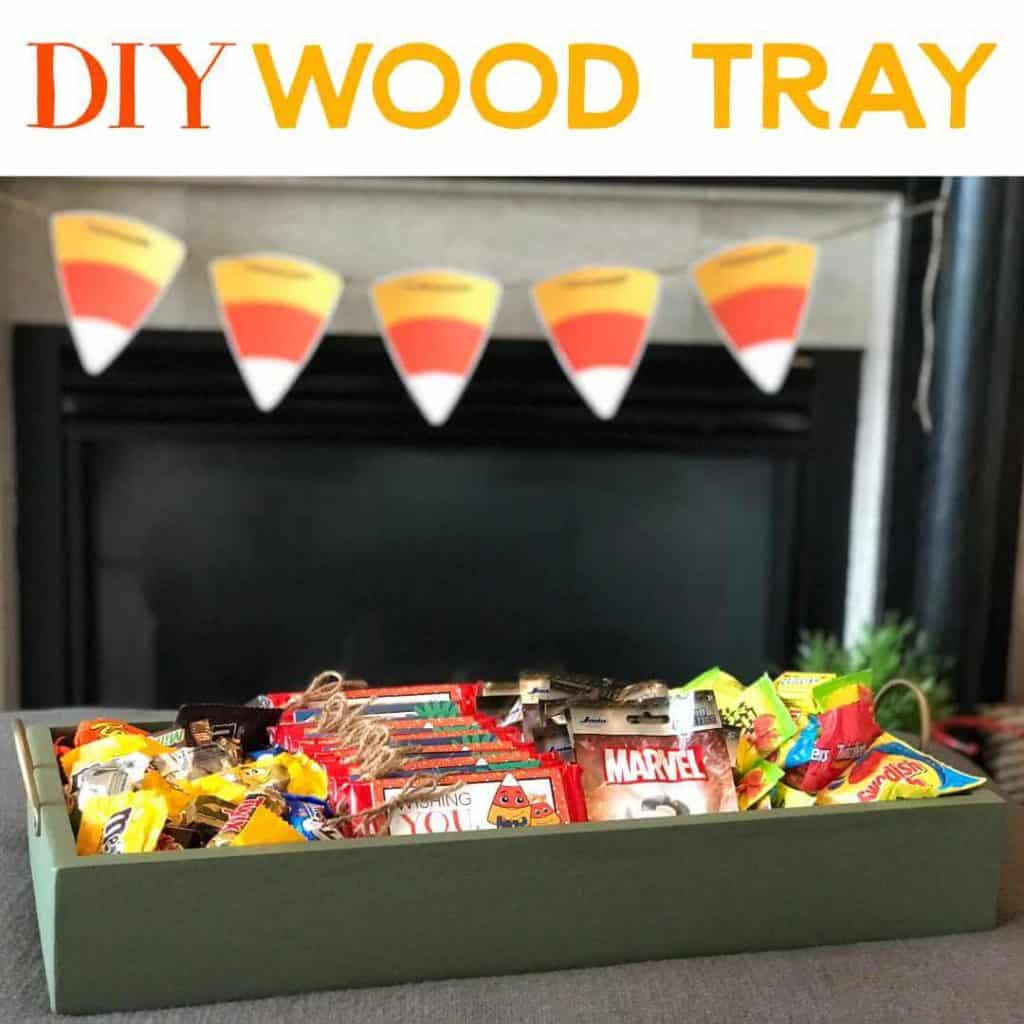
Pictured in the Halloween Treat Tray is Halloween Popcorn!