How To Turn A Coat Closet Into A Mudroom
Do you have a coat closet that you’d like to turn into a mudroom nook that’s functional and pretty, too? We recently learned how to turn a coat closet into a mudroom nook and are ready to share our process with you!
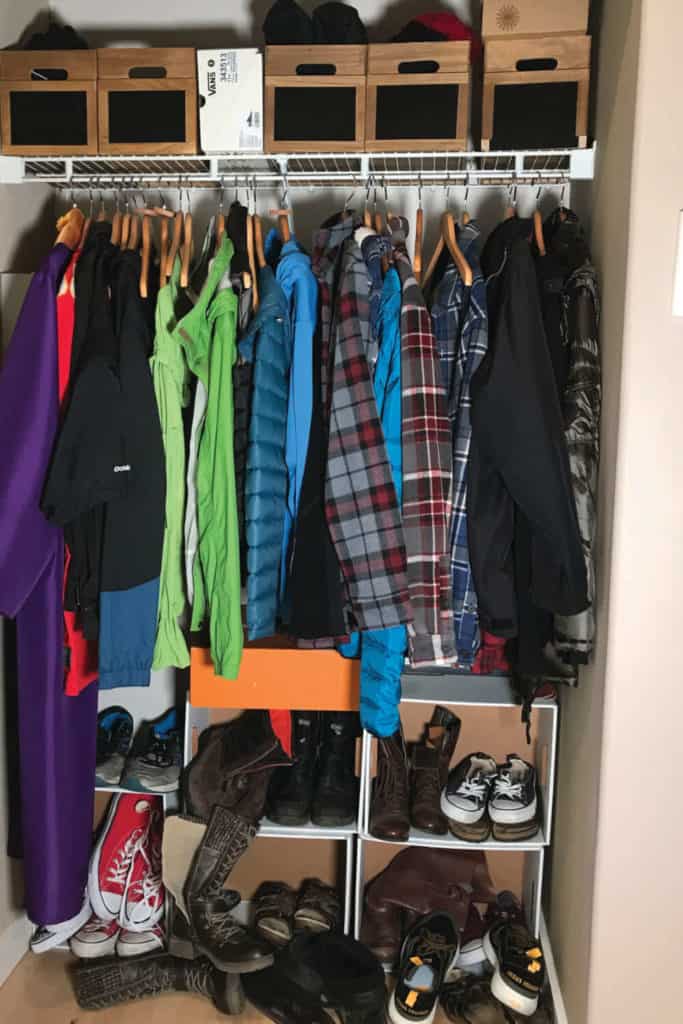
Our coat closet was fairly organized, using file boxes as shelves for shoes and wood boxes on the shelf for winter hats, scarves, and gloves. I’ve never really liked wire shelving though and wanted to ditch the closet doors and create a space to sit and put on shoes so we created a mudroom nook that we are super happy with!
We are known to use file boxes as shelving, in order to stay organized, while we wait to do what we really want to do. Still, the shoes always end up messy.
Clear out your coat closet.
Remove everything from your coat closet including the current wire shelf or closet rod.
This post contains affiliate links. When you purchase through an affiliate link, we receive a small commission at no additional cost to you. Disclosure.
Fill holes.
Use spackling to repair any holes in the drywall, left from removing the closet rod and shelf.
Mark where your studs are.
A stud finder will help you find the studs in your wall. Go ahead and mark them with a pencil.
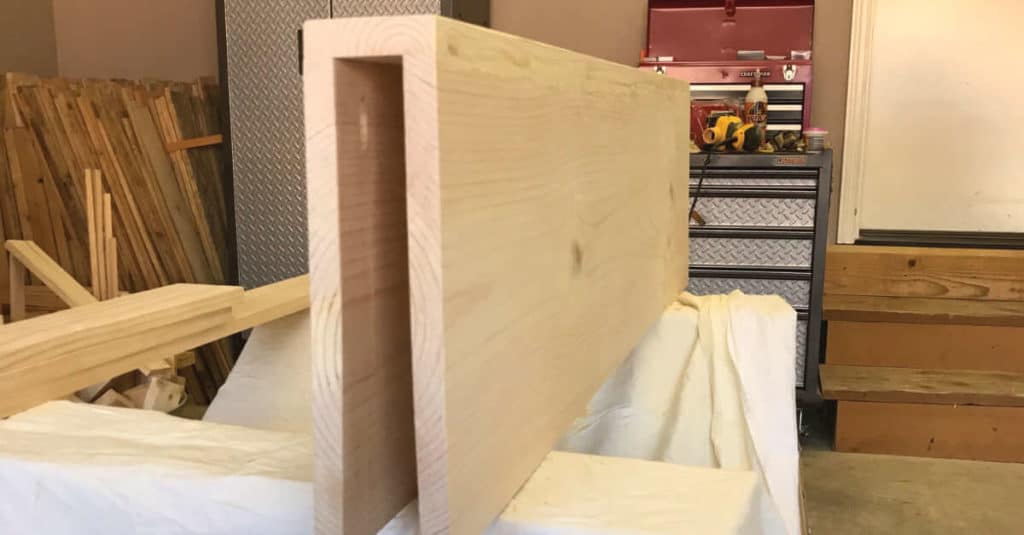
Build a bracket for your built-in floating shelf.
In this case, we used a 2 x 2 to build a bracket for our built-in floating shelf. You may also choose to use a 2 x 3, depending on how wide you want your shelf to be.
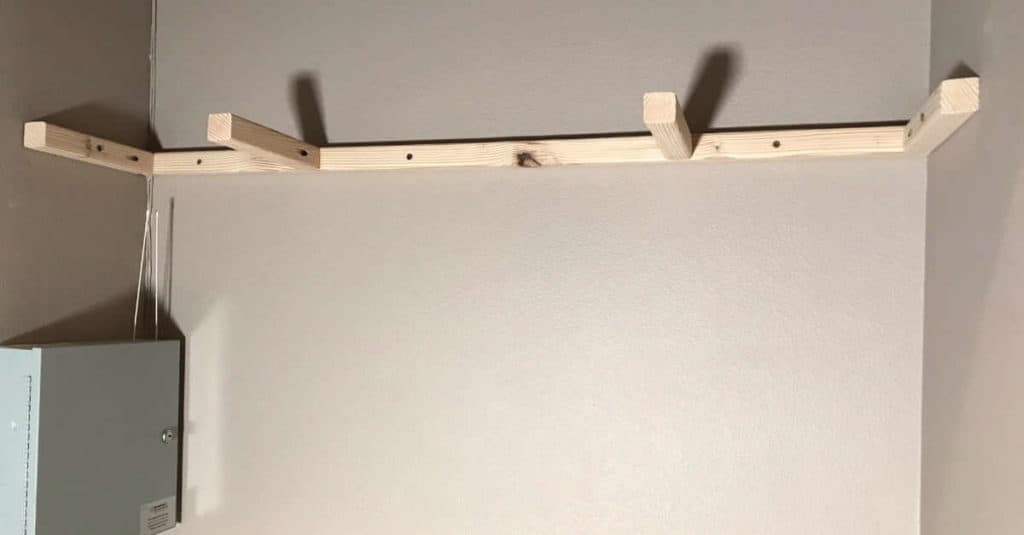
- Measure your back wall.
- Cut a 2 x 2 that fits your back wall.
- Mark where your studs are and also mark L, for left and R, for right so you are sure to place the board in the right orientation on the wall.
- Pre-drill holes where your stud marks are.
- Cut cross brackets out of 2 x 2 and drill pocket holes in one end of each one. The length of your cross brackets will depend on the width of your shelf. I used 1 x 12’s on my shelf so I cut my brackets at 9-1/2 inches because the 1 x 12 is actually 3/4 x 11-1/2 and the back wall bracket is 1-1/2″ (9-1/2 + 1-1/2 = 11″ so the bracket fit nicely in the 11-1/2″ width).
- Attach your center brackets, using pocket holes, and avoid placing them where your wall studs are marked.
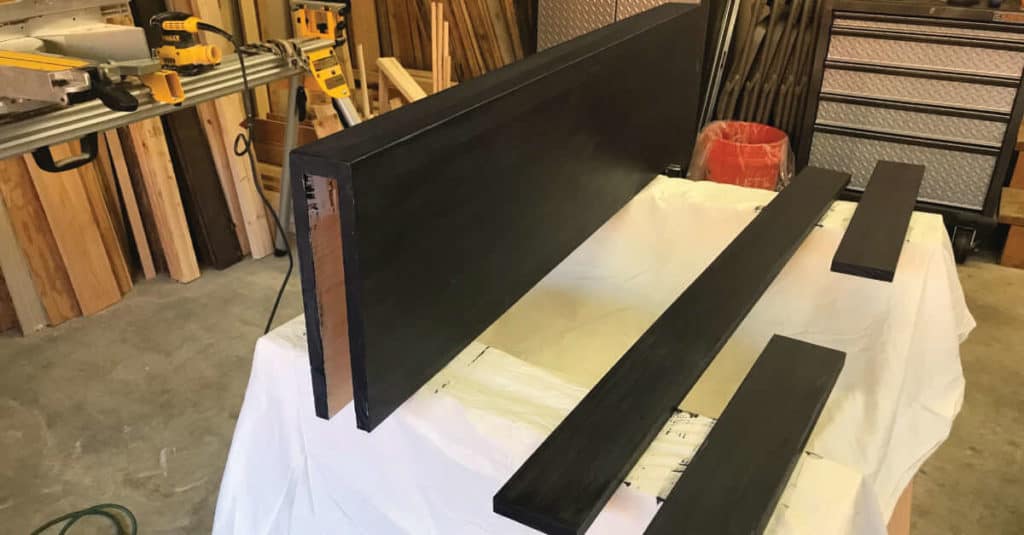
Build a floating shelf.
We chose to use 1 x 12s and purchased a 1 x 4 to rip down for the front piece.
- Cut your boards a tad shorter than the width of your closet. You’ll need two 1 x 12s and 1 x 4. Since closet walls aren’t perfectly square, you will have a small gap at the end, in order to fit the shelf into the closet.
- Create a stack by placing your bottom shelf piece down, the bracket next, and the top shelf piece on top.
- Measure how high the pieces are, stacked, and add 1/4″ for clearance. This will be the measurement you will rip your front board piece (the 1 x 4) to.
- Once you’ve ripped the front-facing piece, sand each piece.
- Use wood glue and pocket holes to secure the 1 x 12s to the front-facing piece. You may also choose to use a nail gun. I used a combination of the two since I couldn’t fit my drill in the small space to use pocket holes so on the second side, I used my nail gun instead. You could also attach the pieces with pocket holes on the outside of the 1 x 12s and fill them in with wood pocket hole plugs.
- Dry fit the floating shelf bracket inside your floating shelf to make sure it fits.
Attach floating shelf bracket to the wall.
- Attach the wall bracket to the back wall, using the pre-drilled wall stud marks. I used deck screws.
- Then, attach your end brackets, using pocket holes. After attaching the pocket holes, attach the side brackets to the side walls with a screw. It’s important to wait to attach the end bracket after your back piece is already secured to the back wall so everything fits properly.
Dry fit the floating shelf.
You’ve already tested to make sure the shelf fits onto the bracket but now that the bracket is on the wall, you need to dry fit the floating shelf onto the bracket to make sure it fits into your space.
On my first try, the floating shelf was a bit too wide to fit inside the walls so I cut it down just a tiny bit, using my table saw.
Cut 1 x 4’s to length for coat hooks.
Cut 1 x 4’s to fit the back wall and closet sides and sand.
Prime your shelf and coat hook boards.
If you plan to paint your floating shelf and coat hook boards, you first need to prime them.
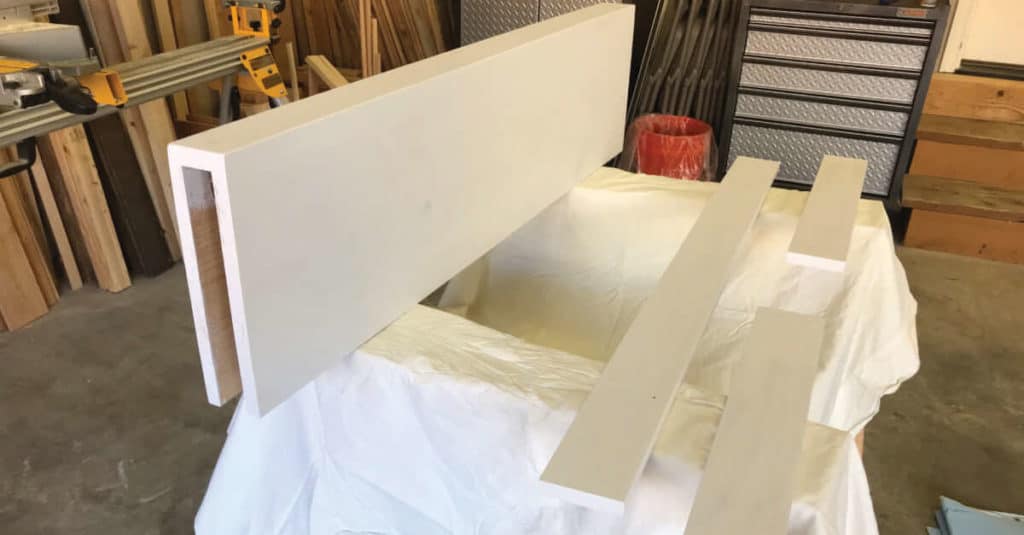
Paint!
After the primer is dry, it’s time to paint! I used two coats of Fusion Mineral Paint in Midnight Blue.
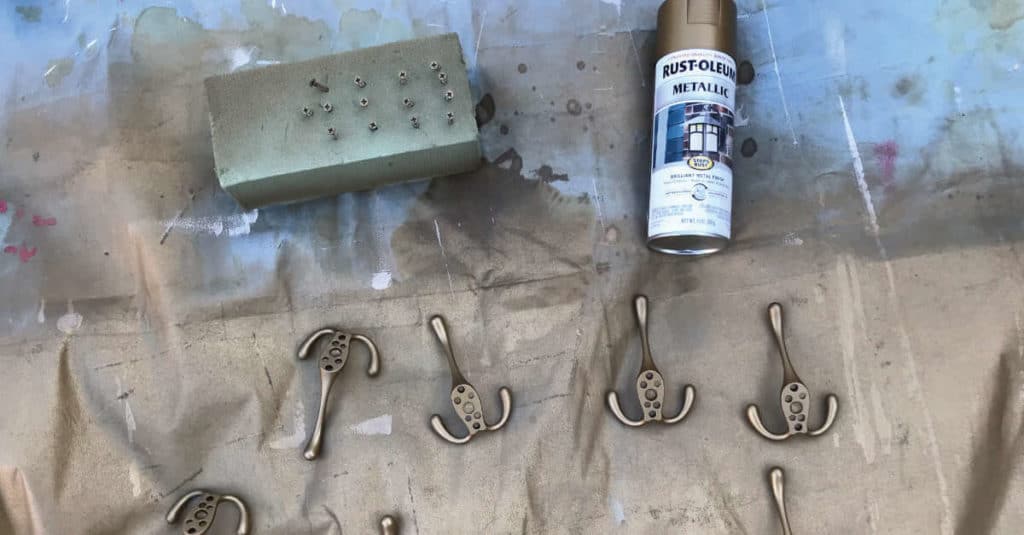
Attach coat hooks to coat hook boards.
Mark where the studs are located on your coat hook boards and pre-drill two holes in each stud location.
Before you hang your coat hook boards to the wall, attach your coat hooks, using the spacing you like and avoiding the stud holes.
I couldn’t find gold hooks so I chose to spray paint hooks to get the color I liked!
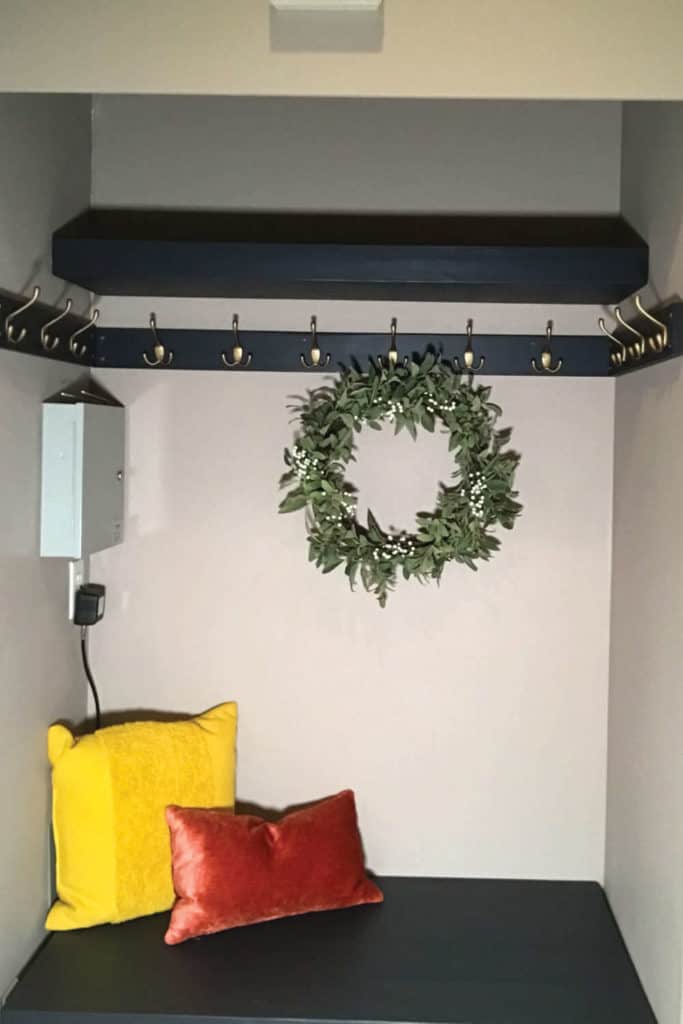
Install the floating shelf.
Slide the floating shelf onto the floating shelf bracket. I used one deck screw in the center, bottom, back to attach the shelf to the bracket and to keep everything in place.
Attach coat hook boards to the walls.
Attach the back coat hook board to the back wall using your pre-drilled stud holes. Then, attach the side coat hook boards.
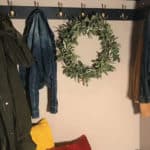
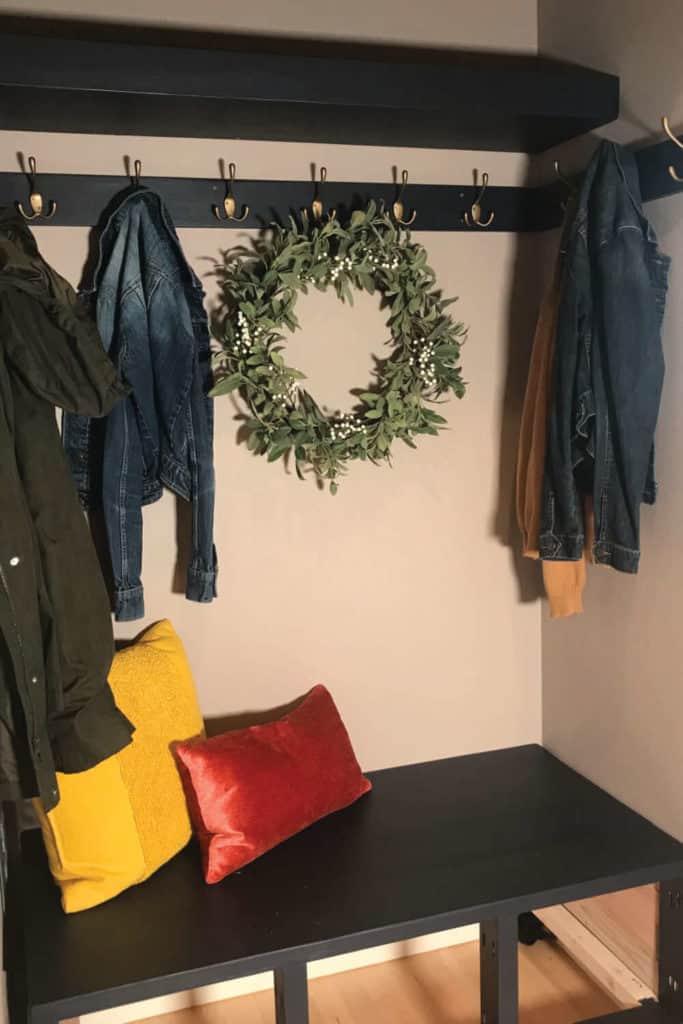
Enjoy your new mudroom nook!
We had quite a few obstacles to work around in our coat closet. Security system, cable boxes, etc. Because of this, we weren’t able to build in a bench. Instead, we built a free-standing bench, on wheels. However, I am waiting on pieces to build the drawers so it isn’t yet complete.
Eventually, drawers will hold shoes and winter gear!
The process to convert a coat closet into a mudroom nook is pretty simple and the results are amazing!