How To Throw A Tie Dye Party
My son’s band wanted to sell tie-dye shirts with their band logo on them but I discovered tie-dye shirts are pretty expensive to buy so the guys chose to take on the challenge of making their own tie-dye shirts.
This post contains affiliate links. When you purchase through an affiliate link, we receive a small commission at no additional cost to you. Disclosure.
We went to Walmart and picked up a tie-dye kit to use on shirts we had ordered from Jiffy and picked up an extra bag of rubber bands.
Tie Dye Party Supplies
- T-Shirts
- Tie Dye Kit – Came with gloves, rubber bands, and dye in squeeze bottles. However next time I’d like to try Tulip brand dye.
- Rubber Bands (extra)
- Plastic – A plastic tablecloth would work.
- An Old Sheet – This helped soak up the extra dye so it wasn’t sitting in puddles on the plastic table covering.
- Dowels – For creating shirt designs.
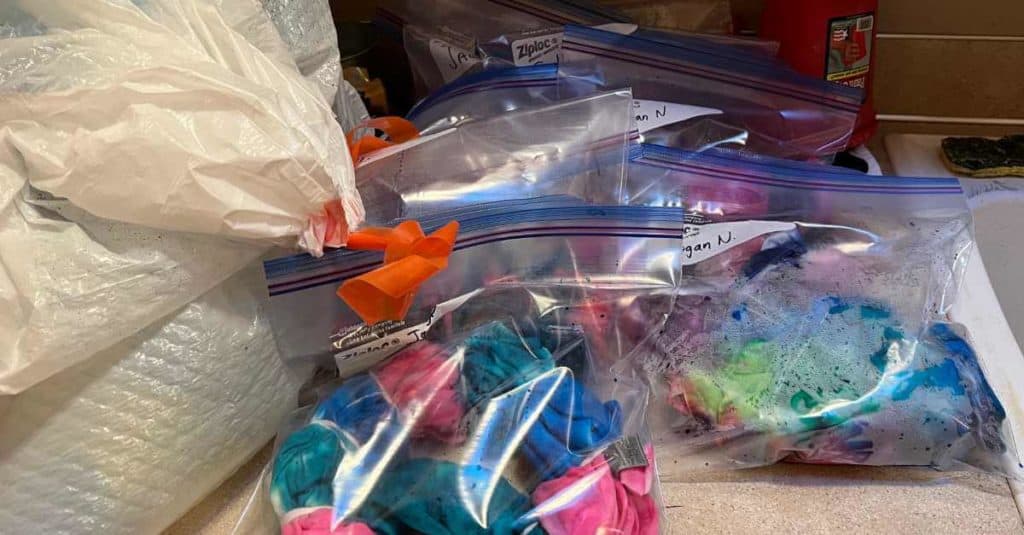
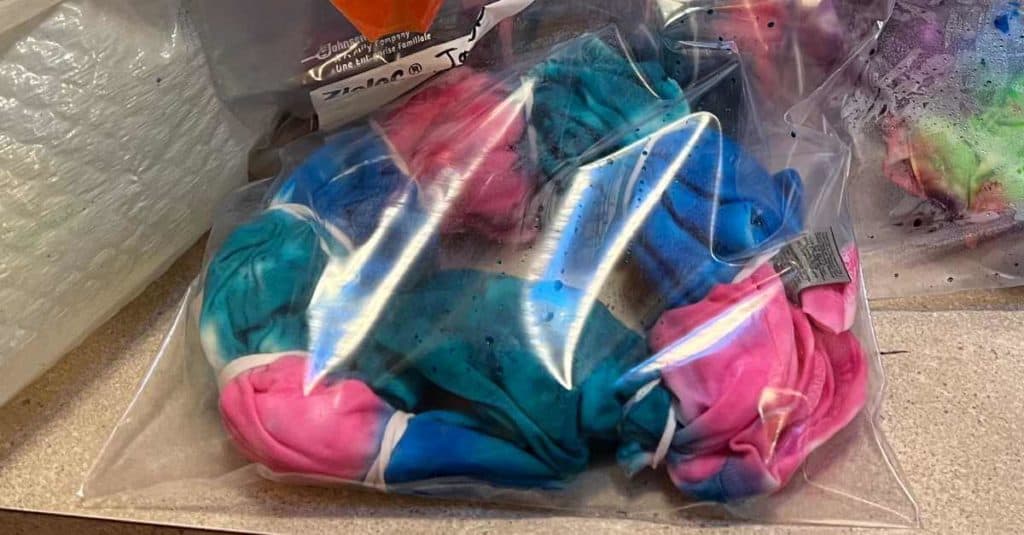
- Gallon Ziploc Bags – To let your shirts soak in for 6 – 8 hours. We also used kitchen garbage bags for the shirts we rolled on dowels.
- Sharpie – To write names on bags.
- Cookie Cooling Racks – Or something similar, to place your shirts on while dyeing.
How To Set Up Your Tie Dye Tables
It would be beneficial to have a space set up for wrapping rubber bands around shirts, a separate space for tie-dye, and a spot to leave your creations to soak.
You can check out our tie-dye stations here!
Design Table
This table will have the following supplies:
- T-Shirts
- Rubber Bands
- Dowels
- Tub of Water – optional
Tie Dye Table
- Plastic Tablecloth
- Old Sheet or Tablecloth
- Cookie Cooling Racks
- Gloves
- Squeeze Bottles With Tie Dye
- Tarp for the Floor – optional
Soaking Table
- Gallon Ziploc Bags
- Sharpie
How To Tie Dye
- Pre-wash your t-shirts to remove any chemicals that are on them from manufacturing.
- Soak your t-shirt in a tub of water and ring out. This step is optional.
- Choose your design. Your tie-dye kit will have a few ideas for you. My favorites are the swirl, bullseye, or the stripe.
- Create your design palette, using rubber bands.
- Move to the tie-dye table and place your shirt on a cookie-cooling rack or something similar. This will keep your shirt from sitting on leftover dye, ruining your design.
- Squeeze your preferred dye colors onto your shirt.
- Have someone hold a Ziploc bag open for you, over the tie-dye table, while you place your shirt inside.
- Close up your bag and write your name on it.
- Let your shirt soak for 6-8 hours but no more than 24.
- After soaking, place your shirt in a bucket of equal parts vinegar and water (by itself) and let it soak for 30 minutes.
- Remove your shirt from the vinegar solution, take the rubber bands off, and rinse until the water runs clear. We have an old, stained sink that I did this in. Some people use a bucket with water to rinse or rinse their shirts outside, with a hose. Just know that whatever method you use will get dye on it.
- Wash with a bit of laundry detergent, by itself. I ran each shirt through the wash two times.
- Hang to dry!
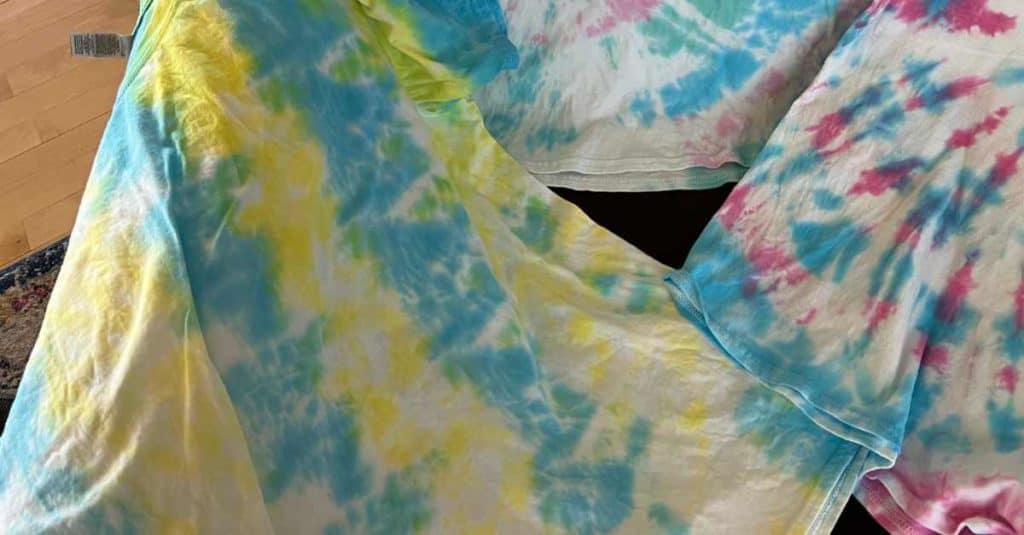
Tie Dye Methods
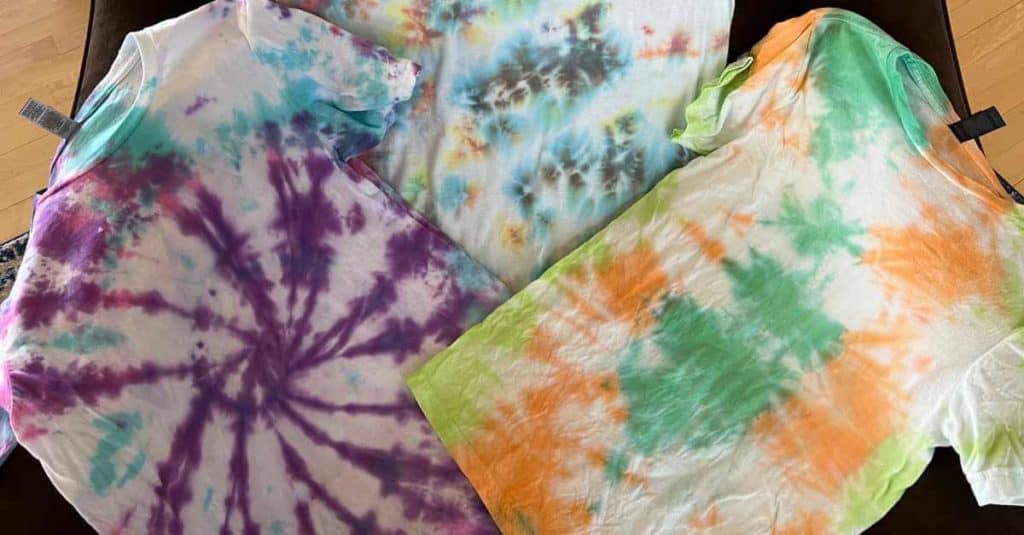
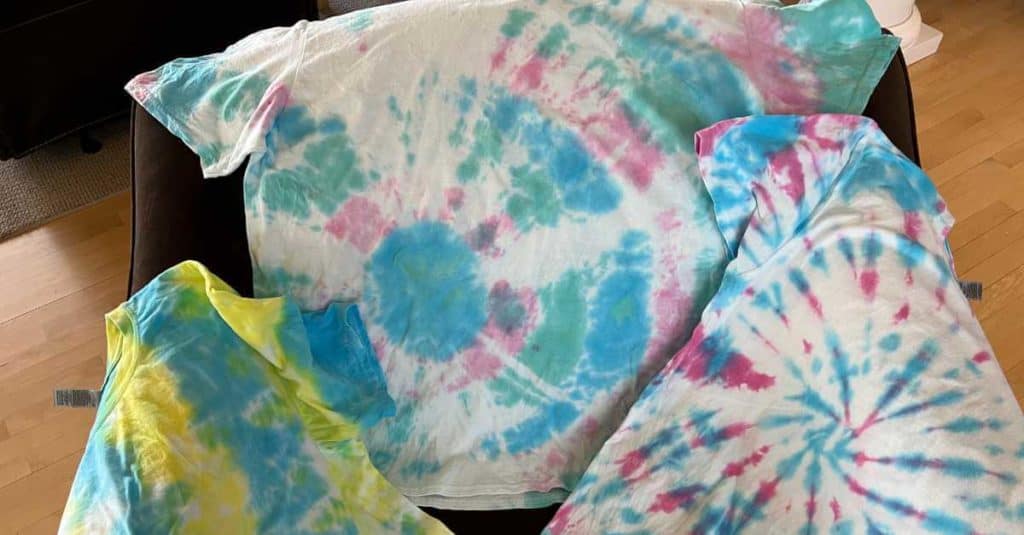
Swirl
The swirl method is the shirt on the left, in the picture below.
- Place your shirt on a flat surface.
- Put the end of a dowel rod where you want your swirl to start.
- Twist the dowel rod to make your shirt form a swirl. Towards the outer edge, you may need to help the swirl along.
- Remove the dowel rod.
- Place rubber bands around the swirled shirt kind of like pizza slices.
- Squeeze different color dyes in each section or alternate colors, by section.
Bullseye
The bullseye method is in the center, in the picture below.
- Place your shirt on a flat surface.
- Determine where you want your bullseye to start, pull that piece up, and place a rubber band around it.
- Continue down, placing rubber bands as you go.
- Squeeze different color dyes on each section or alternate the colors.
Stripe
The stripe design is the shirt on the left, in the picture below.
- Place your shirt on a flat surface.
- Use a dowel to roll your shirt from top to bottom or bottom to top. The part that is on the outside of the shirt will have the most saturated color, while the part closest to the dowel will be the lightest.
- Scrunch the shirt on the dowel, from each end.
- Place a rubber band around each end and in as many spots as you’d like in between.
- Squeeze different color dyes on each section or alternate the colors.
Scrunch
- Place your shirt on a flat surface.
- Scrunch the shirt up.
- Tie rubber bands around the shirt.
- Squeeze different color dye on each section or alternate the colors.
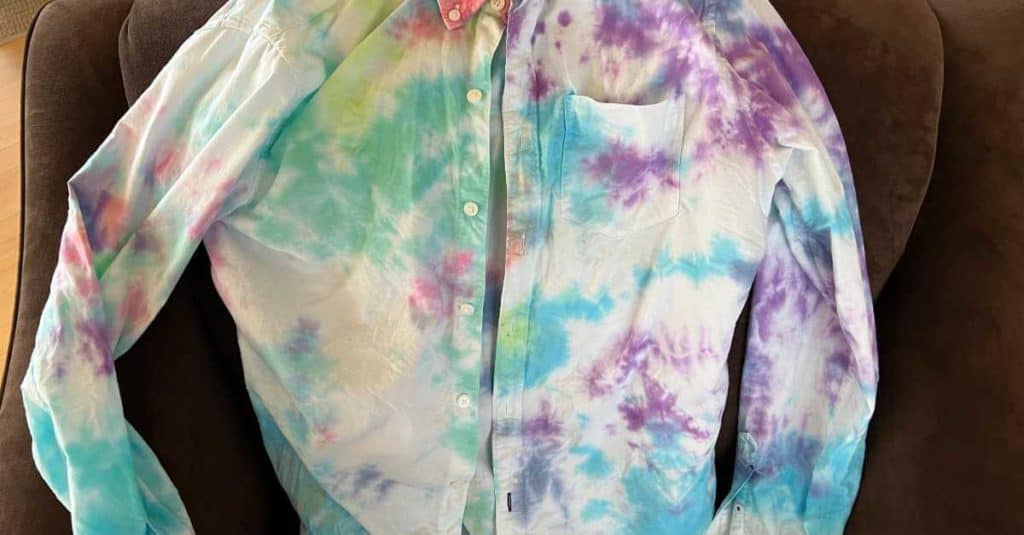
Tip: Mixing the colors orange, green, and purple will create the color brown.
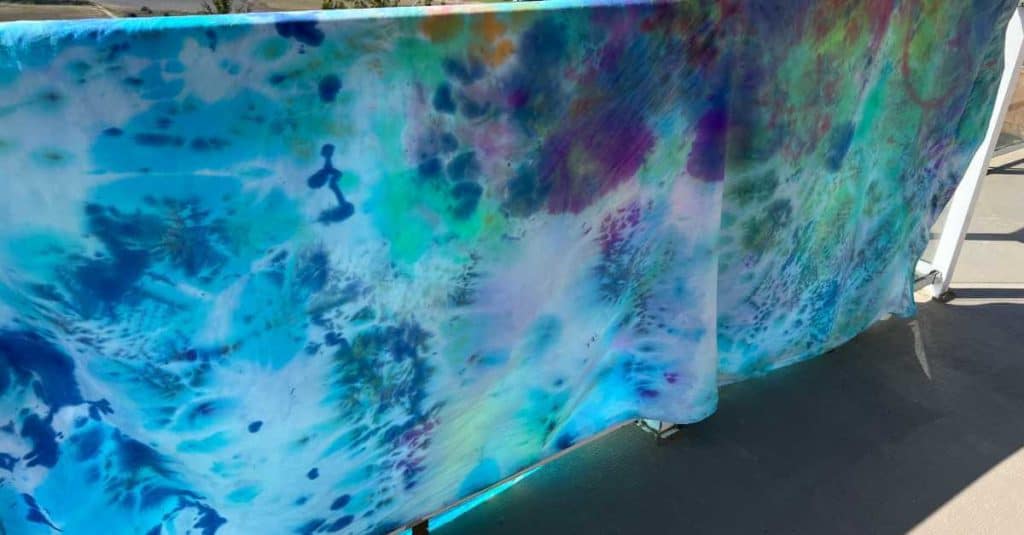
Once mixed, tie dye loses its effectiveness so the guys decided to use the rest of the tie dye on the old sheet we had covering the table. They thought it might make a good tablecloth for their merch table. It turned out better than I thought it would!
What We Learned
This was my first time doing tie-dye shirts and they turned out pretty good! We did learn a few things, along the way:
- We didn’t cover the floor under the dye table and dye did end up on our kitchen floors. The guys were able to clean it up quickly and it was all good but, in the future, I may choose to put plastic or a tarp on the floor or tie-dye in the garage.
- The colors didn’t turn out as vibrant as I had hoped. This could be from not using enough dye on the shirts. We will try the Tulip brand next time to see if that makes a difference.
- Creating a design you’ve thought through matters!
Because we had prepared the different spaces with the proper supplies beforehand, the guys were done dyeing 11 shirts in one hour. The next day, our washing machine stayed busy washing each shirt, individually, but I think it was worth it!