Easy DIY Wood Christmas Tree Triangle

If you’re looking for an easy and inexpensive gift idea for Christmas, check out this Easy DIY Wood Christmas Tree Triangle. It may be a bit time consuming, while waiting for paint to dry, but it’s a pretty straight forward project that makes a great gift to give or item to sell at a Christmas bazaar.
Each year, in an effort to keep it a Cash Christmas, I try my best to come up with a festive, yet inexpensive, DIY gift idea for my husband’s co-workers. I have a neighbor complaining about the noise my saw makes so I opted for a gift that wouldn’t require too much use of my saw.
After seeing triangle Christmas trees at a few Christmas bazaars, I decided this could be a good fit! However, I couldn’t find instructions on how to make them so … I came up with my own.
Tools Used To Make Triangle Christmas Trees
This post contains affiliate links. When you purchase through an affiliate link, we receive a small commission at no additional cost to you. Disclosure.
- Miter Saw
- Sander
- Silhouette Cutting Machine
- Paint Supplies
DIY Triangle Christmas Tree Supplies
- 2 x 8 x 8 Doug Fir – Depending on what size trees you want to make. If you want larger trees or want to create a Triangle Tree Trio, you may also want to use 2 x 6 x 8 and 2 x 12 x 8.
- Sandpaper
- Vinyl
- Transfer Tape
- Foam Paint Rollers
- White Paint – I used Behr Ultra Pure White
- Green Paint – Behr Premium Plus Flat Low Odor Interior Paint & Primer in Perennial Green
- Red Paint – Behr Premium Plus Flat Low Odor Interior Paint & Primer in Fire Cracker
Depending on how many trees you plan to make, you could probably get away with purchasing paint samples.
How To DIY Wood Christmas Tree Triangles
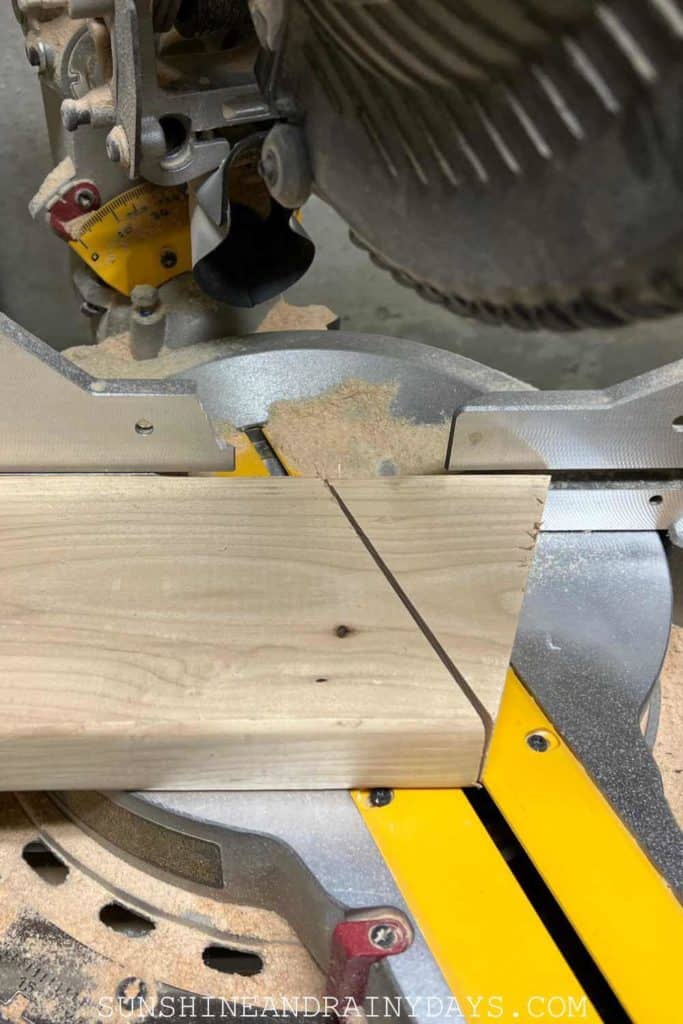
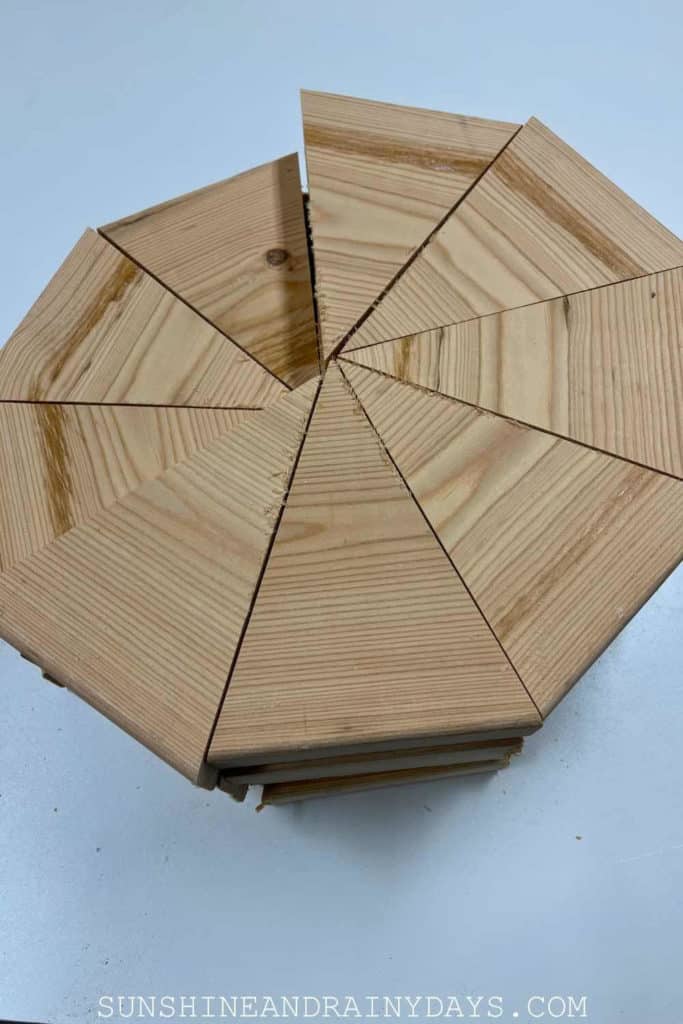
- First, cut your board into triangle shapes using a miter saw. I cut mine at 20° and, instead of moving the saw blade back and forth, I flipped the board for each cut.
I miscalculated how many boards I would need because I went by the 5″ base of each tree not taking into consideration that each 5″ piece of board would give me two trees, not just one.
You should be able to get about 18 trees from one 8′ board but you will have some pieces that are unusable so take that into consideration.
2. After cutting the triangle shapes, we sanded each piece with 80, 120, and 220 grit sandpaper, wiping them down with a damp cloth between each grit.
3. Next, I painted the front of each triangle white because that is the color we wanted to come through for the lettering and designs.
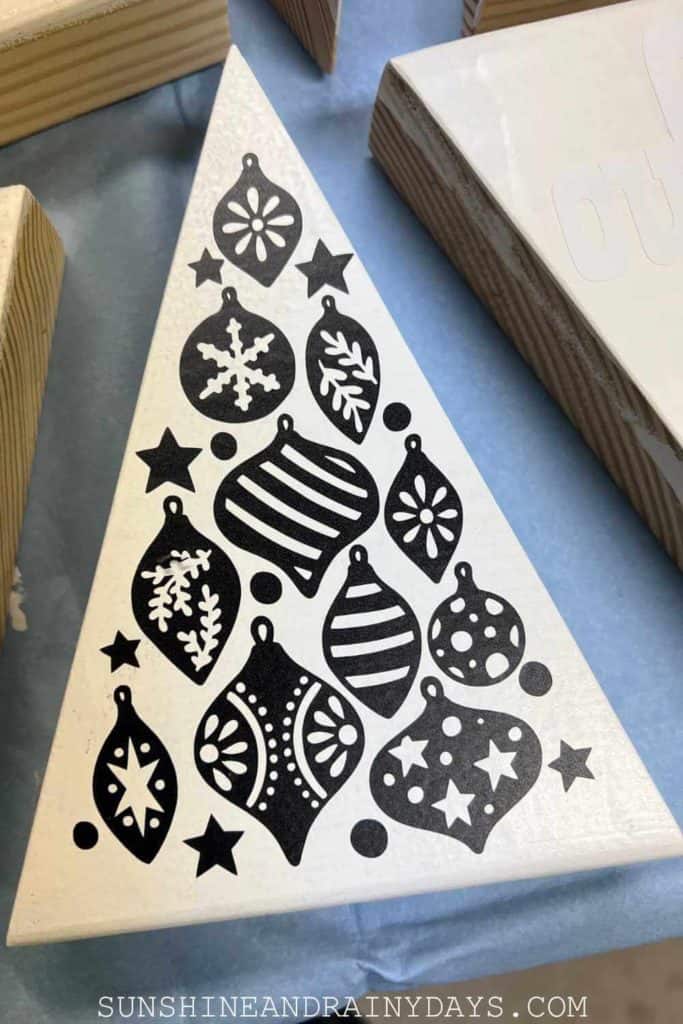
4. While the white paint was drying, I cut lettering and designs out of vinyl on my Silhouette. I purchased the designs from the Silhouette Design Store.
5. As new designs were cutting on my Silhouette, I weeded designs that had already been cut. The designs you choose will determine how much time you spend weeding.
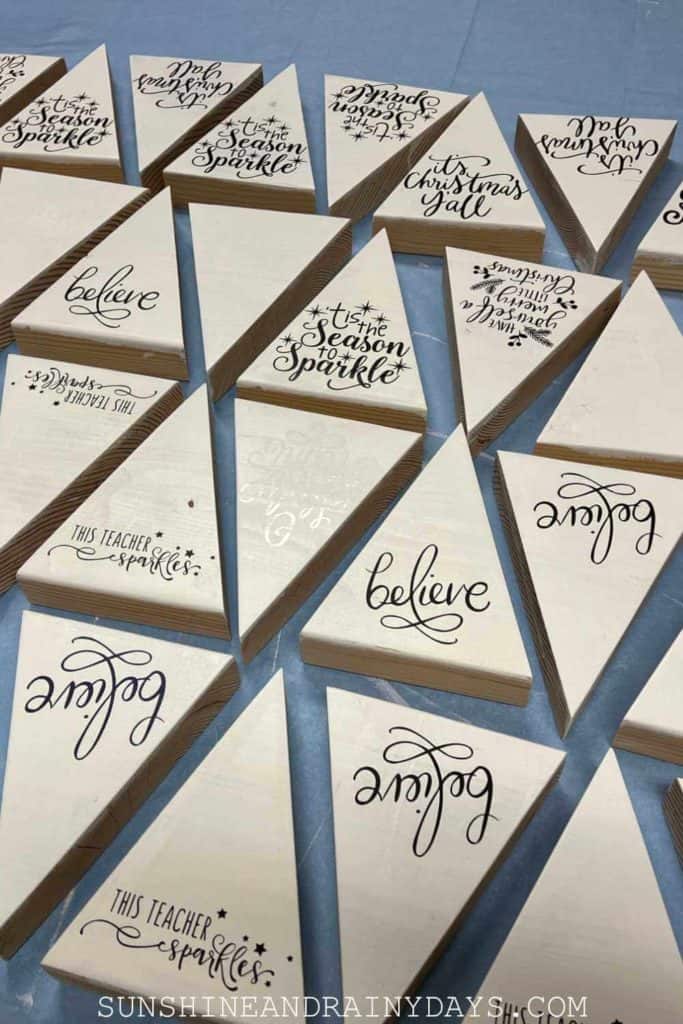
6. After weeding my designs, I adhered transfer tape to each 12 x 12 section.
7. Then, I cut each design out of the 12 x 12 section.
8. Next, I peeled the backing off of the design and applied the designs to the triangle trees.
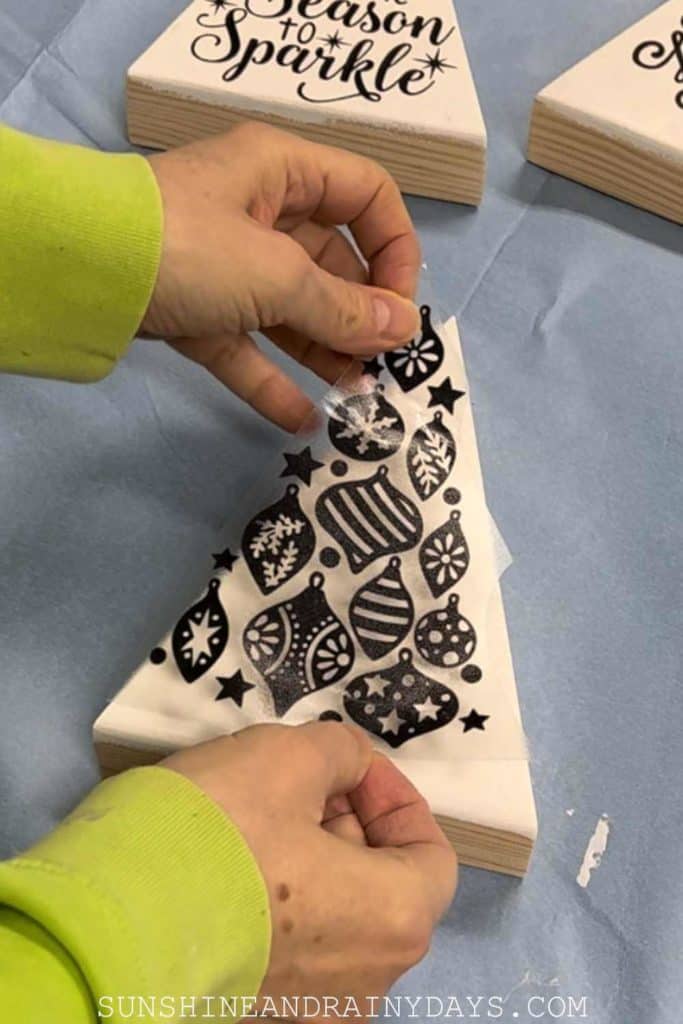
9. After applying the design to the wood triangle, with transfer tape, I burnished the design onto the wood and peeled back the transfer tape, being careful to make sure the design was staying on the wood.
10. Then, I went over the design with my fingertips, ensuring it was pressed down good.
As you can see, from the picture below, I used both white and black vinyl since that’s what I had on hand. It was difficult to see the white vinyl on the white paint so I probably wouldn’t use that again. Also, I happened to have permanent vinyl on hand and wouldn’t use that again either as it pulled up some of the white paint when I peeled off the designs.
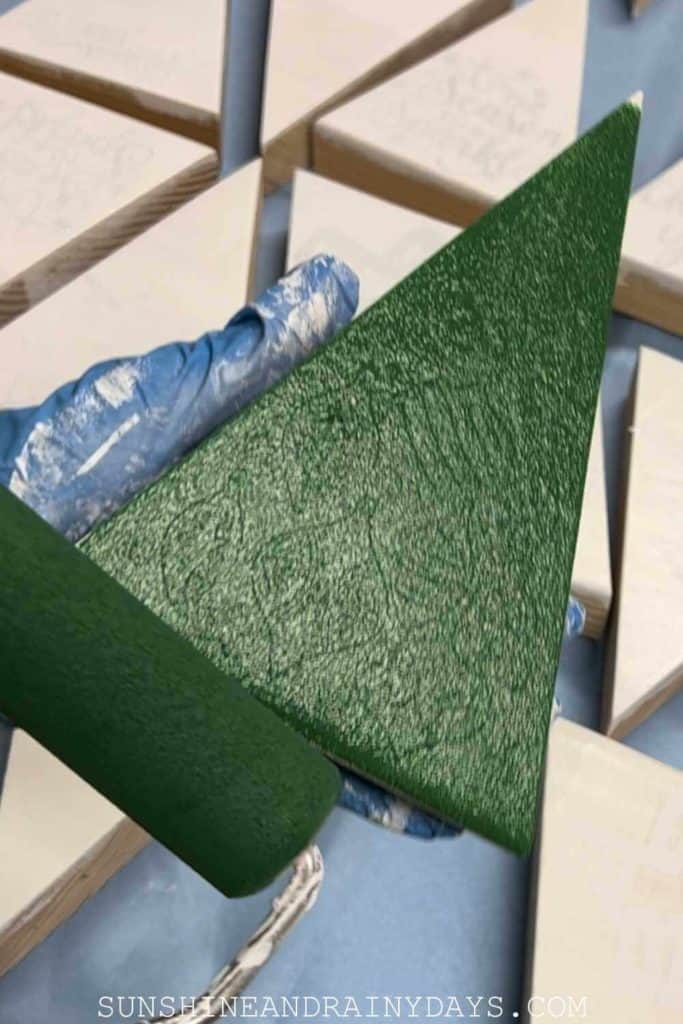
11. After I had adhered all of my designs, I used my foam roller to paint white over the designs. I do this so that if any paint were to bleed under the vinyl, it would be the same color as what’s under the design and seal the edges of the vinyl so the next color won’t bleed.
12. Then, once the white or ‘sealing paint’ is dry, paint your final color over the top.
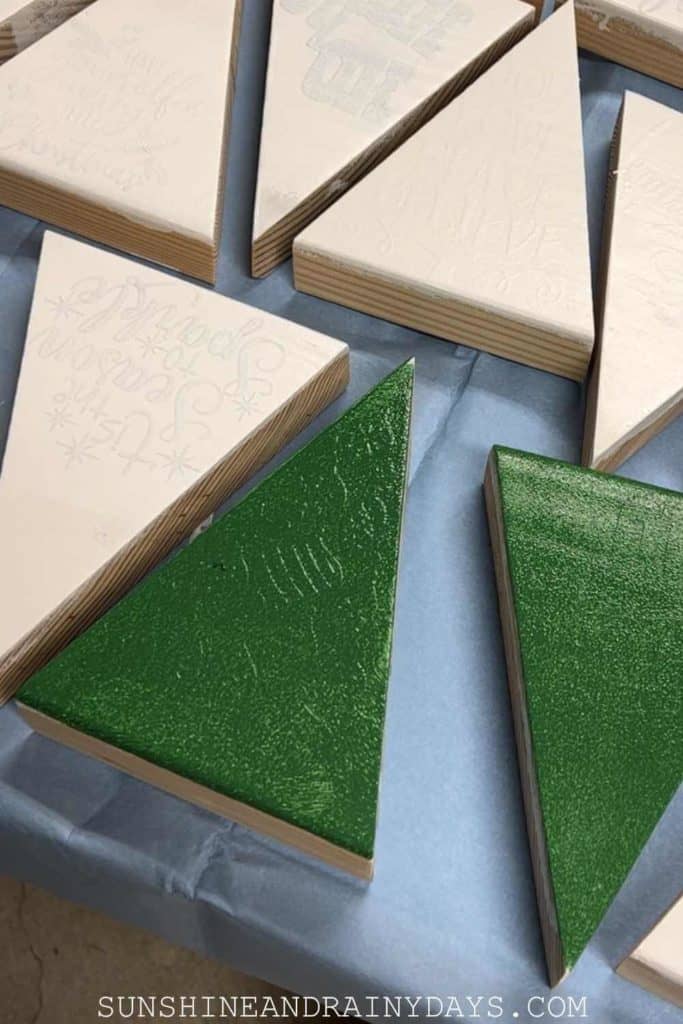
13. Once your top coat is dry, it’s time to peel off the vinyl.
Hint: It is important to do your painting and remove the design in the same day so it is easier to remove the vinyl. Otherwise, removing the vinyl can be difficult and may pull up hardened paint that you don’t want removed.
14. Paint the remaining sides of your tree with your final color.

As you can see, it isn’t a perfect process and I still have a few nicks here and there where my tool dug into the paint. Let’s just say it makes them a bit more rustic!

Although there may be an easier way to make these trees or purchasing a gift would be much simpler, I have to say that, although time consuming, this was a pretty easy project and a good way to make gifts for many people. It was also an inexpensive project.
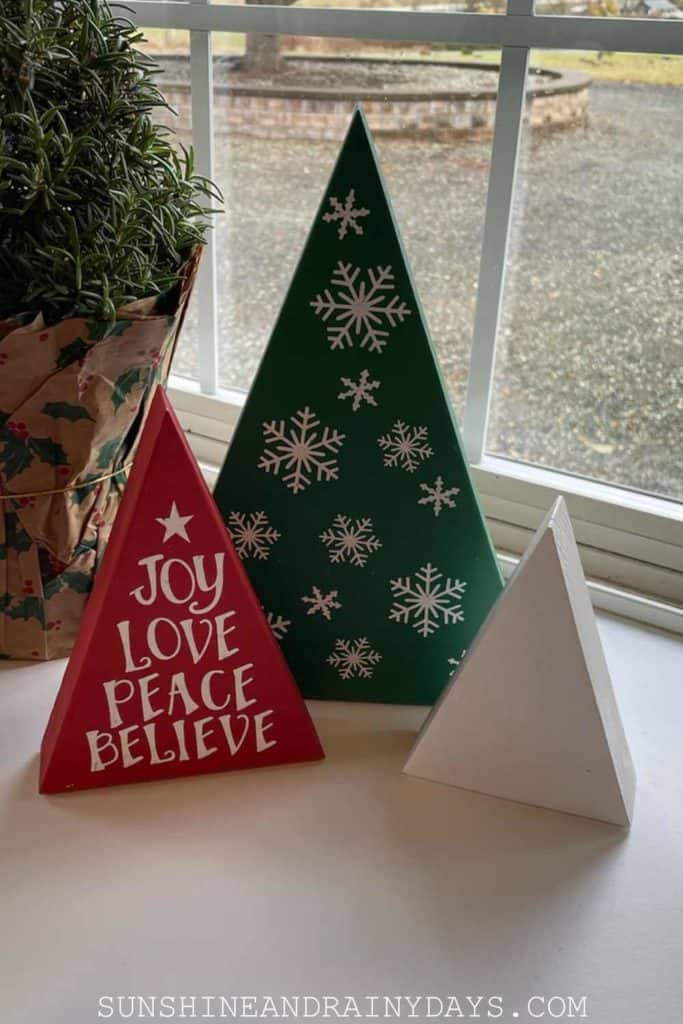
We made a few sets of triangle wood trios. The red one, pictured below, was from a 2 x 8 x 8 and the others were from scrap wood I had on hand!
My hope is that my husband’s co-workers would feel the love that went into these trees and, although imperfect, they would make them feel appreciated and valued!