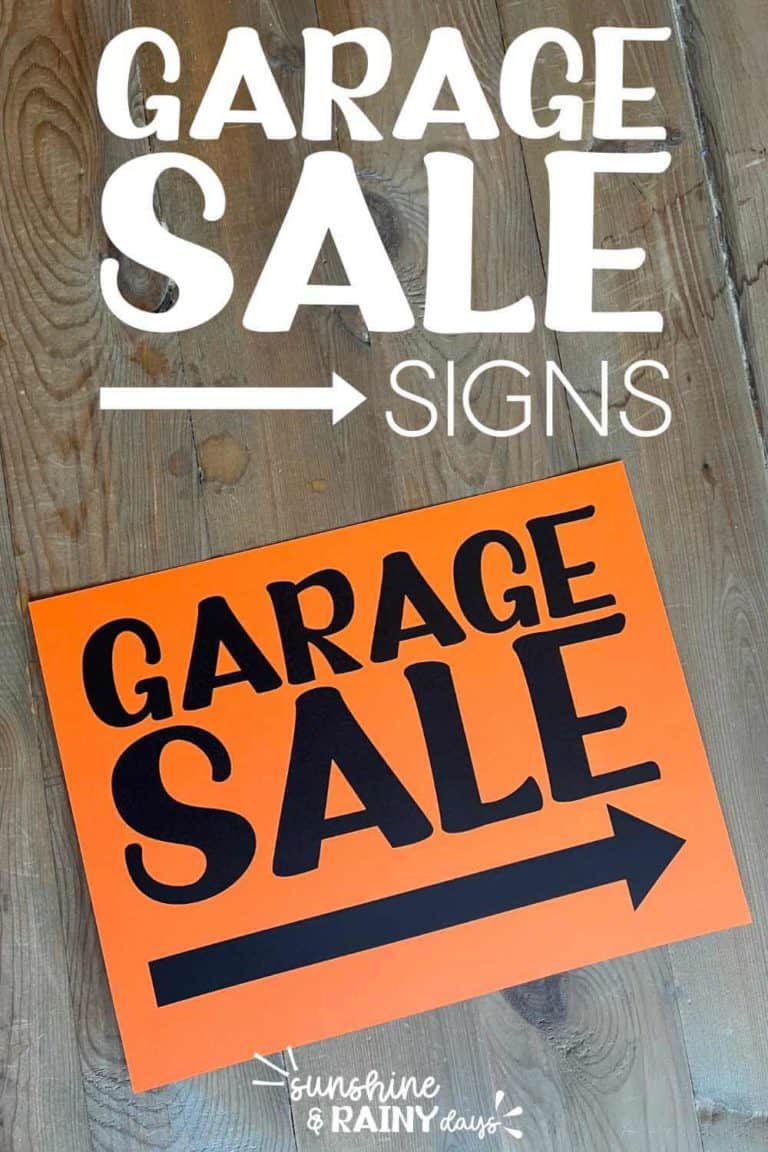
DIY Garage Sale Signs
You’ve cleared the clutter and are ready to sell your stuff at a garage sale, but you need Garage Sale Signs! Signs that will last year after year because you plan to clear the clutter often! It’s time to learn how to make DIY Garage Sale Signs that will last!
In 2017, we sold our home of 13 years, sold a third of our belongings, and moved into an apartment while we searched for our next home. We crammed a lot into that apartment and also had a very small storage unit for things like our lawnmower and ping pong table. It didn’t make sense to store our old rickety a-board garage sale signs, so we sold those too.
Then, a year into our new home, we were ready for another garage sale. I like using a-board garage sale signs because they stand out and are sturdy. However, I didn’t want to pay a lot for them because this is a garage sale and I’m trying to make money not spend it. So, I learned how to build a-board signs. They were so easy to make that my daughter started building DIY Chalkboard Signs, using the same steps, to sell at a youth farmer’s market.
Clutter is nothing more than postponed decisions.
Barbara Hemphill
This post contains affiliate links. When you purchase through an affiliate link, we receive a small commission at no additional cost to you. Disclosure.
Supplies
1 x 4 x 8 (3) – Here’s the deal: I used 1 x 4’s because they had been gifted to me by a friend. You can use whatever you would like. Just don’t spend a lot on this because it will be outside in the elements and doesn’t need to be perfect. You could use 1 x 3’s or 2 x 4’s if you’d like! You will need 3, 8′ boards for one a-board sign cut into 4, 40″ boards and 4, 20″ boards to build your frame.
Utility Plywood 2.7mm 4′ X 8′ – Hardware stores will cut this for you. I had them cut four boards with the dimensions of 35″ x 24″ (enough for two signs) and had a little left over for future projects. You will only need two 35″ x 24″ boards for one sign.
Hinges (2) – Just be sure the screws are the right length for the boards you choose!
1-1/4″ Pocket Hole Screws (16) – I used 1 x 4’s so 1-1/4″ pocket hole screws were right for me but if you use a thicker board, you will need to adjust what size screws you use.
Short Nails – Short enough so they don’t poke through the front side of your frame.
Paint – I used Glidden Kissable Pink. I didn’t know that was the name until I looked at it again. I bought a quart and have plenty left for other projects.
Black Vinyl – If you have a cutting machine and plan to use it to make your letters, numbers, and arrows.
Tools Used
- Miter Saw
- Kreg Jig
- Kreg Clamps
- Drill
- Silhouette – This is optional. Don’t buy a cutting machine just for making Garage Sale Signs. You have options!
Signage matters but if you’re looking at the supplies and tools list and feeling overwhelmed, you might want to start out with Printable Garage Sale Signs or, if you’re not using a garage, Printable Yard Sale Signs. While I don’t think they are as effective as a-board garage sale signs, they are better than nothing and are easy on your budget. After all, you’re trying to make money not spend a bunch on tools you don’t have or can’t borrow.
How To Build An A-Board Sign
It was surprising how fast this sign was to build! I had planned to build the frames while my husband did yard work, but I was done with the frames before he had a chance to get to it. So, we headed to the hardware store for the paint, hinges, and plywood, and I finished up while he mowed the lawn. The longest part of this project was waiting for the paint to dry.
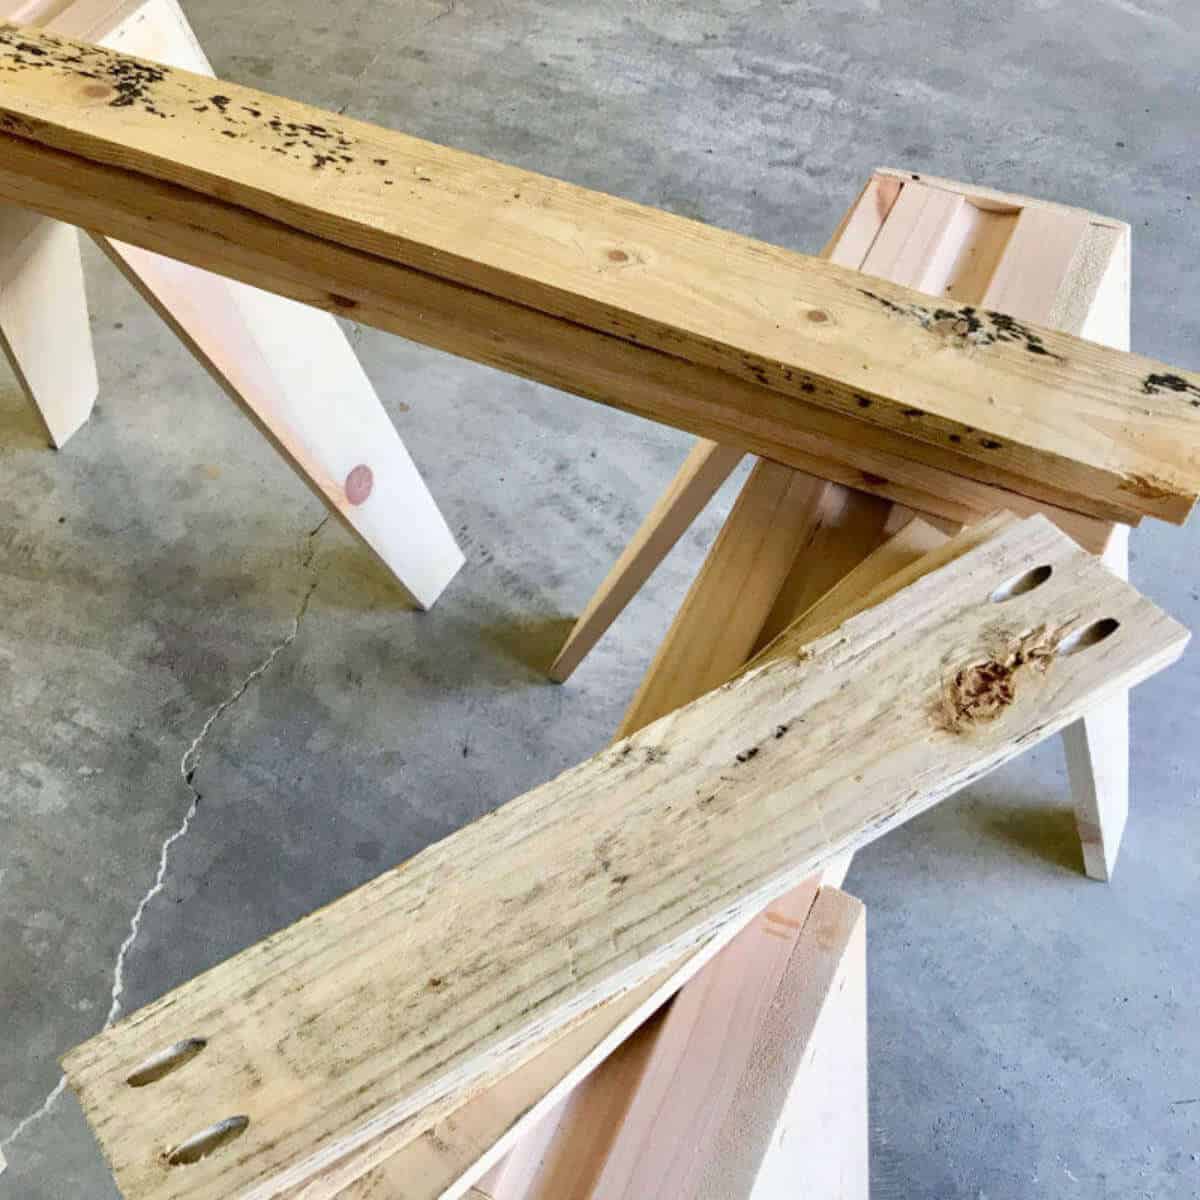
1) Cut The Boards
You will need 4, 40″ boards and 4, 20″ boards for one a-board sign.
2) Drill Pocket Holes
After you’ve made your cuts, drill two pocket holes into each end of all four 20″ boards.
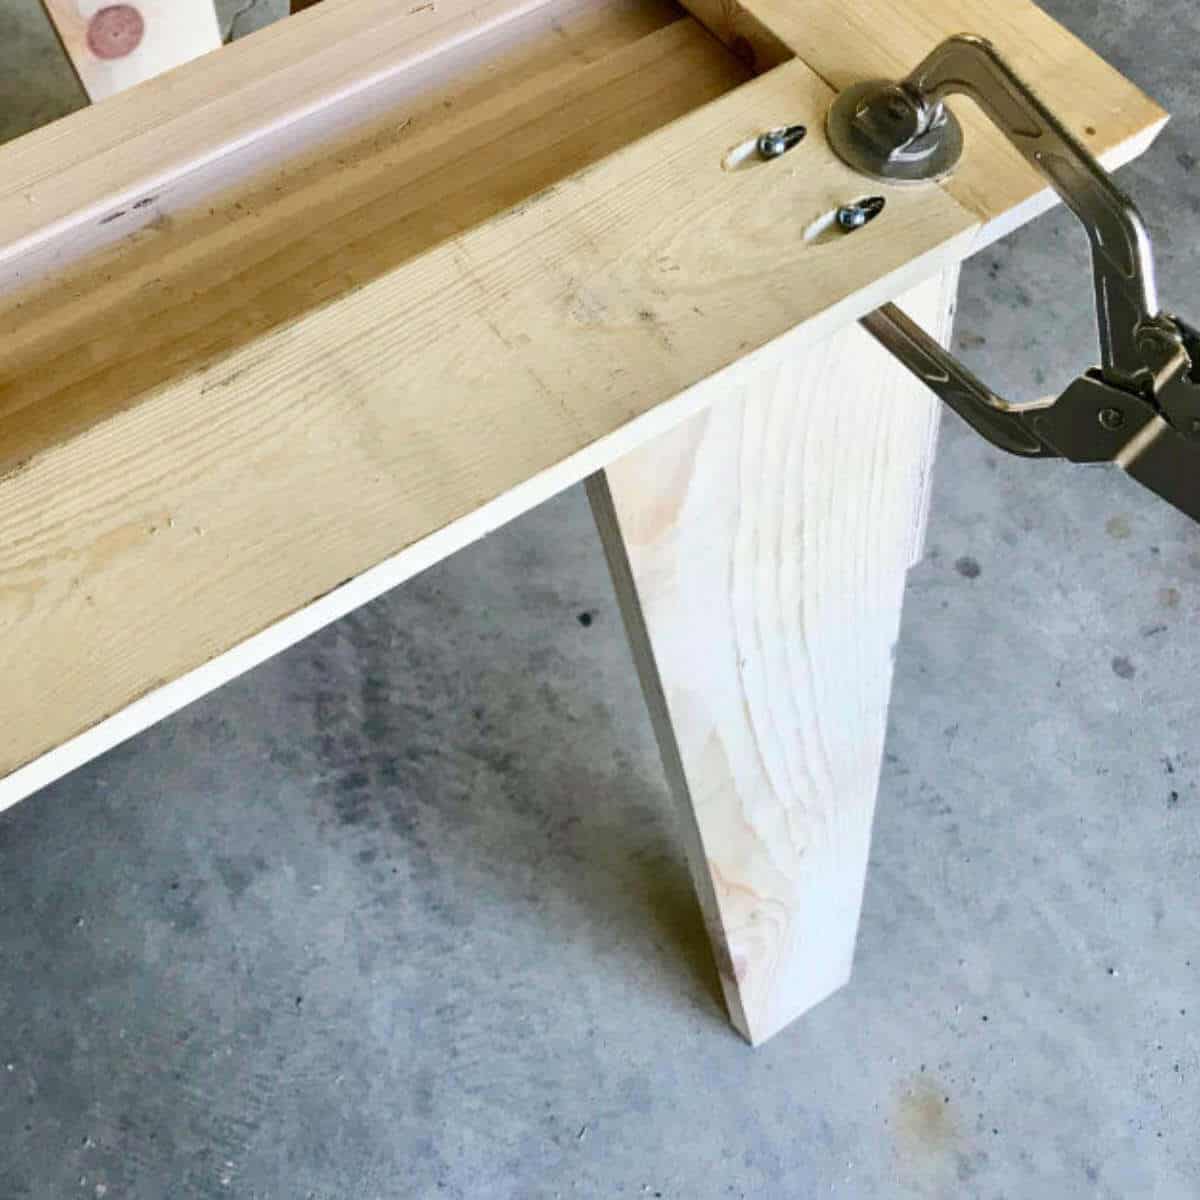
3) Attach The Top Frame Piece
Spread wood glue on each end of one 20″ board and use clamps to attach the top of the frame to the side 40″ boards. Then, screw the pieces together.
4) Attach The Bottom Frame Piece
Measure down 31″ from the bottom of the top frame piece and mark the side pieces. Line up the top of your bottom frame piece with your marks and attach using wood glue, clamps, and pocket hole screws. Your opening will be 20″ x 31″.
5) Build The Second Frame
Repeat this process for the second side of your a-board sign.
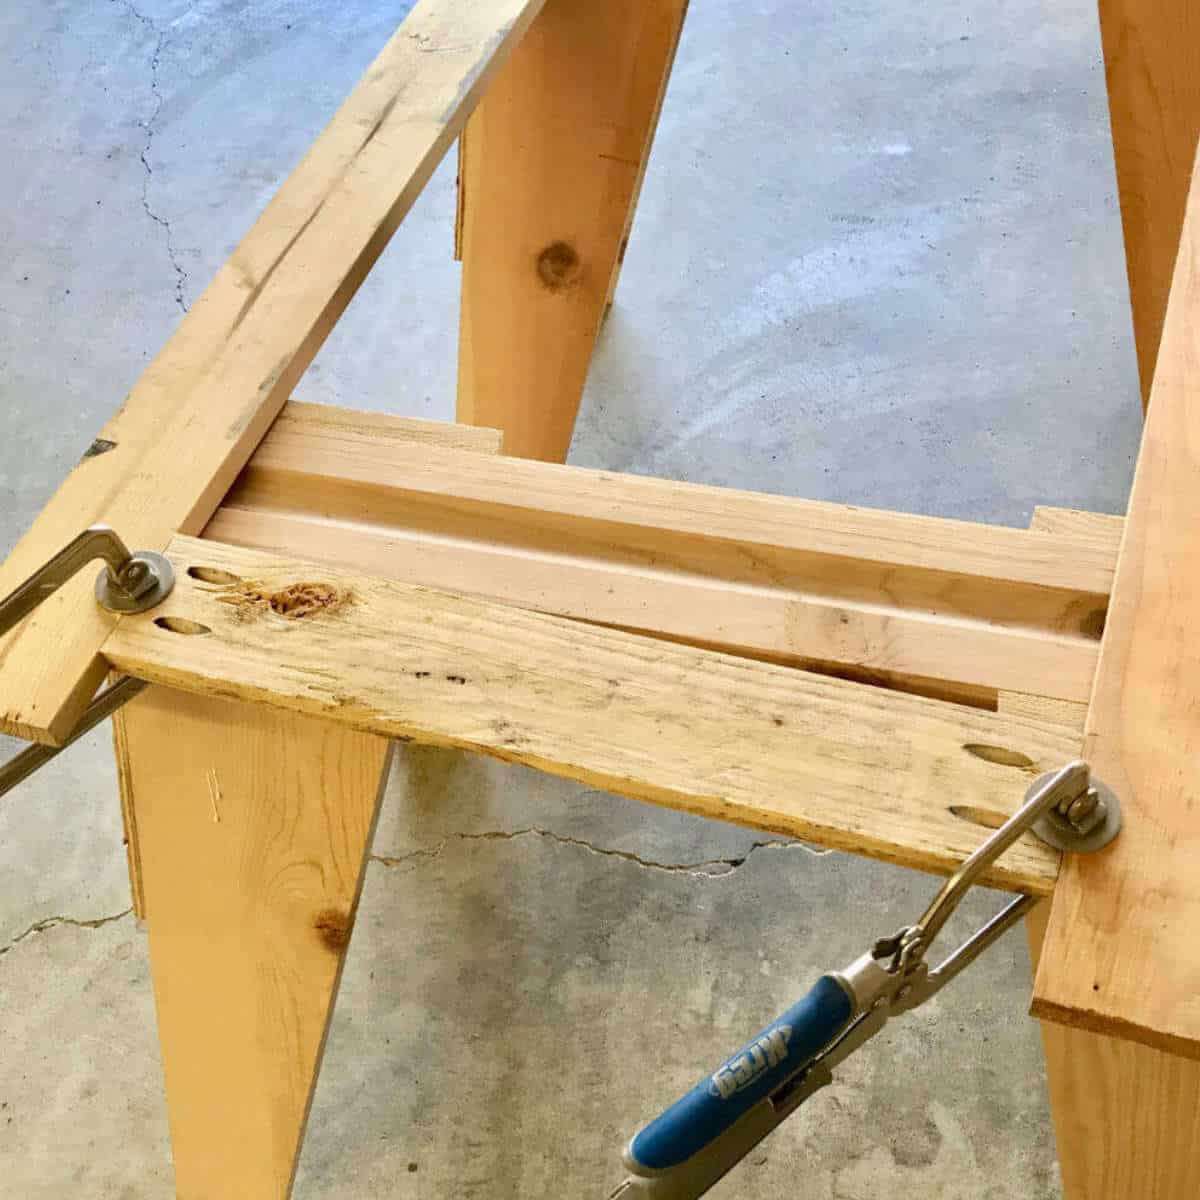
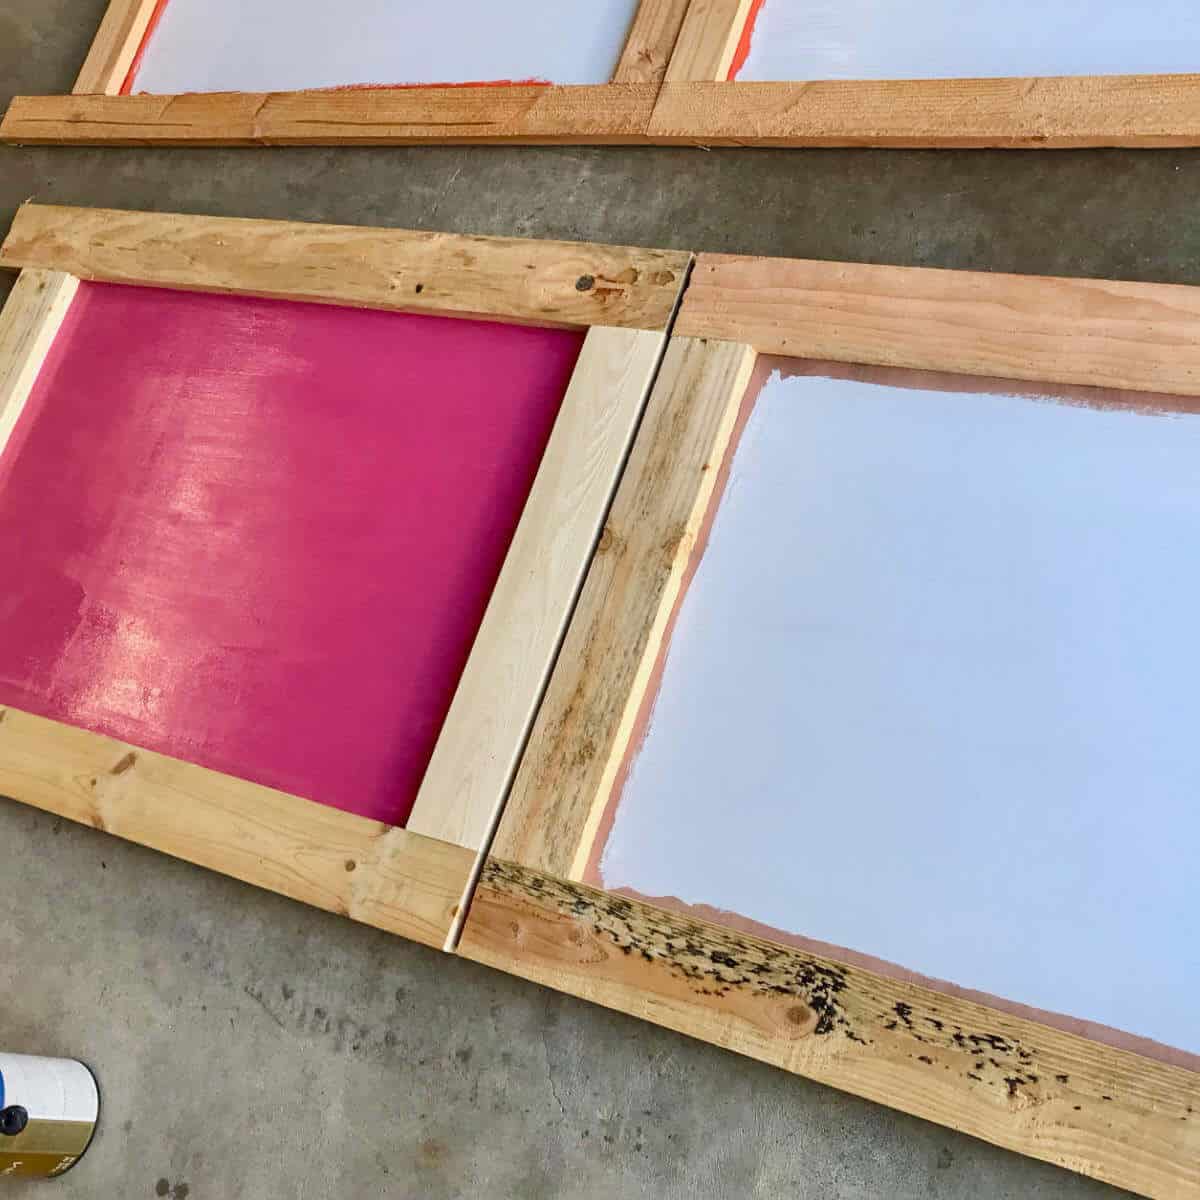
6) Attach The Backer Boards
Next, put a bead of wood glue around the inside edges of one of your frames (the side with pocket holes) and lay the 35″ x 24″ Utility Plywood on top. Use clamps to hold it in place and nail it into place. There should be enough room at the top of each frame to attach your hinges.
Attach the backer board to the second frame.
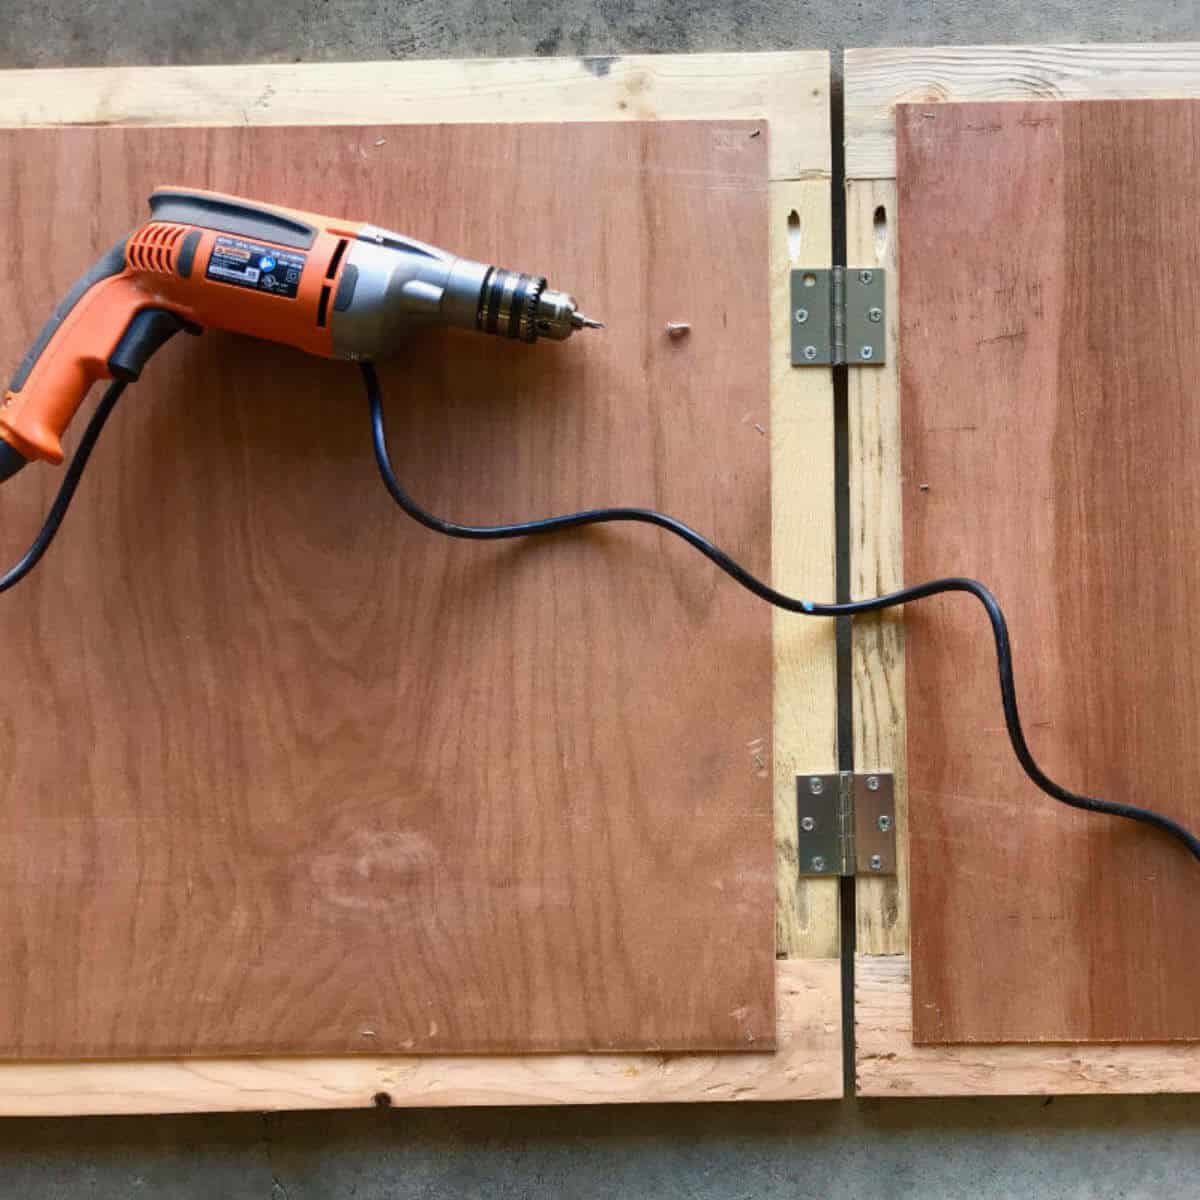
7) Attach Two Hinges
Finally, lay your frames face down, top to top, and attach two hinges.
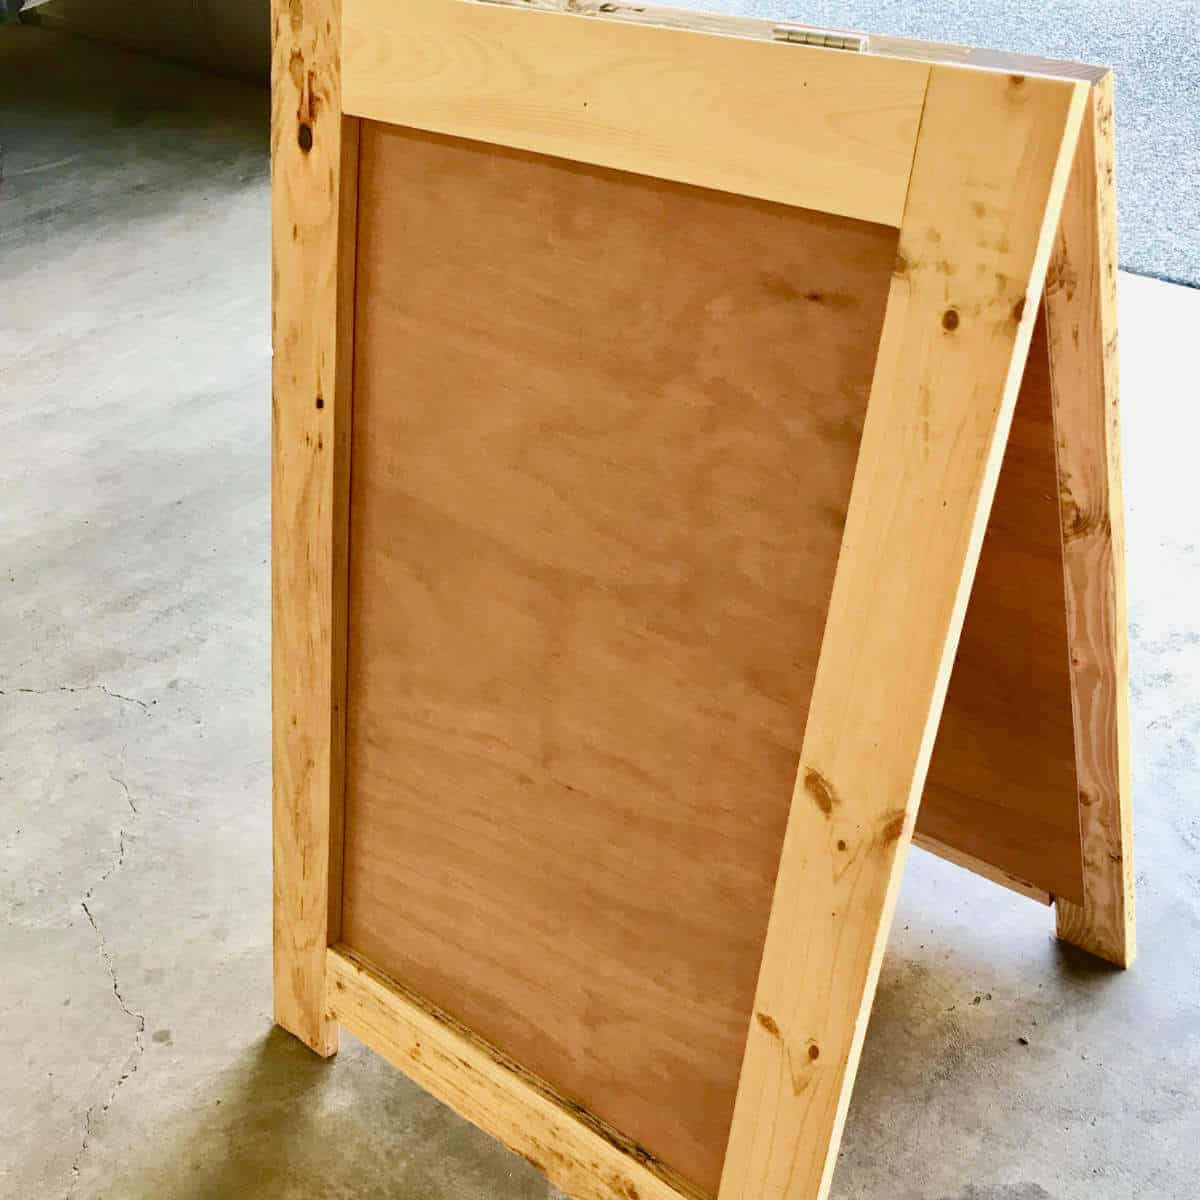
That’s how you build a simple a-board garage sale sign!
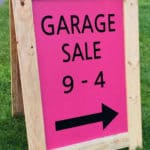
8) Paint Your Garage Sale Sign
After attaching the hinges, I flipped my sign over and painted a coat of primer, let it dry, and then gave it two coats of bright pink paint!
9) Add Words, Letters, And Arrows
Next, I created cut files so I could cut what I wanted to put on the signs, out of vinyl. My letters and numbers are approximately 4″ tall. You can find the Garage Sale Sign SVG Cut Files here: Garage Sale Sign SVG Cut Files
If you don’t have a Silhouette or Cricut, you could use stencils, freehand paint, or purchase vinyl numbers and letters!
I’m pretty excited about how nice these signs turned out! We should be able to get many years of use out of them!
More On Garage Sales
- When hosting a garage sale, it’s important to know How To Set Garage Sale Prices so your things sell but you’re not giving them away. You need to find the sweet spot where resellers can make a little cash but you’re not feeling taken advantage of.
- For a comprehensive tutorial, check out these Garage Sale Tips For A Successful Sale.
- One Step You Must Take To Drive Traffic To Your Garage Sale is good signage! Most customers will find your garage sale solely by your signage so it needs to be good.
- Believe it or not, there are People Who Should NOT Host A Garage Sale. Find out if you’re one of them.
- There are plenty of good Reasons Why You Should Host A Garage Sale and I’ve been hosting them for many years with no regrets.
Frequently Asked Questions

Hi! I’m Bridget!
I create printables and DIYs to help you get organized and celebrate special occasions! It’s my mission to inspire you to get creative and find joy in every day!