How To Build A Counter Height Table
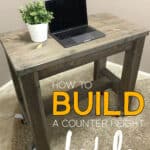
We have a tiny, funny-shaped room that we decided to turn into a studio, of sorts. The room needed a table, but it had to be small enough to fit in and move around the tiny room. It also needed to be counter height so my son could put his laptop on it and record himself playing music (he’s in a band). I’ve been wanting to build a counter-height dining room table and figured I could practice by learning how to build a counter height table.
How To Build A Counter Height Table With Wheels
To make things even more interesting, this table needed to be on wheels so it could be moved around easily. Plus, I just love the look of wheels on furniture!
This post contains affiliate links. When you purchase through an affiliate link, we receive a small commission at no additional cost to you. Disclosure.
Tools Used To Build A DIY Wood Table
- Table Saw – I saved and recently purchased this one. Eek! I’m so excited to have a table saw!
- Miter Saw – I have this one!
- Kreg Jig
- Kreg Jig HD
- Drill
- 6″ Kreg Clamp
- 36″ Trigger Clamp
- Sander
Supplies Used To Build A Wood Table
- 2 x 4 (1)
- 2 x 8 – 8 foot (2) or 10 foot (1)
- 4 x 4 – 8 foot (2)
- 1 x 4 – Scrap piece to use as a guide.
- 4″ Swivel Brake Casters (4)
- Flat Wood Screws (16) – These are the ones I used to adhere the caster wheels.
- 2-1/2″ Kreg Screws
- HD Pocket Hole Screws
- Wood Glue
- Sand Paper – 120 and 220
- Homemade Wood Stain
- Rags – To apply the homemade wood stain.
- Finish – I use Bioshield Floor And Furniture Hardwax (you may also choose to use polyurethane as a finish).
- Old T-Shirt – To apply wax.
Cut List For DIY Table
2 x 4
2 @ 27-3/4″
2 @ 11-1/2″
The 2 x 4 is for the table apron.
2 x 8
3 @ 3 feet
This is for the top of the table.
4 x 4
4 @ 29-1/2″
This is for the legs of the table. If you choose not to add caster wheels, you will want to increase this cut to 34-1/2″ and purchase an extra 4 x 4.
2 @ 11-1/2″
This is for the base sides.
1 @ 27-3/4″ (optional)
This is the for the bar that goes across the bottom. For a table this size, a crossbar isn’t really necessary. I just like the look of it!
How To Build A Small Counter Height Table
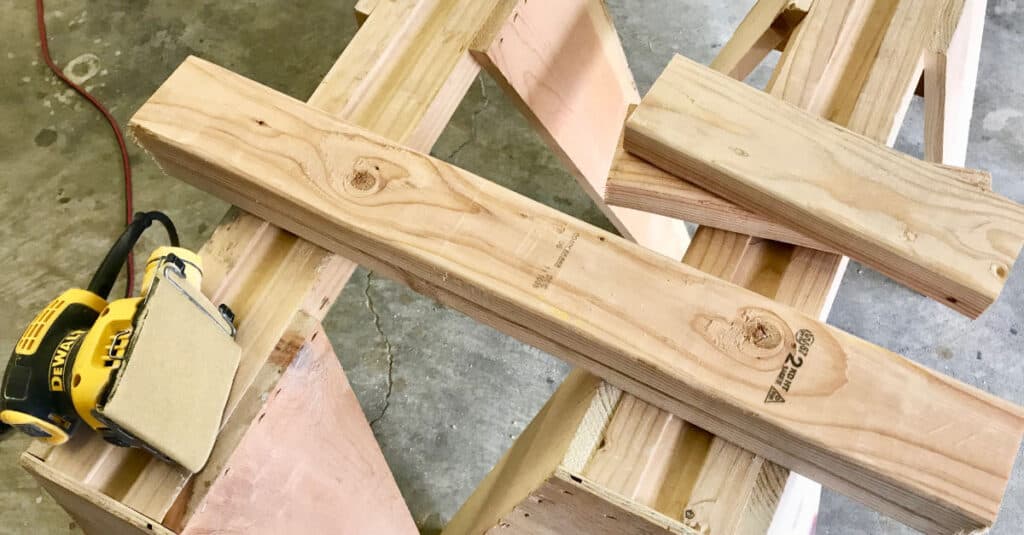
First, make all of your cuts with the miter saw.
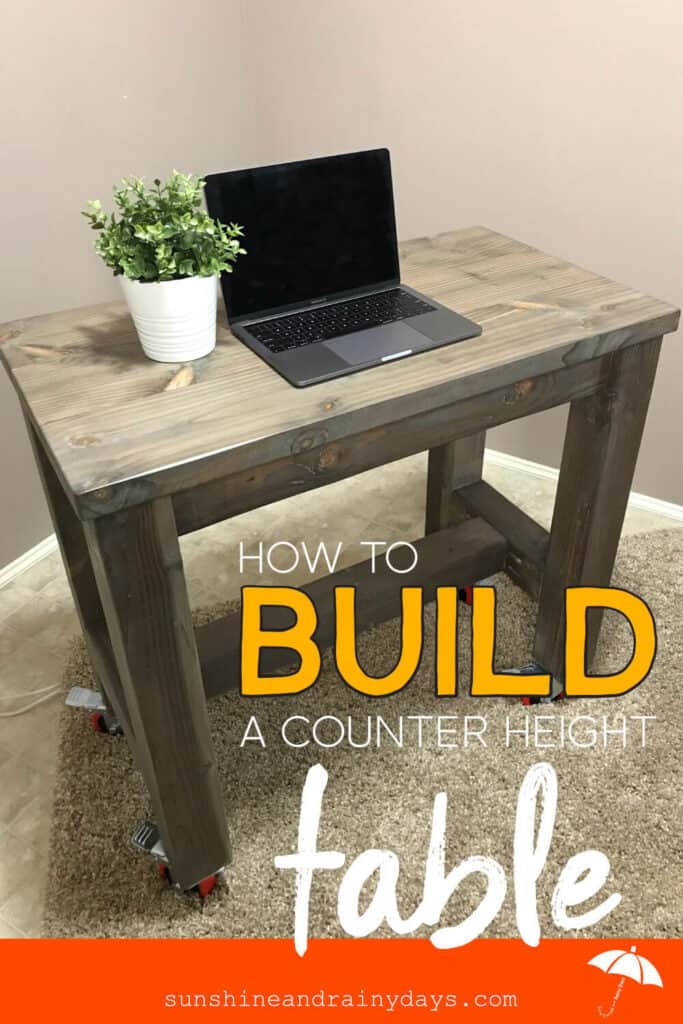
Then, use a table saw to cut 1/4″ off each side of the 2 x 8 pieces. Since this is rough cut lumber, this gives the pieces a nice square edge … meaning, when you attach the pieces together for the table top, there won’t be a little ridge between each piece.
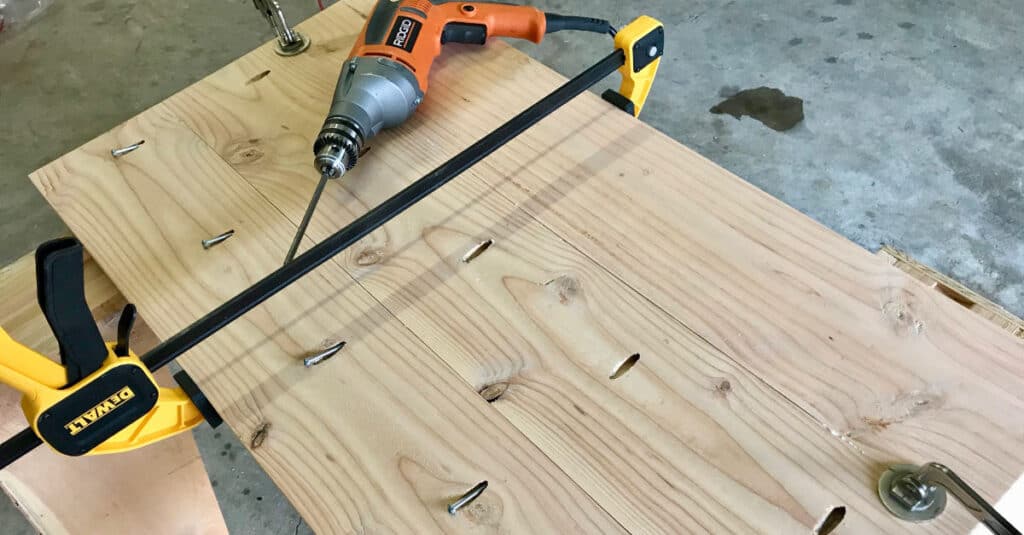
Next, drill pocket holes in two of the three 3-foot pieces. I placed 5 pocket holes on each piece, spacing them out evenly.
After the pocket holes are drilled, sand the table top pieces with 120-grit sandpaper.
Once sanding is complete, vacuum and wipe down each board with a wet rag.
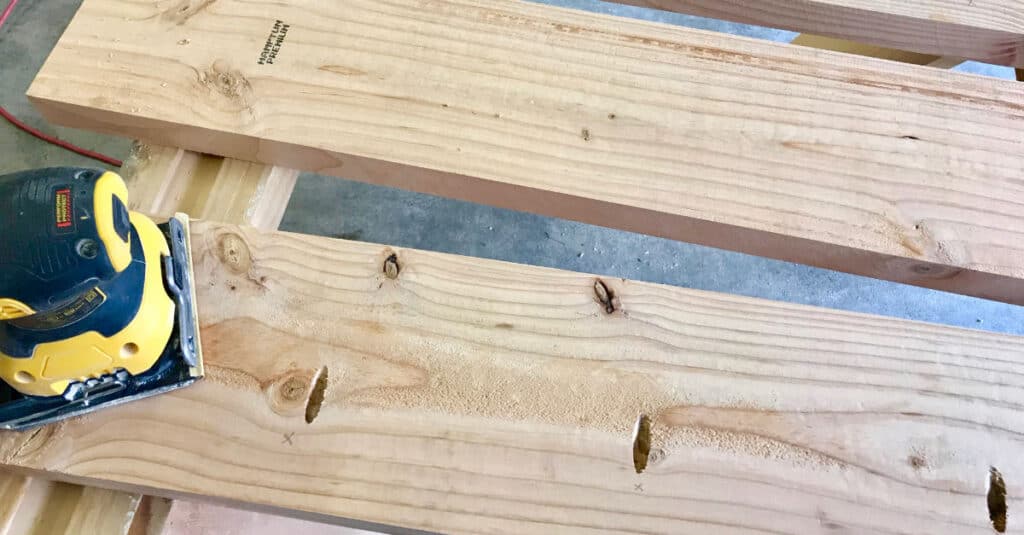
Then, spread wood glue on the long edge of one of your pieces, making sure the pocket holes are facing the right direction.
Use the 36″ trigger clamp to press the boards together. You can also use the 6″ Kreg Clamp, between the pieces, on the ends, to make sure your boards are sitting flush.
Next, screw the 2-1/2″ Kreg Screws into the pocket holes.
Now, attach the third board the same way.
It would have been beneficial to have an additional 36″ trigger clamp to place at each end. Instead, I moved the trigger clamp, as needed.
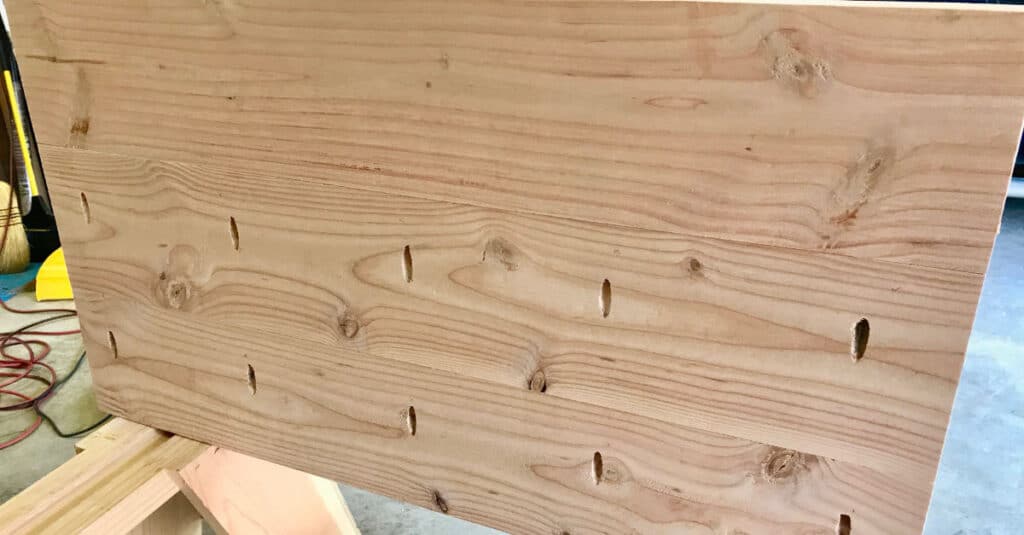
With a little finish sanding, your table top is now complete!
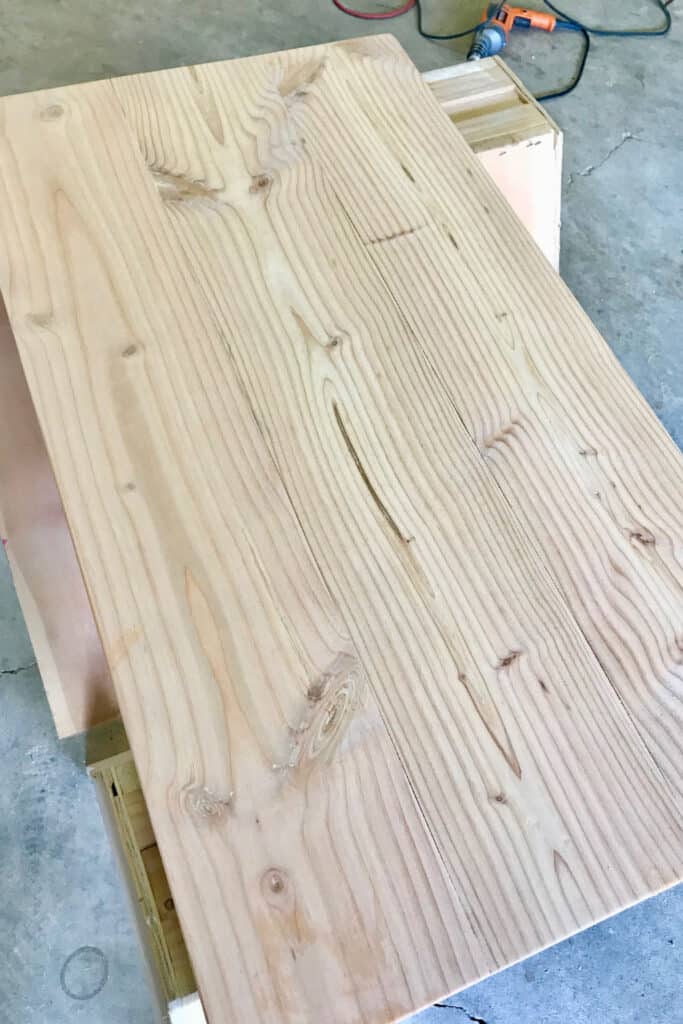
Of course, the boards don’t come together perfectly, and there will be a few spots that are a bit uneven. I’m thinking this is where a planer would come in … I haven’t looked into it muc,h but I’m calling this pretty good without the planer.
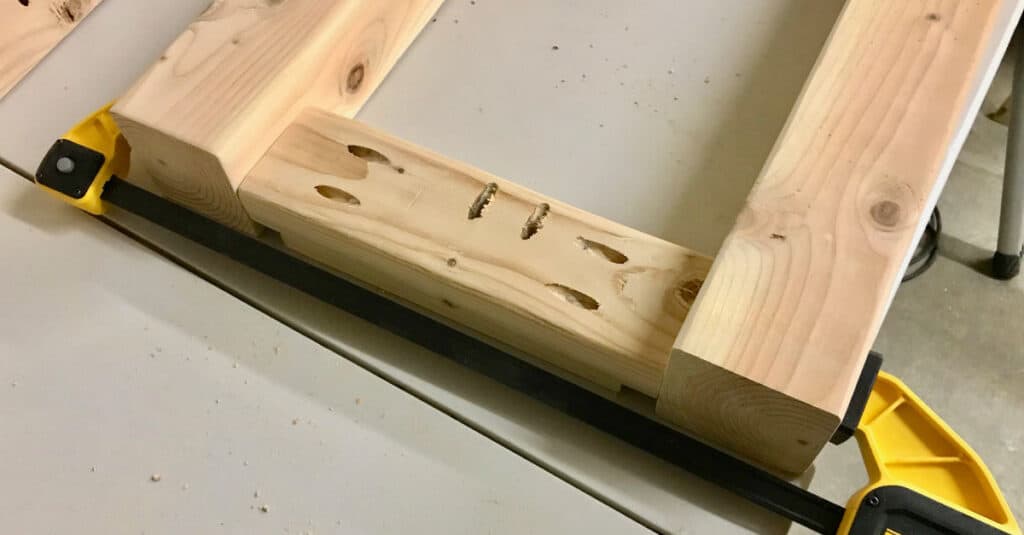
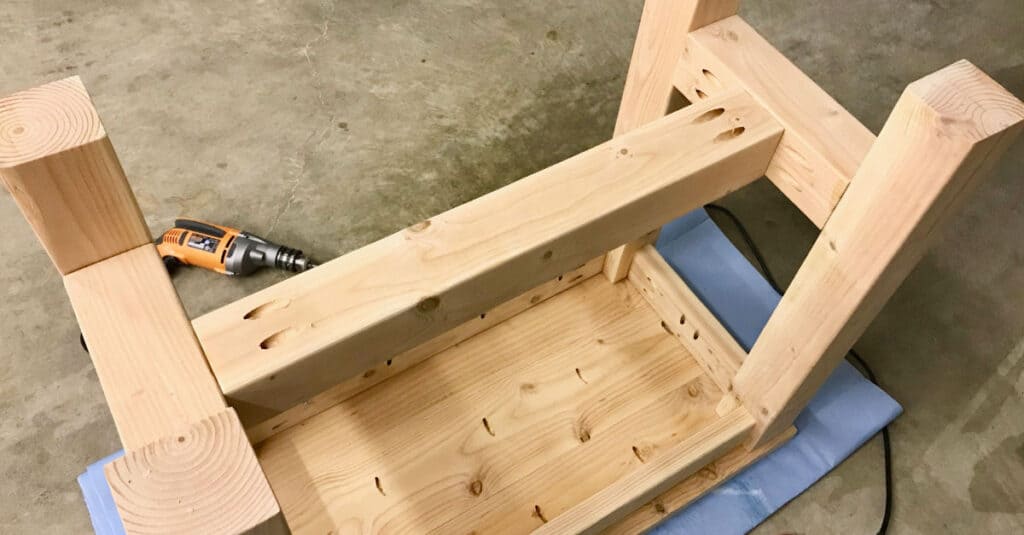
Next, it’s time to work on the four 2 x 4 table apron pieces.
Drill two pocket holes, in each end, to attach to the 4 x 4 legs.
Then, drill four pocket holes along the long edge of each long piece and two pocket holes along the long edge of the short pieces. These pocket holes will be used to attach the table base to the table top.
Sand the table apron pieces with 120 grit sandpaper and wipe with a wet rag.
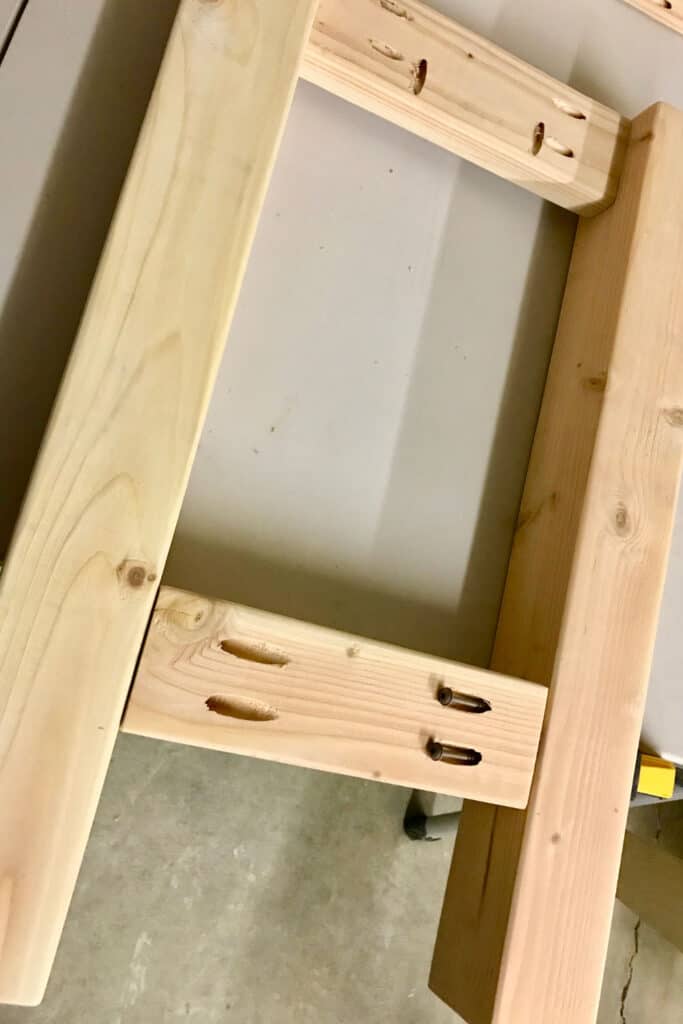
Now, apply wood glue to each end of one of the short pieces, place it between two leg pieces with a 1 x 4 underneath, and use the 36″ trigger clamp to hold it all together. Make sure that the top pieces are even! (The 1 x 4 will offset the table apron from the table legs.) Make sure the pocket holes on the edge are facing up.
Then, adhere the short table apron piece to each leg with pocket hole screws.

Repeat this process for the other end of your table.
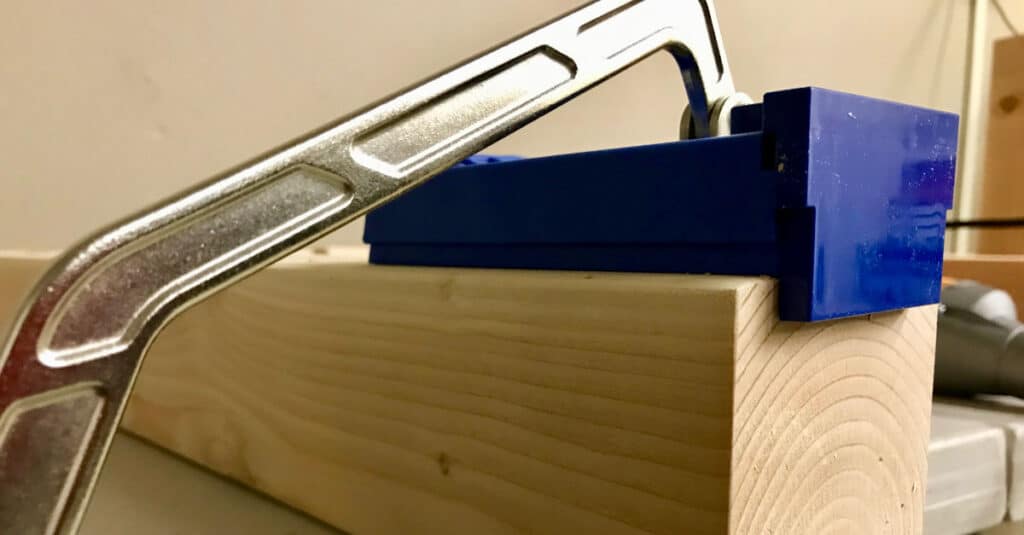
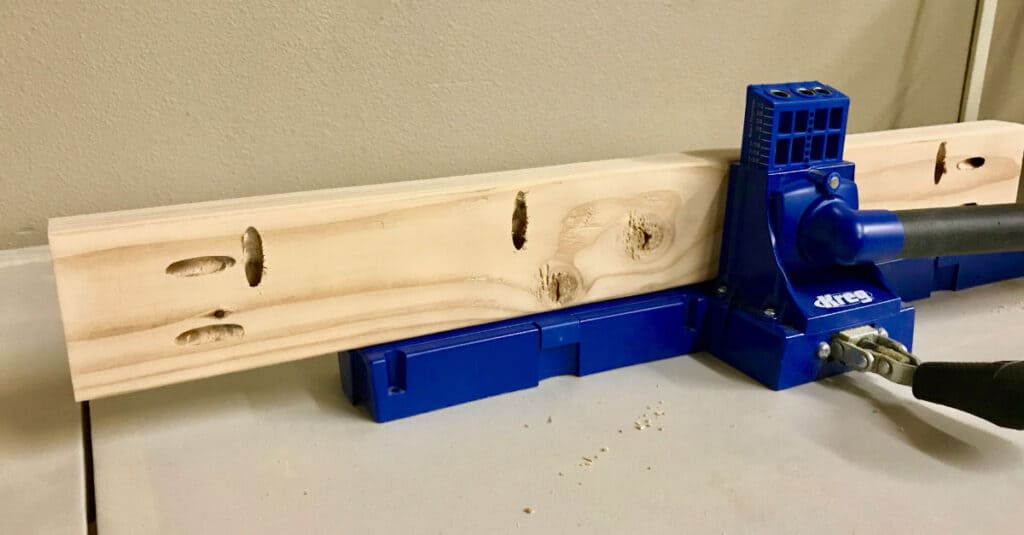
A 4 x 4 does not fit into the Kreg Jig, so I discovered the Kreg Jig HD, purchased it through Amazon Prime, and had it the next day!
The 6″ Kreg Clamp fits nicely and helps secure the Kreg Jig HD to the 4 x 4.
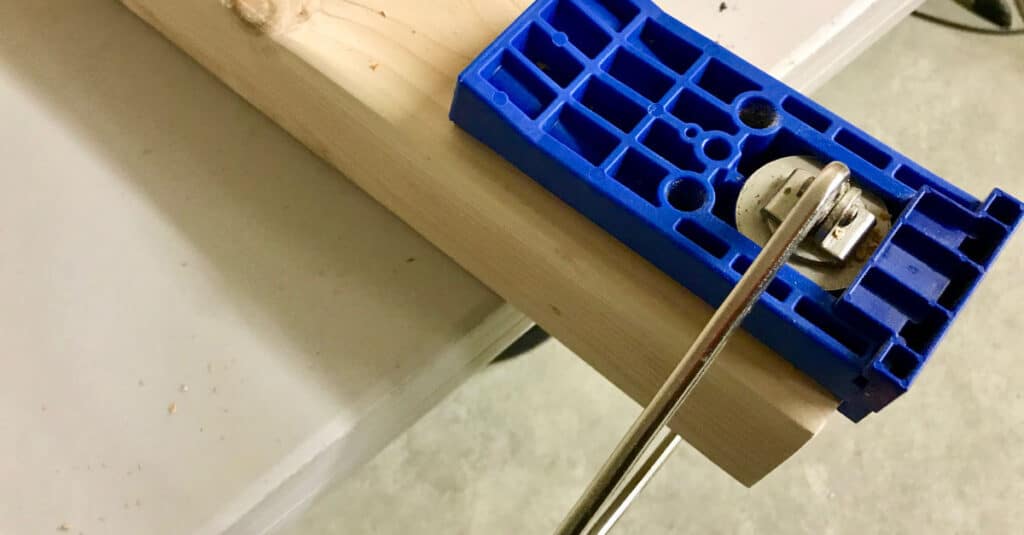
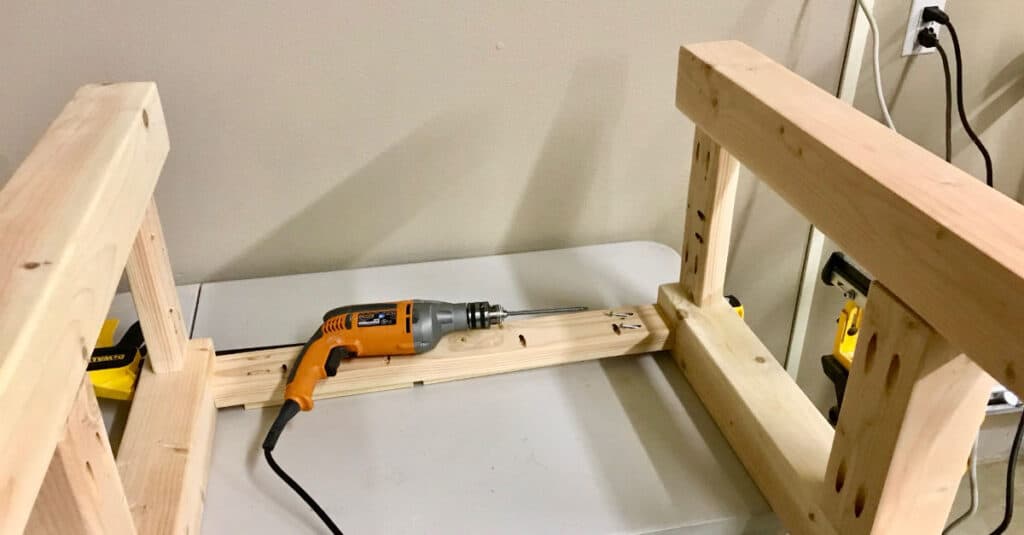
With the Kreg Jig HD, drill two pocket holes in each of your three 4 x 4 crossbar pieces.
Then, attach the two short pieces, flush, on each end piece using HD Pocket Hole Screws. Make sure to place the pocket hole side on the same side where you can see the table apron pocket holes.
Originally, I had thought I would place the pocket holes on the bottom, where they wouldn’t be seen. Unfortunately, this table is too small to do that with because the drill won’t fit between the legs.
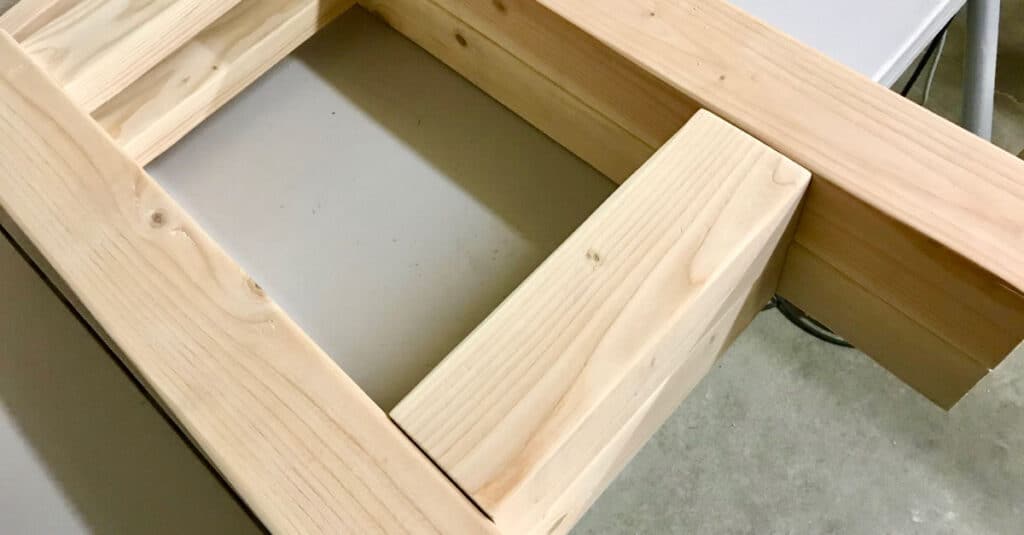
Repeat this process for the second end.
This is where you will really start to see your table base come together!
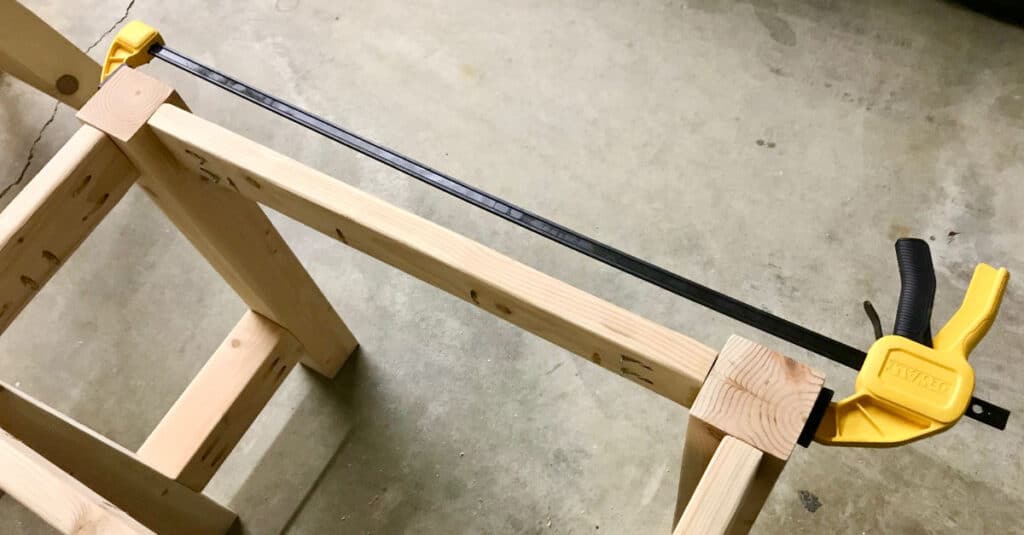
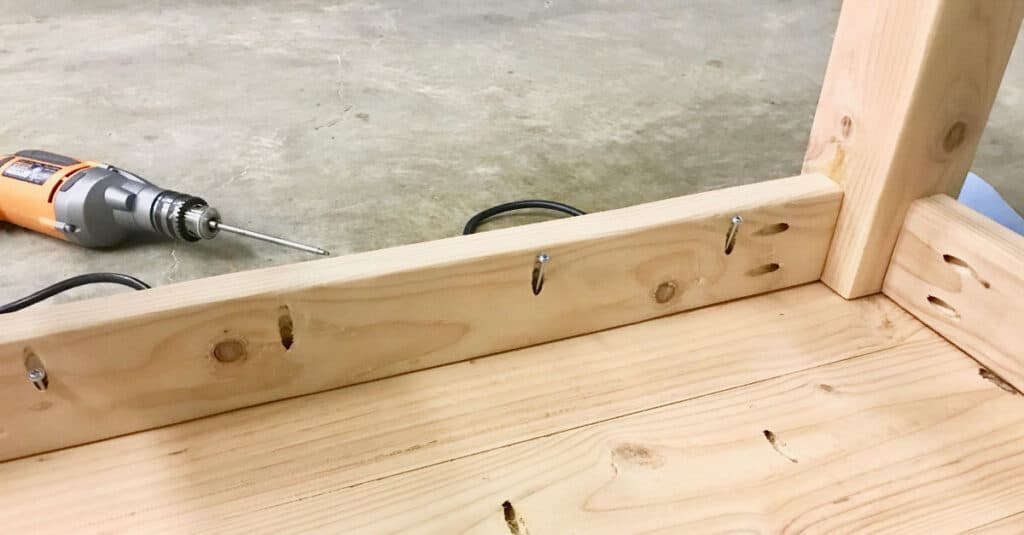
Apply wood glue to each end of one of the long table apron pieces, place it between the two ends with a 1 x 4 underneath, and use the 36″ trigger clamp to hold it all together. Make sure that the top pieces are even! (The 1 x 4 will offset the table apron from the table legs.) Make sure the pocket holes on the edge are facing up.
Then, attach the long table apron piece to each end with pocket hole screws.
It’s now time to attach the last table apron piece.
For this, stand the table base up, glue each end of the final table apron piece, make sure the pocket holes on the long end are facing up, and clamp it in place using the 36″ trigger clamp. You can hold a 1 x 4 up to the edge to make sure your alignment is right.
Now, adhere the final long table apron piece to the table base with pocket hole screws.
A table this size doesn’t really require a crossbar but I like the look!
Measure the center point on each end of the 4 x 4 crossbar and the center of the side 4 x 4 crossbars. Place wood glue on each end of the crossbar and line your measurements up, making sure the crossbar sits flush with the side bars. Use the 36″ trigger clamp to hold everything in place while you screw in the HD Pocket Hole Screws.
Next, lay your table top, face down, on a soft surface and place your table base (with wood glue on the top edge), upside down, on top of the table top. Make sure it is centered on the table top.
Then, use your pocket holes to adhere the table base to the table top!
Flip your table over and give everything a good sand with 220 grit sandpaper.
Choose how you’d like to stain your table! I like to use a homemade wood stain.
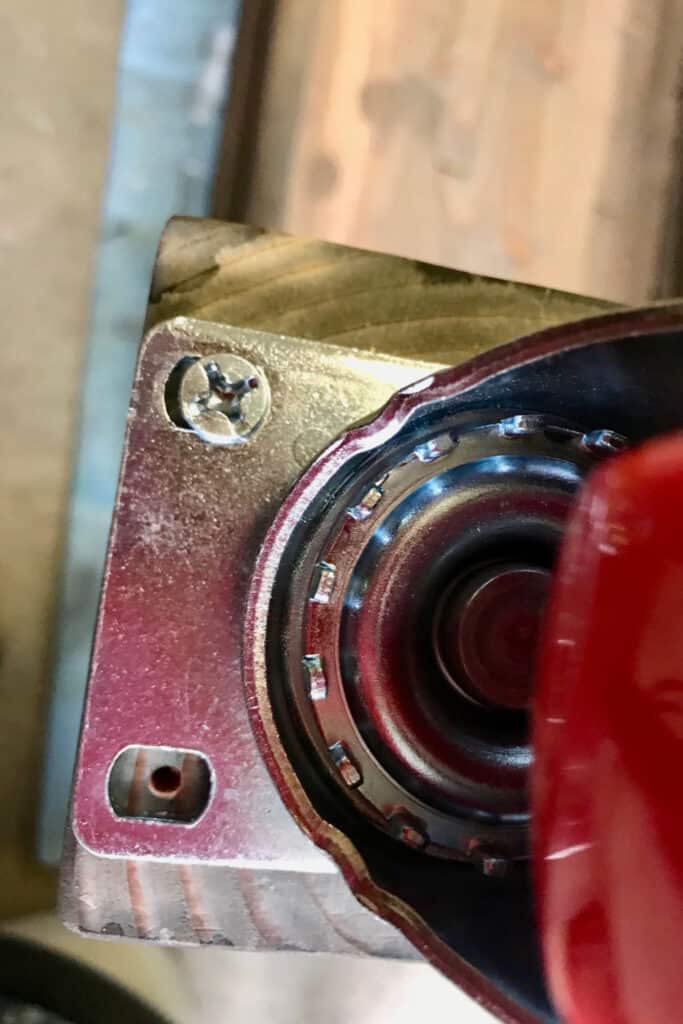
Finally, place your caster wheels where you’d like them to go and carefully (so you don’t split the wood) drill holes where you will place your screws.
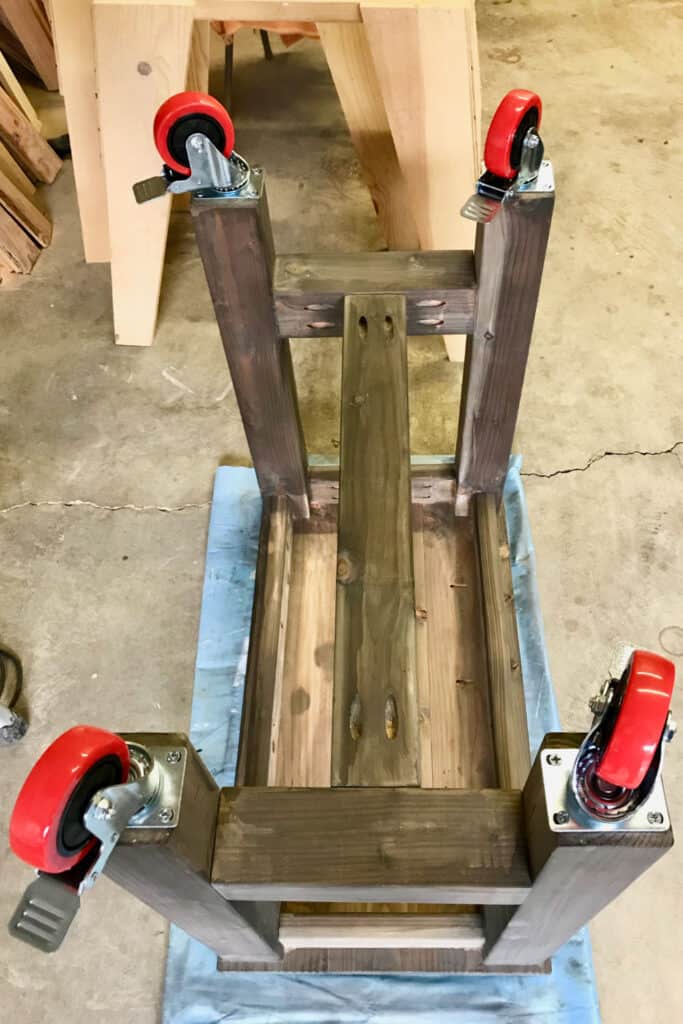
It was hard to find chunky wheels that didn’t also have a big base plate. These base plates actually hang over the edge a bit.
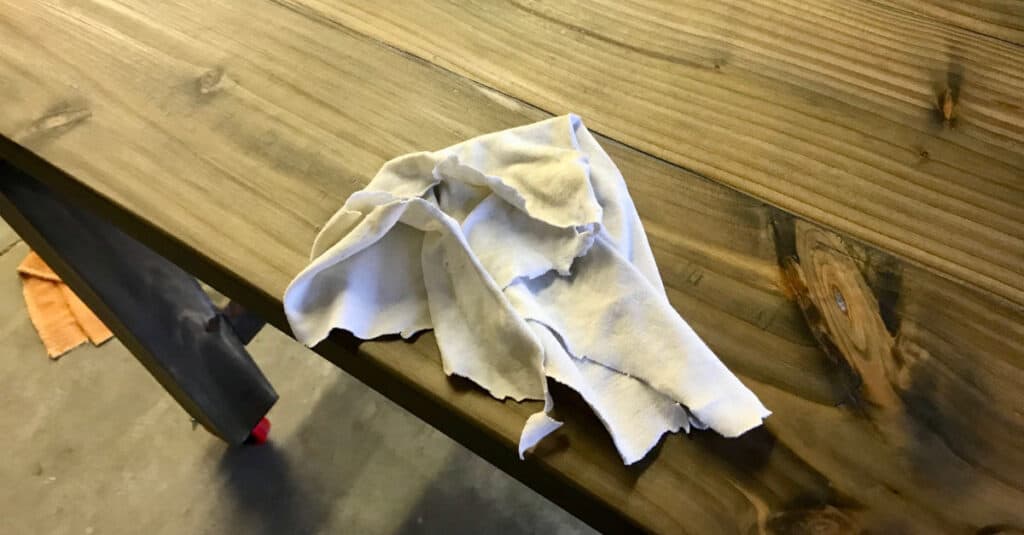
Choose a finish for your table.
I chose to use a wax finish because I don’t like the smell of polyurethane. I don’t believe wax is as durable as polyurethane, though.
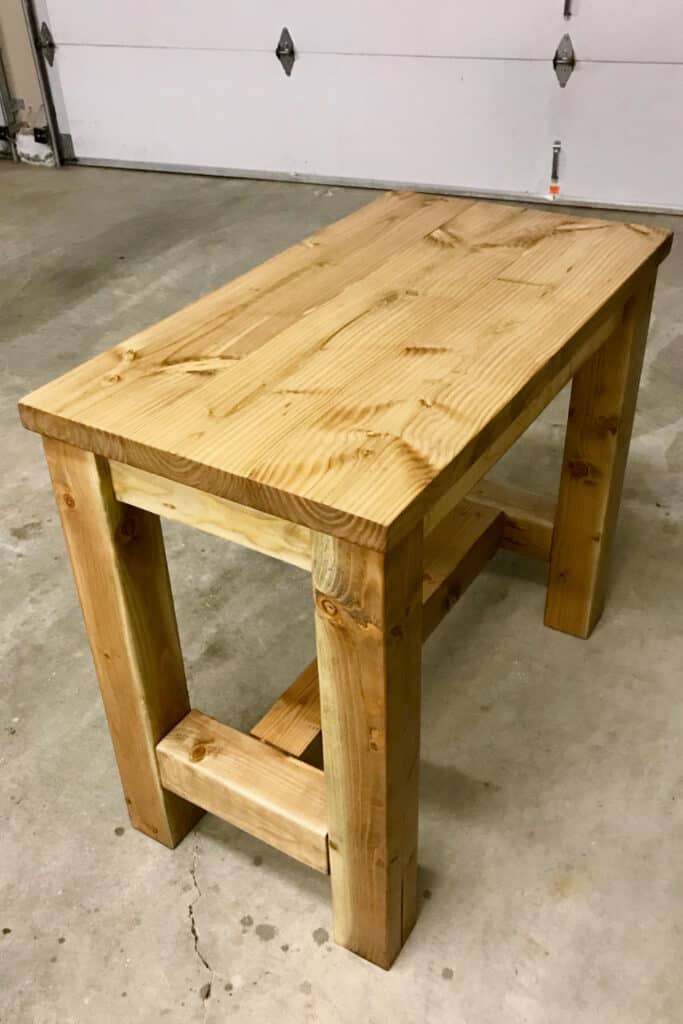
We are super happy with the way this small DIY counter height table turned out and can’t wait to use it in our studio room!
Now that I have a better understanding of how to build a counter-height table, I’m confident I can build a nice, counter-height dining room table too! I will use a better quality of wood that will be super durable to stand the test of time!