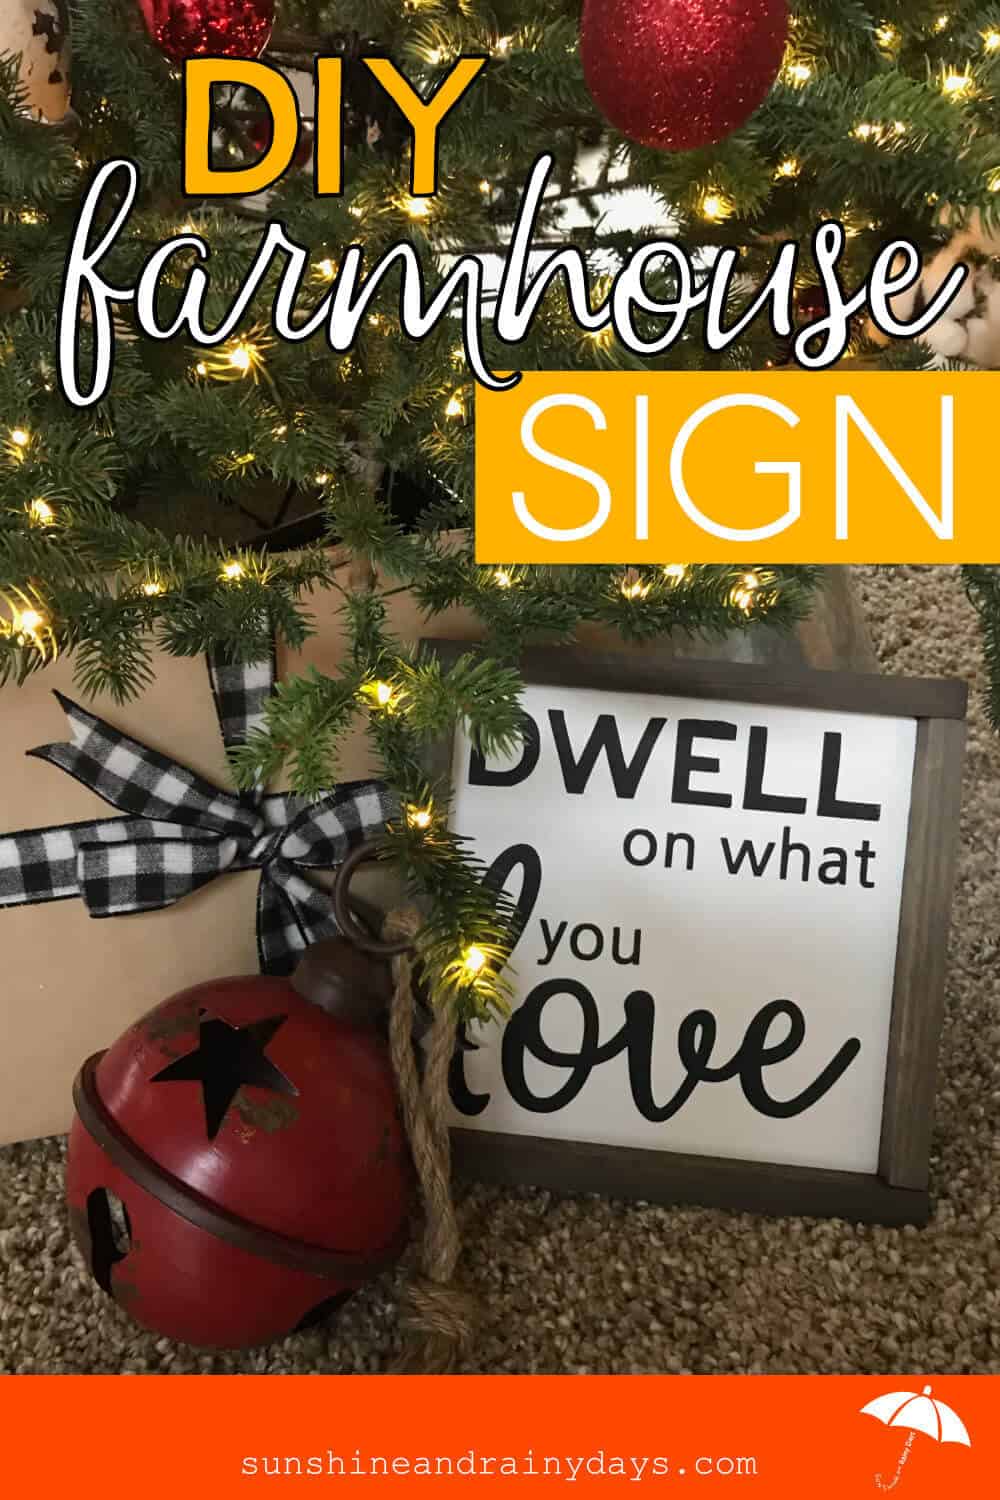
DIY Farmhouse Wood Signs

My husband likes to make homemade gifts for his co-workers every year for Christmas and, this year, we chose DIY Farmhouse Wood Signs!
DIY Farmhouse Wood Signs
There are quite a few steps to make your own Farmhouse Sign but don’t let that intimidate you.
I’ll walk you through step-by-step how to make your own Wood Sign!
Below, you will learn how to:
- Create A Blank
- Prepare Your Design In Silhouette Studio
- Prepare Your Stencil
- Apply Your Stencil To Your Sign
- Paint Your Words With Minimal Paint Bleeds
- Build Your Wood Sign Frame
This post contains affiliate links. When you purchase through an affiliate link, we receive a small commission at no additional cost to you. Disclosure.
Tools Used
- Miter Saw
- Sander
- Nail Gun
- Paint Supplies
- Silhouette
Supplies Used
- 1 x 10 (I used select Whitewood)
- 1 x 2 (for the frame)
- Sand Paper (I used 220 grit)
- White Exterior Paint
- Black Paint (I used a Color Sample of Behr Ultra Matte/Flat – Black)
- Mini Paint Roller
- Small Paint Brushes
- Vinyl
- Transfer Paper
- Stain (I used Varathane | Briarsmoke)
- Wood Glue
- Nails (for Nail Gun)
Make Your Farmhouse Sign Cuts
When I showed someone my DIY Farmhouse Wood Signs, they asked where I got my blanks.
I think that’s a compliment!
I made my own Farmhouse Sign blanks.
It was pretty easy to do, with the right tools.
Cut And Paint Your Farmhouse Sign
I used select wood to decrease my workload. It is a bit more expensive but it takes less sanding and I didn’t need to fill knots.
The actual dimensions of the 1 x 10 were 3/4″ x 9-1/4″.
I wanted to make square signs so I cut my board at 9-1/4″.
Next, I used 220 grit sandpaper to do a quick sand and wiped the dust off with a wet rag.
Then, I used white exterior paint and a mini paint roller to paint the front of the board. I didn’t bother to paint the sides or back.
Cut And Stain Your Farmhouse Frame Pieces
For the frame, I cut 1 x 2’s to the length of each side of the sign board.
Then, with the 1 x 2’s placed next to the sides, I measured the top and bottom of the sign plus 1 x 2’s and cut the top and bottom.
I gave them a quick sand, wiped the dust off with a wet rag, and stained them with Varathane Stain in Briarsmoke.
Create Your Farmhouse Sign Stencil
I like to design my signs in Affinity Designer. If you make the background transparent and export as a PNG, you can easily pull it into the Silhouette software to trace.
You can also design your signs in the Silhouette Studio.
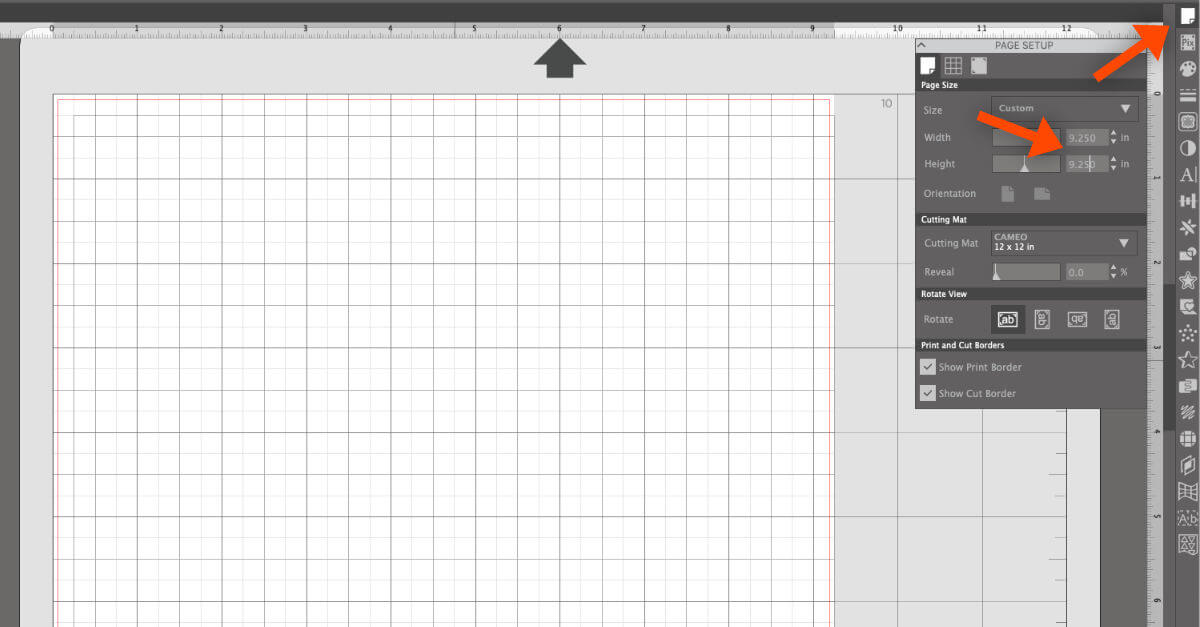
Choose the Paper icon on the upper right hand side.
Then, enter the size of your board. In my case, I put in the dimensions 9.25 x 9.25.
After my dimensions were set, I simply drug my PNG file onto the board, from my desktop.
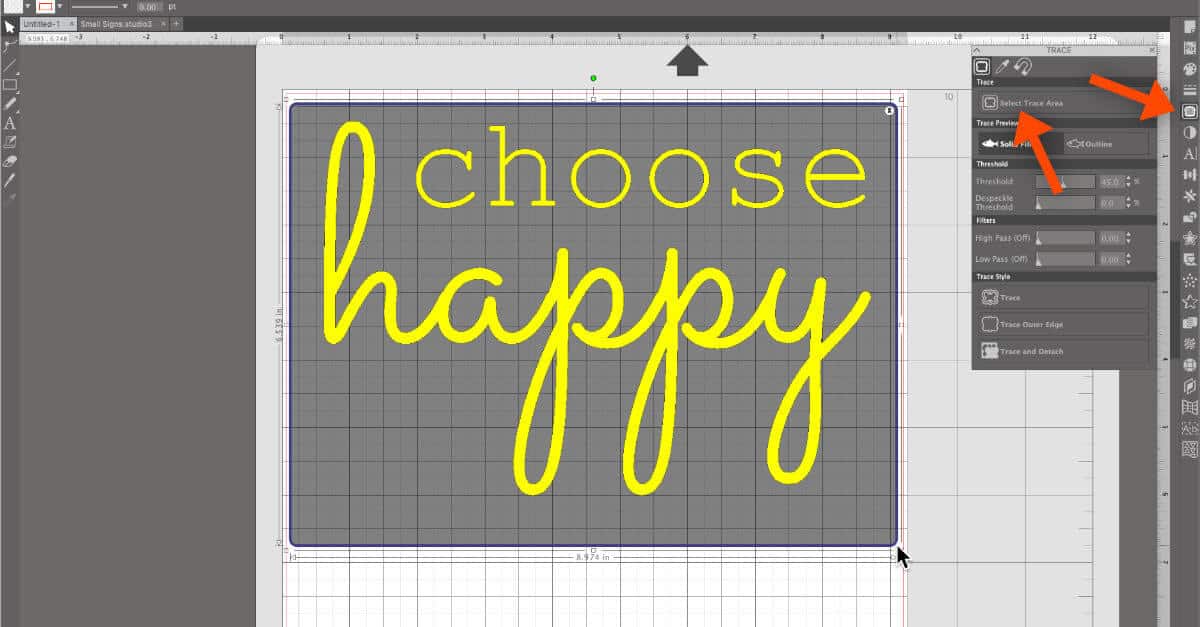
Next, choose the butterfly icon on the right hand side. It kind of looks like a piece of bread to me but I think it’s supposed to be a butterfly.
Then, choose Select Trace Area.
Now, drag your cursor over the area you would like to trace.
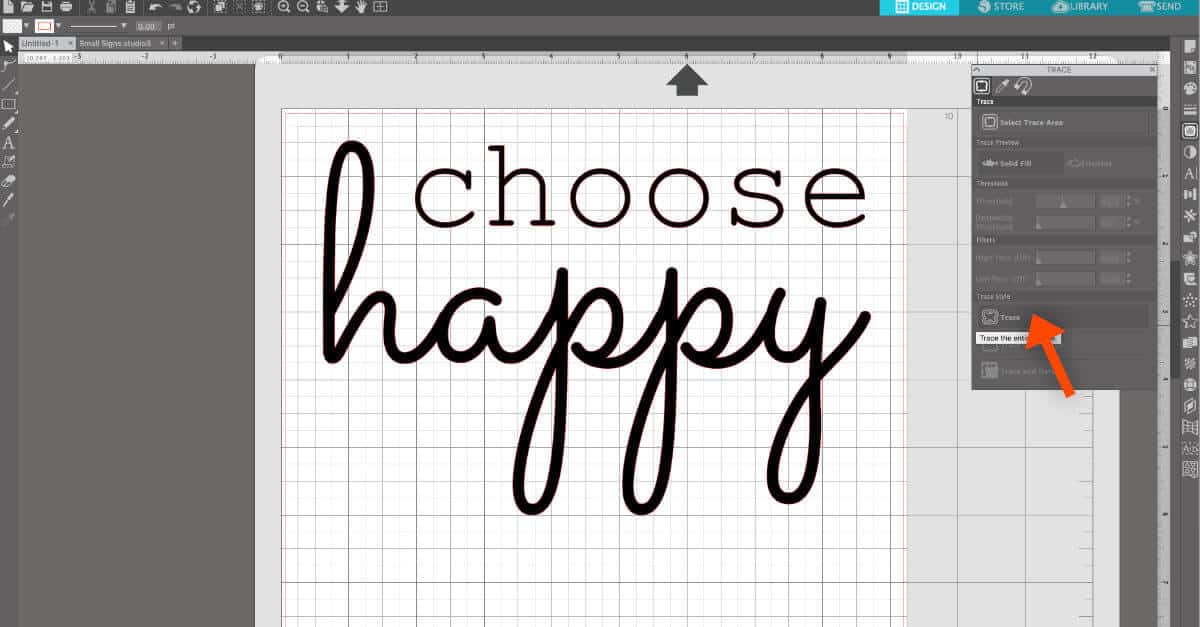
Once your trace area is highlighted, choose Trace.
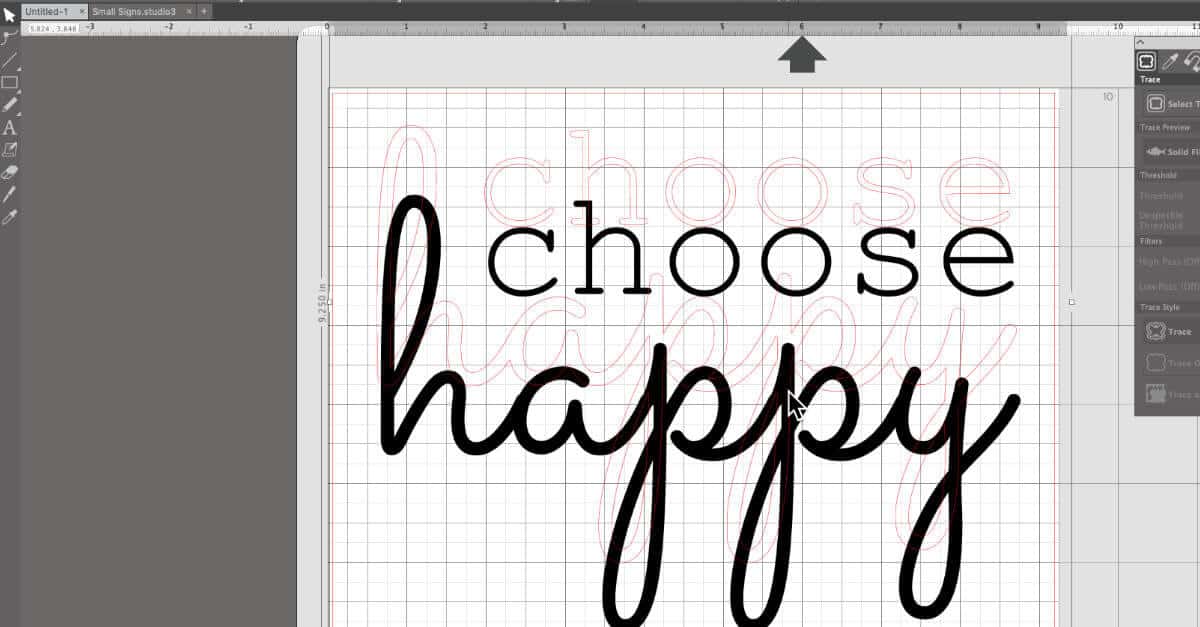
Now, if you move your letters away from the design, you will see red trace lines.
These are the lines your Silhouette will cut.
I chose to delete my words, once the trace lines were there.
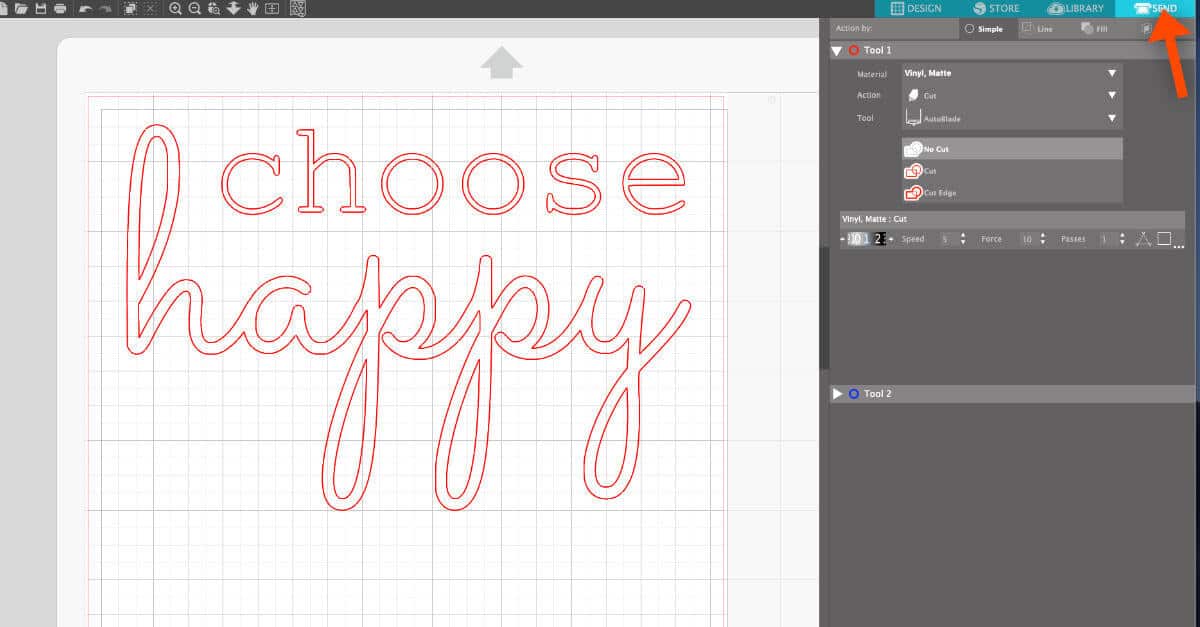
To cut your file, choose Send at the very top.
Next To Material, I chose Vinyl, Matte. This sets the Speed to 5 and the Force to 10. These settings have worked well for me but you need to find the settings that work well for you.

Then, choose Cut.
In order to save vinyl, I chose to place my words at the top of the page.
I cut my vinyl to size and placed it on my matte.
Then, I loaded my matte onto my Silhouette.
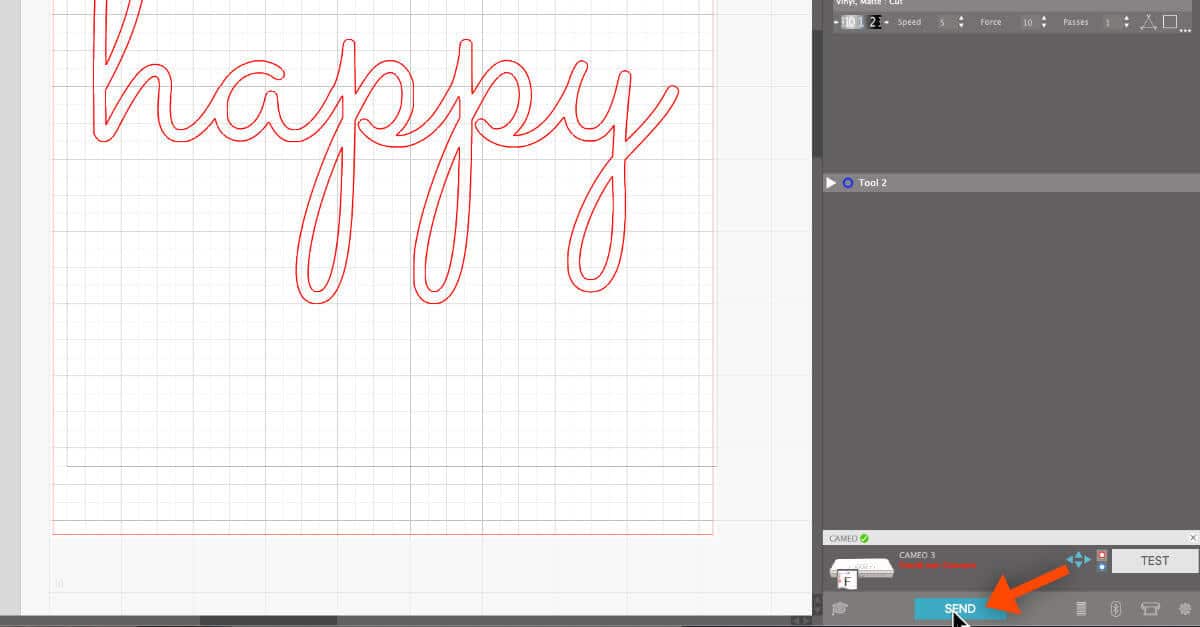
At this point, you may want to choose Test. This will cut a small square and triangle in the upper left hand corner of your vinyl.
With this test cut, you can make sure the cut is working right, without ruining your whole sheet of vinyl.
Once you’re ready, choose Send.
Purchase Your SVG Cut File Here
Apply Your Stencil To Your Sign Board
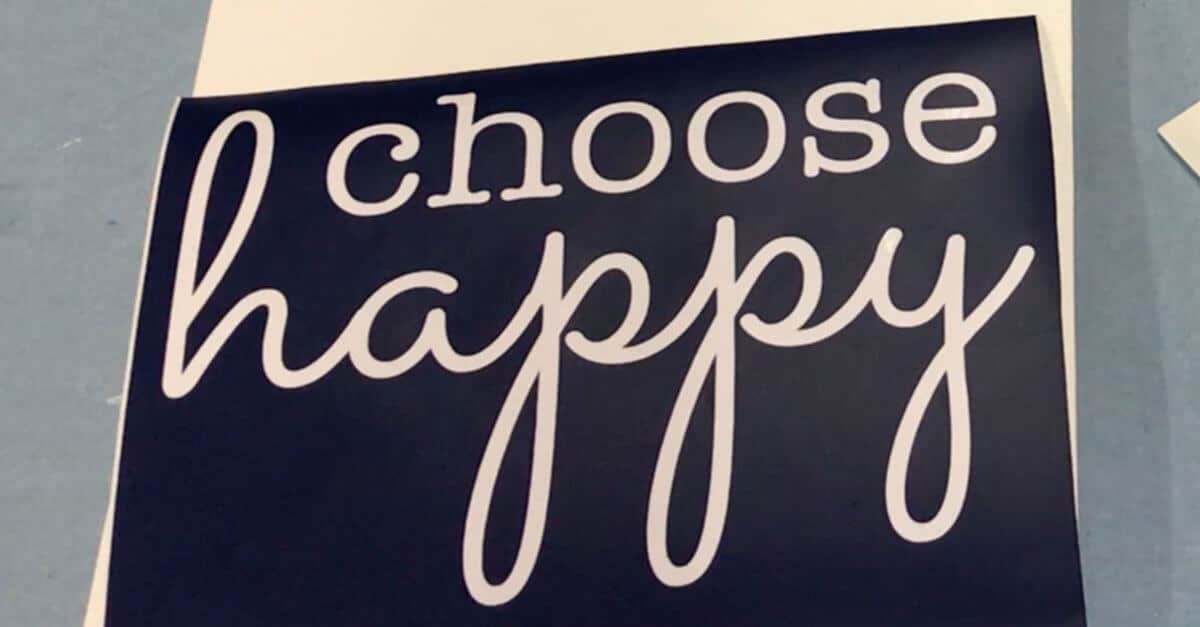
Once my file was cut, I weeded the words from the vinyl.
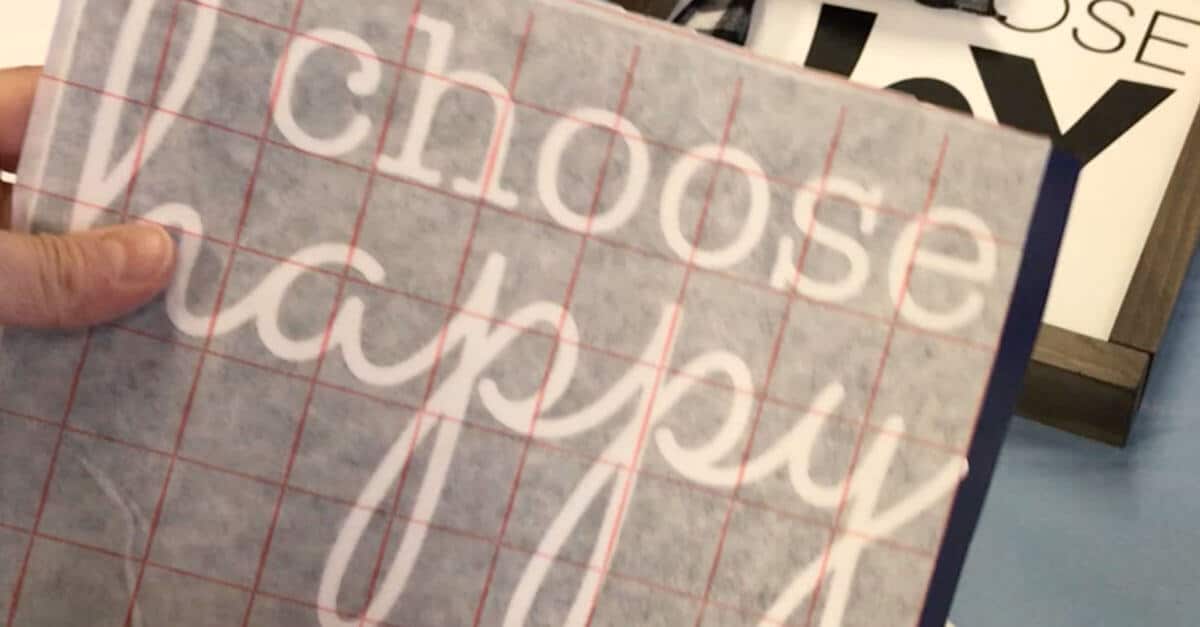
Then, I applied transfer tape to the vinyl and burnished it using a burnishing tool.
Next, I peeled the backing off of the vinyl and placed the vinyl on my board with the transfer tape.
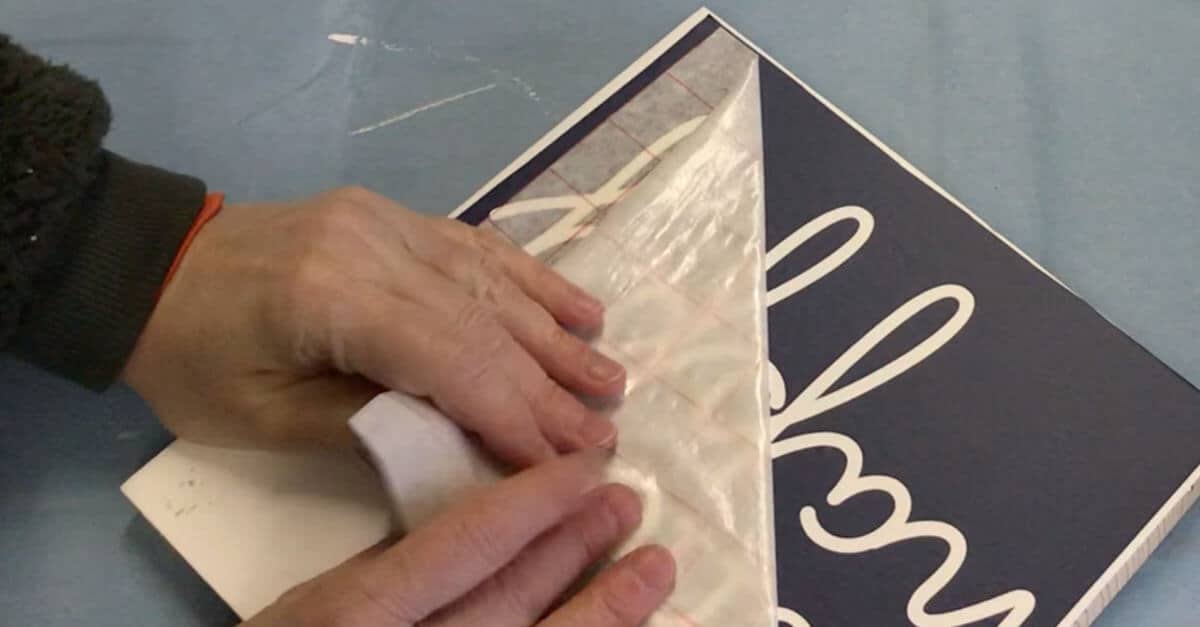
Again, I burnished the vinyl on the board and then peeled up the transfer tape.
Once the transfer tape was off, I burnished the stencil again to make sure there were no bubbles.
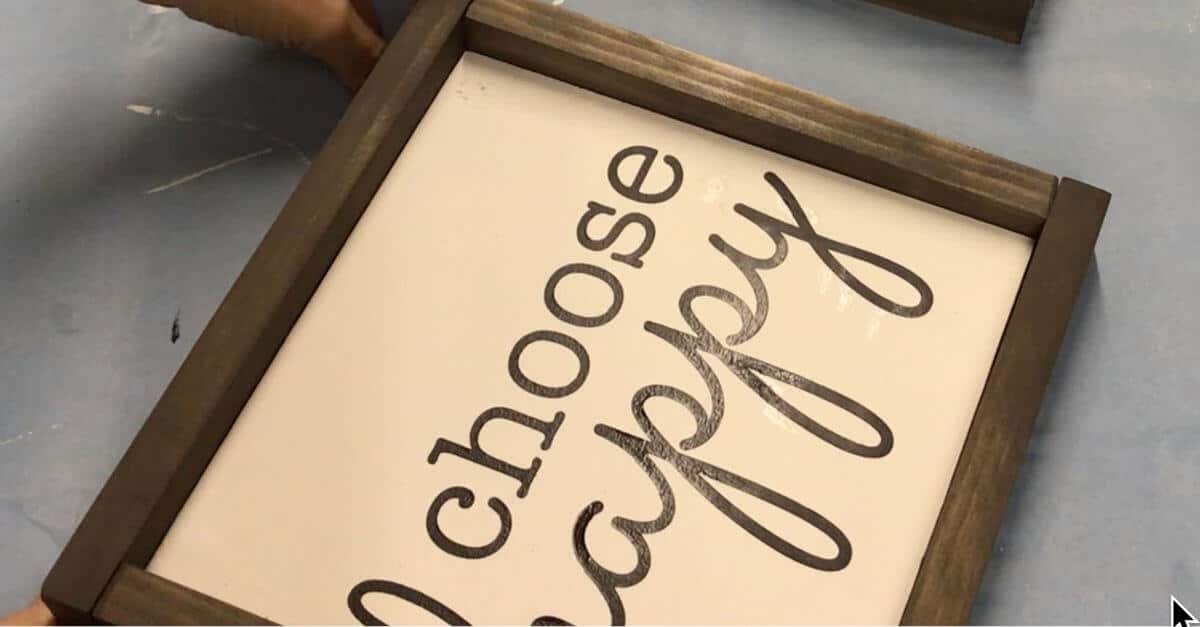
My stencil is now in place and ready to paint!
Paint Words On Your Farmhouse Sign Without Bleeds

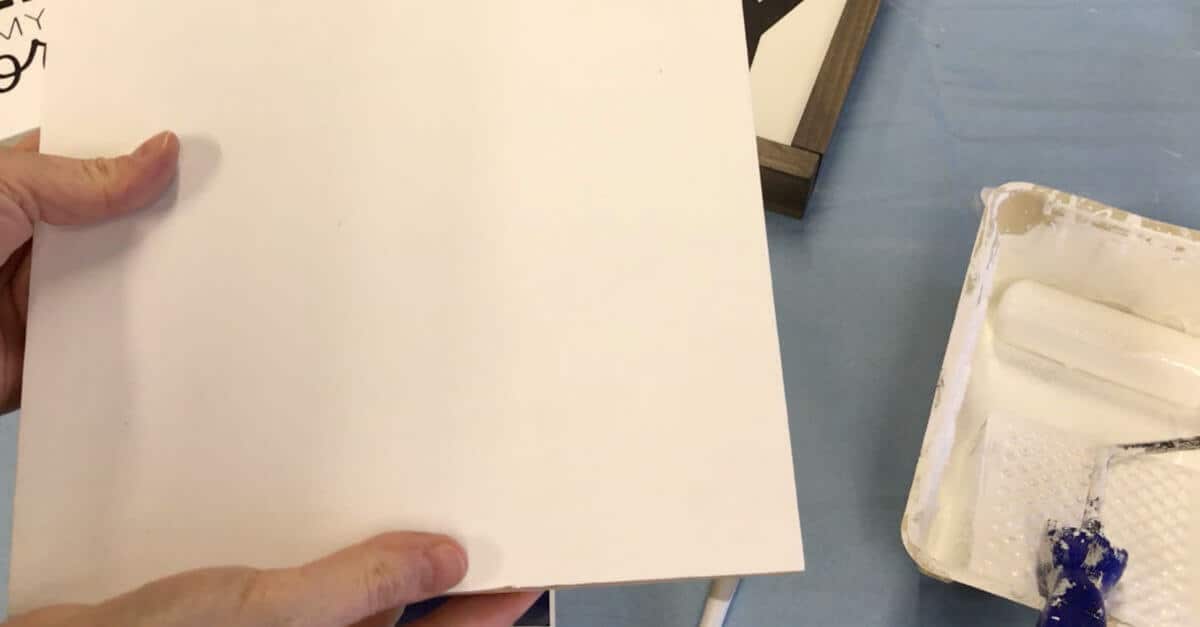
To prevent paint from bleeding underneath the stencil, I first used my mini paint roller to paint a coat of white paint over the stencil.
This way, if paint were to bleed under the stencil, it would be the same color as the background.
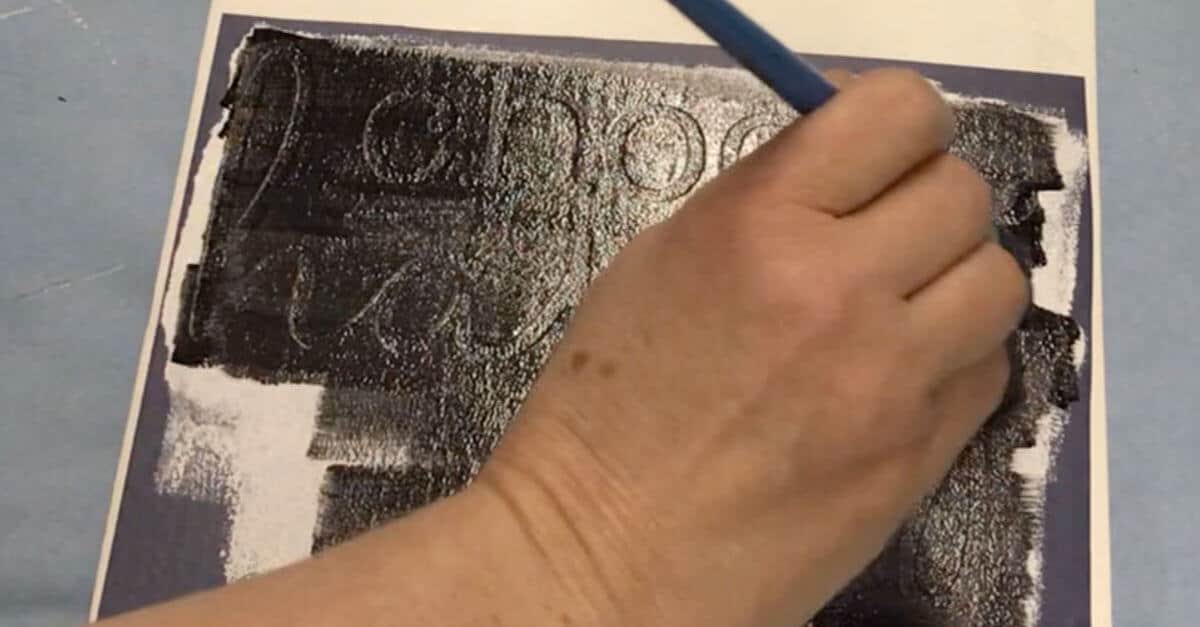
Once the white paint dried, I painted the first thin coat of black paint using a small artist brush.
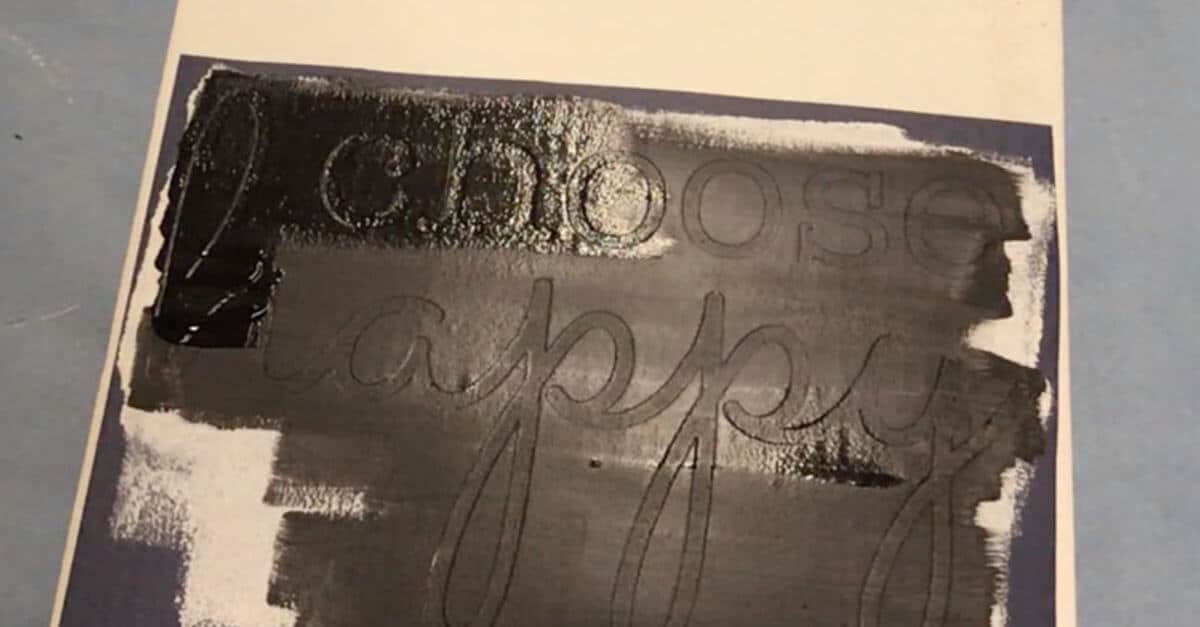
When the first coat of black paint was fairly dry, I painted a second coat.
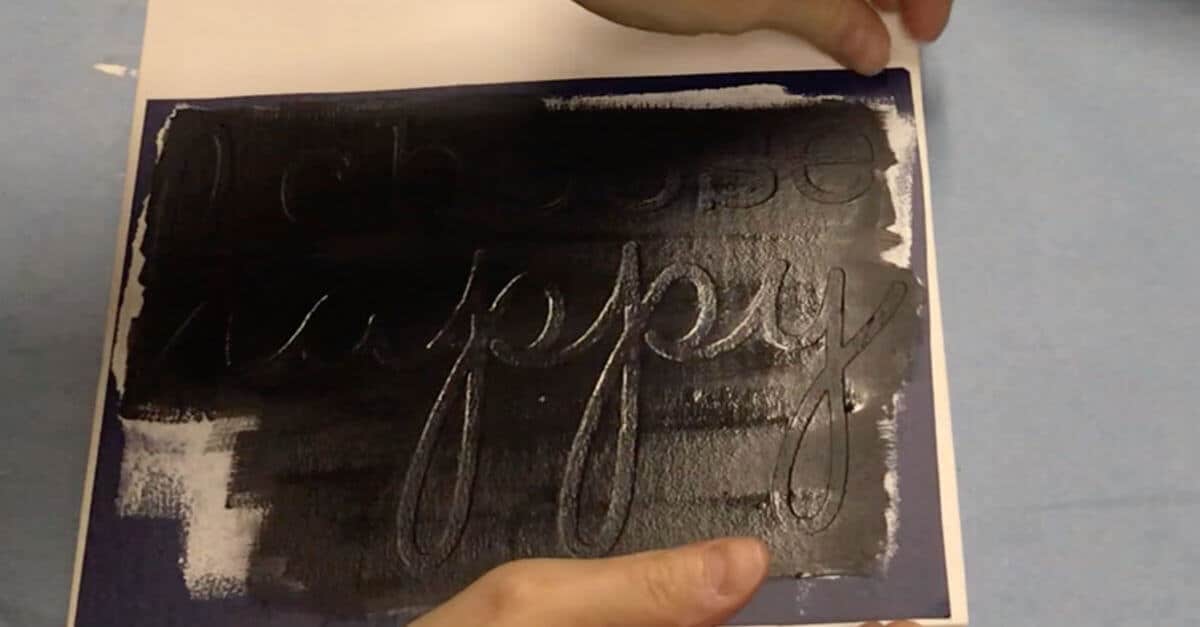
With the second coat of black paint barely dry, I pulled up the stencil.
This is important! You don’t want to let paint dry on your stencil for too long as the stencil will pull up letters, if you do.
I had a few paint bleeds that I touched up quickly with my small artist brushes.
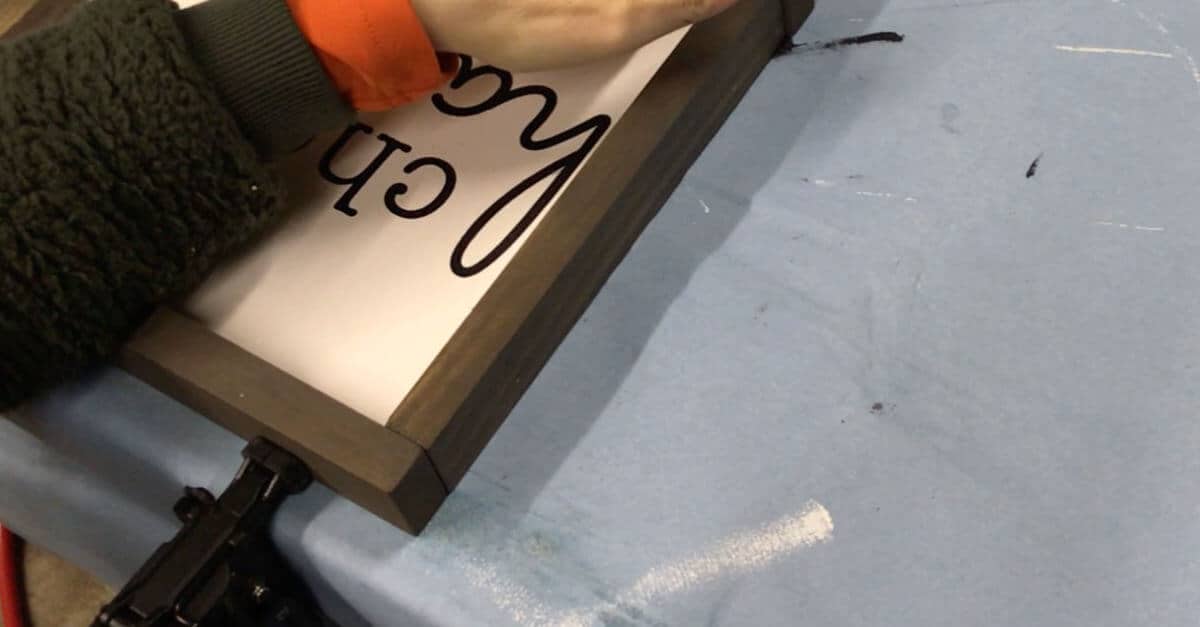
Assemble Your Farmhouse Sign Frame
By now, the frame pieces were dry and I dry fit them to the sign to make sure they fit correctly.

I placed a bead of glue on each side and adhered each side of the frame with two nails, using my nail gun. First, I did the short pieces and then the long pieces.
I’m super happy with the way these DIY Farmhouse Wood Signs turned out!
They are perfect to set on a shelf or you can add hardware to hang them on the wall.
The DIY Farmhouse Signs also make a great gift!

I made quite a few of these signs for Christmas Gifts! I lost count but I think it was 16 signs. Because I made so many, I made them assembly line style. There are quite a few steps but it was fairly easy to do!